- Water Consistently, but Not Too Much
Spider plants like lightly moist soil, but they do not like being constantly wet. One of the most common mistakes is overwatering. These plants store moisture in their fleshy roots, which means they do not need constant watering.
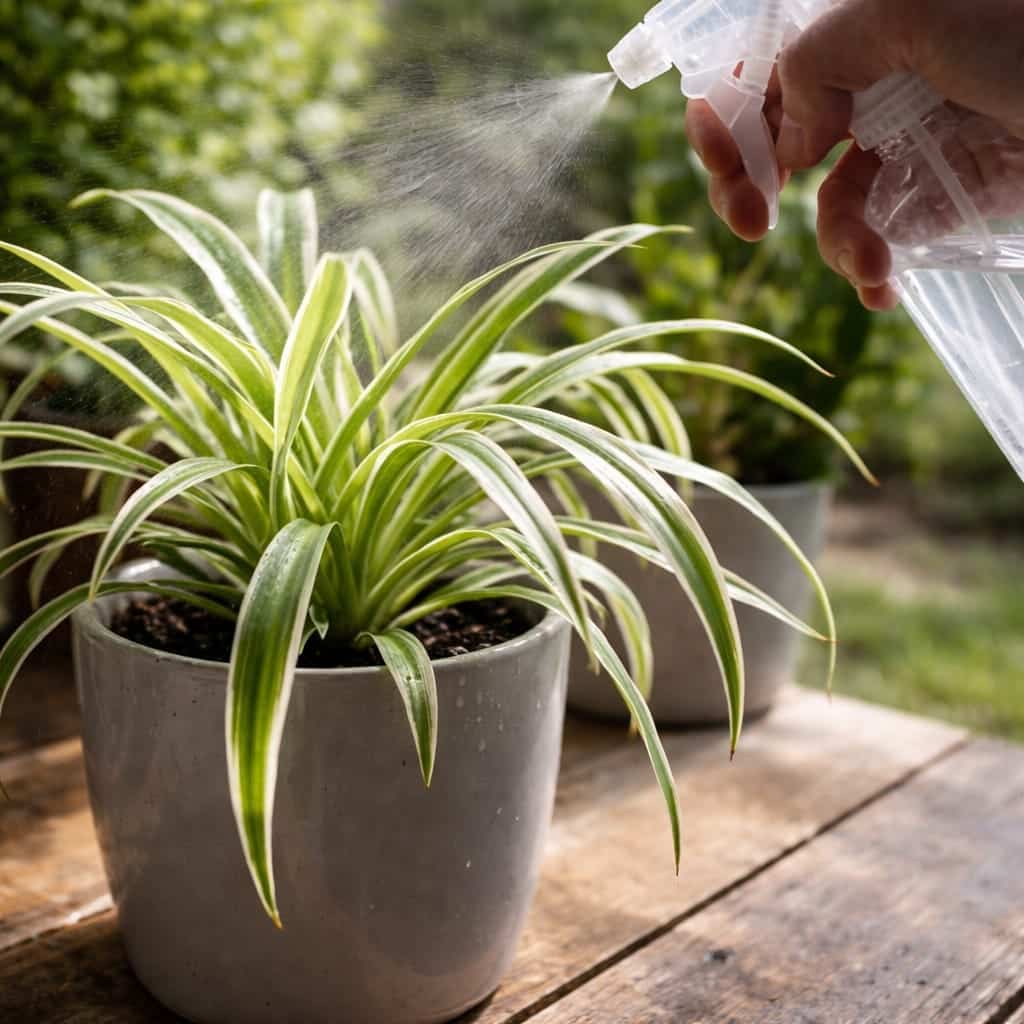
Watering Guideline Details
When to water Let the top inch of soil dry out before watering again. Stick your finger into the soil – if dry, water; if damp, wait.
How often In bright light, about once every 7–10 days. In lower light, every 10–14 days.
How to water Water thoroughly until it runs out the drainage holes. Empty the saucer immediately.
Signs of overwatering Yellowing leaves, mushy roots, foul smell.
Signs of underwatering Brown leaf tips, wilting, dry soil.
Pro tip: If you tend to overwater, use a terracotta pot and a well‑draining mix. If you tend to underwater, a plastic pot retains moisture slightly longer.
- Feed It Occasionally, Not Heavily
Fertilizer can help a spider plant become fuller, but only when used lightly. Too much fertilizer can create fast but weak growth, while gentle feeding during the growing season supports stronger, healthier leaves.
Fertilizer Guideline Details
When to fertilize Spring and summer (active growing season).
What to use Balanced, water‑soluble houseplant fertilizer (e.g., 10-10-10) diluted to half strength.
How often Once every 4–6 weeks.
Do not fertilize In fall and winter – the plant rests.
Signs of over‑fertilizing Brown leaf tips, salt crust on soil, leaf drop.
Optional natural boost: Some gardeners use diluted coffee grounds or compost tea, but these are not necessary. A balanced fertilizer is more reliable.
- Prune Regularly for a Thicker Look
This is the step many people skip, even though it makes a huge visual difference. Regular pruning removes yellowing, browning, or damaged leaves and allows the plant to redirect energy toward healthy new growth. It also instantly improves the plant’s shape.
What to Prune Why How
Yellow or brown leaves They are no longer photosynthesizing; they drain energy. Cut at the base with clean scissors.
Long, leggy leaves They make the plant look sparse. Trim back to encourage new, compact growth.
Damaged or broken leaves They can attract pests or disease. Remove completely.
Old flower stalks After blooms fade, they add no value. Cut at the base.
Pro tip: Don’t be afraid to prune – spider plants are resilient. A good haircut often stimulates a flush of new growth from the center, making the plant look fuller within weeks.
- Repot When the Roots Outgrow the Pot
Spider plants grow quickly, and when they stay root‑bound for too long, they may slow down. If you notice roots pushing out through the drainage holes or the plant seems stalled, it is probably time to repot.
Repotting Guideline Details
How often Every 1–2 years, or when roots are visibly crowded.
Best time Spring or early summer.
Pot size Only 1–2 inches larger than the current pot.
Soil Fresh, well‑draining potting mix (houseplant mix + perlite).
Pro tip: When repotting, gently loosen the root ball and trim away any dead or rotten roots. This encourages healthy new root growth.
- Let the Babies (Spiderettes) Help the Plant Look Fuller
Spider plants naturally produce offshoots, often called spiderettes or babies. These add to the plant’s full, dramatic look, especially in hanging baskets or elevated pots. If you leave them attached for a while, they help create that lush, overflowing appearance many people want.
How to use spiderettes for fullness:
· Leave them attached – they will cascade over the sides, adding volume instantly.
· Root them in the same pot – once they have small root nubs, you can place them in the soil next to the mother plant. They will grow into mature plants, creating an even fuller cluster.
· Propagate for new plants – cut them off and root in water or soil to start new plants for gifts or other pots.
Pro tip: If the mother plant is looking sparse, plant 2–3 rooted spiderettes around the edge of the same pot. Within a few months, they will fill in the gaps.
Bonus: Common Spider Plant Problems – Troubleshooting
Problem Likely Cause Solution
Brown leaf tips Low humidity, fluoride in tap water, or over‑fertilizing Increase humidity; use filtered water; reduce fertilizer.
Yellow leaves Overwatering Let soil dry out; check for root rot.
No spiderettes (babies) Not enough light, or plant is too young Move to brighter light; be patient – plants need maturity (1–2 years).
Leaves bending or breaking Physical damage or weak growth Provide support; prune damaged leaves; improve light.
Pale, washed‑out color Too much direct sun Move to bright indirect light.
Slow growth Root‑bound or lack of nutrients Repot if crowded; fertilize lightly in spring/summer.
Frequently Asked Questions (FAQs)
Q: How often should I water my spider plant in winter?
In winter, spider plants go semi‑dormant. Water only when the top 2 inches of soil are dry – often every 2–3 weeks. Overwatering in winter is a common cause of root rot.
Q: Can I put my spider plant outside in summer?
Yes – they love being outdoors in warm weather. Place in a shady spot (no direct sun). Bring inside before temperatures drop below 50°F (10°C). Outdoor light and humidity can boost growth.
Q: Why are my spider plant’s leaves turning yellow and mushy?
Overwatering. Stop watering immediately, let the soil dry out completely, and check for root rot. If roots are black and mushy, repot in fresh soil and trim away rotten roots.
Q: Can I grow spider plants in water?
Yes – they root easily in water. However, long‑term growth is better in soil. Water‑grown plants tend to be less vigorous and rarely produce spiderettes.
Q: How do I make my spider plant produce more babies (spiderettes)?
Provide bright, indirect light and let the plant become slightly root‑bound. A little stress (not too much) triggers reproduction. Also, ensure the plant is mature (at least 1–2 years old).
Q: Is it safe to put coffee grounds on my spider plant?
Small amounts of used coffee grounds can add nitrogen, but don’t overdo it. Coffee grounds can compact soil and alter pH. A balanced fertilizer is safer and more reliable.
Q: Can I cut off all the leaves of my spider plant and start over?
Yes – if the plant is severely damaged, you can cut all leaves back to 1–2 inches above the soil. With proper care, new leaves will emerge from the center within a few weeks. This is a drastic but sometimes effective revival method.
Quick Care Summary – Spider Plant at a Glance
Care Factor Recommendation
Light Bright, indirect light (east or west window)
Water Let top inch of soil dry; water thoroughly
Soil Well‑draining houseplant mix + perlite
Pot Drainage holes; terracotta preferred
Humidity Average to moderate (40–60%); brown tips indicate low humidity
Temperature 65–80°F (18–27°C); avoid cold drafts below 50°F
Fertilizer Balanced liquid at half strength, every 4–6 weeks (spring/summer)
Pruning Remove yellow/brown leaves; trim leggy growth
Repotting Every 1–2 years, or when root‑bound
Propagation Spiderettes (offshoots) root easily in water or soil
Printable Spider Plant Care Checklist
You can copy and paste this into a document or note:
☐ Place in bright, indirect light (east or west window)
☐ Rotate pot every 1–2 weeks
☐ Water when top inch of soil is dry
☐ Use well‑draining potting mix with perlite
☐ Fertilize lightly every 4–6 weeks in spring/summer
☐ Prune yellow or brown leaves as needed
☐ Repot every 1–2 years, only 1–2 inches larger
☐ Leave spiderettes attached for a fuller look
☐ Increase humidity if leaf tips turn brown
☐ Be patient – growth takes time
Final Thoughts – A Bushy Spider Plant Is Within Reach
A bushy, full spider plant is not the result of one secret hack. It comes from a combination of bright indirect light, well‑draining soil, careful watering, light feeding, regular pruning, timely repotting, and letting the plant grow evenly.
The good news is that none of these steps are difficult. They just need to be done consistently. If your spider plant looks thin today, don’t worry. With a few simple changes, it can become the full, vibrant plant you wanted in the first place.
Sometimes the difference between a struggling spider plant and a stunning one is just a little more light, a little less water, and a little bit of patience. Start with one change – move it closer to a window – and see the difference in just a few weeks.
Now it’s your turn! Have you struggled with a thin spider plant? What worked for you – pruning, repotting, or more light? Drop a comment below – I’d love to hear your experience.
And if you found this guide helpful, share it with a friend who wants a bushier spider plant. Pin it for later, and subscribe to our newsletter for more practical plant care advice.
Stay bright, stay consistent, and watch your spider plant thrive. 🌿✨