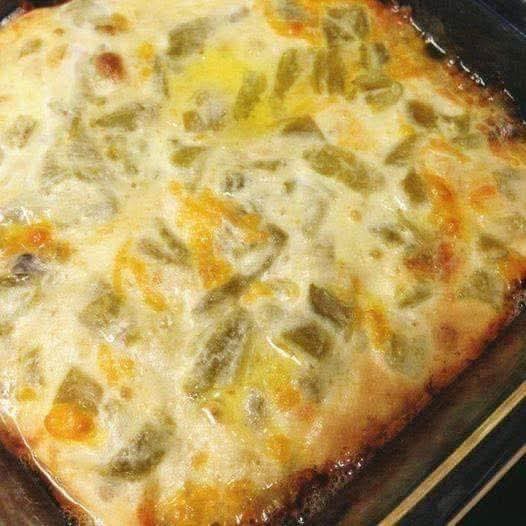
Chile Rellenos are a beloved Mexican dish. Traditionally, they are roasted poblano peppers stuffed with cheese, dipped in egg batter, and fried. The flavor is bold and comforting, but the preparation is time-consuming. Chile Relleno Casserole captures the same flavors in a simpler form. It layers roasted chiles, cheese, eggs, and seasonings in a baking dish. The result is a satisfying meal without the hassle of frying.
This casserole works for dinner, lunch, or even breakfast. It is hearty, cheesy, and loaded with roasted chile flavor. You can make it ahead, bake it fresh, and serve it to a crowd. Bigzazoo highlights a straightforward method with tips for success.
Why This Recipe Works
Simplified method. You get the flavor of traditional Chile Rellenos without frying each pepper.
Layering creates flavor. Cheese and eggs melt between layers of roasted chiles, making every bite rich and satisfying.
Flexible ingredients. You can use fresh roasted poblano peppers or canned green chiles. Both deliver flavor.
Meal prep friendly. Assemble ahead, refrigerate, then bake when ready.
Balanced texture. The eggs puff slightly, holding the casserole together, while the cheese keeps it gooey.
What You’ll Need For This Recipe
Ingredients
6 large poblano peppers (or 2 cups canned whole green chiles, drained)
4 cups shredded cheese (a mix of Monterey Jack and cheddar works best)
6 large eggs
1 cup whole milk
½ cup flour
1 teaspoon baking powder
1 teaspoon salt
½ teaspoon black pepper
1 teaspoon garlic powder
1 teaspoon cumin
Optional: 1 cup cooked ground beef or chorizo for a heartier casserole
Equipment
Baking dish (9×13 inch)
Mixing bowls
Whisk
Cutting board and knife
Oven preheated to 350°F (175°C)
Aluminum foil
Nonstick spray or butter for greasing dish
How To Make This Recipe
Step 1: Prepare the Chiles
If using fresh poblanos: Roast them over an open flame, under a broiler, or in a hot oven until skins blister.
Place in a covered bowl for 10 minutes to steam.
Peel skins, remove seeds, and cut open to lay flat.
If using canned chiles: Drain well and pat dry.
Step 2: Prepare Baking Dish
Grease a 9×13 baking dish with nonstick spray or butter.
Step 3: Layer Ingredients
Place half the roasted chiles in the bottom of the dish.
Sprinkle half the cheese on top.
Add cooked meat if using.
Layer the remaining chiles and top with remaining cheese.
Step 4: Mix Egg Batter
In a large bowl, whisk eggs, milk, flour, baking powder, salt, pepper, garlic powder, and cumin until smooth.
Pour evenly over the layered casserole.
Step 5: Bake
Cover with foil and bake for 30 minutes.
Remove foil and bake another 20 to 25 minutes, until top is golden and set.
Step 6: Rest and Serve
Let casserole rest 10 minutes before slicing.
Serve warm.
Tips + Tricks & More For Recipe Success
Char peppers fully. Proper roasting gives smoky depth. Peel thoroughly for smooth texture.
Dry chiles well. Excess moisture will water down the casserole.
Use a cheese blend. Monterey Jack melts creamy, cheddar adds sharpness.
Do not overmix eggs. Whisk until smooth but avoid whipping too much air.
Add meat wisely. Cook ground beef or chorizo fully, drain fat, then layer.
Bake covered first. This prevents over-browning while the center sets.
Let it rest. Ten minutes cooling makes it easier to slice clean portions.
Make it spicy. Add diced jalapeños or hot sauce for heat.
How To Serve
Slice into squares or rectangles and serve on plates.
Top with sour cream, salsa, or avocado slices.
Garnish with fresh cilantro and a squeeze of lime.
Serve with rice, beans, or tortillas for a complete meal.
Serving Suggestions
Breakfast. Pair with refried beans and tortillas. Serve with hot coffee.
Lunch. Add a green salad with citrus vinaigrette for balance.
Dinner. Serve with Spanish rice, black beans, and warm flour tortillas.
Party platter. Cut into small squares and serve as appetizers with salsa.
Leftovers. Reheat portions in the oven or microwave. Works well as a next-day lunch.
Time Breakdown
- Roasting and prepping peppers: 20 minutes (if using fresh)
- Mixing and layering: 15 minutes
- Baking: 50–55 minutes
- Resting: 10 minutes
Total: About 1 hour 30 minutes
Final Thoughts
Chile Relleno Casserole is a smart way to enjoy the traditional flavors of chile rellenos without the hassle. The roasted chiles give smokiness, the cheese melts into every layer, and the eggs hold everything together. It is satisfying, flexible, and works for any meal of the day.
Bigzazoo recommends making this dish when you need something bold and comforting that still fits into a busy schedule. With a little prep, you bring the essence of Mexican flavors straight to your table in casserole form. It saves time, avoids frying, and feeds a crowd with ease.
Shared by bigzazoo.
More Recipes You Might Like
-

Why Some Homeowners Are Using Onion Water Around Orchids and What Usually Helps More for Strong Roots, Healthy Leaves, and Long-Lasting Blooms
Orchids are among the most elegant indoor flowering plants for homeowners who want graceful stems, glossy green leaves, long-lasting blooms, and a refined decorative display that fits beautifully in living rooms, bedrooms, apartments, home offices, bright kitchens, windowsills, covered patios, commercial interiors, luxury home staging, and premium indoor plant styling. A healthy orchid can turn…
-

Why Some Homeowners Are Pouring Aloe Water Around Orchids and What Usually Helps More for Strong Roots, Healthy Leaves, and Long-Lasting Blooms
Orchids are among the most elegant indoor flowering plants for homeowners who want graceful blooms, sculptural roots, glossy leaves, and a premium decorative display that fits beautifully in living rooms, bedrooms, apartments, home offices, bright kitchens, balcony gardens, covered patios, commercial interiors, luxury home staging, and refined indoor plant styling. A healthy orchid can make…
-
Why Some Homeowners Are Adding Brown Powder Around Snake Plants and What Usually Helps More for Strong Roots, Fuller Growth, and Healthy Indoor Leaves
Snake plant is one of the most dependable indoor plants for homeowners who want strong upright leaves, bold green patterning, yellow-edged variegation, easy maintenance, and a clean decorative display that fits beautifully in living rooms, bedrooms, apartments, home offices, bright kitchens, entry corners, sunny windowsills, plant shelves, commercial interiors, luxury home staging, and premium indoor…


