Learn how to train your snake plant into a stunning spiral shape! Complete guide with step-by-step instructions, best varieties, support frames, and care tips for a living sculpture.
Let me introduce you to the plant project that turns an ordinary snake plant into a breathtaking living sculpture.
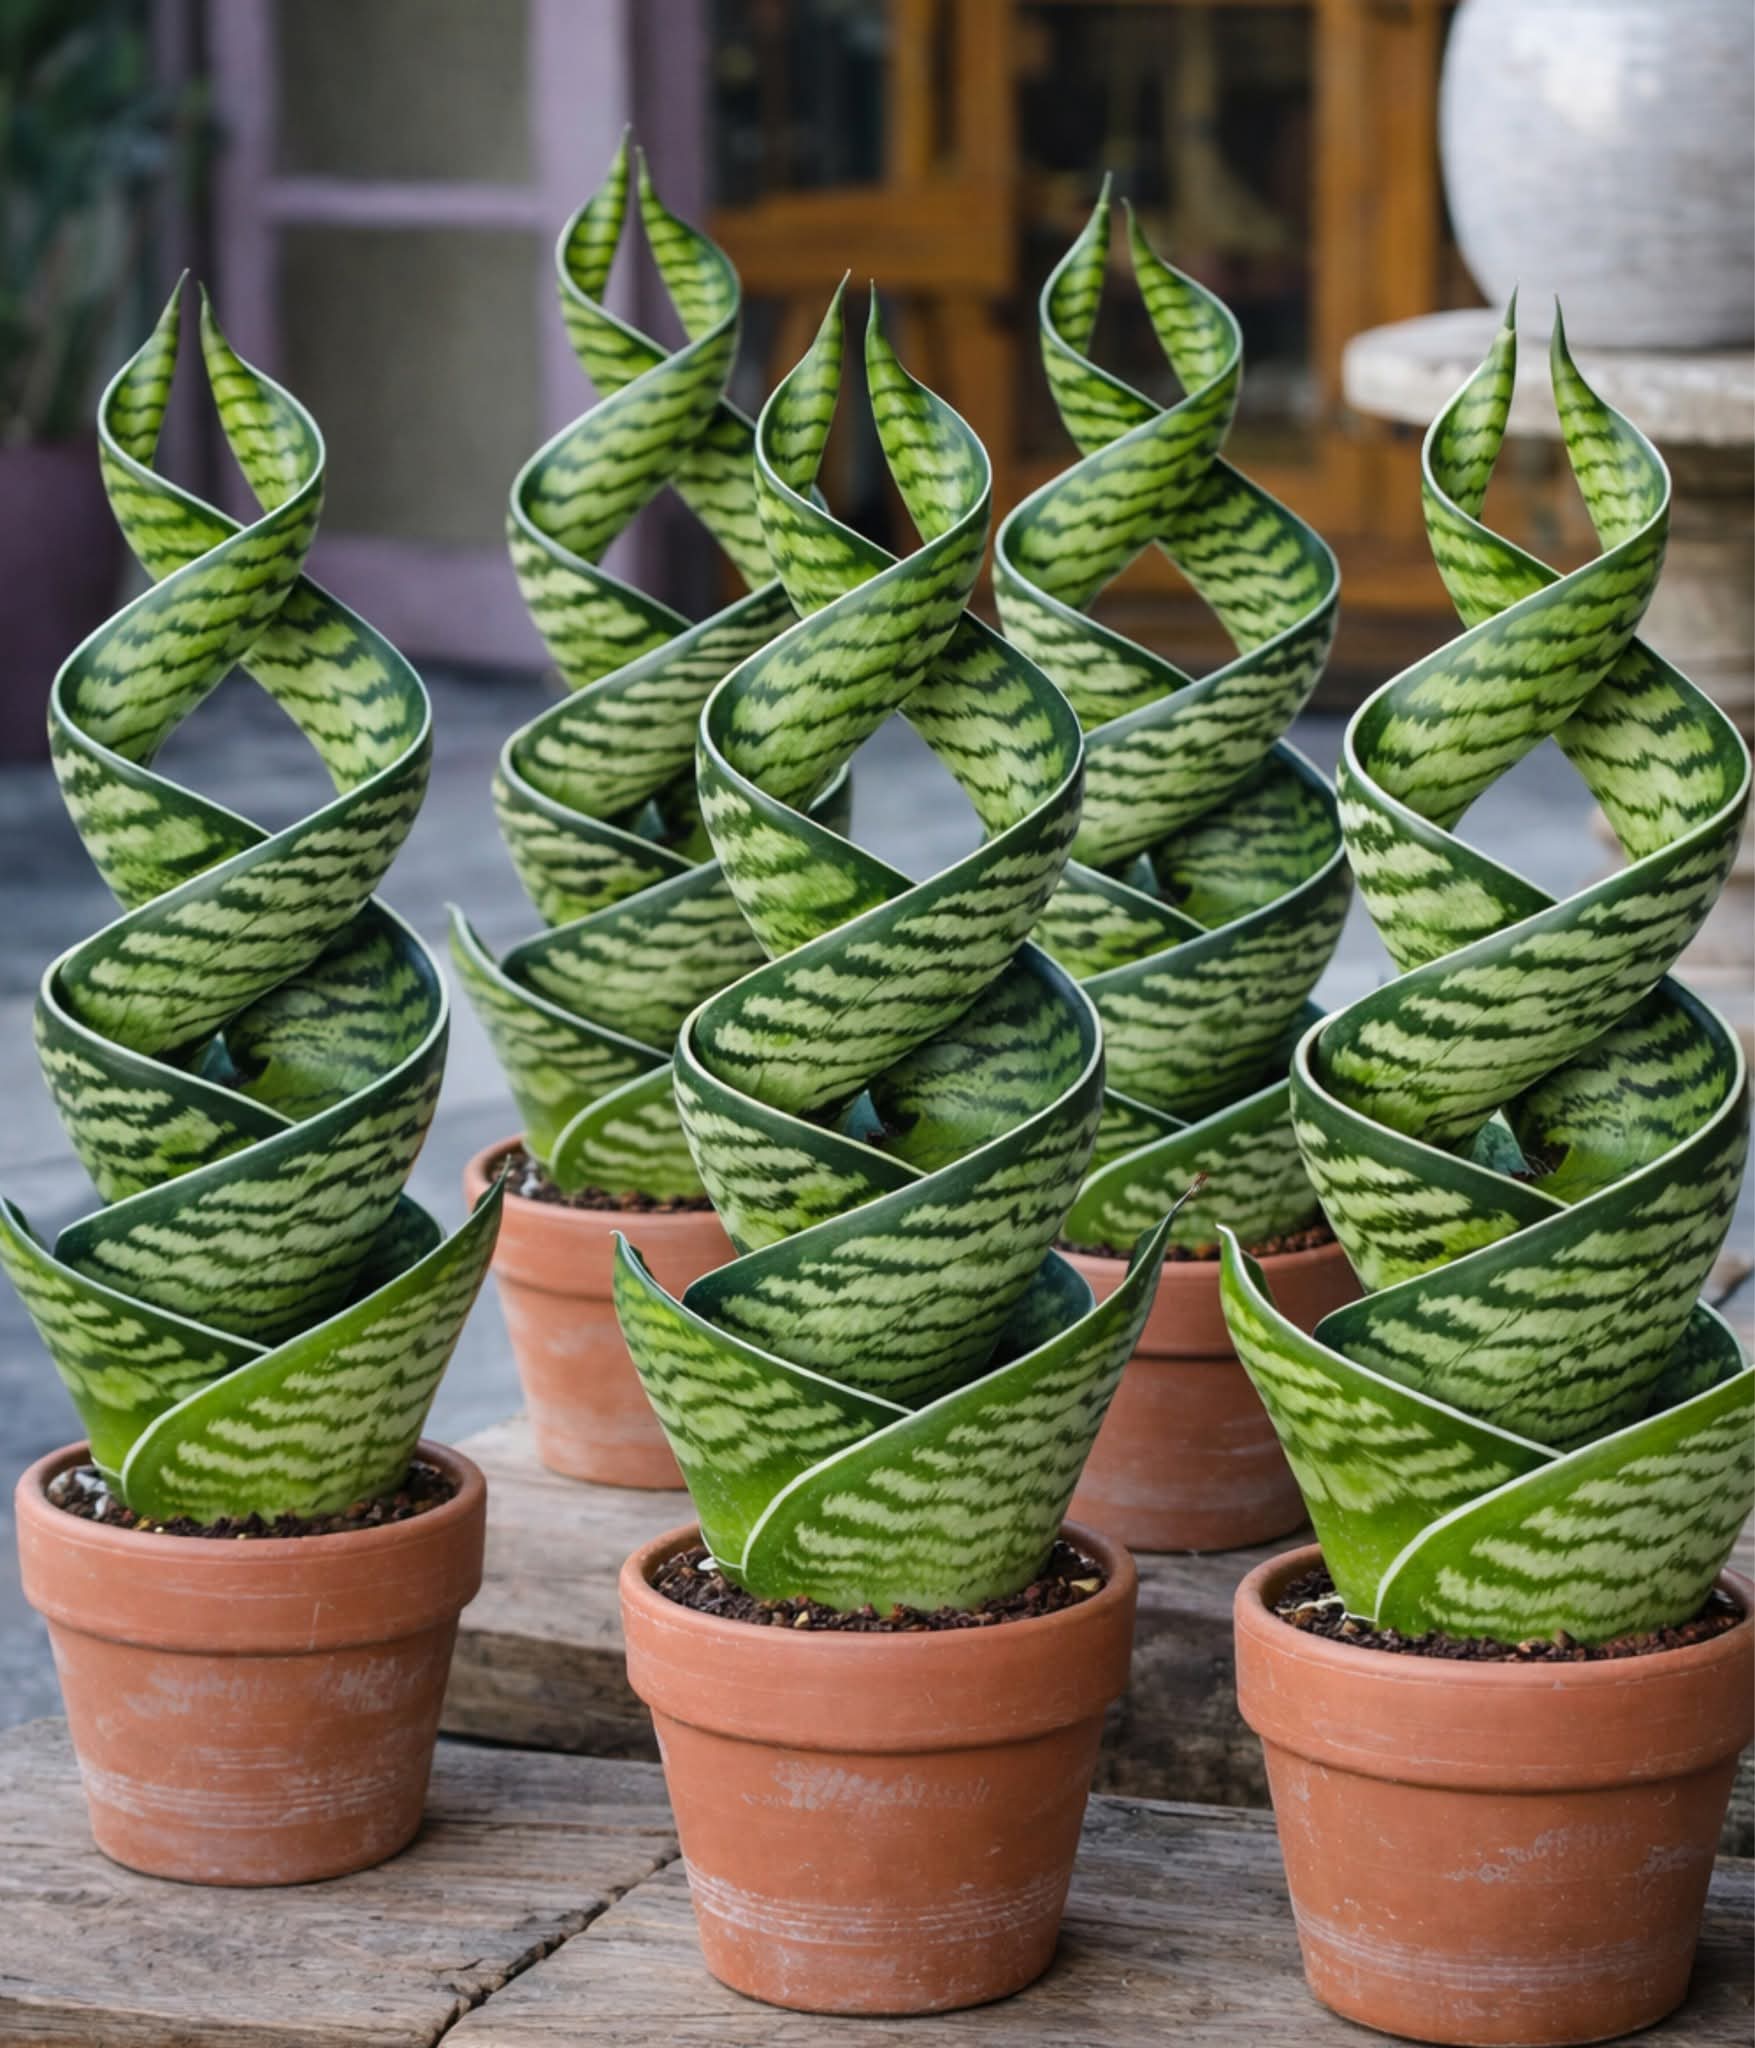
I’ve always admired snake plants for their resilience and architectural beauty. But when I first saw a photo of a snake plant trained into a perfect spiral, I was mesmerized. The elegant, twisting leaves seemed almost impossible—like something that couldn’t possibly be real. I assumed it was either fake or required a degree in horticulture.
Then I discovered that with patience and the right technique, anyone can train a snake plant into a spiral shape.
The secret isn’t magic—it’s about understanding how snake plants grow and giving them a gentle nudge in the right direction. Young, flexible leaves can be guided around a support frame over several months, eventually hardening into beautiful curves. The result is a living piece of art that becomes the centerpiece of any room.
In this comprehensive guide, I’ll walk you through everything you need to know to create your own spiraled snake plant. From choosing the right variety to maintaining your masterpiece, you’ll find step-by-step instructions, pro tips, and answers to all your questions.
Why Shape a Snake Plant?
Snake plants are beloved for their upright, sword-like leaves and nearly indestructible nature. But shaping them into spirals takes their beauty to another level:
· Creates a stunning focal point – A spiraled snake plant becomes a conversation-starting work of art
· Showcases your creativity – Plant shaping is a rewarding blend of horticulture and artistry
· Perfect for small spaces – A compact spiral can fit beautifully on tabletops or shelves
· Unique gift idea – A hand-shaped spiral snake plant makes an unforgettable present
Step 1: Choose the Right Plant
Not all snake plants are suitable for spiraling. Starting with the right variety makes all the difference .
Best Varieties for Spiral Training
Variety Characteristics Best For
Sansevieria cylindrica (African Spear Plant) Long, round, cylindrical leaves that bend easily Tight spirals and braiding
Sansevieria trifasciata ‘Laurentii’ Tall, flat leaves with yellow margins Gentle, gradual spirals
Sansevieria ‘Zeylanica’ Dense, upright growth with strong vertical lines Subtle curves
Sansevieria ‘Hahnii’ Compact rosette shape, naturally cup-like Easier to guide into curves
Sansevieria ‘Twisted Sister’ Naturally curled leaves Already predisposed to twisting
Key Selection Tips
· Start with a young plant – Young leaves are pliable and adapt to shaping much better than mature, stiff leaves
· Choose a plant with compact, symmetrical growth – This gives you a balanced base for shaping
· Avoid lanky, floppy specimens – They’re harder to guide into a neat spiral
· Check for overall health – A healthy plant shapes better and is less likely to snap
Step 2: Create Your Support System
To guide your snake plant into a spiral, you’ll need a support frame. Think of it as a trellis designed for curves .
Frame Options
Option Description Where to Find
Pre-made spiral plant frame Commercial frames designed for training plants Garden centers, online
DIY wire trellis Made from sturdy craft wire or coat hangers Hardware stores
Reshaped tomato cage Cut and bend to create a spiral form Garden centers
Bamboo stake with wire Central stake with wire wrapped around for guidance DIY
How to Install the Frame
- Position the frame – Gently insert the central stake or base of your spiral frame into the soil, close to the plant’s center
- Be careful with roots – Push slowly to avoid damaging the root system
- Ensure stability – The frame should feel snug and steady enough to support leaf growth
- Test the placement – Make sure the frame doesn’t press against leaves too tightly; it’s there to guide, not constrain
Step 3: Shape and Train the Leaves
Now comes the fun—and patient—part. This is where your spiral begins to take form.
The Shaping Process
- Start with the longest, most flexible leaves
Begin by selecting the leaves that are easiest to bend. These will form the outer part of your spiral . - Gently curve the leaves around the frame
Using your hands, slowly guide each leaf in the direction of your desired spiral. Don’t force it—if a leaf resists, give it time and try again later . - Secure with soft plant ties
Use Velcro strips, foam‑coated wire, or soft garden twine to attach leaves to the frame .
· Attach ties at multiple points along each leaf for even support
· Leave room for the leaf to expand—ties should be snug but not tight
- Work from the inside out
Continue shaping leaves one by one, allowing room for the plant to grow and adapt . - Give the plant time to adjust
Don’t try to achieve a perfect spiral in one session. Snake plants respond better to gentle redirection over time .
Important: What to Avoid
· Don’t use tight ties – They can cut into leaves as they grow
· Don’t force stiff leaves – Older, rigid leaves are prone to snapping
· Don’t rush the process – Expect to see a noticeable shape developing over several months
Step 4: Encourage Balanced Growth
As your plant takes shape, proper care and maintenance will ensure it stays healthy and continues to spiral.
Rotate the Pot
Rotate your plant weekly so all sides receive equal light . Uneven exposure can distort the spiral you’re building.
Maintain Leaf Flexibility
If your home’s air is dry, give the plant a light mist in the mornings. This helps keep leaves hydrated and flexible during training .
Adjust Ties as the Plant Grows
Check ties every few weeks and adjust them upward as leaves lengthen . This ensures continued support.
Watch for New Growth
New leaves emerging from the center should be guided along the same spiral path early, before they stiffen .
Step 5: Provide Proper Care During Training
Healthy leaves shape better. Don’t neglect the basics while you’re training your plant .
Light
Requirement Details
Ideal Bright, indirect sunlight
Avoid Direct sun (can scorch leaves)
Why it matters Good light promotes strong, flexible leaf growth needed for shaping
Water
Requirement Details
Frequency Water only when the top few inches of soil are completely dry
Typical schedule Every 2–4 weeks, depending on conditions
Warning Overwatering causes weak, mushy leaves that won’t hold shape
Soil
Requirement Details
Best mix Fast-draining cactus or succulent mix
Why it matters Prevents root rot and keeps leaves firm enough for shaping
Pot requirement Always use a container with drainage holes
Fertilizer
Requirement Details
When Spring and summer (growing season)
What to use Balanced liquid fertilizer, diluted to half strength
Frequency Once a month during active growth
Alternative Methods for Creating a Spiral
If the support frame method doesn’t appeal to you, try one of these alternatives.
The Gradual Twist Method
This hands-on approach requires no frame but takes patience .
How to do it:
- As leaves grow, gently rotate them a few degrees at a time in your desired spiral direction
- Work in small increments—twist too much at once and leaves may tear
- Mark the direction on the pot rim with a small arrow to stay consistent
- Over several months, the plant will harden into its spiral form
Light Positioning Method
Use your plant’s natural tendency to lean toward light to encourage curves .
How to do it:
- Place a light source slightly off-center from the plant
- After a few weeks, rotate the pot so the plant leans the opposite direction
- Repeat the pattern over time to create a gentle, swaying motion that can be guided into a curve
- This works best as a complement to other shaping techniques
Multi-Plant Illusion Method
Create the look of a spiral without bending any leaves .
How to do it:
- Plant 3–5 young cylindrical snake plants in a circular pattern in the same pot
- Angle each plant slightly in the same direction (clockwise or counterclockwise)
- As they grow, the cluster creates the illusion of one spiraled plant
- Prune off any shoots that break the spiral pattern
Step 6: Remove Support Gradually
Once your plant has held its spiral shape for a significant period, you can begin removing the support .
How to Remove Support Safely
- Start with the topmost ties – Loosen them and observe how the leaf holds its form
- Remove ties in stages – If leaves remain steady, remove a few more ties
- Don’t rush – If the plant isn’t ready, leaves may shift or collapse back to their natural posture
- Wait if needed – It’s better to leave support in place for a few extra weeks than to undo months of shaping
What to Expect After Removal
Once established in its spiral form, new pups may follow the same shape—you might end up with an entire family of spiraled snake plants .
Troubleshooting Common Problems
Problem Likely Cause Solution
Leaves snap or crack Bending too much, too fast; leaves too mature Work with younger leaves; use smaller increments
Spiral is uneven Not rotating the pot regularly Rotate pot weekly for even light exposure
Leaves won’t hold shape Support removed too early Reapply ties and wait longer; leaves need months to harden
Plant looks weak or floppy Overwatering Let soil dry completely; check for root rot
New growth grows straight Missed window to train new leaves Guide new leaves as soon as they emerge, before they stiffen
Leaves are brittle Underwatering or low humidity Water properly; mist leaves in dry conditions
Frequently Asked Questions
Q: How long does it take to shape a snake plant into a spiral?
A: With consistent training, you’ll see a noticeable curve in 3–6 months. A full, defined spiral may take a year or more .
Q: Can I shape a snake plant that already has stiff leaves?
A: It’s risky—mature leaves are brittle and will likely snap. Start with a young plant for the best results .
Q: Can I use this method on Sansevieria cylindrica?
A: Absolutely! Cylindrical snake plants are actually the best variety for spiraling because of their round, flexible leaves .
Q: What if my plant doesn’t produce new leaves?
A: Make sure it’s getting enough bright, indirect light. Snake plants need good light to produce new growth for shaping .
Q: Will the spiral hold if I remove the frame completely?
A: If you’ve left the frame in place for several months, the leaves should harden in their new shape. Remove support gradually to be sure .
Q: Can I spiral a snake plant in a hanging basket?
A: It’s not recommended. Spiral training works best with upright pots that allow you to insert a sturdy support frame.
Q: Is this method the same for braiding snake plants?
A: Braiding is a similar concept but requires at least 3 young plants woven together while still flexible .
Pro Tips for Success
- Be Patient
This is a long-term project. Don’t expect overnight results. The beauty of a spiral snake plant is earned over months of gentle guidance .
- Take Photos
Document your plant’s progress. It’s easy to feel like nothing is happening when you see it every day, but photos will show the gradual transformation .
- Start in Spring
Begin training in early spring when the plant enters its active growing season. The plant will be more responsive .
- Use Soft Ties
Avoid wire or string that can cut into leaves. Velcro plant ties, foam‑coated wire, or strips of old pantyhose work perfectly .
- Maintain Health
A healthy plant shapes best. Don’t neglect water, light, and soil basics while you’re focusing on the spiral .
Conclusion
Growing a snake plant in a spiral shape is one of the most rewarding plant projects you can undertake. It combines the resilience of Sansevieria with a creative touch, resulting in a living sculpture that becomes a true conversation piece.
What I love most about this process is that it teaches patience. You can’t rush a spiral—you work with the plant’s natural growth, guiding it gently over weeks and months. And when that shape finally sets, and you remove the ties to reveal a perfect spiral, the sense of accomplishment is unmatched.
Whether you choose the support frame method for a tight, geometric spiral, the gradual twist for a natural curve, or the multi‑plant illusion for instant impact, the result is a unique plant that reflects your care and creativity.
Now it’s your turn! Which method will you try? Share your progress and questions in the comments below.
And if you’re looking for more creative plant projects, check out our guides for Braiding Snake Plants, Propagating Sansevieria, and The Best Fertilizers for Snake Plants.
Happy shaping! 🌿🌀
Did you try growing a snake plant in a spiral? We’d love to see your creations! Leave a comment below and share your photos. Don’t forget to pin this guide for your next plant project!
More Recipes You Might Like
-

Why Some Homeowners Are Using Onion Water Around Orchids and What Usually Helps More for Strong Roots, Healthy Leaves, and Long-Lasting Blooms
Orchids are among the most elegant indoor flowering plants for homeowners who want graceful stems, glossy green leaves, long-lasting blooms, and a refined decorative display that fits beautifully in living rooms, bedrooms, apartments, home offices, bright kitchens, windowsills, covered patios, commercial interiors, luxury home staging, and premium indoor plant styling. A healthy orchid can turn…
-

Why Some Homeowners Are Pouring Aloe Water Around Orchids and What Usually Helps More for Strong Roots, Healthy Leaves, and Long-Lasting Blooms
Orchids are among the most elegant indoor flowering plants for homeowners who want graceful blooms, sculptural roots, glossy leaves, and a premium decorative display that fits beautifully in living rooms, bedrooms, apartments, home offices, bright kitchens, balcony gardens, covered patios, commercial interiors, luxury home staging, and refined indoor plant styling. A healthy orchid can make…
-
Why Some Homeowners Are Adding Brown Powder Around Snake Plants and What Usually Helps More for Strong Roots, Fuller Growth, and Healthy Indoor Leaves
Snake plant is one of the most dependable indoor plants for homeowners who want strong upright leaves, bold green patterning, yellow-edged variegation, easy maintenance, and a clean decorative display that fits beautifully in living rooms, bedrooms, apartments, home offices, bright kitchens, entry corners, sunny windowsills, plant shelves, commercial interiors, luxury home staging, and premium indoor…


