ZZ plants are some of the most elegant houseplants you can keep indoors. Their thick upright stems, glossy leaflets, and sculptural shape make them look clean, modern, and expensive even when they are very easy to care for. They are famous for tolerating low light, dry air, and missed waterings, which is why so many people call them one of the best beginner houseplants.
But there is one thing about ZZ plants that can confuse people: they grow slowly.
A ZZ plant can sit quietly for months without changing much. Then suddenly, almost like a surprise, a bright green spear pushes up from the soil. That new shoot slowly unfurls into a fresh stem with shiny leaves. This is one of the most exciting moments in ZZ plant care because new growth tells you the plant is alive, storing energy, and preparing to become fuller.
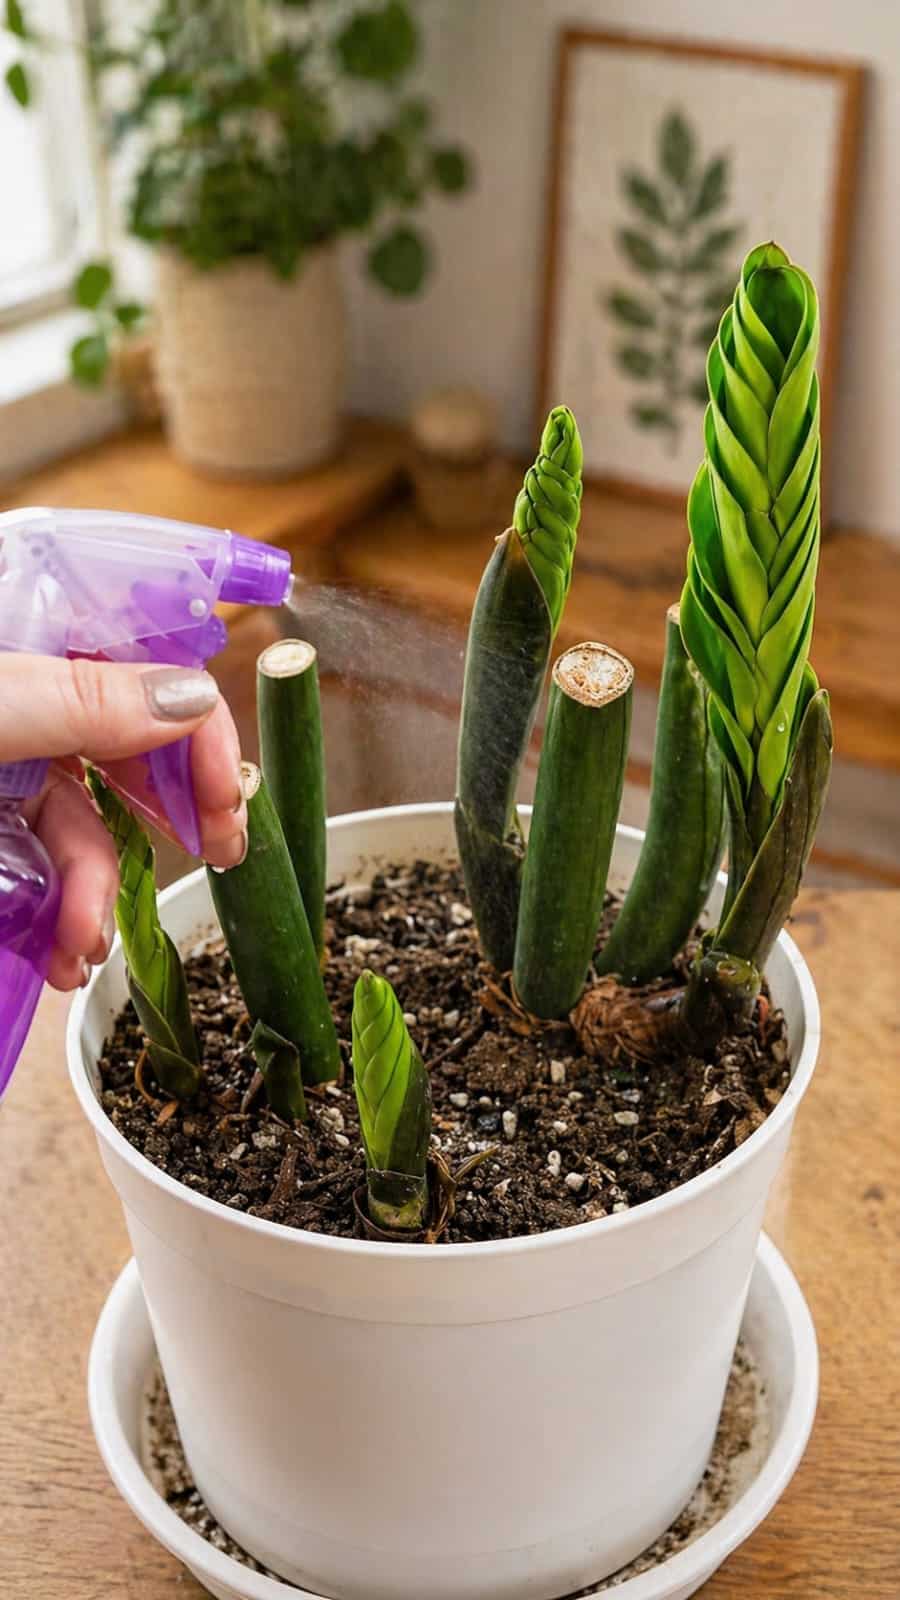
In the image, several ZZ plant stems have been cut back, while new bright green shoots are emerging from the soil. A purple spray bottle is misting the plant and the top of the pot. The scene suggests a simple trick: using a gentle misting routine to refresh the plant, support new shoots, and help a pruned ZZ plant bounce back with fresh growth.
This trick is often called the mist spray ZZ plant method, the new shoot wake-up spray, or the ZZ plant revival mist. It is not about soaking the plant or forcing growth overnight. Instead, it is about creating a light refreshing routine around the new shoots, keeping dust down, supporting humidity around tender growth, and encouraging the grower to check the plant carefully.
ZZ plants do not need constant misting to survive. In fact, they are drought-tolerant plants with thick underground rhizomes that store water. Too much moisture can harm them. But a light, occasional mist around new growth can be useful when done correctly. It can freshen the leaves, reduce dust, slightly raise local humidity for a short time, and make the plant look cleaner and more cared for.
The important word is light. ZZ plants do not want wet soil all the time. They do not want water sitting inside cut stems. They do not want a soggy pot. The mist spray trick should be used carefully, especially if the plant has recently been pruned.
In this complete guide, you will learn what the mist spray ZZ plant trick is, why new shoots appear, how to mist safely, what to put in the spray bottle, what to avoid, how to care for cut stems, how to encourage fuller growth, and how to keep a ZZ plant healthy indoors for years.
What Is the Mist Spray ZZ Plant Trick?
The mist spray ZZ plant trick is a simple care routine where you lightly spray the air and surface around a ZZ plant, especially when new shoots are emerging. The goal is not to water the plant through misting. ZZ plants get most of their water through the roots. The goal is to freshen the plant, support tender new growth, and keep the leaves clean.
In the image, the plant has several cut stems and several new shoots. This suggests the plant may have been pruned to remove old, damaged, or leggy growth. After pruning, the plant is producing new shoots from the rhizomes below the soil. Misting is shown as a gentle care step during this new growth stage.
The trick works best as part of a larger routine. You prune damaged stems, keep the plant in bright indirect light, water only when the soil dries, and lightly mist around the new shoots to refresh the area. The misting itself is not magic, but it can help create a better micro-environment and make you more aware of the plant’s condition.
The spray should be very fine. It should not drip down into the soil in large amounts. It should not collect inside cut stems. It should not leave the plant wet for hours. The best misting is quick, light, and occasional.
Why ZZ Plants Send Up Bright Green Shoots
ZZ plants grow from thick underground rhizomes. These rhizomes look a little like small potatoes or bulbs, and they store water and energy. When the plant has enough stored energy and the conditions are right, a new shoot emerges from the soil.
New ZZ plant shoots look different from mature stems. They are usually brighter green, softer, and tightly folded. As they grow, they gradually open and harden into the glossy stems ZZ plants are known for.
New shoots often appear during warmer, brighter parts of the year. Spring and summer are the most common growth seasons indoors. But if a ZZ plant is kept in a warm room with good light, it can push new growth at other times too.
The mist spray trick is popular because new shoots look delicate and exciting. People want to help them grow faster and stronger. While misting alone does not create the shoot, it can support a clean, fresh environment while the shoot expands.
The real source of the new growth is the rhizome below the soil. Protecting that rhizome is the most important part of ZZ plant care.
Why the Plant in the Image Has Cut Stems
The cut stems in the image suggest pruning. ZZ plant stems may be cut back for several reasons. They may have turned yellow, become damaged, grown too tall, bent over, or started looking unattractive. Sometimes growers cut old stems to encourage a cleaner plant shape and allow new shoots to take over.
Pruning a ZZ plant is simple, but it should be done carefully. Use clean, sharp scissors or pruning shears. Cut unwanted stems close to the soil line. Do not leave tall hollow stumps if they look unattractive or collect water. If a stem is still firm and green, you do not have to remove it unless you are shaping the plant.
After pruning, the plant may look bare for a while. This is normal. ZZ plants grow slowly, and new shoots may take time. The plant uses energy stored in its rhizomes to produce new stems.
The spray bottle in the image adds a “revival” feeling, but the real revival comes from healthy rhizomes, proper light, and patience. Misting is only a light support step.
Can Misting Really Make a ZZ Plant Grow?
Misting does not directly make a ZZ plant grow faster. ZZ plants grow from their roots and rhizomes, not because their leaves are wet. Growth depends mainly on light, temperature, root health, and watering.
However, misting can still be useful in small ways. It can remove dust from young shoots and leaves. It can briefly raise humidity around tender growth. It can help freshen a dry indoor environment. It can also remind you to inspect the plant for pests, damaged stems, or dry soil.
The trick is most helpful when used correctly and sparingly. If misting becomes heavy or constant, it can create problems. Water can settle in cut stems, sit around the base, or keep the top layer of soil damp. That can lead to rot or fungus gnats.
So the honest way to understand the trick is this: misting can support the appearance and freshness of a ZZ plant, but it does not replace the basics that actually drive growth.
The Best Liquid to Use in the Spray Bottle
The best liquid for misting a ZZ plant is plain clean water. That is all you need. Use room-temperature water, not cold water. If your tap water is very hard and leaves white spots, use filtered water, distilled water, or rainwater.
Do not add fertilizer to a misting bottle unless the product specifically says it can be used as a foliar spray. ZZ plants do not need fertilizer on their leaves. Fertilizer residue can leave spots, attract dust, or burn tender new growth if too strong.
Do not add milk, oil, sugar, lemon juice, vinegar, coffee, or baking soda to the spray bottle. These ingredients can leave residue, damage leaves, or attract pests.
A simple mist of clean water is safest and most effective for this trick.
How to Mist a ZZ Plant Safely
Misting a ZZ plant is easy, but there is a right way to do it.
- Use a clean spray bottle.
- Fill it with room-temperature clean water.
- Set the nozzle to a fine mist.
- Spray lightly above and around the plant.
- Avoid soaking the soil.
- Avoid filling cut stems with water.
- Mist in the morning or early afternoon.
- Make sure the plant dries within a short time.
- Wipe away any water sitting in leaf joints or cut stems.
- Do not mist every day unless the air is extremely dry and the plant dries quickly.
The goal is a light refreshing cloud, not a shower. If water is dripping from the leaves or pooling on the soil, you are using too much.
Why You Should Not Spray Into Cut Stems
The cut stems in the image are important. When a ZZ stem is cut, the remaining stump may have an opening or soft tissue at the top. If water sits inside that cut area, it can encourage rot.
This is why misting should be aimed around the plant, not directly into the cut tops. If you accidentally spray water into a cut stem, blot it with a tissue or cotton swab. Keep cut areas dry while they heal.
If a cut stem becomes soft, dark, or smelly, remove it closer to the soil line with clean tools. Let the area dry.
Cut stems are not drinking cups. Keep them dry and clean.
How Often Should You Mist a ZZ Plant?
For most homes, misting once or twice a week is enough if you enjoy the routine. Some ZZ plants do not need misting at all. They tolerate normal indoor humidity well.
If your home is very dry, a light mist every few days may help the leaves look fresh, but it should not leave the plant wet for long. If your room is cool, dark, or humid, mist less often or skip it.
During winter, be careful. Indoor air can be dry, but plants also grow more slowly and use less water. Heavy misting in winter can keep the pot surface damp and invite problems.
The best schedule depends on your environment. Watch how quickly the plant dries after misting. If moisture remains for hours, reduce misting.
What Misting Can Help With
Misting can be useful for a few specific reasons.
It freshens dusty leaves. ZZ leaves are naturally glossy, but dust can make them dull. A light mist followed by wiping can restore shine.
It supports tender new shoots. New shoots are softer than mature stems. A brief humidity boost can help them feel less dry in very dry indoor air.
It helps you inspect the plant. When you mist, you naturally look closely at the stems, soil, and new growth.
It improves the plant-care ritual. Sometimes the benefit is consistency. You pay attention to the plant and catch problems early.
These benefits are real, but they are gentle. Misting is not a replacement for watering, light, or proper soil.
What Misting Cannot Do
Misting cannot water a ZZ plant properly. The plant’s rhizomes and roots need occasional deep watering when the soil is dry. Mist on the leaves does not reach the root zone in a meaningful way.
Misting cannot fix root rot. If the rhizomes are mushy or the soil is sour, the plant needs repotting and drying, not more moisture.
Misting cannot force new shoots overnight. New growth comes from the rhizomes and depends on light, warmth, and stored energy.
Misting cannot repair a cut stem. Once a stem is cut, it will not regrow from the cut top. New growth must come from the rhizome.
Misting cannot replace fertilizer. If the plant needs nutrients, use a weak soil fertilizer during active growth, not random sprays.
How to Encourage More ZZ Plant Shoots
If your ZZ plant has new shoots like the one in the image, you are already doing something right. To encourage more, focus on the conditions that help rhizomes store and use energy.
Give Bright Indirect Light
ZZ plants tolerate low light, but they grow much better in bright indirect light. A ZZ plant in a dark corner may survive for years without much new growth. Move it closer to a bright window, but avoid harsh direct sun that can scorch leaves.
Water Correctly
Let the soil dry between waterings. When it is time to water, water thoroughly and let excess drain. Do not keep the soil constantly damp.
Use Well-Draining Soil
A chunky, airy mix helps protect the rhizomes from rot. Regular dense potting soil can stay wet too long.
Keep It Warm
ZZ plants prefer warm indoor temperatures. Cold conditions slow growth and can stress the plant.
Feed Lightly During Growth
A weak balanced houseplant fertilizer during spring and summer can support new shoots. Do not overfeed.
Misting can be part of the routine, but these five factors matter more.
Best Light for a ZZ Plant With New Shoots
New ZZ shoots need enough light to develop into strong stems. If the plant is in low light, the new shoot may grow slowly, stretch, or remain weak. Bright indirect light is ideal.
Place the plant near a window where it receives lots of brightness but not harsh afternoon sun. East-facing windows are often excellent. North-facing windows can work if they are bright. South or west windows may need a sheer curtain.
If your home is dark, a grow light can help. ZZ plants do not require intense light, but they respond well to consistent brightness.
Light is the real “wake-up” signal for new growth. Misting may freshen the shoot, but light fuels it.
How to Water a ZZ Plant Correctly
ZZ plants store water in their rhizomes, so they should not be watered too often. Let the soil dry out before watering again. Depending on your home, this may mean every two to four weeks, sometimes longer.
Check the soil before watering. Push your finger into the mix, or use a wooden skewer. If the soil is damp, wait. If it is dry, water thoroughly.
When watering, pour water onto the soil until it drains from the bottom. Empty the saucer. Never let the pot sit in standing water.
Do not confuse misting with watering. Misting is a light leaf refresh. Watering is for the roots.
Best Soil for ZZ Plants
ZZ plants need soil that drains well but still holds a little moisture. A good mix should be lighter than regular potting soil. You can use a houseplant mix amended with perlite, pumice, or orchid bark.
A simple ZZ plant mix can include:
- 2 parts indoor potting mix
- 1 part perlite or pumice
- 1 part orchid bark or coarse coco chips
This creates air pockets around the rhizomes. Good airflow helps prevent rot. If your ZZ plant is in heavy soil that stays wet for many days, repotting may improve growth more than misting ever could.
The pot should also have drainage holes. Without drainage, even good soil can become dangerous.
Continue to Page 2
Continue to page 2 for more details about this article and the key points many readers miss on the first page.