🌱 Amazing Idea for Growing Ginger in a Bag (Fast Harvest Method)
Growing ginger at home is one of the smartest small-space gardening ideas you can try. Known scientifically as Zingiber officinale, ginger is a tropical root crop prized for its bold flavor, powerful health benefits, and versatility in cooking.
The best part? You don’t need a garden bed. With a simple grow bag or recycled sack, you can produce a generous harvest right on your balcony, patio, rooftop, or backyard.
Let’s break down exactly how to grow ginger in a bag for faster growth and an easier harvest.
🌿 Why Growing Ginger in a Bag Is Genius
This method isn’t just trendy—it’s practical.
✅ 1. Perfect for Small Spaces
If you live in an apartment or have limited outdoor space, grow bags make ginger cultivation possible anywhere.
✅ 2. Better Drainage = Healthier Roots
Ginger hates soggy soil. Bags allow excess water to drain quickly, preventing root rot.
✅ 3. Faster Warming Soil
Grow bags warm up quicker than ground soil, which stimulates rhizome growth—meaning quicker development.
✅ 4. Easy Harvest
No digging. Just tip the bag over and collect your ginger.
✅ 5. Budget-Friendly
Reuse rice sacks, compost bags, or heavy-duty shopping totes.
🧄 What You’ll Need
Before you begin, gather:
Fresh ginger rhizomes (with visible buds)
A grow bag (12–16 inches deep)
Loose, well-draining potting mix
Compost or organic fertilizer
Watering can
Optional mulch (dry leaves or straw)
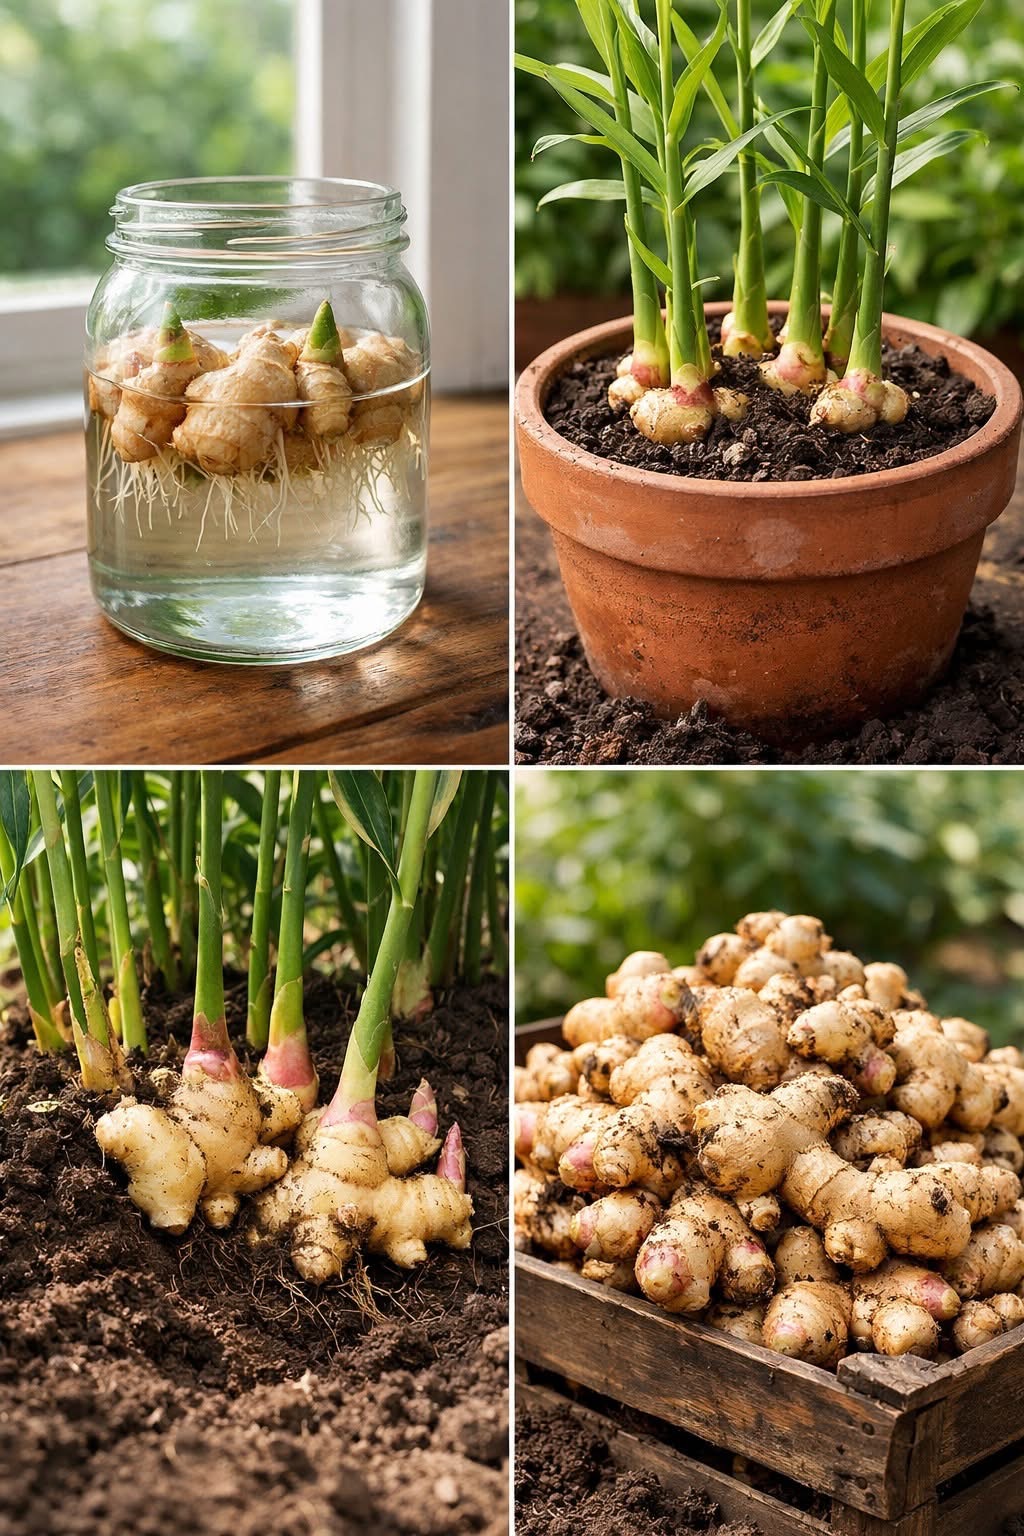
🪴 Step-by-Step: How to Grow Ginger in a Bag
1️⃣ Choose the Right Ginger
Select firm, plump rhizomes with visible “eyes.” Organic ginger is best since it’s less likely treated with growth inhibitors.
Pro Tip:
Soak ginger overnight in warm water to encourage sprouting.
Cut large pieces into sections, ensuring each has 1–2 buds. Let them dry for 24 hours to prevent rot.
2️⃣ Prepare Your Grow Bag
Poke drainage holes if reusing a sack.
Fill one-third of the bag with a light, airy mix:
1 part compost
1 part garden soil
1 part sand or coco peat
The key is excellent drainage and organic richness.
3️⃣ Plant the Ginger
Place rhizomes bud-side up
Space 6 inches apart
Cover with 2–3 inches of soil
Water lightly
Within 2–3 weeks, green shoots should appear.
💧 Ginger Care Guide
🌞 Sunlight
Ginger prefers partial shade.
3–5 hours of gentle morning sun is ideal.
Too much harsh sun can dry the soil quickly.
💦 Watering
Keep soil consistently moist—not soaked.
Water every few days, more often in hot climates.
If water pools at the bottom, improve drainage immediately.
🌱 Feeding for Bigger Roots
Feed every 3–4 weeks with:
Compost tea
Liquid seaweed
Vermicompost
Organic vegetable fertilizer
Consistent feeding leads to larger rhizomes and lush foliage.
🪴 Keep Adding Soil
As ginger grows horizontally, add soil gradually to cover new rhizomes. This encourages expansion and increases yield.
⏳ When to Harvest Ginger
🟢 Early Harvest (4–5 Months)
You can harvest “baby ginger” by gently removing soil and cutting small sections.
🟡 Full Harvest (8–10 Months)
When leaves yellow and dry:
Tip the bag over
Collect rhizomes
Brush off soil
Rinse and air-dry
Fresh homegrown ginger has a stronger aroma and juicier texture than store-bought.
🚀 Tips for Faster Growth & Bigger Harvest
✔ Start with pre-sprouted ginger
✔ Use nutrient-rich organic soil
✔ Keep temperature warm (20–30°C)
✔ Maintain humidity
✔ Remove damaged leaves
✔ Avoid overwatering
🌍 Why Ginger Is Worth Growing
Ginger isn’t just a spice—it’s a medicinal powerhouse.
It’s widely used for:
Digestive support
Anti-inflammatory benefits
Immune boosting teas
Natural cold remedies
Growing your own ensures freshness, purity, and chemical-free produce.
🌱 Final Thoughts
Growing ginger in a bag is one of the easiest and most rewarding container gardening projects you can try.
It’s:
Low maintenance
Space efficient
Budget friendly
Beginner friendly
Once you harvest your first batch of fragrant, homegrown ginger, you’ll never look at store-bought the same way again.
Why not plant a bag today and enjoy fresh ginger straight from your balcony in just a few months? 🌿🧄
-

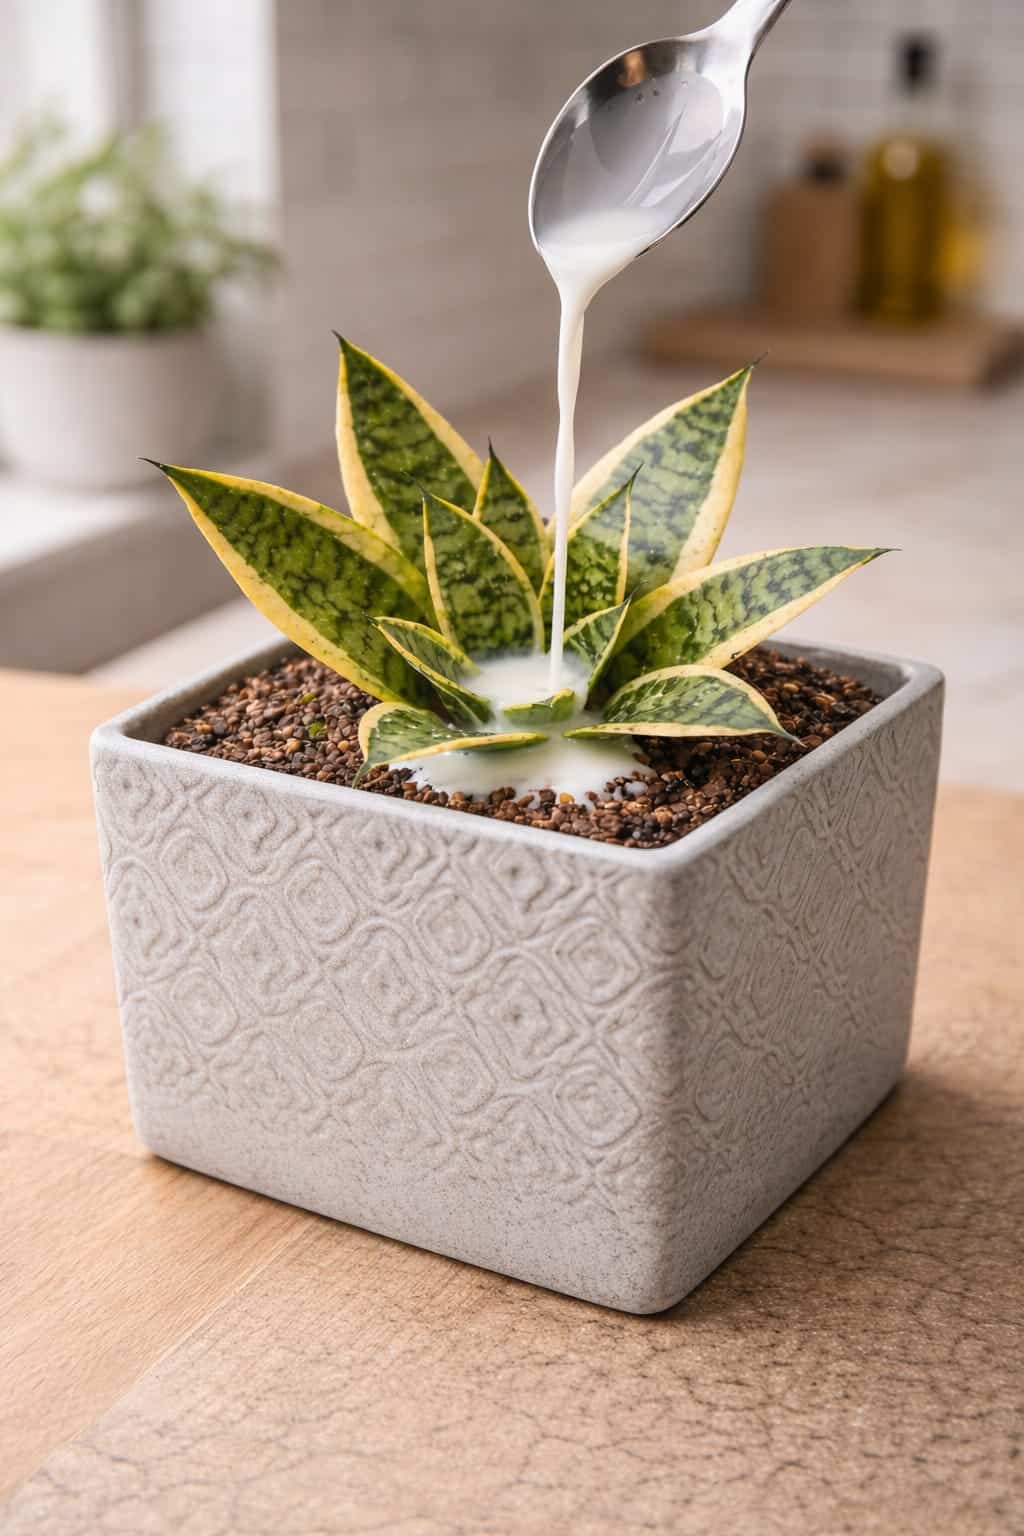
The Low Cost Snake Plant Boost That’s Trending in Modern Homes – The Complete Guide to Using Diluted Milk Safely
Discover the low‑cost “milky liquid” boost trending for snake plants. Learn how to use diluted milk safely, avoid common mistakes, … Read more
-
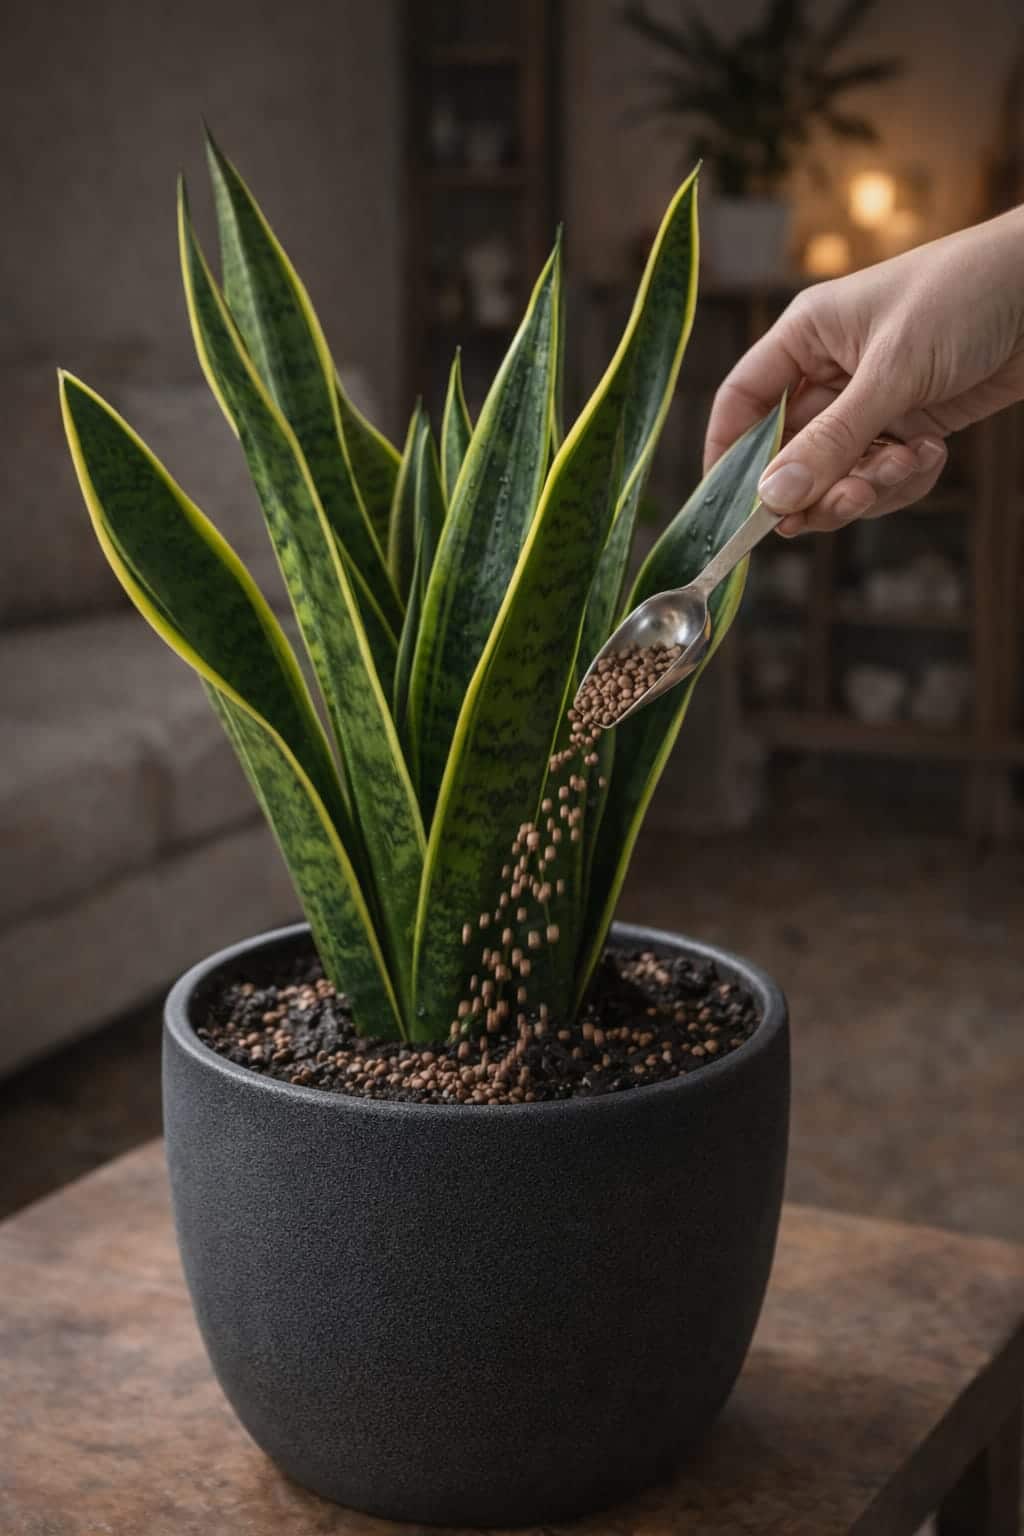
The Best Way to Grow a Snake Plant in a Spiral or Circular Shape – A Complete Step‑by‑Step Guide
Learn how to train your snake plant into a stunning spiral or circular shape. Step‑by‑step guide from choosing the right … Read more
-
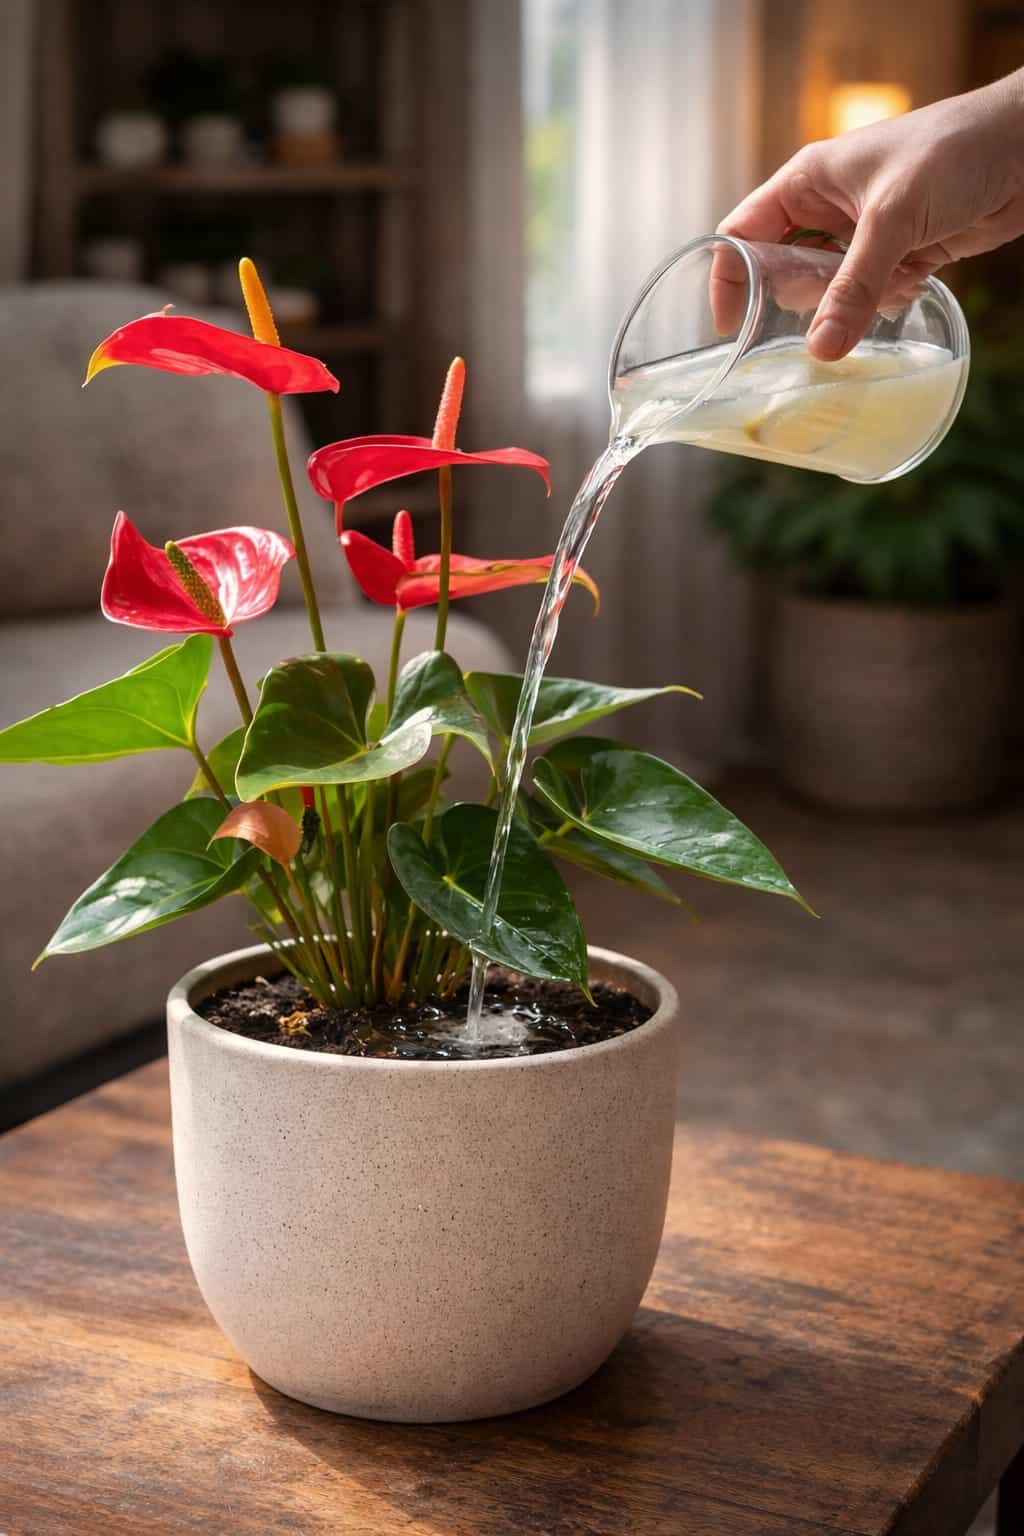
How To Keep Anthuriums Happy And Flowering All Year Round – The Complete Care Guide
Want your Anthurium to bloom all year? Learn the secrets – proper watering, bright indirect light, humidity, fertilizing, and pruning. … Read more