Meta Description: Can milk really help your snake plant thrive? Discover the science behind using milk as a gentle fertilizer, how to apply it without causing rot, and the one mistake that could ruin your plant.
Snake plants (Dracaena trifasciata) are the undisputed champions of low-maintenance houseplants. They tolerate neglect, survive in low light, and forgive irregular watering. But even these tough succulents appreciate a little help now and then.
You’ve likely heard of using coffee grounds, eggshells, or banana peels for plants. But milk? It sounds like something out of a gardening myth. However, this common kitchen staple contains nutrients that snake plants can use—if you apply it correctly.
Here is the simple truth about using milk for snake plants: when diluted properly and used sparingly, milk can provide a gentle calcium boost that supports cell structure and growth. But if you get it wrong, you’ll be dealing with sour soil, mold, and a very unhappy plant.
The Nutritional Profile: What’s Actually in Milk?
Before we pour anything on our plants, it helps to understand what milk contains. Cow’s milk is a complex liquid, and its components affect plants differently.
· Calcium: This is the star player. Calcium is essential for plant cell wall structure. It helps cells divide properly and grow strong. In snake plants, adequate calcium supports firm, upright leaves.
· Protein (Nitrogen): Milk contains small amounts of protein, which breaks down into nitrogen. Snake plants need nitrogen for leaf growth, but too much causes weak, floppy growth.
· Vitamin B Complex: These vitamins support root development and overall plant metabolism.
· Natural Sugars (Lactose): This is where things get tricky. Plants cannot absorb lactose directly. It sits in the soil and feeds bacteria and fungi.
The key takeaway? Milk offers calcium and trace nutrients, but the sugars require careful management to prevent problems.
Why Snake Plants Specifically Benefit
Snake plants have unique needs that make them good candidates for occasional milk treatments.
Calcium Lovers: Snake plants grown in pots for years eventually deplete calcium from the soil. Without enough calcium, new leaves may emerge twisted, weak, or unable to stand upright. A calcium boost strengthens cell walls, helping leaves maintain that signature architectural form.
Slow Growth Means Low Risk: Unlike fast-growing vegetables that guzzle nutrients, snake plants grow slowly. This means they won’t accumulate salts or organic matter as quickly as other plants, giving you a wider margin for error.
Drought Tolerance: Snake plants store water in their leaves. This same mechanism allows them to handle occasional “treatments” that might overwhelm thirstier plants.
The Right Way: Milk Application Methods
Here are three safe, effective ways to use milk for your snake plant, ranked from safest to most experimental.
Method 1: The Diluted Soil Drench (Safest for Beginners)
This method delivers calcium directly to the roots while minimizing the risk of rot or odor.
What You Need:
· 1 tablespoon of milk (whole, 2%, or skim—avoid flavored or sweetened)
· 1 quart (4 cups) of room-temperature water
· A watering can
Step-by-Step:
- Mix the tablespoon of milk thoroughly into the quart of water. The goal is a very weak solution—roughly 1 part milk to 60 parts water.
- Water your snake plant with this mixture as you would with plain water. Use it to replace one regular watering session.
- Ensure the pot drains completely. Never let the plant sit in saucer water.
- Apply this once every 2-3 months during spring and summer only. Never use it in winter when the plant is resting.
Why This Works: Heavy dilution prevents milk from coating the roots or soil surface. The small amount of lactose breaks down slowly without overwhelming the soil biology.
Method 2: The Leaf Wipe (For Shine and Pest Prevention)
This method bypasses the soil entirely and delivers nutrients directly through the leaves.
What You Need:
· 1 tablespoon milk
· 1 cup water
· A soft cloth or paper towel
Step-by-Step:
- Mix the milk and water in a small bowl.
- Dip the cloth into the mixture and wring it out well. The cloth should be damp, not wet.
- Gently wipe each leaf from base to tip, supporting the leaf with your other hand.
- Allow the leaves to air dry. The thin protein film will slowly break down, and the plant will absorb trace nutrients through its stomata (tiny pores).
Bonus Benefit: Some gardeners report that milk sprays help deter common pests like aphids and spider mites. The milk residue may also clean dust off leaves, improving photosynthesis .
Caution: Ensure no liquid drips into the soil or collects in the crown (the center where leaves emerge). Standing moisture in the crown causes rot.
Method 3: The Ice Cube Trick (For the Forgetful)
This method slows down the release of milk into the soil, reducing the shock to soil microbes.
What You Need:
· Milk
· Ice cube tray
Step-by-Step:
- Pour milk into an ice cube tray and freeze.
- Once frozen, pop out one cube.
- Place the cube on the soil surface, away from the main stem.
- Let it melt slowly. This gradual release prevents a sudden flood of milk sugars into the soil.
- Use this method once per season at most.
Why It Works: Snake plants tolerate cold roots briefly, and the slow melt mimics a gentle, extended feeding.
The One Mistake That Kills Snake Plants
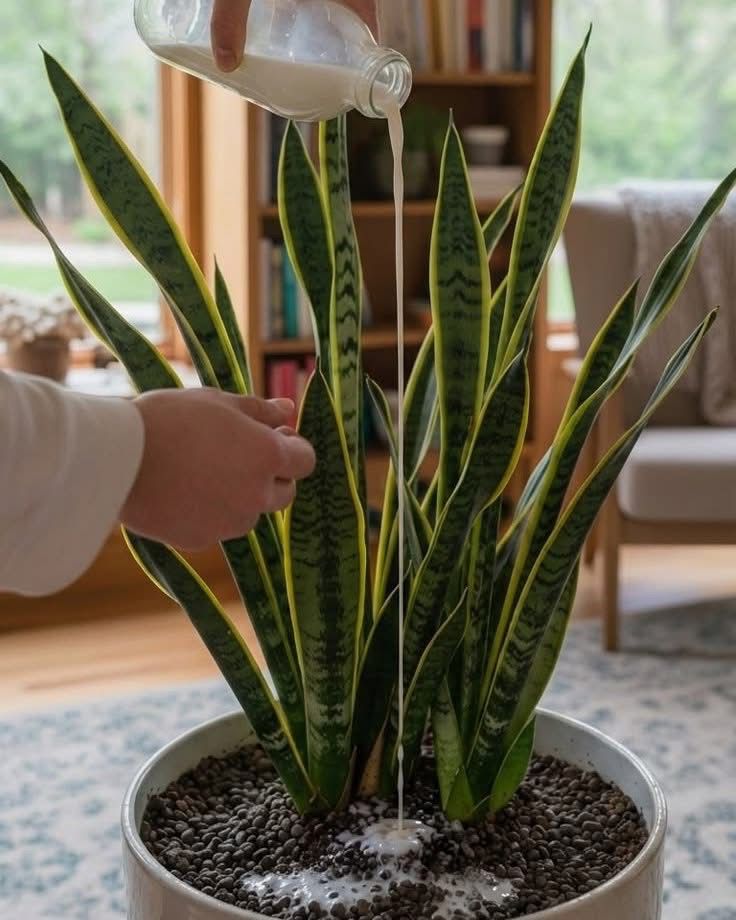
If there is one rule to remember, it is this: never use undiluted milk.
Pouring straight milk onto your snake plant is a recipe for disaster. Here is what happens:
- Fat Coating: The fats in milk coat the roots and soil particles, creating a barrier that prevents water absorption.
- Rancid Rot: Within days, the milk sours. The smell attracts fruit flies, fungus gnats, and other pests.
- Mold Explosion: The lactose feeds every fungus and bacteria in the pot. Within a week, you may see white fuzzy mold spreading across the soil surface.
- Root Death: The combination of coating, pests, and microbial overgrowth suffocates the roots. The plant wilts, leaves turn yellow, and recovery is unlikely.
I learned this lesson the hard way with a pothos years ago. One cup of “kindness” turned into a science experiment I won’t forget.
What Type of Milk Works Best?
Not all milk is created equal for plant use.
· Whole Milk: High in fat. The fat is problematic for roots and soil. Not recommended.
· 2% or Skim Milk: Lower fat content makes these safer choices. Skim milk provides calcium and protein with minimal fat.
· Raw Milk (Unpasteurized): Contains beneficial bacteria and enzymes that some gardeners believe help soil life. However, it spoils faster and carries a higher risk of odor.
· Plant-Based Milk (Almond, Oat, Soy): These lack the calcium and protein profile of cow’s milk. Almond milk contains some calcium but also oils and thickeners that can harm soil. Stick to cow’s milk if you want results.
Best Choice: Skim or 2% milk, organic if possible to avoid synthetic hormones and antibiotics that might affect soil microbes .
Signs You’ve Overdone It
Even with careful application, sometimes things go wrong. Watch for these warning signs:
· White Fuzzy Mold on Soil: This means the milk sugars aren’t breaking down fast enough. Scrape off the mold, let the soil dry out completely, and stop milk treatments.
· Sour Smell: If your pot smells like spoiled dairy, you’ve added too much. Flush the soil thoroughly with plain water several times and let it dry.
· Yellowing Lower Leaves: This can indicate root stress. If combined with a bad smell, repotting in fresh soil may be necessary.
· Fungus Gnats: These pests love decaying organic matter. A sudden infestation means something in the soil is rotting—often excess milk.
The Realistic Results: What to Expect
Using milk on snake plants won’t produce dramatic overnight changes. Snake plants grow slowly by nature. Here is a realistic timeline:
· Week 1-2: You may notice leaves looking slightly glossier, especially if you used the leaf wipe method.
· Month 1-2: With consistent, careful application, new leaves may emerge thicker and more upright. Existing leaves may feel firmer.
· Month 3-6: Over a full growing season, you might see increased pup production and overall vigor.
Milk is a supplement, not a miracle cure. If your snake plant is already struggling with root rot, pests, or severe neglect, fix those problems first. Milk won’t save a dying plant—it will just make the rot worse.
A Complete Snake Plant Care Routine (With Milk)
Here is how to integrate milk into a holistic care routine for a thriving snake plant.
· Light: Bright, indirect light is ideal. Snake plants tolerate low light but grow faster and produce more pups with good light.
· Water: This is the most critical factor. Water only when the top 2-3 inches of soil are completely dry. In winter, this may mean watering once a month or less.
· Soil: Use a well-draining mix. Cactus or succulent potting soil mixed with perlite works perfectly. Avoid heavy soils that hold moisture.
· Fertilizer: Snake plants need very little food. A balanced liquid fertilizer (10-10-10) diluted to half strength once or twice per growing season is plenty.
· Milk Schedule:
· Spring: One diluted soil drench.
· Summer: One leaf wipe treatment.
· Fall/Winter: No milk treatments. Let the plant rest.
Alternatives to Milk for Calcium
If milk feels too risky or you’re vegan, here are other ways to provide calcium to snake plants:
· Eggshell Tea: Soak crushed, cleaned eggshells in water for 24 hours, then use the water to irrigate.
· Lime (Garden Lime): A small amount of dolomitic lime mixed into the soil provides calcium and magnesium. Use sparingly—snake plants prefer slightly acidic to neutral soil.
· Commercial Calcium Supplements: Products like Rot-Stop (calcium chloride) are designed for plants and provide precise calcium delivery.
Conclusion
The idea of feeding milk to snake plants sounds unusual, but it has a basis in plant biology. The calcium supports strong cell walls, the trace proteins provide gentle nitrogen, and the vitamins aid root health. When used correctly—heavily diluted and infrequently—milk can be a useful supplement for these hardy plants.
But remember the golden rule: snake plants thrive on neglect, not pampering. A tablespoon of milk in a quart of water, applied once in spring and once in summer, is plenty. Anything more invites rot, pests, and odor.
Your snake plant doesn’t need much to be happy. But if you want to give it a little something extra, that carton in your fridge might just do the trick.
Frequently Asked Questions (FAQ)
Q: Can I use spoiled milk on my snake plant?
A: No. Spoiled milk has already broken down into compounds that smell terrible and attract pests. Always use fresh milk for plant treatments.
Q: How often should I apply milk to my snake plant?
A: Once every 2-3 months during the growing season (spring and summer) is sufficient. Never apply in winter.
Q: Will milk make my snake plant grow faster?
A: Milk provides calcium and trace nutrients, but it won’t dramatically speed up growth. Snake plants are naturally slow growers. Milk supports healthy growth rather than forcing fast growth.
Q: My snake plant has white spots on the leaves after using milk. What happened?
A: This is likely dried milk residue. If you used a leaf spray and didn’t wipe it off, the proteins and fats can leave spots. Next time, wipe leaves with a damp cloth after treatment or dilute more heavily.
Q: Is milk safe for all snake plant varieties?
A: Yes, all Dracaena trifasciata varieties (Laurentii, Zeylanica, Hahnii, etc.) have similar needs. However, variegated varieties (with yellow or white edges) are slightly more sensitive to overfeeding. Use even less milk for these plants.
More Ideas You Might Like
-

Why Some Homeowners Are Using Onion Water Around Orchids and What Usually Helps More for Strong Roots, Healthy Leaves, and Long-Lasting Blooms
Orchids are among the most elegant indoor flowering plants for homeowners who want graceful stems, glossy green leaves, long-lasting blooms, and a refined decorative display that fits beautifully in living rooms, bedrooms, apartments, home offices, bright kitchens, windowsills, covered patios, commercial interiors, luxury home staging, and premium indoor plant styling. A healthy orchid can turn…
-

Why Some Homeowners Are Pouring Aloe Water Around Orchids and What Usually Helps More for Strong Roots, Healthy Leaves, and Long-Lasting Blooms
Orchids are among the most elegant indoor flowering plants for homeowners who want graceful blooms, sculptural roots, glossy leaves, and a premium decorative display that fits beautifully in living rooms, bedrooms, apartments, home offices, bright kitchens, balcony gardens, covered patios, commercial interiors, luxury home staging, and refined indoor plant styling. A healthy orchid can make…
-
Why Some Homeowners Are Adding Brown Powder Around Snake Plants and What Usually Helps More for Strong Roots, Fuller Growth, and Healthy Indoor Leaves
Snake plant is one of the most dependable indoor plants for homeowners who want strong upright leaves, bold green patterning, yellow-edged variegation, easy maintenance, and a clean decorative display that fits beautifully in living rooms, bedrooms, apartments, home offices, bright kitchens, entry corners, sunny windowsills, plant shelves, commercial interiors, luxury home staging, and premium indoor…


