Orchids are elegant, delicate-looking plants, but they are stronger than many people think. A tired orchid with yellow leaves, limp stems, weak roots, dry flower spikes, or a sad drooping look is not always dead. Many orchids can recover when the real problem is found early and handled carefully. One simple ingredient that is often used in orchid rescue is hydrogen peroxide, but it must be used the right way.
Hydrogen peroxide can help clean damaged orchid roots, reduce surface bacteria, and support a cleaner recovery process after root rot. It is not a magic potion. It will not save a plant that has no living crown, no healthy roots, and no viable growing point. It should not be poured heavily over the leaves or used every day. When used properly, it can be part of a careful orchid rescue routine that gives the plant a better chance to recover.
The most important part of saving a dying orchid is understanding why it is failing. A yellow orchid leaf may mean natural aging, overwatering, root rot, sun damage, nutrient stress, or crown rot. A limp orchid may be thirsty, but it may also have rotten roots that can no longer drink. A dry flower spike may simply mean the blooming cycle has ended. Before using any rescue ingredient, you need to inspect the roots, potting mix, crown, and leaves.
This complete guide explains how to save a dying orchid safely using hydrogen peroxide as a cleaning support, how to diagnose the real problem, how to remove rotten roots, how to repot the orchid, how to water after rescue, how to encourage new roots, and how to avoid the common mistakes that kill orchids indoors.
First: What Is the One Ingredient?
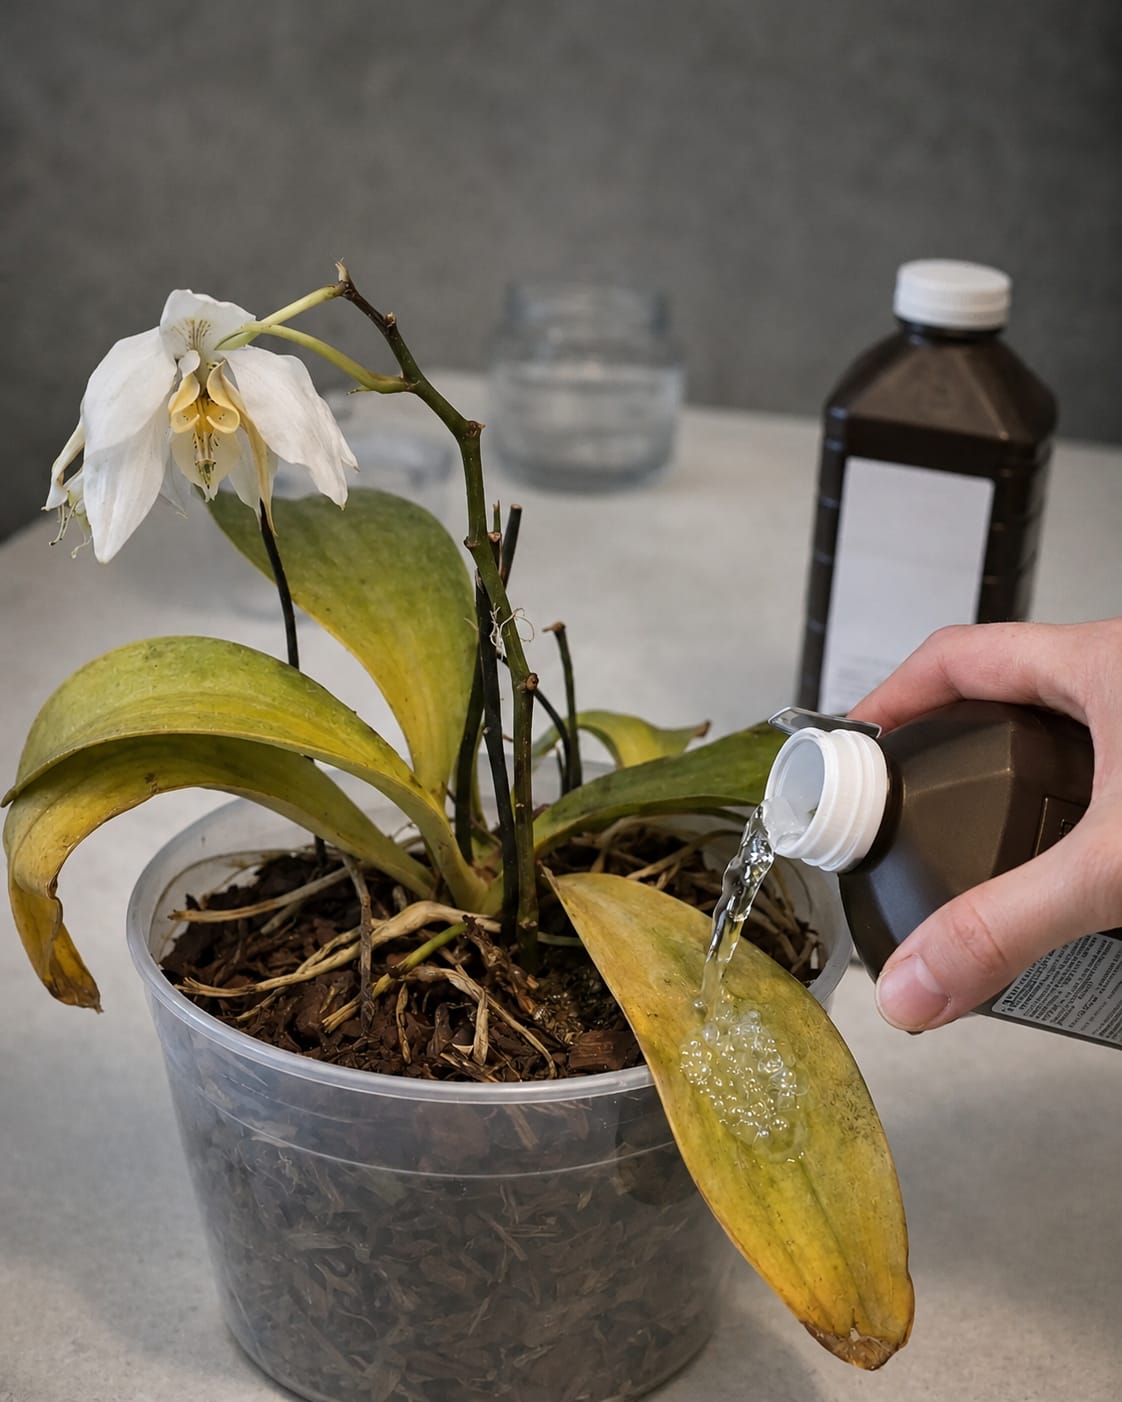
The one ingredient often used for orchid rescue is 3% hydrogen peroxide. This is the common household strength usually found in brown bottles at pharmacies and stores. It is used by many plant owners to clean small areas of root rot, crown rot, and bacterial buildup.
For orchids, 3% hydrogen peroxide should be used carefully and only when needed. It can bubble when it touches organic material. This bubbling action may help clean damaged tissue on the surface. It is most useful after trimming rotten roots or cleaning a small affected area.
Hydrogen peroxide is not fertilizer. It does not feed the orchid. It does not replace light, airflow, correct watering, or fresh bark mix. Think of it as a cleaning step in the rescue process, not the full cure.
Important Safety Notes Before Using Hydrogen Peroxide
Hydrogen peroxide can help, but overuse can damage living root tissue and stress the plant. Orchids need beneficial microbes and healthy root surfaces. If you soak the entire plant too often, you may disturb the natural balance around the roots.
- Use only 3% hydrogen peroxide.
- Do not use strong industrial peroxide.
- Do not mix hydrogen peroxide with vinegar, bleach, or other chemicals.
- Do not pour it into the pot every day.
- Do not use it as regular watering water.
- Keep it away from eyes and skin irritation.
- Use it only on damaged areas or during rescue cleaning.
- Let the orchid dry with good airflow after treatment.
The goal is to clean damaged tissue, then return the orchid to proper care.
Why Orchids Start Dying Indoors
Most indoor orchids decline because their roots are struggling. Many orchids sold as houseplants are Phalaenopsis orchids. They naturally grow with roots that like air, moisture, and drainage. In homes, they are often kept in dense old bark, packed moss, decorative pots without drainage, or plastic sleeves that trap water.
When roots sit wet for too long, they rot. Once roots rot, the orchid cannot drink properly. The leaves may turn yellow or limp even though the pot looks wet. This confuses many plant owners, and they water even more. More water leads to more rot.
Other common causes include too much direct sun, not enough light, cold drafts, fertilizer burn, crown rot, pest damage, old potting mix, and natural leaf aging.
Step 1: Do Not Panic Over One Yellow Leaf
One yellow lower leaf does not always mean the orchid is dying. Orchids naturally shed older lower leaves from time to time. If the rest of the plant is firm, the crown is green, and the roots are healthy, one yellow leaf may simply be normal aging.
However, if several leaves are yellow, limp, wrinkled, or falling off, the plant needs attention. If the yellowing begins near the crown, or if the center of the plant looks soft, there may be a serious problem.
Before using hydrogen peroxide, inspect the plant carefully.
Step 2: Check the Crown
The crown is the central area where the leaves meet. It is one of the most important parts of a Phalaenopsis orchid. If water sits inside the crown, it can rot. Crown rot can kill an orchid quickly if not caught early.
A healthy crown feels firm. It should not smell bad, look mushy, or turn black. If the crown is soft, wet, brown, or collapsing, remove any trapped water and treat the affected area carefully.
For a small crown rot spot, apply a small amount of 3% hydrogen peroxide directly to the damaged area using a dropper or cotton swab. Let it bubble, then gently dry the area with tissue. Keep the orchid in a warm place with strong airflow. Do not water into the crown again.
Step 3: Check the Roots
Roots tell the truth about orchid health. A plant may look dry above the pot while the roots are rotting below. Remove the orchid from its pot and examine the root system.
Healthy orchid roots are firm. They may be green when wet and silvery or pale when dry. Some healthy roots may also be cream or light tan inside the pot. Rotten roots are mushy, hollow, brown, black, slimy, or smelly.
If most roots are rotten, the orchid may still survive if the crown is healthy and at least a few roots or root nodes remain. Recovery will be slow, but possible.
Step 4: Remove the Old Potting Mix
Old bark and moss can hold too much moisture and break down over time. If the mix smells sour, looks mushy, or stays wet for many days, it must be removed.
Gently pull away old bark, moss, and debris from the roots. Be patient. Some roots may stick to the mix. Do not tear healthy roots if you can avoid it. If pieces of bark remain attached to healthy roots, leave them rather than causing damage.
Removing old mix improves airflow and helps you see which roots are alive.
Step 5: Trim Rotten Roots
Use clean scissors or pruning shears. Sterilize them before cutting. Trim away mushy, hollow, black, or rotten roots. Cut back to firm tissue. If a root is partly rotten but partly firm, remove only the damaged section.
Do not cut firm healthy roots just because they are not perfectly green. Some roots inside the pot naturally look pale or tan. Firmness matters more than color.
After trimming, the orchid may look smaller, but removing rot gives it a better chance to recover.
Step 6: Use Hydrogen Peroxide on Damaged Root Areas
After trimming rotten roots, you can use 3% hydrogen peroxide as a cleaning step. Apply it to the cut areas and any suspicious rotten spots. Let it bubble for a short time. Do not soak the entire orchid for a long period.
A simple method:
- Trim rotten roots with clean scissors.
- Place the orchid on a clean surface.
- Apply 3% hydrogen peroxide to cut areas.
- Let bubbling happen briefly.
- Gently blot extra moisture.
- Allow the plant to air-dry for 20 to 60 minutes.
- Repot in fresh orchid mix.
This helps clean the damaged areas before the orchid goes into fresh media.
Step 7: Choose the Right Orchid Pot
Orchids need excellent drainage and airflow. A clear plastic orchid pot with holes is ideal because it lets you see root health and moisture levels. Terracotta orchid pots with side holes can also work well.
A pot should not be too large. If the pot is much larger than the root system, the mix stays wet too long. Choose a pot that fits the remaining roots comfortably.
If you love decorative pots, use them as cover pots only. Keep the orchid in a drainage pot inside the decorative container. Remove it for watering and let it drain fully before returning it.
Step 8: Use Fresh Orchid Bark Mix
Do not repot a rescued orchid into regular houseplant soil. Orchids need chunky, airy media. Standard potting soil is too dense and can suffocate roots.
A good orchid rescue mix includes:
- Medium orchid bark
- Perlite
- Charcoal
- A small amount of sphagnum moss if your home is very dry
For a plant recovering from root rot, use more bark and less moss. Bark allows better airflow. Moss holds moisture, which can be helpful in dry homes but risky if packed too tightly.
Step 9: Repot Gently
Place a little orchid bark at the bottom of the pot. Set the orchid in the center. Spread the remaining healthy roots gently. Add bark around the roots, tapping the pot lightly to settle the mix.
Do not bury the crown. The crown should sit above the mix. If the crown is buried, it can rot. The orchid should feel stable, but not packed tightly.
If the plant has very few roots, use a small stake or clips to keep it steady. Movement can slow new root growth.
Step 10: Do Not Water Immediately if Roots Were Cut Heavily
After a major root trim and hydrogen peroxide treatment, wait a little before watering heavily. The cuts need time to dry. Depending on the condition of the plant and your room humidity, you can wait 24 hours before watering.
If the orchid is severely dehydrated, you may lightly mist aerial roots or keep humidity around the plant, but do not soak the crown or fresh cuts.
Once you water, let all excess water drain completely.
How to Water After Rescue
Watering after rescue should be careful and controlled. Water when the bark is nearly dry, not on a fixed schedule. Clear pots help because healthy roots look green when wet and silvery when dry.
To water, take the orchid to a sink. Run room-temperature water through the bark for a short time. Avoid getting water trapped in the crown. Let the pot drain fully before placing it back.
Do not let the orchid sit in standing water.
How Often Should You Use Hydrogen Peroxide?
Hydrogen peroxide should not be used as a regular watering routine. Use it only for rescue cleaning, small rot spots, or after trimming damaged roots. Once the orchid is repotted and recovering, return to normal care.
Repeated peroxide use can stress healthy roots. It may also disturb beneficial organisms in the potting mix. If the orchid keeps rotting after treatment, the problem is usually watering, airflow, potting mix, or crown moisture, not a lack of peroxide.
Signs Your Orchid Can Still Be Saved
- The crown is firm.
- At least one or two roots are firm.
- There are green leaf bases.
- The plant has a living growing point.
- Rot has not destroyed the entire crown.
- Leaves are wrinkled but not mushy.
- New root tips may appear after care improves.
Even if the orchid looks rough, a firm crown is a good sign. Orchids can regrow roots with patience.
Signs the Orchid May Be Too Far Gone
- The crown is black and mushy.
- All leaves have fallen off from rot.
- No firm roots remain.
- The plant smells rotten.
- The base collapses when touched.
- Rot has spread through the central stem.
If the crown is completely destroyed, recovery is unlikely. Still, if any living tissue remains, some growers attempt a final rescue, but it may take a long time and success is not guaranteed.
Yellow Leaves: What They Mean
Yellow leaves on orchids can have many causes. The pattern matters. A single lower yellow leaf may be normal aging. Several yellow leaves at once may indicate root problems. Yellow leaves with soft roots usually point to overwatering or rot.
Yellow leaves with dry, shriveled roots can mean underwatering or root death. Yellow leaves with burned patches can mean too much sun. Yellow leaves with sticky residue may mean pests.
Do not treat yellow leaves blindly. Check roots and growing conditions first.
Wrinkled Leaves: Thirst or Root Rot?
Wrinkled orchid leaves often mean the plant is dehydrated, but dehydration can happen for two opposite reasons. The orchid may not be getting enough water, or the roots may be rotten and unable to absorb water.
If the roots are healthy and dry, water the orchid properly. If the roots are rotten and wet, trim rot and repot. Watering more will not help rotten roots.
This is why root inspection is so important.
Should You Cut the Flower Spike?
If the orchid is dying or badly stressed, cut the flower spike. Blooms use energy. A weak orchid needs to focus on root and leaf recovery, not flowers.
Use clean scissors and cut the spike near the base, leaving a small stub. If the spike is already brown and dry, removing it is simple. If it is green but the plant is very weak, cutting it still helps the plant conserve energy.
Once the orchid recovers, it can bloom again in the future.
Best Light for Orchid Recovery
Orchids need bright indirect light to recover. Too little light slows root growth. Too much direct sun burns leaves. Place the orchid near an east-facing window or a bright filtered window.
Leaves should be medium green. Very dark green leaves may mean not enough light. Yellow-green leaves or burned spots may mean too much light.
Good light helps the orchid produce energy for new roots.
Airflow Is Essential
Good airflow helps prevent rot and fungal problems. Orchids do not like stale, wet conditions. After watering, the roots and crown should dry properly.
Place the orchid where air moves gently. A small fan in the room can help, but do not blast the plant with strong cold air.
Airflow is especially important after using hydrogen peroxide or after repotting from root rot.
Humidity for Recovery
Orchids like moderate humidity, but humidity should not mean wetness trapped in the crown. A humidity level around 40% to 60% is helpful for many indoor orchids.
You can use a humidity tray, group plants together, or run a humidifier nearby. Keep water below the pot level so the orchid is not sitting in water.
High humidity plus poor airflow can cause more rot, so balance is important.
Temperature for Orchid Recovery
Most common Phalaenopsis orchids prefer comfortable indoor temperatures. Keep them away from cold drafts, heaters, air conditioners, and hot direct sun. Temperature stress can slow recovery and cause buds or leaves to drop.
A warm, stable room helps the orchid grow new roots. Avoid placing a recovering orchid near a cold window at night.
Feeding a Sick Orchid
Do not fertilize heavily while the orchid is sick or rootless. Fertilizer can burn damaged roots. Wait until you see signs of recovery, such as new root tips or firm new leaves.
When feeding resumes, use a balanced orchid fertilizer at weak strength. A common approach is “weakly, weekly,” but for a recovering plant, even less may be better. Use fertilizer only when the roots are healthy enough to absorb it.
Never use fertilizer as a rescue shortcut.
How to Encourage New Roots
New roots grow when the orchid has warmth, bright indirect light, airflow, and proper moisture. The plant must be stable in the pot. If it wobbles, new root tips can break.
Keep the bark slightly moist but never soggy. Provide humidity around the plant. Avoid disturbing it too often. New roots may take weeks to appear.
Patience is one of the most important parts of orchid rescue.
The Sphagnum Moss Recovery Method
If an orchid has almost no roots, some growers use a careful sphagnum moss recovery method. The moss is kept barely damp, not wet, around the base to encourage root growth. This method requires close attention because wet moss can cause rot.
If you try this, use clean moss, good airflow, and a small container. Do not pack moss tightly around the crown. Check often for mold or rot.
For beginners, fresh bark in a small pot is often safer than too much moss.
Common Mistakes When Using Hydrogen Peroxide
- Pouring peroxide into the pot every day
- Using strong peroxide above 3%
- Mixing peroxide with other chemicals
- Soaking healthy roots too often
- Thinking peroxide replaces repotting
- Ignoring old rotten potting mix
- Leaving water in the crown after treatment
- Not fixing overwatering habits
Hydrogen peroxide is only one tool. The real rescue comes from removing rot and improving growing conditions.
Continue to Page 2
Continue to page 2 for more details about this article and the key points many readers miss on the first page.