Anthuriums are already stunning houseplants, but the real secret to getting bigger, brighter, longer‑lasting blooms is not what you do when the flowers are already open.
It is what you do before the next bloom cycle begins.
That quiet period between blooms — sometimes called the resting or prep phase — is when the plant decides whether it has enough strength to produce another healthy flower. If the roots are weak, the light is poor, or the feeding is off, the next bloom cycle will usually be smaller, slower, or disappointing.
But if you prepare the plant the right way, the next round of blooms can be even better.
In this guide, you will learn exactly how to strengthen your anthurium before its next bloom cycle, what that brown powder in videos really does, and a step‑by‑step routine that leads to stronger growth and more impressive flowers.
Why the Time Before Blooming Matters So Much
A lot of people focus only on the flowers. They see a bloom fading and immediately look for a way to “force” another one. But anthuriums (Anthurium andraeanum and hybrids) are not like annual flowers that bloom continuously without effort. They are tropical perennials that bloom in cycles, and each cycle depends on how much energy the plant stored during the previous weeks.
Think of it this way: blooming is expensive for the plant. Producing those glossy, waxy spathes (the colorful part we call the flower) and the spadix (the spike that holds the tiny real flowers) requires significant energy.
This is the stage when the plant needs to build:
· Stronger roots – For water and nutrient uptake.
· Healthier leaves – For photosynthesis and energy production.
· Better nutrient reserves – To fuel flower development.
· More stable growth – Without stress from drafts, dryness, or overwatering.
The better the plant feels before blooming, the better the bloom cycle usually is. More flowers, brighter colors, longer lasting, and shorter gaps between cycles.
Step 1: Check the Roots First (Before You Do Anything Else)
Before the next bloom cycle, root health matters most. You cannot have strong flowers without strong roots.
How to Inspect Anthurium Roots
Gently remove the plant from its pot (best done when the soil is slightly dry). Look at the roots:
Healthy roots are:
· Firm and thick (not mushy)
· Light tan to white (sometimes slightly greenish)
· Free of dark spots or rot
Unhealthy roots are:
· Soft, mushy, or slimy (root rot)
· Dark brown or black
· Hollow or stringy (dead)
· Smelling sour or musty
Also check the potting mix. Anthuriums need a chunky, breathable mix — not heavy, dense soil. A good mix might include orchid bark, perlite, coarse peat, or coconut husk chips. If the mix is compacted, waterlogged, or smells bad, repot immediately.
What to Do If Roots Are Weak
· Trim away all rotten, dead, or mushy roots with clean scissors.
· Rinse the remaining healthy roots gently.
· Repot in fresh, well‑draining anthurium mix (orchid bark + perlite + peat).
· Choose a pot with drainage holes that is only 1–2 inches larger than the root ball.
· Water lightly after repotting, then let the top inch of soil dry before watering again.
Strong roots are the foundation of every future bloom.
Step 2: Give Brighter Indirect Light (The #1 Bloom Trigger)
If you want more flowers, this is one of the biggest upgrades you can make.
Anthuriums need bright, indirect light to build energy for blooming. They can survive in lower light, but they will not bloom well.
Ideal Light Conditions
· Best placement: East‑facing window (morning sun) or a south/west window with a sheer curtain to diffuse harsh afternoon rays.
· How much: 10–12 hours of bright indirect light daily.
· Signs of too little light: Dark green leaves, long stems reaching toward light, no blooms for months.
· Signs of too much direct sun: Scorched, yellow, or brown leaf edges; leaves curling.
If your anthurium has been in a dark corner, move it closer to a window. You may see new leaf growth within weeks and flower buds within 2–3 months.
Can You Use Grow Lights?
Yes. If your home lacks natural light, use a full‑spectrum LED grow light. Place it 12–18 inches above the plant and run it for 10–12 hours daily. This is especially helpful in winter.
Step 3: Feed Gently Before Blooming Starts
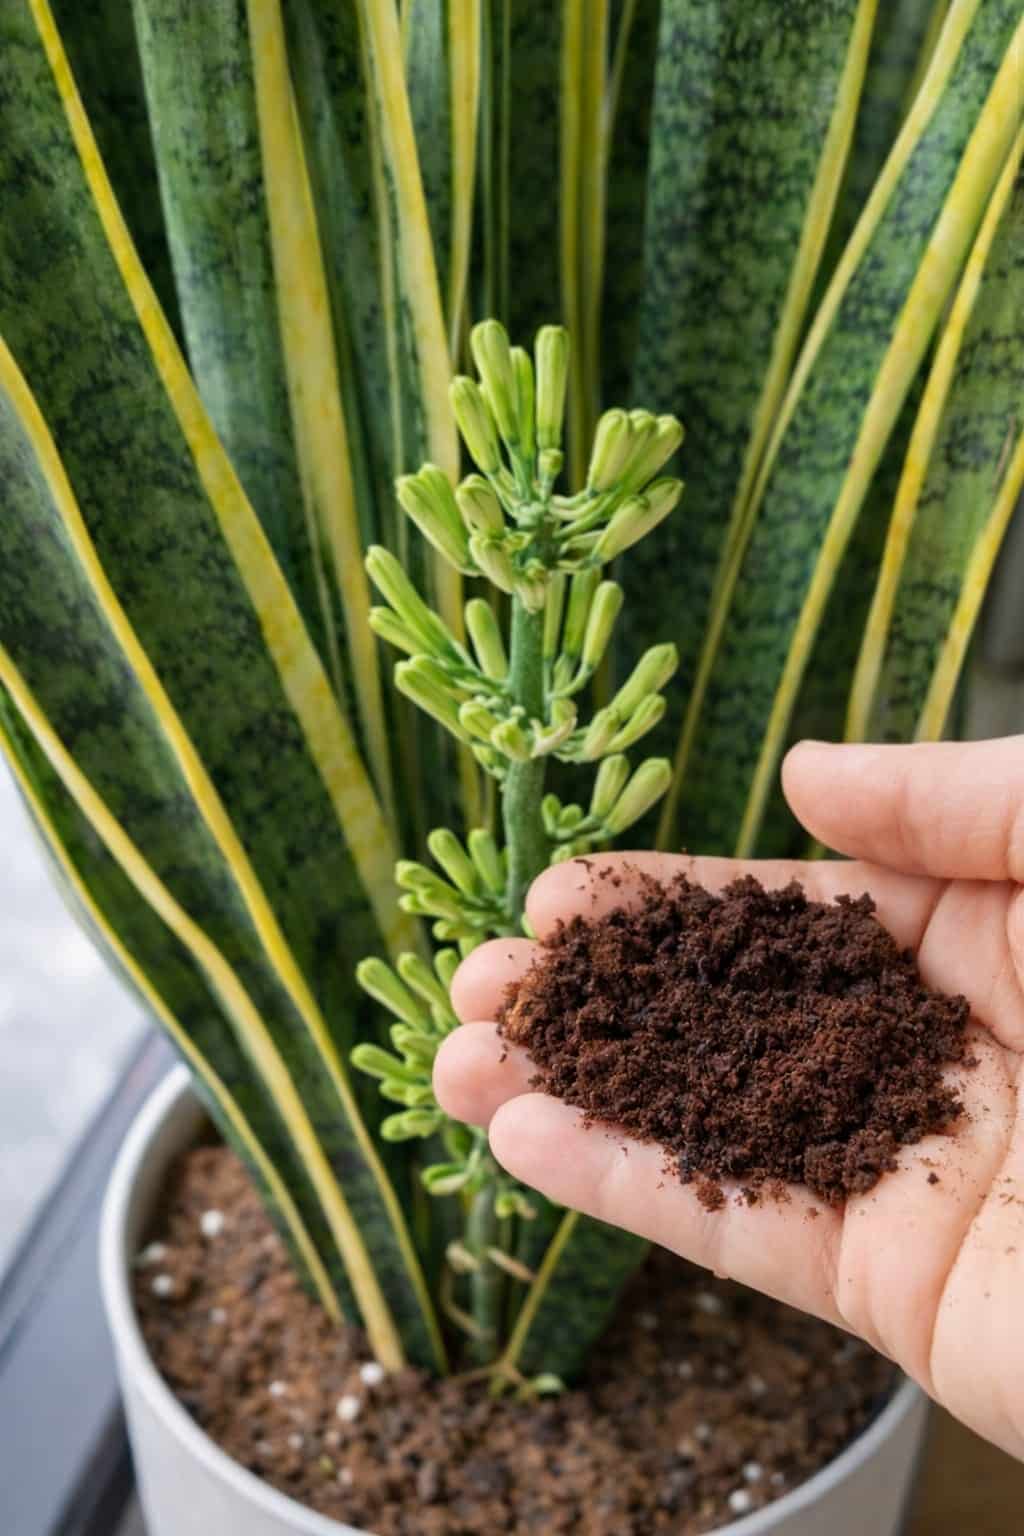
This is where many plant lovers start trying powders, granules, or homemade mixes. You may have seen videos of a brown powder being sprinkled onto anthurium soil, claimed to be a miracle bloom booster.
What Is That Brown Powder?
In many videos, the brown powder is often:
· A slow‑release fertilizer (like Osmocote or similar)
· Worm castings (organic, gentle)
· Powdered bloom booster (higher phosphorus)
· Sometimes just cinnamon or coffee grounds (less effective)
The truth: A gentle feeding routine before the next bloom cycle can help, but moderation matters. The real improvement comes from steady support, not one dramatic spoonful.
How to Feed Your Anthurium for Better Blooms
· Use a balanced, water‑soluble fertilizer (like 10‑10‑10 or 20‑20‑20) diluted to half strength.
· Or use a bloom‑booster formula (higher middle number, like 10‑20‑10) once a month during the prep phase.
· Feed every 2–4 weeks during spring and summer (active growth).
· Do not fertilize a newly repotted or stressed plant for 4–6 weeks.
· Always water first (moisten the soil) before applying fertilizer to prevent root burn.
Natural alternatives that work gently:
· Diluted worm casting tea (steep worm castings in water, dilute until pale)
· Weak compost tea
· Diluted fish emulsion (use sparingly — it smells)
Do not overload the roots. Healthy feeding should support the plant, not stress it. Overfeeding leads to salt buildup, root burn, and weak, leggy growth.
Continue to Page 2
Continue to page 2 for more details about this article and the key points many readers miss on the first page.