Orchids are often described as delicate plants, but the truth is a little more practical: they are not impossible to care for, they simply respond badly to rushed care. One of the most common mistakes orchid owners make is trying to “force” growth with too much fertilizer, especially when the plant already looks weak, tired, or slow to bloom. A spoonful of fertilizer granules can look harmless, but when it is placed directly on exposed orchid roots or poured too heavily into the crown area, it can cause stress instead of recovery.
If you have seen an orchid with thick silver-green roots, healthy leaves, and a clear pot filled with bark, you are looking at a plant that needs a very different feeding routine from a normal houseplant growing in soil. Orchids, especially Phalaenopsis orchids, naturally grow with roots that cling to trees and absorb moisture, air, and small amounts of nutrients from their environment. Their roots are designed to breathe. They do not like heavy soil, constant wetness, or concentrated fertilizer sitting directly on them.
This article explains how to use slow-release fertilizer granules on orchids in a safer, more realistic way. It is not a miracle trick, and it will not bring back a dead orchid overnight. But when used carefully, slow-release fertilizer can support steady leaf growth, stronger roots, and future blooming. The key is knowing when to use it, how much to apply, where to place it, and when to avoid it completely.
Before adding any fertilizer to an orchid, remember one important rule: fertilizer is not medicine. It does not fix rotten roots, crown rot, dehydration, pests, or a potting mix that has broken down. Fertilizer only helps when the orchid is already capable of absorbing nutrients. If the roots are mostly healthy and the plant is actively growing, a careful feeding routine can help. If the roots are mushy, black, hollow, or badly damaged, the orchid needs root care first, not more fertilizer.
What Are the Small White Granules Used on Orchids?
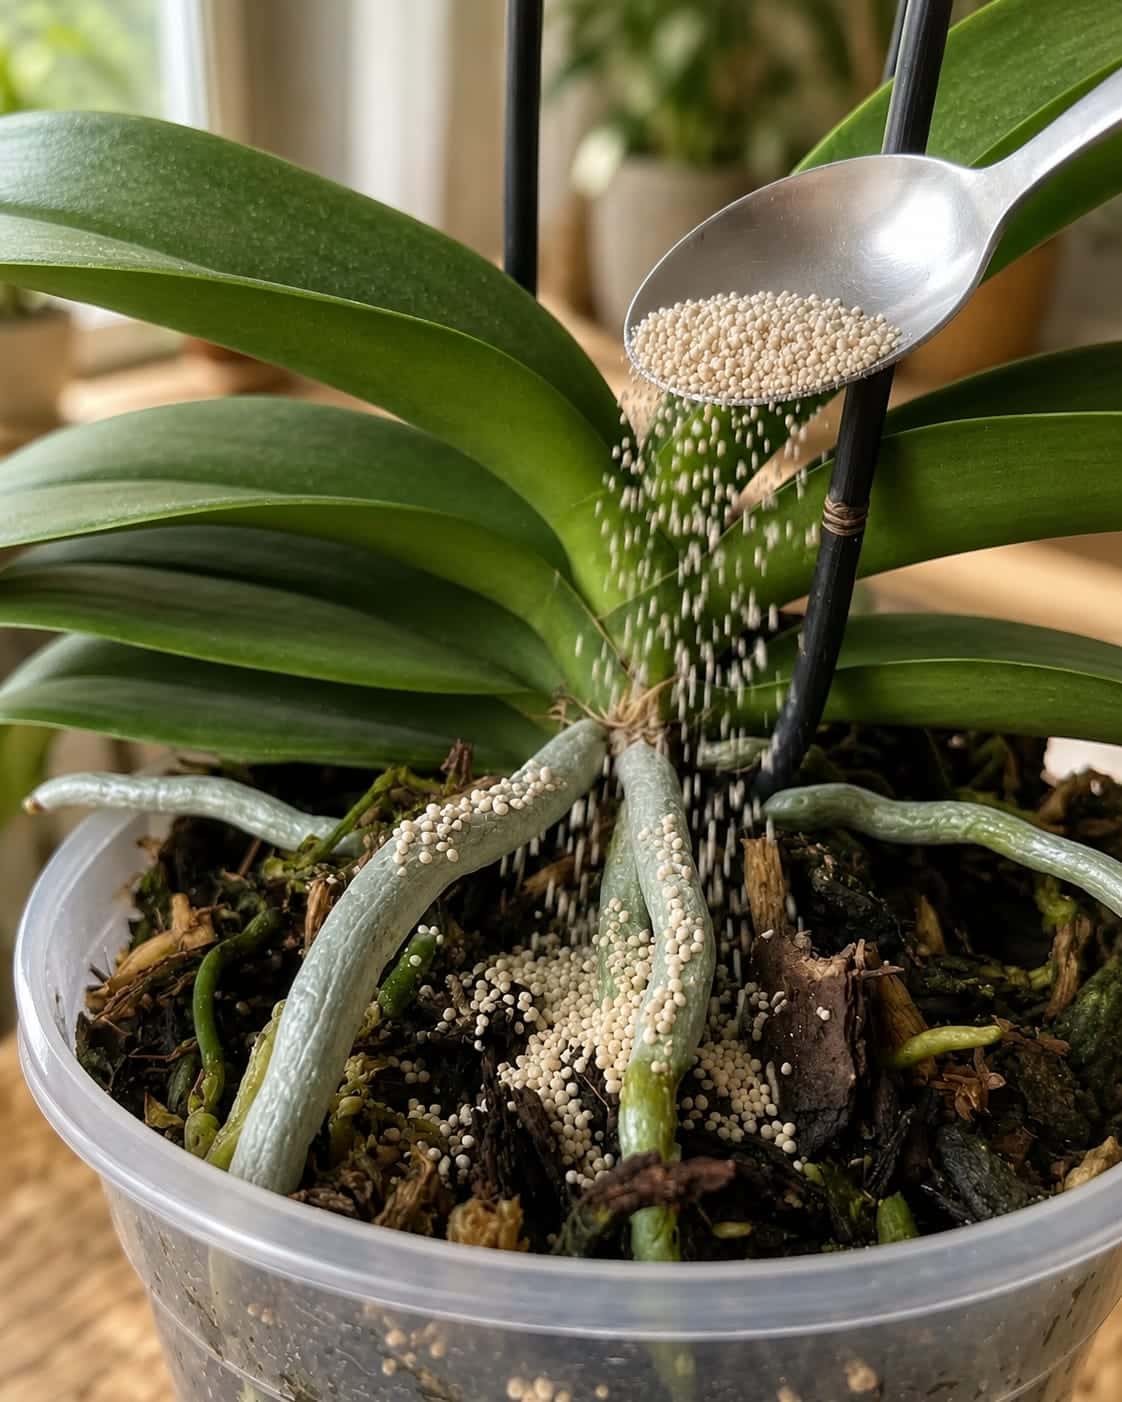
The small white or pale beige granules often sprinkled around orchids are usually slow-release fertilizer pellets. These pellets are made to release nutrients gradually over time when they come into contact with moisture. Unlike liquid fertilizer, which feeds the plant immediately and then washes away, slow-release granules stay in the potting mix and release small amounts of nutrients slowly.
Many gardeners like them because they are simple to use. You do not need to mix fertilizer every week, and you do not have to remember complicated feeding schedules. However, orchids are not the same as garden flowers or heavy-feeding houseplants. Their roots are sensitive, and their potting mix is usually made of bark, moss, charcoal, perlite, or coconut husk. This makes fertilizer placement very important.
When slow-release granules are applied too heavily, they can create areas of concentrated nutrients in the pot. If those granules sit directly on exposed roots, especially when the orchid is watered, the roots may receive too much fertilizer at once. This can cause root tip burn, yellowing leaves, dry root patches, or stalled growth. That is why the goal is not to cover the pot with granules. The goal is to use a small amount in a controlled way.
Why Orchids Need Gentle Feeding
Orchids grow slowly compared to many other houseplants. A healthy orchid may produce one or two new leaves in a season, several new roots, and then a flower spike when conditions are right. This slow growth does not mean the plant is failing. It simply means orchids use nutrients gradually.
In nature, orchids receive very diluted nutrients from rainwater, decomposing leaves, dust, and organic matter around their roots. They are not used to strong fertilizer. This is why many orchid growers follow the idea of feeding “weakly, regularly” rather than feeding heavily once in a while.
Slow-release fertilizer can fit into this approach if it is used with restraint. The problem begins when the owner sees a weak orchid and assumes more fertilizer will make it recover faster. In reality, a stressed orchid often absorbs nutrients poorly. If the roots are dehydrated, damaged, or rotting, fertilizer can make the problem worse.
Think of fertilizer as support, not rescue. It supports an orchid that is already stable. It does not replace correct watering, proper light, fresh potting mix, airflow, or root health.
When Slow-Release Fertilizer Can Help an Orchid
Slow-release fertilizer is most useful when your orchid is in a growth phase. This means the plant is producing new roots, a new leaf, or fresh green root tips. These are signs that the orchid is active and able to use nutrients.
You may consider using a small amount of slow-release fertilizer if your orchid has firm leaves, several healthy roots, and a potting mix that drains well. Healthy orchid roots are usually green when wet and silvery or pale gray when dry. They should feel firm, not mushy. A few dry or old roots are normal, but the plant should still have enough living roots to support itself.
Slow-release fertilizer can also be helpful after repotting, but only after the orchid has had a little time to adjust. If you repot an orchid into fresh bark, it is usually better to wait a few weeks before adding fertilizer. Freshly disturbed roots need time to settle. Feeding too soon can stress them.
If your orchid has recently finished blooming and is beginning to grow new leaves or roots, this is also a good time to support it with gentle feeding. After flowering, the plant often shifts energy back into vegetative growth. A mild nutrient supply can help it build strength for the next bloom cycle.
When You Should Not Fertilize an Orchid
There are times when fertilizer should be avoided completely. If your orchid has root rot, do not fertilize it. Root rot usually appears as brown, black, mushy, or hollow roots. These roots cannot absorb nutrients properly. Adding fertilizer to rotten roots is like putting food on a damaged system that cannot use it.
Do not fertilize an orchid with crown rot. Crown rot happens when water sits in the center of the plant where the leaves meet. If the crown becomes soft, dark, or foul-smelling, the plant needs drying, cleaning, and careful treatment, not fertilizer.
A severely dehydrated orchid should also be rehydrated gently before feeding. If the leaves are wrinkled and the roots are dry, papery, or shriveled, start by correcting the watering routine and humidity. Fertilizer should come later, once the roots are functioning again.
Avoid fertilizing immediately after buying an orchid if you do not know what is already in the pot. Many store-bought orchids have fertilizer already mixed into the medium or may have been fed recently. Give the plant time to adjust to your home first. Observe it for a few weeks before adding anything.
Also avoid fertilizing during extreme heat, direct sun stress, pest infestations, or when the plant is clearly declining for unknown reasons. In these situations, the first step is diagnosis. Fertilizer should never be used as a guess.
How Much Slow-Release Fertilizer Should You Use?
With orchids, less is usually safer. The exact amount depends on the fertilizer brand, pot size, and nutrient strength, so the product label matters. However, as a general orchid-safe approach, use much less than you would use for ordinary potted plants.
For a small to medium Phalaenopsis orchid in a clear pot, a very light sprinkle is usually enough. You do not need to cover the surface. You do not need to fill the crown area. You do not need to place granules on every visible root. A few granules placed around the edge of the potting mix are safer than a spoonful dumped directly into the center of the plant.
The biggest mistake is thinking that more granules mean faster growth. Orchids do not work that way. Too much fertilizer can damage the roots, create salt buildup, and slow the plant down. A lightly fed orchid with healthy roots will usually grow better than an overfed orchid with burned roots.
If you are unsure, start with half or even one quarter of the recommended amount. You can always adjust later, but it is much harder to undo fertilizer burn once it happens.
Where to Place Fertilizer Granules on an Orchid
Placement matters a lot. The safest place for slow-release fertilizer granules is usually on top of the potting mix near the outer edge of the pot, not directly on the crown and not piled on exposed roots.
The crown is the central area where the leaves meet. This part should stay dry as much as possible because trapped moisture can cause rot. Granules should not be poured into this area. When you water the orchid, the granules may hold moisture or dissolve nutrients around the crown, increasing the risk of damage.
Exposed aerial roots are also sensitive. It is normal for orchid roots to grow above the potting mix. These roots help the plant breathe and absorb moisture from the air. Avoid coating them with fertilizer granules. If pellets sit on these roots and become wet, they may release nutrients directly onto the root surface in a concentrated way.
Instead, place a small amount of granules on the bark surface, spread out lightly. If possible, keep them slightly away from direct contact with thick exposed roots. The nutrients will gradually move through the potting mix when you water.
Step-by-Step: How to Feed an Orchid With Slow-Release Granules
Step 1: Check the Roots First
Before feeding, inspect the roots through the clear pot if possible. Healthy roots should look green when wet and silver-gray when dry. They should be firm and plump. If most roots are brown, black, mushy, or hollow, skip fertilizer and focus on root recovery.
If only a few old roots are dry but the plant has several strong roots, you can continue carefully. A small number of old, dry roots is normal for orchids. What matters is whether the plant still has enough living roots to absorb water and nutrients.
Step 2: Check the Potting Mix
Orchid bark breaks down over time. When bark becomes old, soft, sour-smelling, or compacted, it holds too much moisture and reduces airflow. Fertilizing an orchid in broken-down mix can make root problems worse.
If the potting mix is fresh, chunky, and airy, feeding is safer. If it looks decomposed or stays wet for too long, repotting may be more important than fertilizing.
Step 3: Use a Small Amount
Take a small pinch of slow-release fertilizer granules. Do not use a full spoon unless the product label specifically supports that amount for orchids and the pot is large enough. For most indoor orchids, a light application is better.
Spread the granules thinly. Avoid creating piles. Piles release nutrients unevenly and may cause concentrated spots in the potting mix.
Step 4: Keep Granules Away From the Crown
Do not pour granules into the center of the orchid. Keep the crown clean and dry. If granules fall into the crown or between the leaves, gently remove them.
This step is especially important for Phalaenopsis orchids because their crown is vulnerable to rot when moisture sits there for too long.
Step 5: Water Normally
After applying the granules, water the orchid according to its normal needs. Do not overwater just to activate the fertilizer. Orchids should be watered when the potting mix is almost dry, not on a fixed schedule that ignores the plant’s condition.
When watering, allow water to run through the pot and drain completely. Never leave the orchid sitting in water. Standing water around the roots can lead to rot, especially in decorative pots without drainage.
Step 6: Observe the Plant
After feeding, watch the orchid for signs of stress. Healthy signs include firm leaves, green root tips, and steady new growth. Warning signs include yellowing leaf edges, blackened root tips, dry patches on roots, or sudden leaf limpness.
If the orchid reacts badly, flush the pot thoroughly with plain water to help remove excess salts. Then avoid fertilizing again until the plant stabilizes.
Continue to Page 2
Continue to page 2 for more details about this article and the key points many readers miss on the first page.