How to Water Orchids in Bark
Water when the bark is mostly dry and the roots look silver-gray. Pour water through the pot and allow it to drain completely. Do not let water sit in the crown or saucer.
In warm bright conditions, watering may be needed about once a week. In cooler or darker conditions, it may be less often. Always check the roots and bark before watering.
Signs Your Orchid Needs Water
- Roots look silver-gray
- Bark feels dry
- Pot feels light
- Leaves feel slightly less firm
Signs of Overwatering
- Mushy roots
- Yellow lower leaves
- Sour smell
- Moldy bark
- Soft crown
- Drooping while medium is wet
How to Encourage Orchid Blooms
After the orchid grows strong roots and healthy leaves, you can encourage blooming. For many Phalaenopsis orchids, a slight nighttime temperature drop helps trigger flower spikes. Bright indirect light is also essential.
- Grow strong roots first.
- Give bright indirect light daily.
- Water correctly.
- Feed lightly during active growth.
- Provide slightly cooler nights for a few weeks.
- Keep the plant stable.
- Wait for a flower spike to appear.
Fertilizer for Orchids
Use orchid fertilizer at a weak strength. Strong fertilizer can burn orchid roots. Many beginners do well with feeding every 2 to 4 weeks during active growth using a diluted orchid fertilizer.
Flush the pot with plain water between feedings to prevent buildup.
Can Potato Water Be Used as Fertilizer?
Potato water is sometimes used in gardening, but it is not ideal for orchids. Starchy water can become cloudy, ferment, and attract bacteria. Orchids are better fed with a proper orchid fertilizer or very weak seaweed extract.
Do not pour thick potato water into an orchid pot.
How to Clean Orchid Leaves
Dust can block light. Wipe orchid leaves with a soft damp cloth. Support the leaf while wiping so it does not crack. Do not use oily leaf shine products.
Clean leaves help the orchid absorb light and look healthier.
Common Orchid Problems
Yellow Leaves
One old yellow lower leaf can be normal. Many yellow leaves can mean overwatering, root rot, low light, or stress.
Wrinkled Leaves
Wrinkled leaves may mean dehydration, but dehydration can happen from either underwatering or root loss. Check the roots.
Black Roots
Black mushy roots are rotten and should be trimmed with clean scissors.
No Flowers
No flowers usually means low light, weak roots, lack of temperature change, or the plant is still recovering.
Bud Drop
Bud drop can come from sudden temperature changes, dry air, low light, moving the plant, or watering stress.
How to Repot an Orchid Properly
- Remove the orchid from the old pot.
- Shake away old bark.
- Trim rotten roots.
- Keep firm healthy roots.
- Choose a clear orchid pot.
- Add fresh orchid bark.
- Place the orchid with crown above the bark.
- Fill around roots gently.
- Water lightly and drain well.
How Often to Repot Orchids
Repot every 1 to 2 years, or when bark breaks down. Old bark becomes dense and holds too much moisture. Fresh bark improves airflow and root health.
Seasonal Orchid Care
Spring
Spring is a good time for repotting, root growth, and light feeding. If using experiments like the potato method, spring is safer because the plant is actively growing.
Summer
Give bright indirect light, steady watering, and gentle fertilizer. Protect from harsh sun.
Fall
Cooler nights may help flower spikes form. Keep care steady and avoid overwatering.
Winter
Water less often if growth slows. Keep the orchid warm and away from cold drafts.
Common Mistakes to Avoid
- Leaving the orchid on a potato too long
- Letting the potato rot in water
- Burying the orchid crown in potato flesh
- Using regular soil for orchids
- Keeping roots constantly wet
- Using dirty jars
- Placing the setup in harsh sun
- Adding sugar or fertilizer to the water
- Ignoring bad smells
- Expecting instant blooms
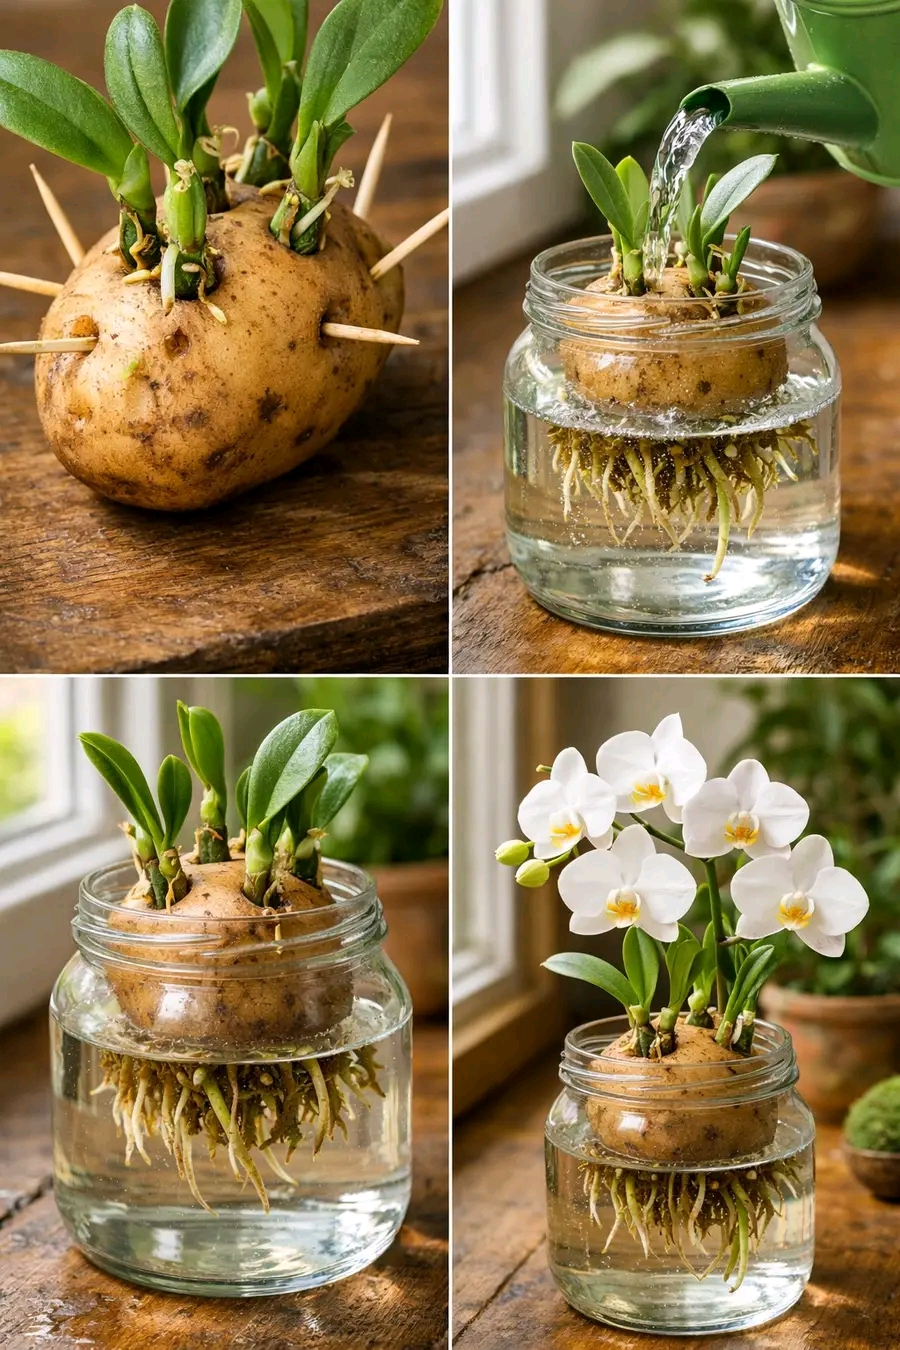
Safe Step-by-Step Summary
- Choose a healthy orchid piece.
- Use a clean firm potato only as temporary support.
- Keep the crown dry and above water.
- Suspend the potato over a clean jar.
- Use clean water and change it often.
- Place in bright indirect light.
- Watch closely for rot or smell.
- Move the orchid to bark when roots grow.
- Use proper orchid care for long-term success.
Frequently Asked Questions
Can orchids grow from a potato?
A potato may act as temporary support, but orchids do not naturally grow from potatoes. Long-term orchid growth should happen in bark or another airy orchid medium.
Can potato help orchid roots grow?
It may create moisture around the base, but it can also rot. A safer rooting setup is sphagnum moss, bark, or a controlled humidity method.
Can I keep the orchid on the potato forever?
No. The potato will eventually rot. Move the orchid into proper orchid bark once roots develop.
Why is my potato setup smelling bad?
The potato is likely rotting or fermenting. Remove the orchid immediately, rinse it gently, and move it to a safer medium.
Can I use potato water on orchids?
It is not recommended. Starchy water can become cloudy and encourage bacteria. Use orchid fertilizer instead.
How long do orchid roots take to grow?
Root growth can take several weeks or longer, depending on plant health, light, warmth, and humidity.
How do I make my orchid bloom after rooting?
First grow healthy roots and leaves. Then give bright indirect light, proper watering, gentle fertilizer, and slightly cooler nights to encourage flower spikes.
Final Thoughts
The potato method for orchids is a creative plant experiment, but it should be used with caution. A potato can provide temporary moisture support, but it can also rot quickly and damage sensitive orchid roots. It is not a permanent orchid potting medium.
If you try this method, use a clean firm potato, keep the orchid crown dry, change the water often, watch for mold or smell, and move the orchid into proper orchid bark as soon as healthy roots form. Never let the orchid sit on a rotten potato.
The true secret to beautiful orchid blooms is not the potato itself. It is healthy roots, bright indirect light, fresh bark, correct watering, good airflow, gentle feeding, and patience. With the right care, a small orchid piece can grow strong roots, fresh leaves, and eventually produce elegant flowers that brighten your home for weeks.