When an orchid starts to decline, the roots are usually where the real story begins. Leaves may wrinkle. Flowers may drop. The crown may still look alive, but the plant slowly loses strength. That is when many orchid owners start searching for quick fixes — powders, homemade mixes, and root “treatments” that promise a fast recovery.
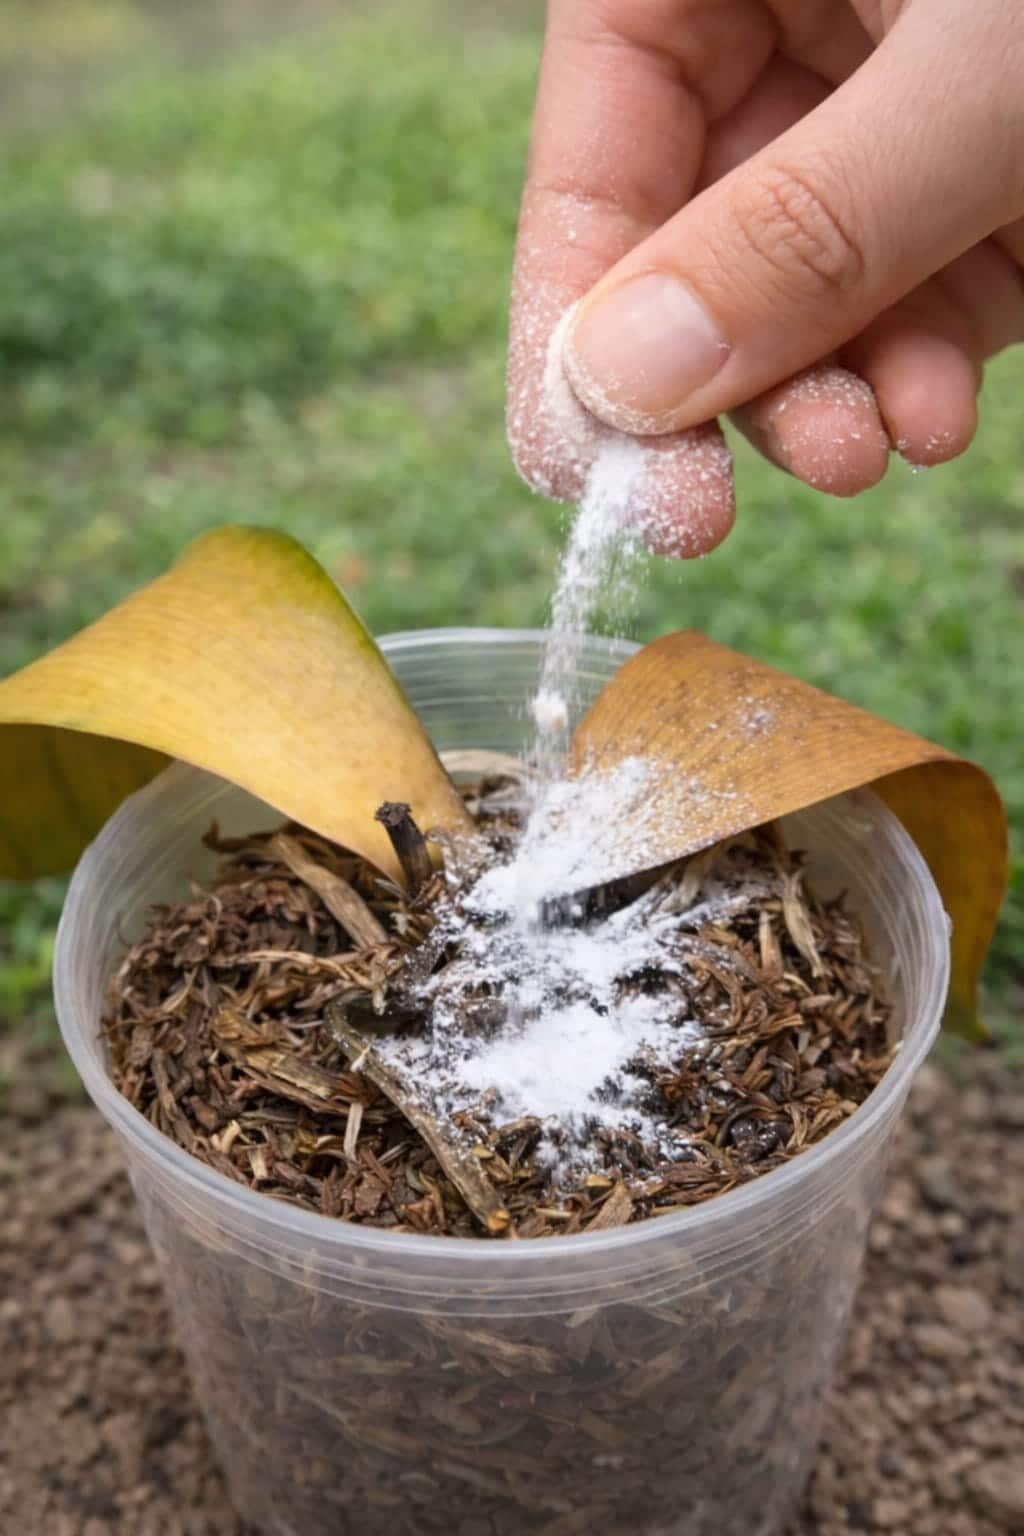
And that is exactly why videos like this spread so quickly. A little white powder gets sprinkled over weak orchid roots, and suddenly it looks like the secret to saving the whole plant.
But here is the truth: sometimes a powder can help. Sometimes it does nothing. And sometimes it makes things worse.
Before you treat your orchid roots again, it helps to understand what the roots actually need — and what most viral videos leave out. In this guide, you will learn why orchid roots fail, when a powder might help, when it will not, and — most importantly — the step‑by‑step process that truly revives weak orchids.
Why Orchid Roots Fail in the First Place
Orchid roots are not like ordinary houseplant roots buried in dense soil. Most common orchids (like Phalaenopsis) are epiphytes — they grow on trees in nature. Their roots are built for air, quick drainage, and cycles of moisture followed by drying.
That means orchid roots usually struggle because of:
· Overwatering – The #1 killer. Soggy bark suffocates roots and leads to rot.
· Old, broken‑down bark – Bark decomposes over 1–2 years, becoming compact and waterlogged.
· Poor airflow – Stagnant air around the roots promotes fungus and rot.
· Staying wet too long – Roots need to dry out between waterings.
· Crown rot spreading downward – Water trapped in the crown kills the plant from the top down.
· Mineral buildup – From tap water and fertilizer, causing brown root tips.
· Low light weakening the plant over time – Without enough light, the orchid cannot produce energy for root growth.
So if the roots are rotting, drying out, or collapsing, the answer is rarely just “add powder.” The real solution begins with fixing the environment around them.
What the White Powder Usually Is
In orchid videos, the white powder is often one of these:
· Cinnamon powder – Tan to light brown, used as a natural antifungal on cut wounds.
· Rooting hormone – White or gray powder used to stimulate root growth on cuttings and keikis.
· Powdered fungicide – Commercial product to prevent fungal infections.
· Epsom salt – White crystals, used for magnesium deficiency, not a cure‑all.
· Fertilizer powder – Water‑soluble plant food, usually blue or white.
· An unknown ingredient – Used just for attention, with no real benefit.
Each one serves a very different purpose. That is the biggest problem with copying online tricks blindly. If you do not know what the product is, why it is being used, or how much is safe, you can easily stress a weak orchid even more.
When Powder Might Actually Help (Specific Situations)
There are a few situations where a powder can make sense. But note that these are targeted, not general.
After Trimming Rotten Roots
If you cut away mushy, black, or infected roots, the cut ends are vulnerable to reinfection. Some growers use a very small amount of cinnamon dusted only on the cut surfaces. Cinnamon is a natural antifungal and can help keep the wounds dry. Do not put cinnamon on healthy roots — it can dry them out unnecessarily.
During Propagation
When you are growing keikis (baby orchids) or dividing a mature orchid, rooting hormone powder can encourage faster root development. Dip the cut end into the powder before planting. This is not for routine root treatment of a mature plant.
For Fungal Concerns
If you have identified a fungal issue (e.g., black rot or mold on the bark), a powdered fungicide (like sulfur) may be used sparingly according to label directions. Again, this is a specific treatment, not a general tonic.
Notice what all these have in common: the powder is being used for a specific reason. It is not just being dumped onto the pot as a miracle cure.
What Powder Does NOT Fix (The Part Videos Skip)
This is the part most viral videos conveniently leave out. A powder does not fix:
· Soggy, broken‑down bark – You need fresh bark, not powder.
· Dead, mushy roots – They must be trimmed away.
· Poor drainage – No powder can replace a pot with holes.
· Too little light – Orchids need bright indirect light to build energy.
· Constant overwatering – You must change your watering habits.
· Rotten crowns – Crown rot is often fatal; powder will not help.
· Exhausted growing medium – Old bark must be replaced.
If those problems remain, the orchid may keep declining no matter what gets sprinkled on top.
The First Thing to Do Before Any Treatment
Before adding anything, take the orchid out of its pot and inspect the roots. You cannot treat what you have not checked.
How to Tell Healthy from Unhealthy Roots
Healthy orchid roots are usually:
· Firm to the touch
· Green when wet (after watering)
· Silvery when dry
· Plump, not flat or hollow
Unhealthy roots are often:
· Mushy, soft, or slimy (rot)
· Brown, black, or dark gray
· Papery, flat, or hollow
· Foul‑smelling (sour or musty)
Use clean, sterilized scissors to trim away every dead or rotten root. Cut back to healthy tissue. If the root is brown at the tip but firm near the base, you can cut off only the damaged part.
That is real orchid root treatment — not guessing, not sprinkling.
The Better Recovery Process (No Powder Required)
If your orchid roots are in trouble, this basic process helps more than most mystery hacks. Follow these steps in order.
Step 1 – Remove Old Bark
Old bark breaks down over time, becoming compact, acidic, and waterlogged. It suffocates roots. Discard all the old potting medium.
Step 2 – Trim Dead Roots
Use clean scissors. Remove roots that are mushy, black, hollow, or papery. Leave only firm, healthy roots. If more than half the roots are gone, the orchid is in critical condition but may still be saved.
Step 3 – Let Cuts Dry Briefly
After trimming, leave the orchid out of the pot on a paper towel for a few hours (or overnight). This allows cut surfaces to callus over. Do not rush into soaking or repotting.
Step 4 – Repot in Fresh Orchid Bark
Use a high‑quality orchid bark mix (fir bark with perlite and charcoal). Do not use regular potting soil. Choose a pot with plenty of drainage holes — clear plastic orchid pots are ideal because you can see the roots. The pot should be just large enough to hold the root ball (snug, not oversized).
Step 5 – Adjust Watering
After repotting, wait 3–5 days before watering. This gives cut roots time to heal. Then water thoroughly until water runs from the drainage holes. Let the pot drain completely. After that, water only when the bark is nearly dry — usually every 7–10 days, depending on humidity.
Step 6 – Improve Light
Place the orchid in bright indirect light. An east window or a south/west window with a sheer curtain is ideal. Good light gives the orchid energy to grow new roots.
Step 7 – Do Not Fertilize Immediately
Wait 4–6 weeks before using any fertilizer. Damaged roots cannot absorb nutrients properly. Once you see new root growth, use a diluted orchid fertilizer (quarter strength) every other week during spring and summer.
That is the real root treatment. No mystery powder required.
Continue to Page 2
Continue to page 2 for more details about this article and the key points many readers miss on the first page.