Orchids are some of the most beautiful indoor plants, but they can also be some of the most misunderstood. Their thick green leaves, silver roots, and delicate flowers make them look luxurious, yet many people struggle with yellowing leaves, weak roots, mineral buildup, dull foliage, and flowers that fade too quickly. Because orchids grow differently from ordinary houseplants, small changes in care can make a big difference in how refined and healthy they look.
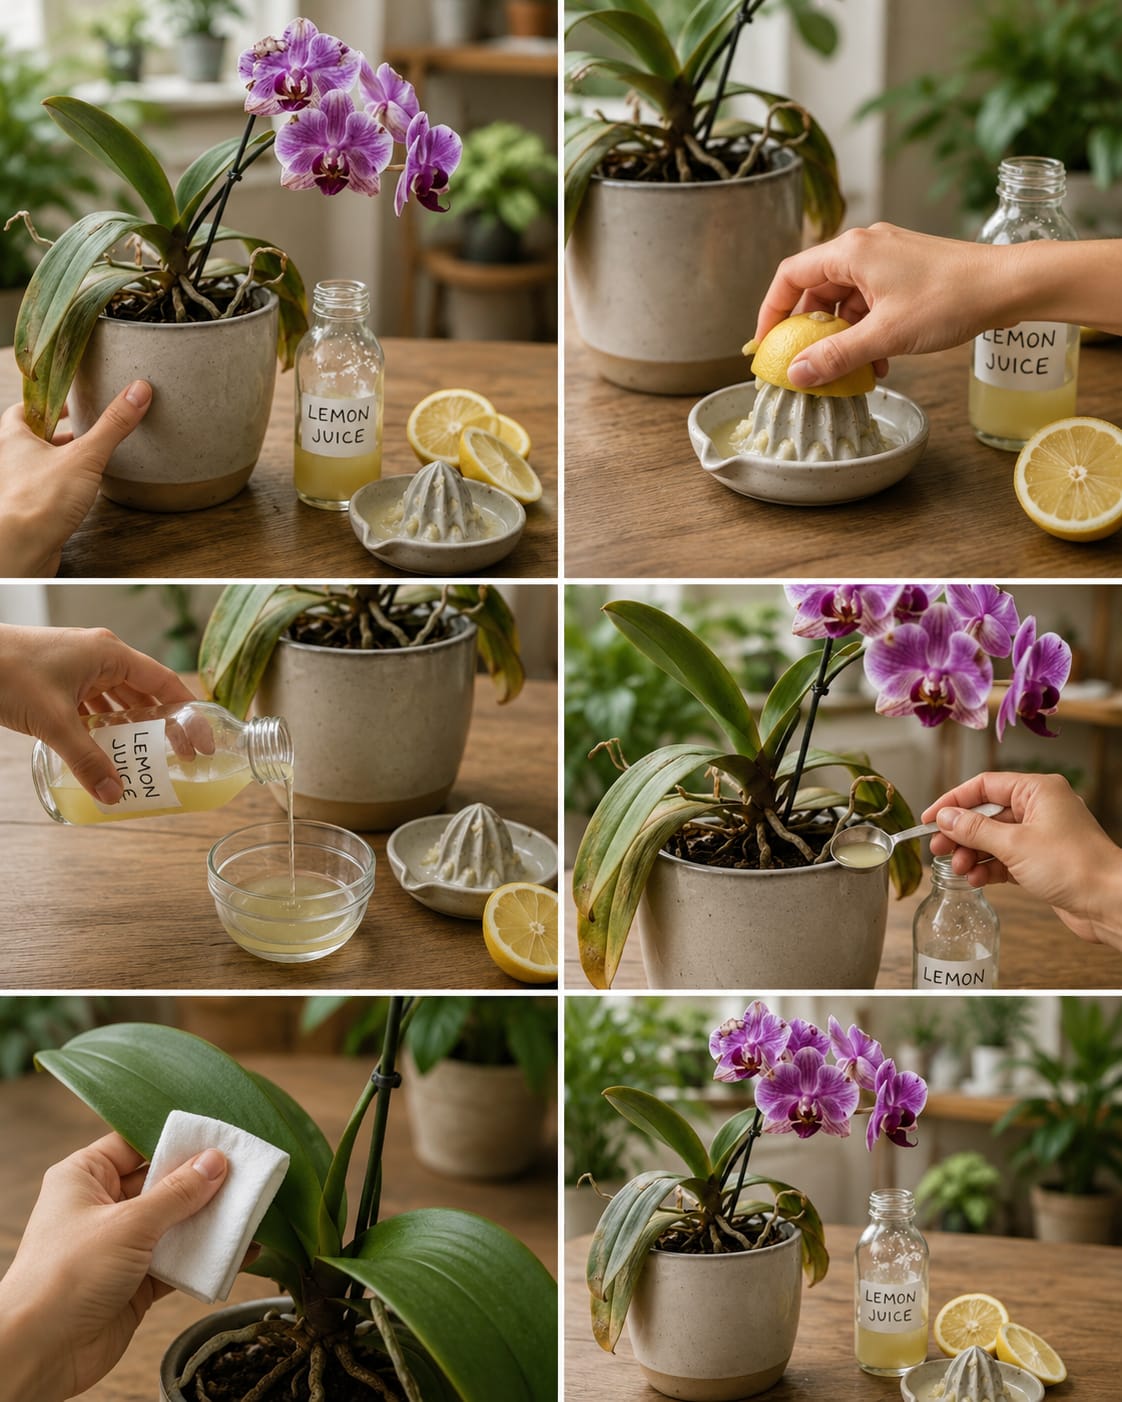
One natural trick that many plant lovers talk about is using a very light lemon-based rinse around the orchid root zone. The idea is not to pour strong lemon juice directly onto the plant. That would be too acidic and could burn roots. Instead, the safe version of this method uses only a few drops of lemon juice diluted in plenty of water. When used carefully and rarely, this light acidic rinse may help refresh the potting medium, reduce surface dullness from hard-water minerals, and encourage a cleaner-looking orchid display.
The key word is light. Orchids do not need harsh homemade treatments. They need balance. They need air around their roots, gentle moisture, bright indirect light, and a potting medium that does not stay soggy. Lemon juice should never become the main care routine. It is only an occasional rinse for people who want to refresh the plant’s look and support cleaner root care in a careful way.
Why Orchids Need a Different Kind of Care
Most common indoor orchids, especially Phalaenopsis orchids, are epiphytes. In nature, they often grow attached to trees rather than buried in heavy garden soil. Their roots are designed to breathe. They absorb moisture from rain, humidity, and the environment around them. This is why orchids are usually grown in bark, sphagnum moss, coconut chips, perlite, charcoal, or airy orchid mixes instead of dense potting soil.
When an orchid is placed in a heavy mix or watered too often, the roots can suffocate. Healthy orchid roots are usually firm, thick, and silvery when dry. After watering, they often turn green. Soft, brown, hollow, black, or mushy roots are signs of trouble. A beautiful orchid starts below the leaves, in the root system.
This is why many orchid care tricks focus on the roots. If the roots stay clean, airy, and healthy, the leaves usually look stronger, and the plant has a better chance of producing future flower spikes. The lemon rinse idea should be understood in that context: it is a root-zone refresh, not a magic blooming potion.
What a Light Lemon Rinse Is Supposed to Do
A very diluted lemon rinse may help with one common indoor orchid issue: mineral buildup. Many homes have tap water that contains minerals. Over time, these minerals can leave white crust on bark, pots, roots, and leaves. Fertilizer salts can also build up when the pot is not flushed properly. This buildup can make the orchid look dusty, tired, or neglected.
Lemon juice is acidic, so in a very diluted form, it may help lightly soften or rinse away some surface mineral residue. This is why lemon is often associated with cleaning in the home. But plants are living tissue, not kitchen counters. The mixture must be weak. Strong lemon juice can damage orchid roots, irritate leaf tissue, and make the potting medium too acidic.
The safe goal is simple: use a mild rinse occasionally to refresh the root area and make the plant look cleaner. It should never be used as a strong treatment, daily tonic, or direct replacement for proper fertilizer.
The Most Important Warning Before Trying Lemon on Orchids
Never pour pure lemon juice onto orchid roots. Never rub lemon juice directly on damaged leaves. Never soak an orchid in strong citrus water. Orchids are sensitive, and their roots can burn easily when exposed to acidic liquids.
If your orchid is already weak, rotting, dehydrated, or losing many leaves, do not start with lemon. First check the basics: root health, watering frequency, drainage, light, and potting medium. A stressed orchid needs gentle correction, not stronger tricks.
Also avoid lemon rinse if your orchid is planted in very old bark, soggy moss, or a pot without good drainage. In those cases, repotting and improving airflow are much more important.
Safe Lemon Rinse Recipe for Orchids
For a cautious orchid rinse, use this weak mixture:
- 1 liter of clean water
- 3 to 5 drops of fresh lemon juice
- Optional: let the mixture sit for 10 minutes before use
This is much weaker than the dramatic homemade mixtures often shown online. That is intentional. Orchids prefer gentle care. A few drops are enough for a light refresh. More is not better.
If your water is already soft or filtered, you may not need this method at all. If your tap water leaves white residue, a light rinse may be useful once in a while. Rainwater, distilled water, or filtered water are often better long-term choices for sensitive orchids.
How to Apply the Lemon Rinse Correctly
First, check the orchid roots. If the roots are already wet, wait. Apply the rinse only when the potting medium is nearly dry and the roots are ready for watering.
Second, place the orchid over a sink or basin. Slowly pour the diluted lemon water through the bark or orchid medium. Let it run through the pot and drain completely. Do not let the pot sit in the liquid afterward.
Third, avoid pouring the mixture into the crown of the orchid, which is the center area where the leaves meet. Water trapped in the crown can lead to crown rot. Always water around the root zone and let the plant drain well.
Fourth, after rinsing, allow the orchid to dry in a bright, airy place with indirect light. Do not place it in harsh direct sun immediately after watering.
How Often Should You Use It?
Use this method rarely. Once every four to six weeks is enough for most orchids, and many orchids do not need it at all. If your plant looks healthy, roots are firm, leaves are glossy, and there is no mineral crust, skip the lemon rinse.
Too much acidity can disturb the potting medium and stress the roots. The best orchid care is steady and simple. Water properly, feed lightly, provide airflow, and repot when needed.
Think of lemon water as an occasional refresh, like cleaning the surface of the pot and flushing old residue. It is not a weekly fertilizer.
What to Use Instead of Lemon for Regular Care
For regular watering, plain water is best. If possible, use rainwater, filtered water, or water that has been left to sit for a short time. Avoid softened water from salt-based softeners, because it can add sodium that plants do not like.
For feeding, use a balanced orchid fertilizer diluted to a weak strength during active growth. Orchids usually prefer light feeding rather than heavy feeding. A common approach is to fertilize weakly and flush the pot with plain water regularly to prevent buildup.
For root cleaning, plain water flushing is often enough. Run water through the pot for a minute and let everything drain. This simple habit removes excess salts and keeps the potting medium fresher.
Why Orchid Roots Turn White, Green, or Brown
Healthy orchid roots often look silver or white when dry because they have a spongy outer layer called velamen. When watered, they turn green as they absorb moisture. This color change is normal and helpful because it tells you when the plant is dry or hydrated.
Brown roots are not always bad, especially if they are stained by bark. But mushy, hollow, black, or smelly roots are a warning sign. Those roots should be removed during repotting with sterile scissors.
A light lemon rinse will not repair rotten roots. Rotten roots must be trimmed away, and the orchid must be repotted into a fresh airy mix.
How Lemon Rinse Can Improve the Display Look
One reason this method is popular is that it fits into a cleaner indoor styling routine. Orchids look best when the pot is neat, the leaves are dust-free, the roots are visible and fresh, and the flower spike is supported with a simple stake.
A weak lemon rinse may help reduce dull mineral marks around the potting medium, especially when followed by a plain water flush. The result can be a cleaner-looking root zone and a more polished display. When the orchid is placed in a ceramic pot, on a wooden table, near a bright window, or beside natural decor, this clean look makes the plant feel more expensive.
The beauty of an orchid is not only in the flowers. The leaves, roots, pot, and surrounding area all contribute to the final look.
How to Clean Orchid Leaves Safely
Dusty orchid leaves can make the plant look tired. To clean them, use a soft damp cloth with plain water. Gently wipe the top and underside of each leaf while supporting it with your hand.
Do not use strong lemon juice on the leaves. Do not use oil, mayonnaise, or heavy shine products. These can block leaf pores, attract dust, or damage the plant. If there are hard-water spots, use a very lightly damp cloth and repeat gently rather than scrubbing.
Clean leaves absorb light better and immediately improve the appearance of the plant.
How to Keep Orchid Flowers Looking Elegant Longer
Orchid flowers can last for weeks or even months when conditions are right. Keep the plant in bright indirect light, away from hot direct sun, heaters, cold drafts, and fruit bowls. Ripening fruit releases gases that can shorten flower life.
Do not mist the flowers heavily. Water sitting on petals can cause spotting. Instead, focus on root hydration and general humidity around the plant.
When flowers fade naturally, do not panic. Orchids have blooming cycles. A plant may rest for months before producing another spike. During that rest period, root and leaf care matter most.
Best Light for Orchids
Phalaenopsis orchids usually prefer bright indirect light. An east-facing window is often ideal. A north-facing window can work if it is bright enough. A south or west window may be too intense unless filtered by a sheer curtain.
Leaves can tell you a lot. Dark green leaves may indicate low light. Yellowish or reddish leaves may indicate too much light. Healthy orchid leaves are usually medium green, firm, and smooth.
If your orchid is not reblooming, light may be the missing factor. A lemon rinse will not replace good light.
Continue to Page 2
Continue to page 2 for more details about this article and the key points many readers miss on the first page.