Caring for Your Spiral Snake Plant During Training
Even while shaping, your plant needs basic care. Neglect can undo weeks of progress.
Watering
· Let the soil dry completely between waterings.
· Water deeply, then empty the saucer.
· Overwatering leads to root rot – the #1 killer.
Light
· Bright, indirect light is essential. If your plant is in a dark corner, move it closer to a window.
· Consider a grow light during winter months.
Fertilizing
· Feed lightly once in spring and once in summer with a diluted balanced fertilizer.
· Do not fertilize while actively training if the plant is stressed.
Checking Ties
· Inspect ties every week. If they are digging into the leaf, loosen them.
· Replace any ties that have become brittle or dirty.
Decorative Touches – Stones, Moss, and More
For an extra creative twist, consider using decorative stones or moss on the soil surface to enhance the overall presentation. This not only looks beautiful but also helps retain slight moisture and deter pests.
Ideas for Finishing Touches
Material Effect
Smooth river stones Modern, minimalist look
White pebbles Clean, bright contrast
Sphagnum moss Natural, woodland feel
Colored sand or glass gems Fun, artistic pop
Bark chips Rustic, earthy texture
Pro tip: Add the decorative layer after the spiral is well‑established (at least 3–4 months) so you don’t disturb the training process.
Common Mistakes to Avoid
Mistake Why It’s Harmful Correct Approach
Forcing leaves Causes cracks, creases, or snapping Bend slowly, in small increments.
Using tight ties Cuts into leaves, leaves scars Use soft ties; check weekly.
Training in low light Growth is too slow, leaves become weak Provide bright indirect light.
Overwatering Roots rot, leaves lose turgor Let soil dry completely.
Removing supports too soon Shape loosens, plant springs back Remove ties gradually over weeks.
Starting with a mature plant Stiff leaves snap easily Use young, flexible plants only.
Troubleshooting – What Went Wrong?
Problem Likely Cause Solution
Leaves cracking Bent too sharply or too fast Stop training; let rest for 2 weeks; restart slowly.
Spiral not holding Removed ties too soon Reapply ties for another 2–4 weeks.
Leaves turning yellow Overwatering or root rot Check soil; reduce watering; repot if needed.
No new growth Insufficient light or cold temps Move to brighter spot; keep above 65°F.
Plant leaning unevenly Not rotated during training Rotate pot weekly to correct.
Frequently Asked Questions (FAQs)
Q: Can I turn an existing large snake plant into a spiral?
It’s very difficult. Mature leaves are stiff and prone to snapping. You can try training only the new pups while leaving older leaves upright, but the result will be uneven. Starting with a young plant is strongly recommended.
Q: How long does it take to see a spiral?
You’ll notice gentle curves within 4–8 weeks. A full, tight spiral can take 3–6 months or longer.
Q: Will the spiral damage my snake plant?
If done gently and gradually, no. Aggressive bending or tight ties can cause permanent damage. Always prioritize plant health over shape.
Q: Can I buy a pre‑trained spiral snake plant?
Yes – many nurseries sell pre‑shaped spirals, often labeled as “twisted snake plant.” They save you months of training but cost more.
Q: How do I care for a spiral snake plant after shaping?
Care is the same as any snake plant: bright indirect light, water when soil is dry, well‑draining soil. The shape may relax over time; you can re‑apply ties for a few weeks to reinforce it.
Q: Can I use this method on other succulents?
Some succulents with flexible leaves (like certain aloes) can be trained, but snake plants are among the most forgiving. Research each plant’s flexibility before trying.
Printable Spiral Training Checklist
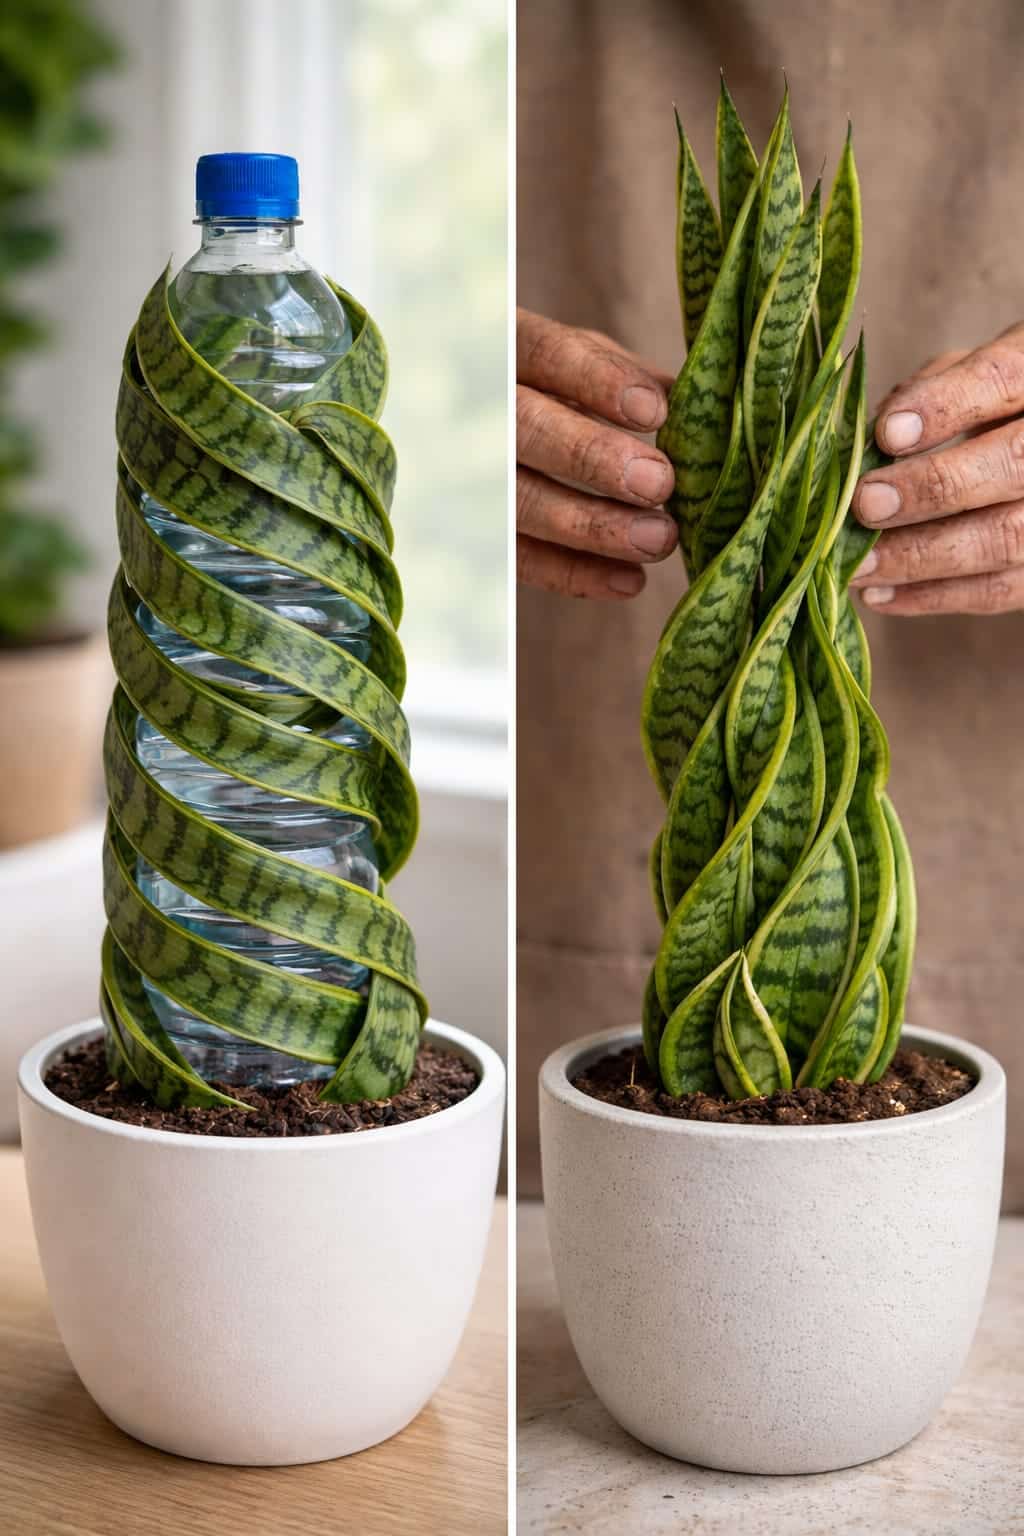
☐ Choose a young, healthy snake plant (under 1 year old)
☐ Prepare a cylindrical support (bottle, tube, or stake)
☐ Insert support in the center of the pot
☐ Gently wrap the most flexible leaves around the support
☐ Secure leaves with soft plant ties (loose, not tight)
☐ Place in bright, indirect light (east/west window)
☐ Water only when soil is completely dry
☐ Rotate pot weekly
☐ Check ties every week – loosen if needed
☐ Be patient – shape takes 3–6 months
☐ Remove ties gradually once shape holds
☐ Optional: add decorative stones or moss for final presentation
Final Thoughts – Your Living Sculpture Awaits
A spiral snake plant is not a magic trick – it’s the result of gentle training, consistent care, and a lot of patience. Start with a young plant, guide it slowly, use soft supports, keep the roots healthy, and rotate it for even growth. The process takes time, but that’s what makes the final result so rewarding.
When it works, you don’t just get a plant. You get a living sculpture that still keeps all the easy‑care benefits snake plants are known for. And with decorative stones or moss, you can turn it into a true centerpiece.
So gather your materials, pick a young snake plant, and begin your spiral journey. With each gentle twist, you’re not just shaping a plant – you’re creating art.
Now it’s your turn! Have you tried shaping a snake plant into a spiral? What challenges did you face? Drop a comment below – I’d love to hear your story.
And if you found this guide helpful, share it with a friend who loves creative plant projects. Pin it for later, and subscribe to our newsletter for more plant DIYs.
Stay patient, stay gentle, and watch your snake plant become art. 🌿✨