
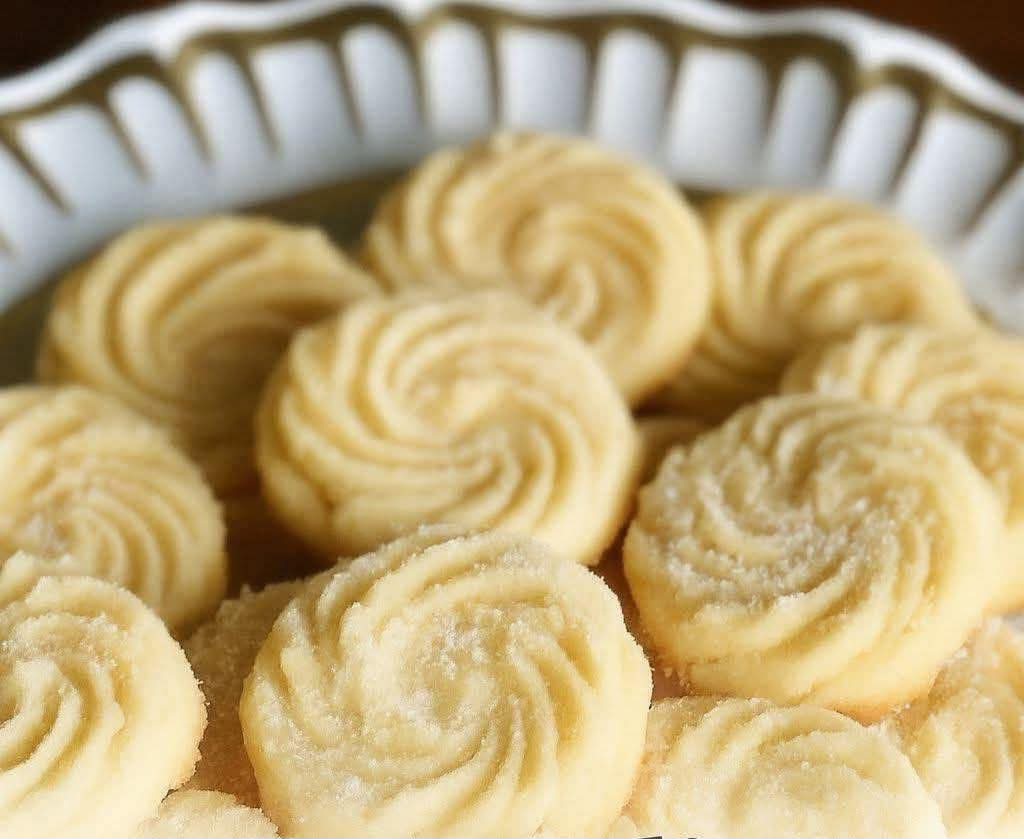
In a world of complex baking recipes with lengthy ingredient lists, there’s something profoundly satisfying about mastering a classic that requires just three pantry staples. These 3-Ingredient Butter Cookies are a testament to the power of simplicity. They are the cookie equivalent of a little black dress—elegant, versatile, and always appropriate. With a texture that’s perfectly crumbly and sandy, and a rich, pure butter flavor that shines through unadulterated, this recipe is the ultimate easy cookie recipe for beginners, the savior for last-minute guests, and a beloved favorite for seasoned bakers who appreciate culinary elegance. Forget the fuss; let’s celebrate the sublime magic of butter, sugar, and flour.
Why This 3-Ingredient Recipe is a Forever Favorite
· Absolute Simplicity: No eggs, no leavening, no vanilla extract. Just three core ingredients you definitely have on hand.
· Unbeatable Texture: Achieves that coveted shortbread-like melt-in-your-mouth texture—crisp at the edges, tender in the center.
· A Blank Canvas for Creativity: The neutral, buttery base is perfect for dips, drizzles, or mix-ins.
· Foolproof Baking: With so few variables, success is almost guaranteed. It’s the perfect beginner baking recipe.
· Nostalgic Flavor: The taste is pure, nostalgic, and reminiscent of the finest bakery shortbread you’ve ever had.
The Alchemy of Three Ingredients: How It Works
The sheer perfection of this cookie lies in understanding the role of each component. There’s nowhere for a subpar ingredient to hide.
Butter: This is the star. It provides all the flavor, richness, and moisture. As the cookies bake, the water in the butter turns to steam, helping create a tender crumb, while the milk solids toast, giving that signature nutty, buttery taste. The instruction for “slightly melted” or very soft butter is key for a specific, dense yet crumbly texture.
Powdered Sugar: Also called confectioner’s sugar or icing sugar. Unlike granulated sugar, powdered sugar contains a small amount of cornstarch, which contributes to a finer, more tender crumb. It also dissolves instantly into the butter, creating a smooth, cohesive dough without any graininess.
All-Purpose Flour: The structure. It provides the gluten-free (in this mixing method) framework that holds the cookie together. Proper measurement is critical here—too much flour leads to dryness, too little leads to spreading.
Ingredient Deep Dive: Choosing the Best
· Butter (1 cup, softened and slightly melted): Use a high-quality, unsalted butter so you control the salt level. European-style butter (with a higher fat content) will yield an even richer, more flavorful cookie. “Slightly melted” means it should be very soft, almost to the point of being shiny and pourable at the edges, but not fully liquid.
· Powdered Sugar (1 cup): Sift your powdered sugar before measuring to avoid lumps in your dough. This ensures a perfectly smooth texture.
· All-Purpose Flour (2 cups): For the most accurate results, weigh your flour. If using cups, use the spoon-and-level method: fluff the flour in its bag, spoon it gently into your measuring cup, and level it off with a knife. Do not pack or tap the cup.
The Minimalist Baker’s Toolkit
· Large mixing bowl
· Electric hand mixer or stand mixer (you can mix by hand, but a mixer is easier)
· Spatula
· Baking sheets
· Parchment paper or silicone baking mats (highly recommended)
· Fork or cookie press (for shaping and pattern)
· Wire cooling rack
Complete Step-by-Step Directions to Perfect Cookies
Step 1: Preheat and Prep. Preheat your oven to 350°F (175°C). Line your baking sheets with parchment paper. This prevents sticking and ensures even browning without extra grease.
Step 2: Cream Butter and Sugar. In your large bowl, combine the very soft, slightly melted butter and the sifted powdered sugar. Using your mixer on medium speed, beat for 2-3 minutes until the mixture is completely smooth, creamy, and light in color. This step incorporates air and is crucial for texture.
Step 3: Incorporate Flour. Reduce the mixer speed to low. Gradually add the all-purpose flour in two or three additions. Mix until the flour is just incorporated and a soft dough forms. Stop as soon as you no longer see dry flour. Overmixing can lead to tough cookies.
Step 4: Shape Your Cookies. Here’s where you get creative. The dough will be soft and slightly sticky.
· For Classic Rounds: Roll tablespoon-sized portions of dough into smooth balls. Place them 2 inches apart on your baking sheet. Use the tines of a fork to gently press down in a classic criss-cross pattern, which also helps them bake evenly.
· For Pressed Cookies: Use a cookie press fitted with your favorite disk to create spritz-style shapes directly onto the baking sheet.
· For Sliced Rounds: Form the dough into a log wrapped in plastic, chill until firm, then slice into 1/4-inch rounds.
Step 5: Bake to Perfection. Bake in your preheated oven for 12-15 minutes. The cookies are done when the edges are just beginning to turn a very light golden brown. The centers will still look pale and soft—this is correct! They will firm up dramatically as they cool. Do not overbake.
Step 6: The Critical Cool. Let the cookies cool on the baking sheet for 5 minutes. They are incredibly fragile when hot. Then, using a spatula, carefully transfer them to a wire rack to cool completely. This allows them to set into their final crisp-yet-tender texture.
Professional Baker’s Tips for 3-Ingredient Success
· Butter Temperature is Everything: “Slightly melted” is the secret. If your butter is too cold, the dough will be crumbly; if it’s fully melted, the cookies may spread too much.
· Weigh Your Flour: For absolute consistency, use 250 grams of all-purpose flour.
· Don’t Skip the Creaming: Beating the butter and sugar for the full time creates a tiny bit of aeration for a lighter texture.
· Uniform Size = Even Baking: Use a cookie scoop or tablespoon to ensure all your dough portions are the same size.
· One Tray at a Time: Bake in the center of the oven for even heat circulation. Bake one sheet at a time for best results.
5-Star Flavor Variations & Add-Ins
While perfect plain, these cookies are a dream to customize.
· Citrus Zest: Add the zest of one lemon, lime, or orange to the butter-sugar mixture.
· Vanilla or Almond Extract: Add 1 tsp for a classic aromatic note.
· Chocolate-Dipped: Dip half of each cooled cookie in melted dark, milk, or white chocolate. Sprinkle with flaky sea salt.
· Espresso Dust: Add 1 tbsp of instant espresso powder to the flour for a mocha twist.
· Spiced: Whisk 1 tsp of ground cinnamon, cardamom, or chai spice into the flour.
· Rolled in Sugar: Roll the dough balls in coarse or turbinado sugar before baking for a sparkly, crunchy exterior.
How to Serve, Store, and Gift These Cookies
· Serving Suggestion: These are the quintessential afternoon tea cookie. Serve with coffee, tea, or a glass of cold milk. They also pair beautifully with sorbet or fruit compote.
· Storing: Keep in an airtight container at room temperature for up to 1 week. They freeze exceptionally well.
· Freezing Dough: You can freeze shaped dough balls on a tray, then transfer to a bag. Bake from frozen, adding 1-2 minutes to the bake time.
· Gifting: Their elegant simplicity makes them a wonderful gift. Package in a decorative tin or box lined with parchment. A tag saying “3-Ingredient Wonder Cookies” always sparks conversation.
Frequently Asked Questions (FAQ)
Q: Can I use salted butter?
A:You can, but omit any additional salt. The flavor will be slightly different, often a bit more savory.
Q: My dough is too sticky to handle. What do I do?
A:This means your butter was likely too warm. Cover the dough and refrigerate it for 20-30 minutes until it’s firm enough to shape.
Q: Why did my cookies spread flat?
A:The butter was probably too melted or the oven wasn’t hot enough. Ensure your oven is fully preheated and your butter is just “slightly melted,” not oily.
Q: Can I make these gluten-free?
A:Yes! Substitute the all-purpose flour with a 1:1 gluten-free baking blend. The texture will be slightly more delicate.
Q: Why are my cookies hard instead of tender?
A:The most common causes are overmixing the dough after adding the flour, or overbaking. Remember to mix until just combined and pull them out when the edges are just golden.
The Secret History of the Butter Cookie
This recipe is a direct descendant of traditional shortbread, which originated in Scotland. The classic ratio was one part sugar, two parts butter, and three parts flour—a formula still honored here. These cookies represent centuries of baking wisdom, proving that luxury often comes from the quality of a few ingredients, not the quantity.
Final Thoughts: The Joy of Minimalist Baking
In our complex world, the act of creating something so delightful from so little is a special kind of magic. These 3-Ingredient Butter Cookies are more than a recipe; they are a baking lesson in restraint, a celebration of butter, and a reminder that you don’t need a packed pantry to create joy in the kitchen. They are humble, yet sophisticated. Simple, yet deeply satisfying. So, take out your three ingredients, and in less than 30 minutes, you’ll have a plate of pure, buttery bliss that promises to impress far beyond its modest means.
Now, bake, share, and enjoy the delicious proof that less is truly more.
More Recipes You Might Like
-

Turmeric Chicken Anti Inflammatory Soup: A Bowl of Golden Healing
Discover the ultimate turmeric chicken anti-inflammatory soup! Packed with ginger, garlic, and golden turmeric, this comforting soup soothes inflammation and warms the soul. Easy, healthy, and delicious. Let me tell you about the soup that became my go‑to whenever I need comfort, warmth, and a little extra healing. A few years ago, after a bout…
-
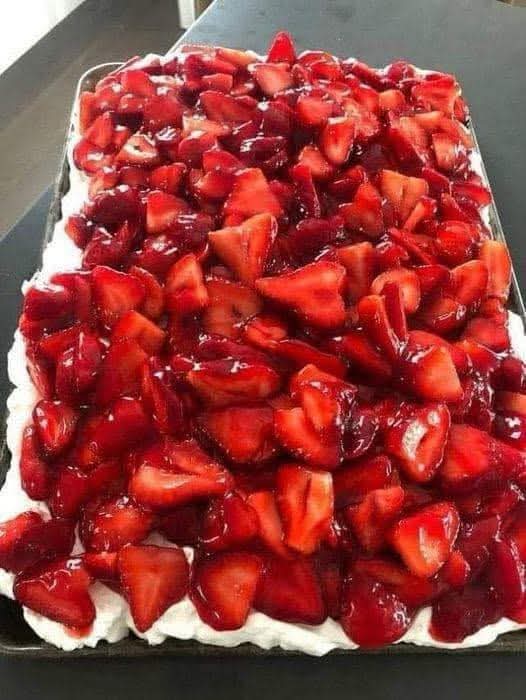
Strawberry Cream Cheese Icebox Cake: The No-Bake Dessert That Steals the Show
Discover the easiest, most elegant strawberry cream cheese icebox cake! Layers of graham crackers, creamy cheesecake filling, and fresh strawberries come together in this no-bake masterpiece. Perfect for summer entertaining. Let me tell you about the dessert that looks like you spent hours in the kitchen but actually takes about 15 minutes to assemble. I…
-

3 Ingredient Pineapple Ice Cream (5 Minutes)
Discover the easiest, healthiest ice cream you’ll ever make! Just 3 ingredients—frozen pineapple, almond milk, and Greek yogurt—create a creamy, tropical treat in 5 minutes. No machine, no sugar added! Let me tell you about the ice cream that made me a convert—no churning, no heavy cream, no sugar, and done in five minutes. I…