There are recipes that feel like home, recipes that carry family stories, and recipes that make people gather around the kitchen waiting for the first slice. For me, one of those recipes has always been Grandma’s Apple Pie Bars. This isn’t your typical apple pie. It’s a flaky, golden slab of pastry filled with juicy cinnamon-kissed apples, cut into bars that are as perfect for Sunday dinner as they are for holiday celebrations.
The beauty of this recipe is its simplicity. As bigzazoo, I’ve been making these for years, and every single time, people lose their minds over them. They seem like a special homemade treat that took hours of effort, yet the secret is that they’re incredibly easy to make. In fact, even my 10-year-old can whip these up on her own with just a little guidance. That’s how foolproof this recipe is.
If you’ve never had Apple Pie Bars before, you’re in for a treat. Imagine the nostalgic flavors of a classic apple pie—sweet, tender apples, warm spices, and buttery pastry—but in a convenient, shareable format. Perfect for parties, potlucks, bake sales, or simply when your family is craving something sweet, these bars are destined to become a staple in your recipe box.
Why This Recipe Works
There’s a reason why this dessert has stood the test of time. Grandma knew what she was doing when she created this recipe, and here’s why it’s such a winner:
Easy But Impressive – It looks like you spent hours in the kitchen, but the prep is quick and beginner-friendly.
Kid-Friendly – With straightforward steps, even children can help (or make it themselves, like my daughter).
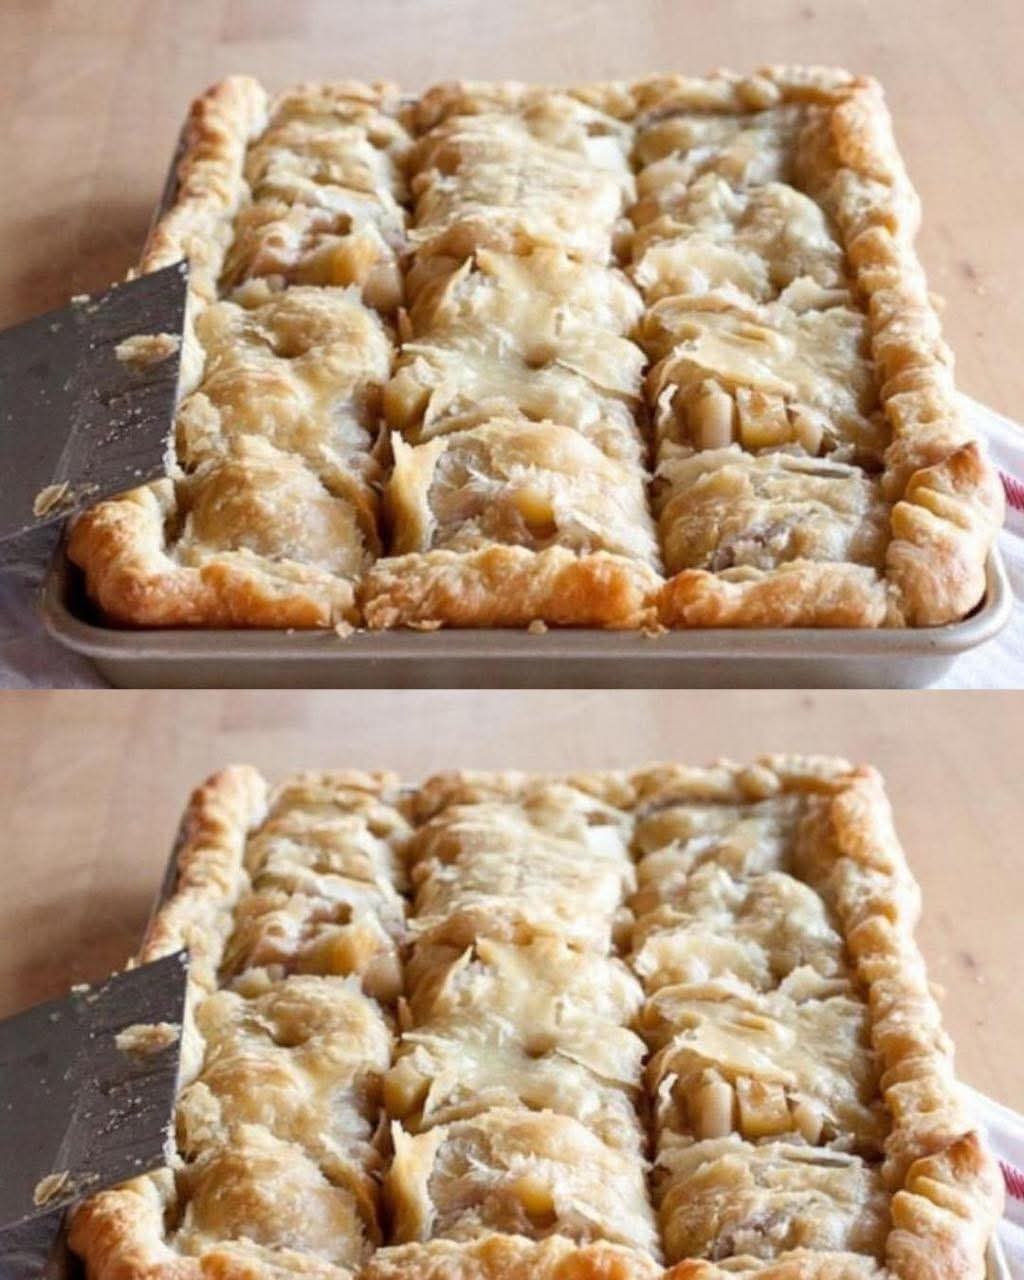
Flaky Pastry Meets Gooey Filling – The contrast between the crisp, buttery crust and the soft apple filling is unbeatable.
Feeds a Crowd – Since it’s made in a sheet pan, you get multiple servings, making it perfect for gatherings.
Adaptable – You can tweak the filling with different apples, add nuts, drizzle caramel, or even top with a glaze.
Tastes Like Tradition – It captures the cozy, nostalgic flavor of homemade apple pie while being easier to serve.
What You’ll Need for This Recipe
Let’s break down the simple but powerful ingredients that make this dessert shine:
Apples – Tart, firm apples like Granny Smith or Honeycrisp work best, but you can mix varieties for depth of flavor.
Sugar – A mix of granulated sugar and a little brown sugar for richness.
Cinnamon & Nutmeg – The classic warming spices that make apple desserts irresistible.
Lemon Juice – Keeps the apples bright and adds a hint of tang to balance the sweetness.
Butter – Essential for that golden, flaky crust and a little richness in the filling.
Pastry Dough – You can use homemade pie crust or store-bought puff pastry for convenience. Both work beautifully.
Flour – Helps thicken the apple filling so it doesn’t get runny.
Optional Extras – A sprinkle of chopped pecans, a drizzle of caramel, or a simple powdered sugar glaze.
Equipment
You don’t need any fancy tools for this recipe—just a few kitchen basics:
Sheet Pan or 9×13 Baking Dish – The classic shape for slab-style apple pie bars.
Mixing Bowls – For tossing the apple filling together.
Rolling Pin – If you’re working with homemade dough or store-bought pie crust.
Spatula – To help lift and serve the bars.
Sharp Knife & Cutting Board – For slicing the apples evenly.
Pastry Brush – For brushing the top crust with butter or egg wash.
How to Make Grandma’s Apple Pie Bars
Here’s the step-by-step method for creating this crowd-pleasing dessert:
Step 1: Prepare the Apples
Peel, core, and slice 6–7 medium apples into thin slices. Toss them in a large bowl with sugar, cinnamon, nutmeg, flour, and a splash of lemon juice. This ensures every slice is coated with flavor and prevents excess liquid.
Step 2: Prepare the Crust
Roll out your pastry dough or puff pastry to fit your baking dish. Press one layer into the bottom of the pan, making sure it goes up the edges slightly. This will hold all the juicy filling.
Step 3: Add the Filling
Spread the apple mixture evenly over the crust. Add a few pats of butter over the apples to keep them moist and rich.
Step 4: Add the Top Crust
Roll out the second sheet of pastry and lay it on top of the apples. Seal the edges by pressing them together, and cut a few small slits in the top crust to allow steam to escape.
Step 5: Bake
Brush the top with melted butter or egg wash for a golden finish. Bake in a preheated oven at 375°F (190°C) for about 40–50 minutes, or until the crust is golden brown and the filling is bubbling.
Step 6: Cool and Slice
Let the dessert cool for at least 20 minutes before slicing into bars. This allows the filling to set and makes serving easier.
Tips + Tricks & More for Recipe Success
Choose the Right Apples – A mix of tart and sweet apples gives the best flavor balance. Granny Smith for tartness and Honeycrisp for sweetness are a great combo.
Prevent Soggy Bottoms – Dust the bottom crust with a little flour or breadcrumbs before adding the filling.
Extra Flavor Boost – Add a teaspoon of vanilla extract or a drizzle of caramel sauce before baking.
Golden Finish – Don’t skip the butter or egg wash on the top crust—it gives that irresistible golden sheen.
Glaze Option – Once cooled, drizzle with a simple glaze made of powdered sugar and milk for an extra touch of sweetness.
Make Ahead – These bars can be baked the night before and served the next day. They store well covered at room temperature for 2 days or in the fridge for up to 5.
Freezer Friendly – Bake, cool, cut into bars, and freeze individually wrapped for up to 3 months. Perfect for when you want dessert in a hurry.
How to Serve
These apple pie bars are meant to be enjoyed warm, straight out of the oven, or at room temperature. They slice beautifully into neat squares or rectangles, making them perfect for parties, family dinners, or bake sales.
Serve them plain to showcase their natural goodness, or elevate them with a scoop of vanilla ice cream or a dollop of fresh whipped cream. If you’re serving them at a holiday gathering, sprinkle a little powdered sugar over the top for a festive touch.
Serving Suggestions
With Ice Cream – Classic vanilla ice cream is the ultimate partner for warm apple pie bars.
With Whipped Cream – Light and airy whipped cream balances the richness of the pastry.
With Caramel Drizzle – For caramel apple vibes, drizzle caramel sauce over each bar.
With Coffee or Tea – These bars make a perfect afternoon treat with a warm drink.
As a Holiday Dessert – Bring them to Thanksgiving, Christmas, or Easter and watch them disappear in minutes.
Time
- Prep Time: 20 minutes
- Cook Time: 45 minutes
- Cooling Time: 20 minutes
- Total Time: 1 hour 25 minutes
This makes it a great dessert to prepare while you’re cooking dinner—by the time the meal is finished, dessert is ready to be sliced and served.
Conclusion
Grandma’s Apple Pie Bars are more than just a dessert—they’re a slice of tradition, a taste of comfort, and a reminder that the best recipes don’t have to be complicated. They’re flaky, gooey, sweet, and spiced just right, the kind of treat that makes people go back for seconds (and sometimes thirds).
As bigzazoo, I can tell you this recipe has never failed me. It’s my go-to dessert when I want to impress without stress, and it always brings smiles to the table. Whether you’re baking with your kids, sharing with neighbors, or treating yourself to something cozy, this is one dessert you’ll make again and again.
If you’ve never tried these apple pie bars before, consider this your sign—it’s time to bake up a batch of grandma’s famous recipe and create memories of your own.
More Recipes You Might Like
-

Why Some Homeowners Are Using Onion Water Around Orchids and What Usually Helps More for Strong Roots, Healthy Leaves, and Long-Lasting Blooms
Orchids are among the most elegant indoor flowering plants for homeowners who want graceful stems, glossy green leaves, long-lasting blooms, and a refined decorative display that fits beautifully in living rooms, bedrooms, apartments, home offices, bright kitchens, windowsills, covered patios, commercial interiors, luxury home staging, and premium indoor plant styling. A healthy orchid can turn…
-

Why Some Homeowners Are Pouring Aloe Water Around Orchids and What Usually Helps More for Strong Roots, Healthy Leaves, and Long-Lasting Blooms
Orchids are among the most elegant indoor flowering plants for homeowners who want graceful blooms, sculptural roots, glossy leaves, and a premium decorative display that fits beautifully in living rooms, bedrooms, apartments, home offices, bright kitchens, balcony gardens, covered patios, commercial interiors, luxury home staging, and refined indoor plant styling. A healthy orchid can make…
-
Why Some Homeowners Are Adding Brown Powder Around Snake Plants and What Usually Helps More for Strong Roots, Fuller Growth, and Healthy Indoor Leaves
Snake plant is one of the most dependable indoor plants for homeowners who want strong upright leaves, bold green patterning, yellow-edged variegation, easy maintenance, and a clean decorative display that fits beautifully in living rooms, bedrooms, apartments, home offices, bright kitchens, entry corners, sunny windowsills, plant shelves, commercial interiors, luxury home staging, and premium indoor…


