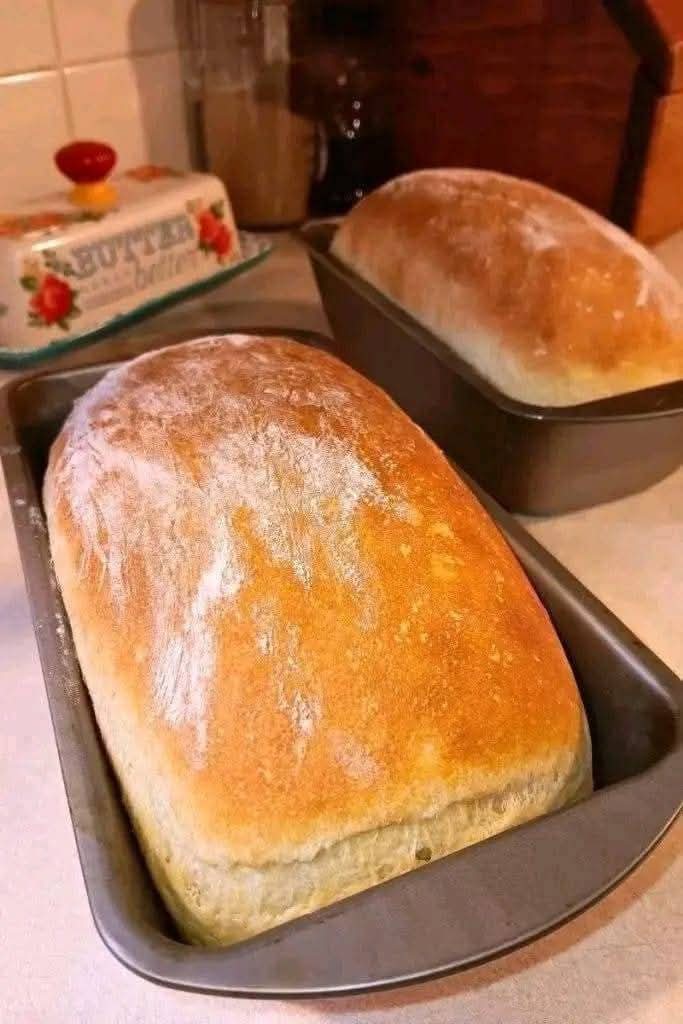
There’s something truly magical about freshly baked bread—the smell that fills the kitchen, the warmth as you tear into a loaf, and the comfort of knowing it’s homemade. But for many, making bread feels intimidating. Kneading, proofing, and working with complicated ingredients like butter and eggs can make it seem like bread baking is only for seasoned bakers.
Well, let me share a secret: you don’t need to be a professional baker to make soft, delicious, and golden bread right at home. This no-knead, no-egg, no-butter bread recipe is so easy, even beginners can make it on their first try. With just a few pantry staples—flour, yeast, water, and a touch of oil—you’ll have a fresh loaf that rivals anything you’d find in the store.
Honestly, once you make this recipe, you’ll find yourself saying the same thing I do: “I don’t buy bread anymore!” And trust me, when friends and family taste it, they’ll be shocked that such simple ingredients can produce such incredible results.
Why This Recipe Works
This recipe is proof (pun intended!) that simplicity is often the key to greatness. Here’s why it’s so special:
No kneading required – The yeast does the work for you. As the dough rests, gluten naturally develops, giving the bread structure without the need for elbow grease.
No eggs or butter – Instead of rich fats, this recipe uses simple oil and water, making it budget-friendly, dairy-free, and lighter in texture.
Few ingredients – You only need everyday pantry staples: flour, water, yeast, salt, and a drizzle of oil.
Versatile – This bread is a blank canvas. Enjoy it plain, toasted, with spreads, or alongside soups and stews.
Beginner-friendly – With clear steps, anyone—even kids—can whip up this bread successfully.
It’s the kind of recipe that makes you wonder: Why did I ever buy bread from the store?
What You’ll Need For This Recipe
Ingredients:
4 cups (500 g) all-purpose flour or bread flour
2 teaspoons salt
1 packet (7 g or 2 ¼ tsp) active dry yeast
1 ½ cups (360 ml) warm water (not hot, about 100–110°F / 37–43°C)
1 tablespoon sugar (helps activate the yeast)
2 tablespoons vegetable oil or olive oil
Optional (for extra flavor):
1 teaspoon garlic powder, dried herbs, or seeds to sprinkle on top
Equipment
To keep things simple, you don’t need fancy bakery tools. Here’s what will help:
A large mixing bowl (glass, ceramic, or stainless steel)
A wooden spoon or spatula for mixing
A clean kitchen towel or plastic wrap to cover the dough
A loaf pan or baking tray
Parchment paper (optional, but makes cleanup easier)
An oven preheated to 400°F (200°C)
That’s it! No mixer, no kneading hooks—just the basics.
How To Make This Recipe
Activate the Yeast
In a small bowl or measuring cup, mix the warm water, sugar, and yeast.
Stir gently and let it sit for 5–10 minutes until foamy. (This shows your yeast is alive and ready to work.)
Mix the Dough
In a large bowl, combine flour and salt.
Pour in the yeast mixture and oil.
Stir with a spoon until a sticky dough forms. Don’t worry—it doesn’t need to look perfect.
First Rise
Cover the bowl with a towel or plastic wrap.
Let the dough rise for 1–2 hours in a warm spot until it doubles in size.
Shape the Dough
Once risen, lightly flour your hands and surface.
Transfer the dough and gently shape it into a loaf. (No kneading, just a light touch.)
Place into a greased loaf pan or on a lined baking sheet.
Second Rise
Cover again and let rise for another 30 minutes. This helps the bread become light and airy.
Bake the Bread
Preheat oven to 400°F (200°C).
Bake the loaf for 30–35 minutes, until golden brown and hollow-sounding when tapped on the bottom.
Cool & Enjoy
Remove from the oven, cool slightly on a wire rack, and slice into perfection.
Tips + Tricks & More For Recipe Success
Water temperature matters – Too hot, and you’ll kill the yeast; too cold, and it won’t activate. Aim for warm, bath-like water.
Don’t skip the second rise – This is key for fluffy bread.
Want extra crunch? Place a small oven-safe dish with water in the oven while baking. The steam creates a crispier crust.
Use bread flour if possible – It gives the bread a chewier texture, but all-purpose works just fine.
Flavor boosters – Add herbs like rosemary, thyme, or oregano to the dough for a savory twist.
Storage tip – Wrap cooled bread in a clean towel or keep in a bread box. Stays fresh for 2–3 days.
How to Serve
This bread is so versatile that you’ll find yourself reaching for it at every meal. Here are some ideas:
Breakfast: Toasted with butter and jam, or dipped in olive oil.
Lunch: Use slices for sandwiches or paninis.
Dinner: Serve alongside soups, stews, or pasta.
Snack: Spread with hummus, avocado, or garlic butter for a quick bite.
Serving Suggestions
Pair with hearty dishes like beef stew, chicken soup, or chili.
Transform into garlic bread by brushing with olive oil and garlic powder before baking.
Make mini loaves or rolls instead of one big loaf for parties.
For a sweet twist, add a sprinkle of cinnamon sugar on top before baking.
Timing
Prep Time: 10 minutes
First Rise: 1–2 hours
Second Rise: 30 minutes
Baking Time: 30–35 minutes
Cooling: 10 minutes
⏱️ Total: About 2.5–3 hours (most of this is hands-off resting time).
Conclusion
With this simple recipe, you’ll see why I say: “I don’t buy bread anymore!” It’s affordable, requires no fancy ingredients, and is foolproof enough that even beginners or kids can make it. The golden crust, soft interior, and fresh-baked aroma will keep you coming back again and again.
For anyone who has ever felt intimidated by bread-making, this is the recipe that changes everything. No kneading, no eggs, no butter—just pure, homemade goodness.
And as I, bigzazoo, always remind friends and readers: sometimes the most delicious things in life are also the simplest. Give this bread a try, and you’ll never look at store-bought loaves the same way again.
More Recipes You Might Like
-

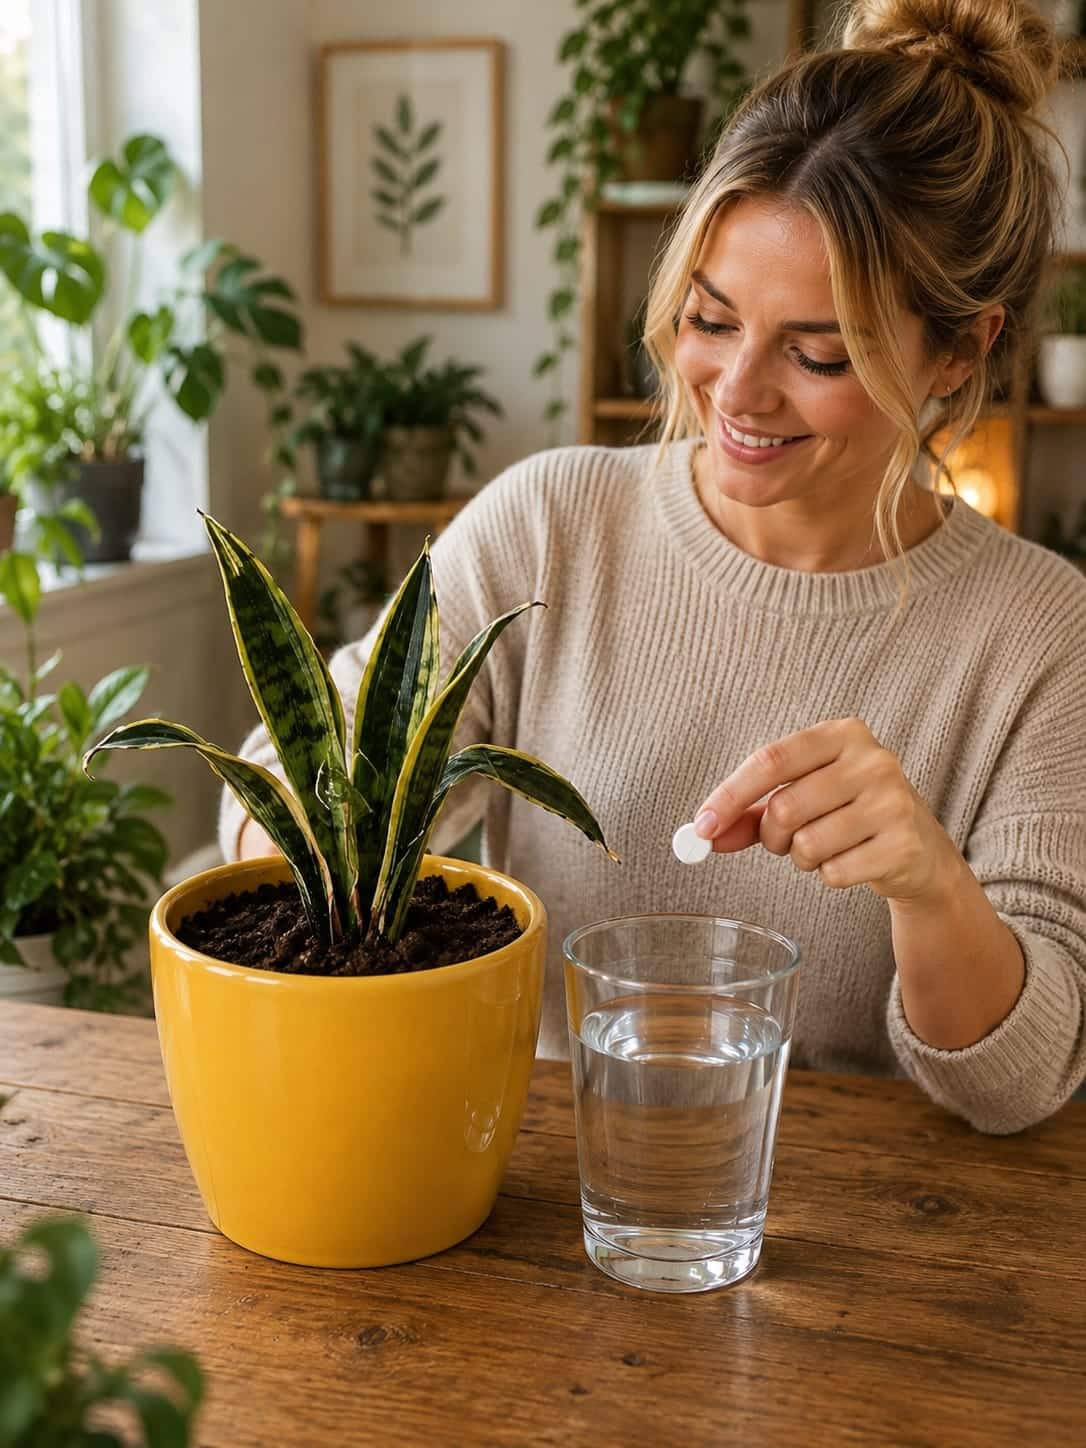
The Tablet in Water Trick for Snake Plants: What It Does, When to Use It, and How to Avoid Burning the Roots
Snake plants are some of the most forgiving indoor plants you can grow, but when their leaves start curling, fading, … Read more
-

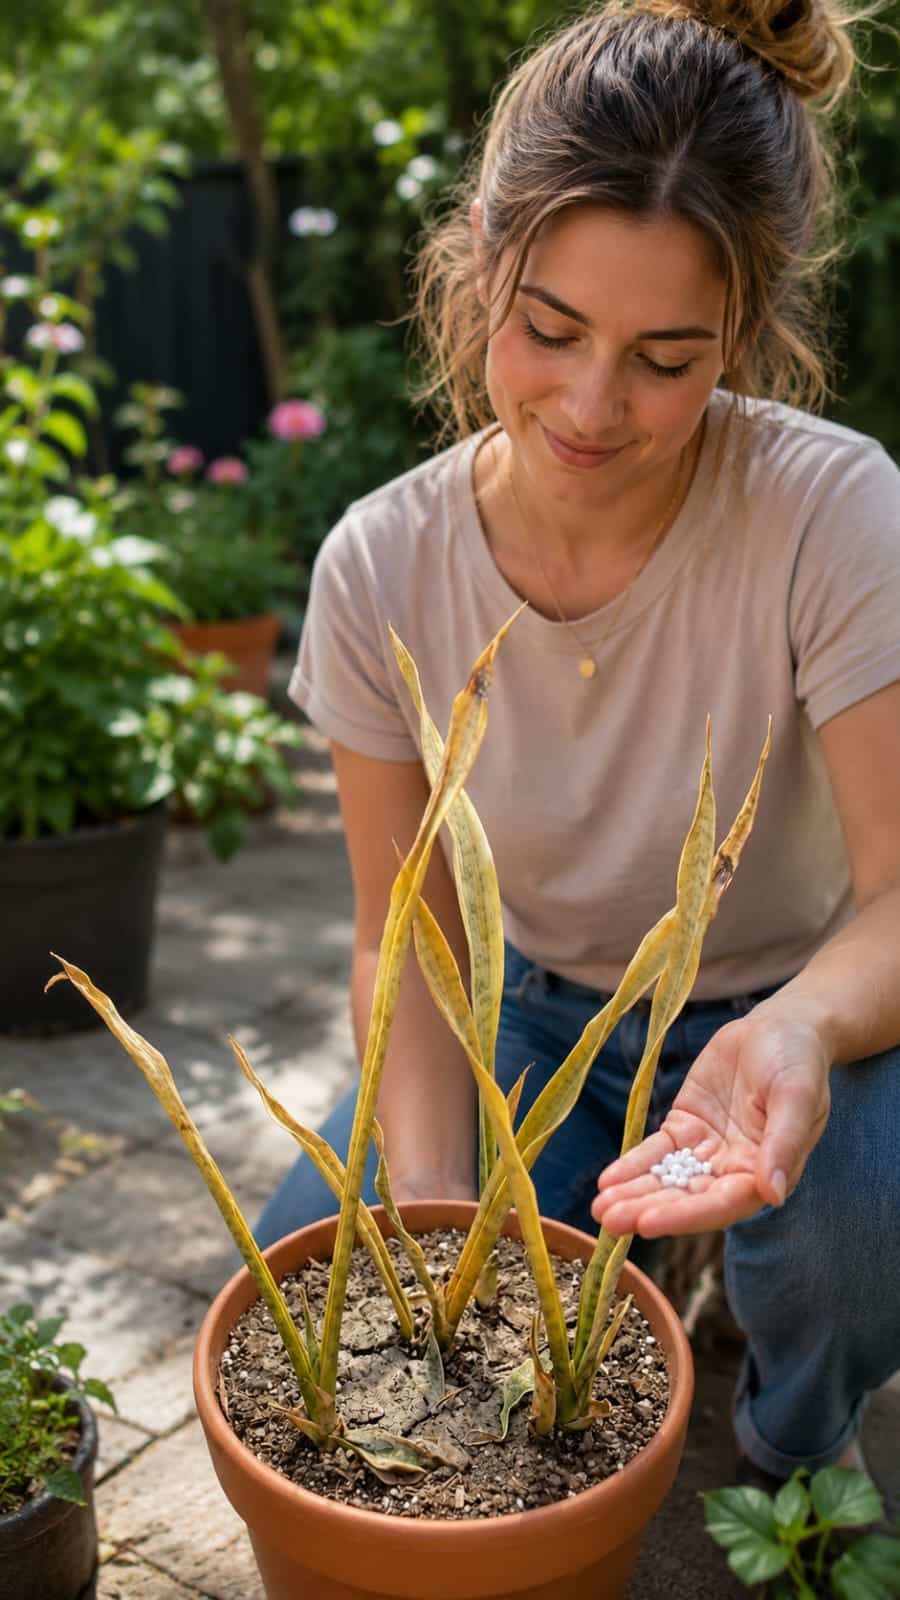
How to Save a Dying Snake Plant: The Safe Recovery Method for Yellow Leaves, Dry Soil, and Weak Growth – Best Snake Plant Rescue Guide for Beginners
Snake plants are famous for being almost impossible to kill, but even this tough indoor plant can collapse when the … Read more
-
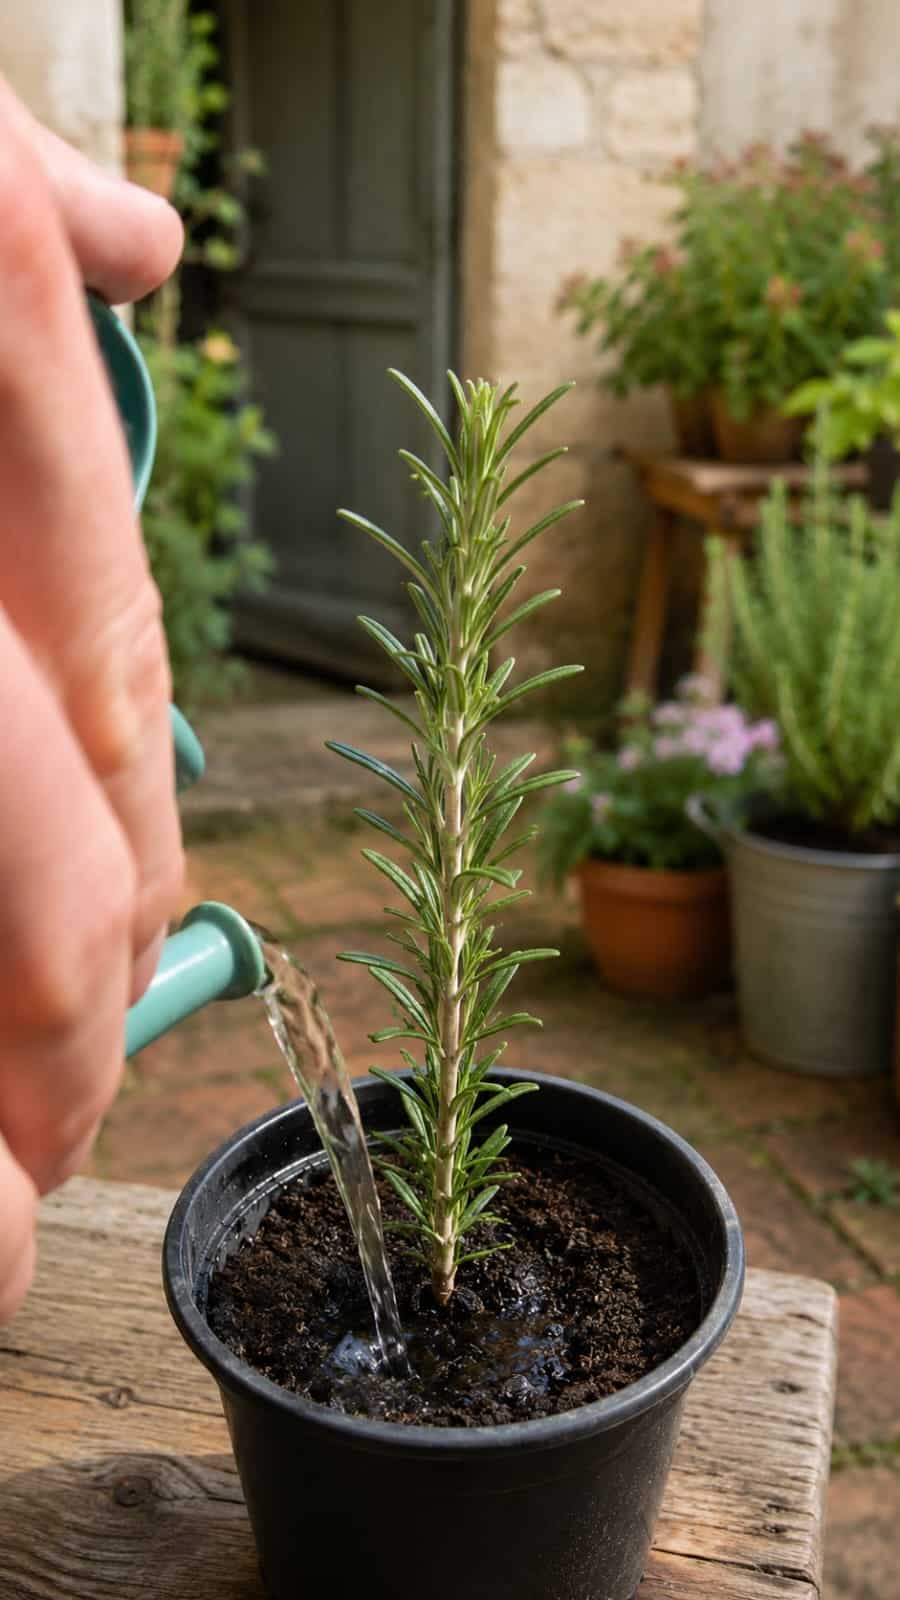
How to Propagate Rosemary from Cuttings in Water: The Simple Rooting Method for a Fresh Herb Garden at Home – Best Rosemary Propagation Guide for Beginners
Rosemary is one of the most useful herbs you can grow at home. It smells wonderful, looks beautiful in pots, … Read more