Is your mop looking tired, dirty, and worn out, but you’re not ready to spend money on a brand new one? Don’t worry! You don’t need to replace it just yet. There’s a simple, effective way to restore your mop to its clean and fresh state using just a few household items.
This easy cleaning method will help you rejuvenate even the most heavily soiled mop head, making it as good as new. Let’s break down the step-by-step process to get your mop back in action!
Why Cleaning Your Mop is Important
Mops are essential tools for keeping our floors clean, but over time, they can accumulate grime, dust, and oils. If left uncleaned for too long, a dirty mop can even make your floors dirtier instead of cleaner. Maintaining a clean mop not only helps it work more effectively but also extends its lifespan. A well-cared-for mop can do a much better job of cleaning, making your floor maintenance easier and more efficient.
Step-by-Step Guide to Cleaning a Dirty Mop
Here’s how to properly clean a dirty mop without having to buy a new one:
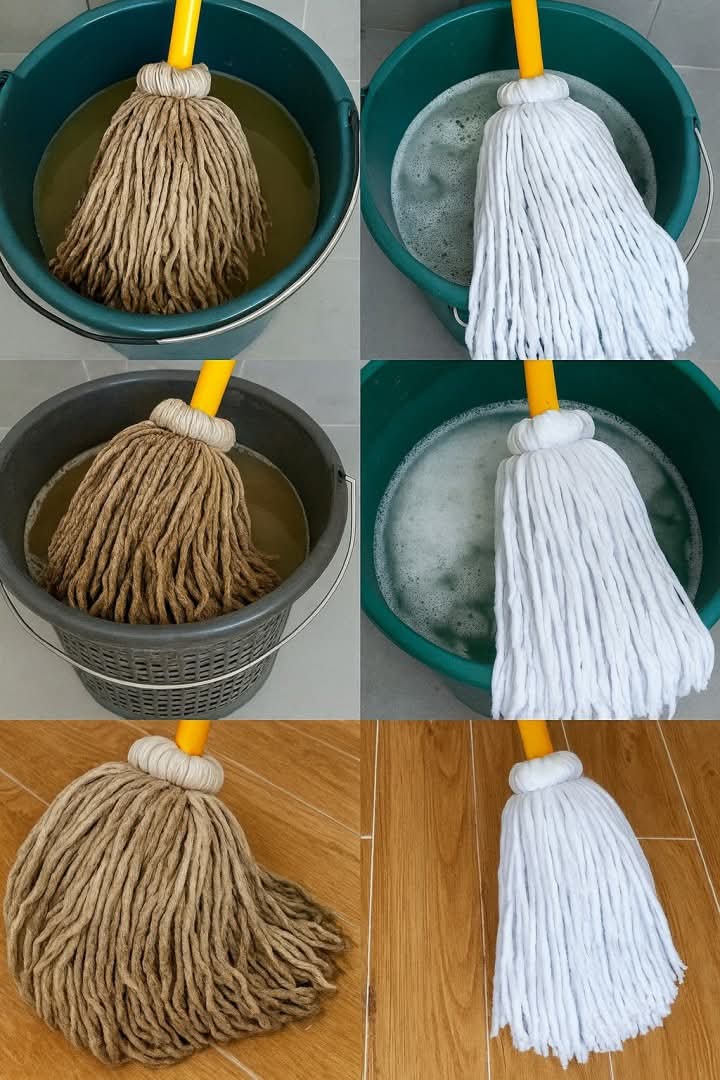
Step 1: Prepare a Cleaning Solution
To deep clean your mop head, you’ll need a solution that can break down grime and kill bacteria. Here are a few options:
Vinegar and Water Solution: Mix equal parts of water and white vinegar in a bucket or large container. Vinegar is great at breaking down dirt, stains, and bacteria. It’s also a natural disinfectant.
Baking Soda and Water Paste: For a more abrasive cleaning method, make a paste with baking soda and water. Baking soda can help scrub away tougher grime from your mop.
Dish Soap and Hot Water: If you have a mop head that isn’t heavily soiled, a few drops of dish soap in hot water can do the trick. The soap will help break down oils and residue.
Step 2: Soak the Mop Head
Submerge your dirty mop head in the cleaning solution. Let it soak for about 15–30 minutes, depending on how dirty the mop is. For stubborn dirt and grime, you can let it sit longer. This step helps loosen any caked-on dirt and grime, making the next cleaning steps easier.
Step 3: Scrub the Mop Head
Once the mop head has soaked, it’s time to scrub away the grime. You can use an old toothbrush, a cleaning brush, or even your hands to scrub the mop head. Focus on the areas with the most buildup. Gently work through the mop fibers, scrubbing off dirt and any debris that has accumulated.
For extra stubborn spots, you can apply a little more baking soda directly onto the mop fibers and scrub again.
Step 4: Rinse the Mop
Once the mop head has been scrubbed clean, rinse it thoroughly with hot water to remove any remaining dirt, cleaning solution, or residue. You may need to repeat the soaking and scrubbing steps for heavily soiled mops.
Step 5: Dry the Mop Head
After rinsing, wring out excess water and hang the mop head to dry in a well-ventilated area. Ideally, let it air dry completely to avoid any mold or mildew growth. You can also use a fan to speed up the drying process.
Extra Tips for Mop Maintenance:
Wash Mop Heads Regularly – For optimal cleaning and hygiene, wash your mop head regularly. A dirty mop can spread bacteria and germs, so aim to clean it after every few uses.
Avoid Fabric Softener – If you’re machine-washing your mop head, avoid using fabric softener. It can make the fibers less absorbent, reducing the mop’s effectiveness.
Store Mop Properly – After each use, hang your mop to dry rather than leaving it in a damp spot. This prevents bacteria and mold buildup, and keeps your mop in good condition for longer.
Replace Mop Heads Periodically – While cleaning your mop head can prolong its life, it’s also important to replace it periodically, especially if the fibers are fraying or no longer cleaning effectively.
In Conclusion: No Need for a New Mop!
Before rushing to buy a new mop, try these simple cleaning steps to restore your old mop to its full cleaning potential. Not only will this save you money, but it’ll also help maintain a cleaner, healthier home. So, next time your mop looks dirty or grimy, remember: a little cleaning solution and some elbow grease can bring it back to life. Happy cleaning! 🧹✨
More Recipes You Might Like
-

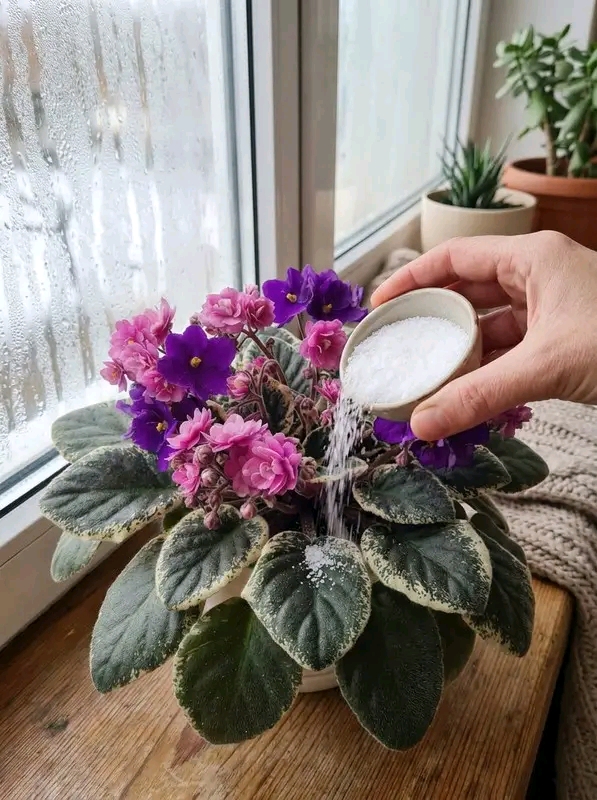
Easy African Violet Care: Simple Tips for Lush Growth and Vibrant Blooms
African violets are small, elegant, and full of charm. Their soft fuzzy leaves, compact shape, and bright purple, pink, white, blue, or double flowers make them one of the most loved indoor flowering plants. They look beautiful on windowsills, shelves, kitchen counters, bedroom tables, office desks, and cozy plant corners. Even one healthy African violet…
-

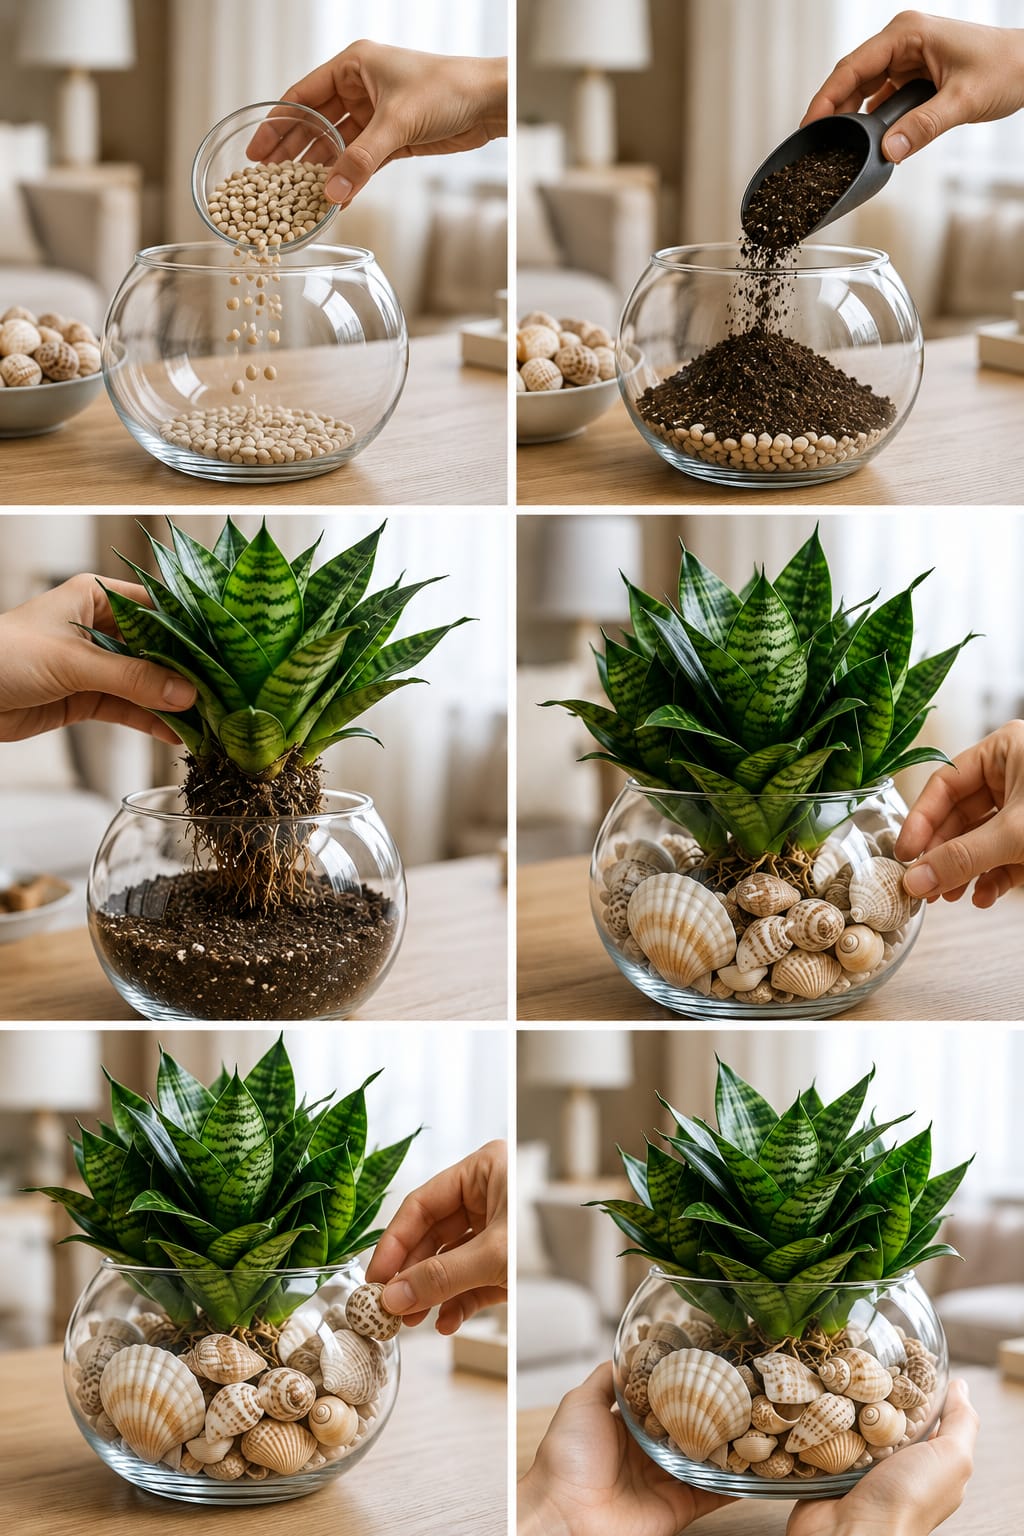
Bird’s Nest Snake Plant Fishbowl Garden: A Complete Guide to Creating a Beautiful Glass Bowl Display With Shells, Strong Roots, Healthy Leaves, and Stylish Indoor Decor
Bird’s Nest Snake Plant is one of the most beautiful compact houseplants for small indoor spaces. Its short rosette shape, thick patterned leaves, and elegant green form make it perfect for tables, shelves, desks, windowsills, bedrooms, offices, and living room displays. Unlike tall snake plants that grow like upright swords, Bird’s Nest Snake Plant grows…
-

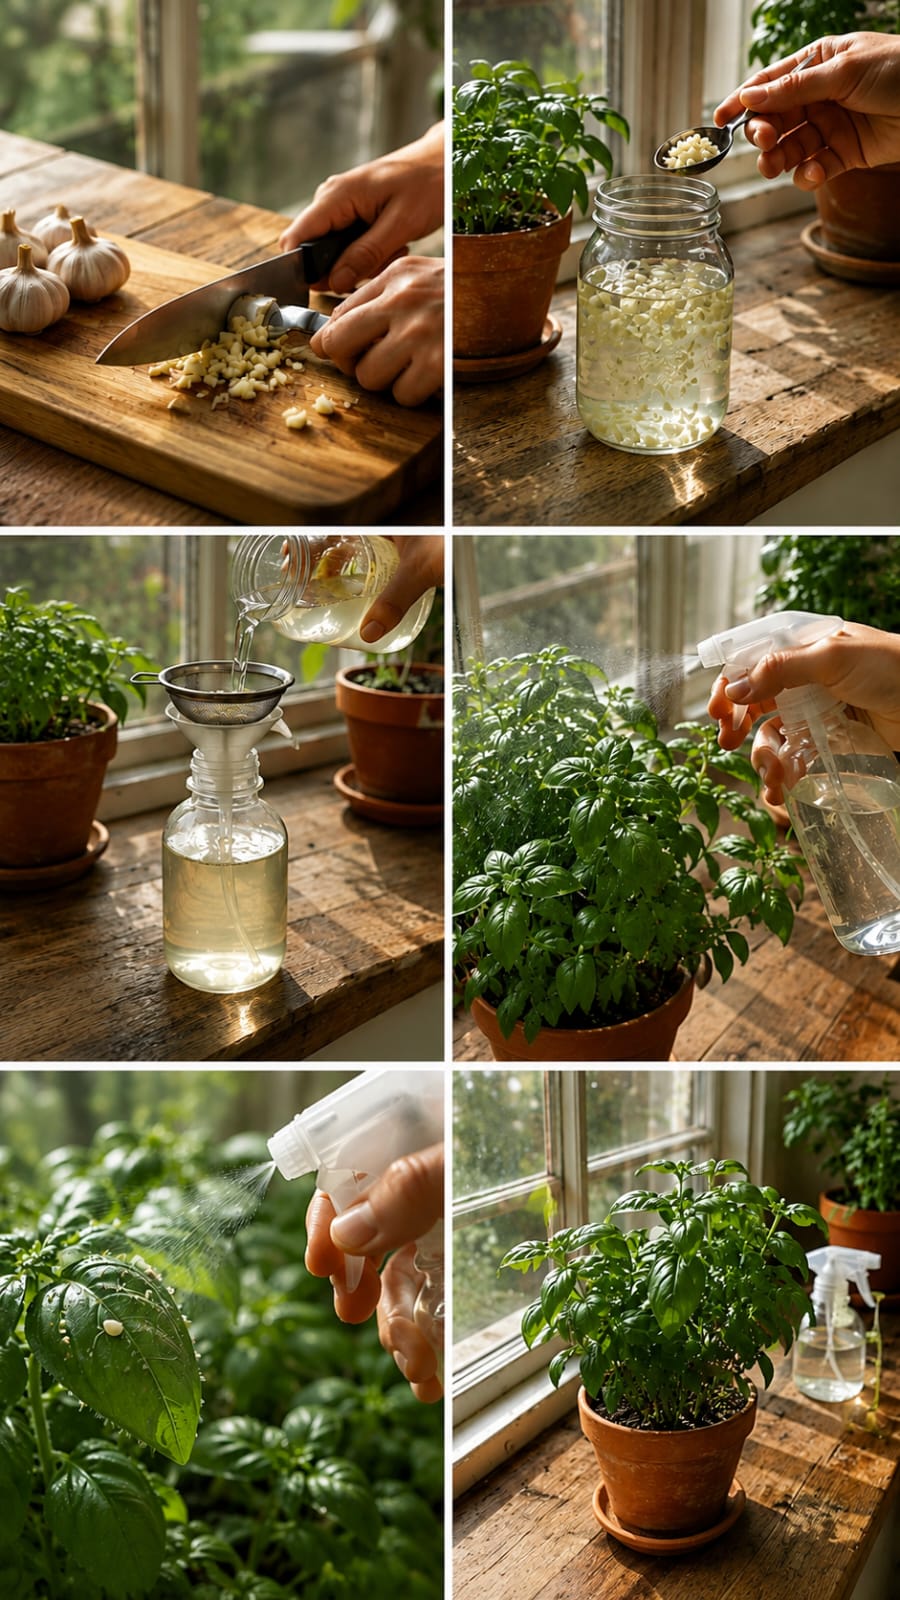
Garlic Spray for Indoor Plants: A Complete Guide to Making a Natural Garlic Water Spray for Basil, Herbs, Houseplants, Pest Prevention, Leaf Care, and Healthy Indoor Growth
Indoor plants bring freshness, color, scent, and life into the home. A sunny windowsill filled with basil, mint, parsley, pothos, peppers, flowers, and leafy houseplants can make any room feel warmer and more natural. But indoor plants also face problems. Leaves can become dusty. Tiny pests can appear. Soil can stay too wet. Basil can…