Stuffing balls are a twist on traditional stuffing, offering a fun and easy way to serve this favorite holiday side dish. The combination of bread crumbs, herbs, and vegetables, all molded into perfect little balls and baked until golden and crispy, is elevated even further when paired with a rich and savory gravy.
Whether you serve them as a side dish for Thanksgiving or as a comforting dinner option, these stuffing balls with gravy are sure to be a hit with family and friends. This recipe breaks down every step to ensure your stuffing balls come out perfectly every time, with a crispy exterior and a soft, flavorful interior.
2. Ingredients
For the Stuffing Balls:
6 cups bread cubes (about 10 slices of day-old bread, preferably a rustic loaf or sourdough)
1 medium onion, finely chopped
2 celery stalks, finely chopped
2 cloves garlic, minced
1/2 cup unsalted butter
2 teaspoons dried sage
1 teaspoon dried thyme
1 teaspoon salt
1/2 teaspoon black pepper
2 large eggs
1 1/2 cups chicken or vegetable broth
1/2 cup parsley, chopped (for added freshness)
1/2 cup grated Parmesan cheese (optional, for added flavor)
1 tablespoon olive oil (for greasing the baking dish)
For the Gravy:
2 tablespoons unsalted butter
2 tablespoons all-purpose flour
2 cups chicken or vegetable broth
1/2 cup heavy cream
Salt and pepper, to taste
3. Equipment Needed
| Equipment | Purpose |
|---|---|
| Large mixing bowl | For mixing the stuffing ingredients. |
| Frying pan or skillet | For sautéing onions, celery, and garlic. |
| Baking sheet or dish | For baking the stuffing balls. |
| Spoon or ice cream scoop | To shape the stuffing into balls. |
| Small saucepan | For making the gravy. |
| Whisk | For stirring the gravy to ensure smooth consistency. |
| Oven | For baking the stuffing balls. |
| Knife and cutting board | For chopping the vegetables. |
| Measuring spoons and cups | For accurate ingredient measurements. |
4. How to Make Stuffing Balls
Step 1: Prepare the Bread
Cube the bread: Cut the bread into small cubes (about 1-inch pieces). You can use a loaf of white bread, sourdough, or any other bread of your choice. Day-old bread works best because it’s firmer and absorbs the broth better.
If your bread is fresh, dry it out: Place the cubes on a baking sheet and toast them in a 350°F (175°C) oven for about 10–15 minutes until they are dry and slightly golden. Let them cool.
Step 2: Sauté the Vegetables
In a large frying pan, melt 1/2 cup butter over medium heat.
Add the chopped onion and celery, and sauté until softened, about 5–7 minutes.
Add the minced garlic and sauté for another 30 seconds until fragrant.
Step 3: Prepare the Stuffing Mixture
In a large mixing bowl, combine the toasted bread cubes, sautéed vegetables, sage, thyme, salt, and black pepper.
Crack the eggs into the mixture and add the chopped parsley and grated Parmesan (if using).
Slowly pour in the broth and gently toss the mixture, adding more broth if necessary until the bread cubes are moistened but not soggy.
Taste the mixture and adjust seasoning as needed with extra salt, pepper, or herbs.
Step 4: Shape the Stuffing Balls
Grease your hands with a little olive oil or butter to prevent sticking.
Using an ice cream scoop or spoon, form the mixture into golf-ball-sized balls.
Arrange the stuffing balls on a greased baking sheet or in a baking dish, leaving a little space between each one.
Step 5: Bake the Stuffing Balls
Preheat the oven to 375°F (190°C).
Bake the stuffing balls in the preheated oven for 25–30 minutes, or until they are golden brown and crispy on the outside.
5. How to Make Gravy
Step 1: Melt Butter
In a small saucepan, melt 2 tablespoons of butter over medium heat.
Step 2: Make the Roux
Add 2 tablespoons of flour to the melted butter and whisk to combine.
Continue to cook, stirring constantly, for 1–2 minutes to form a roux (this thickens the gravy).
Step 3: Add Broth
Slowly pour in the chicken or vegetable broth, whisking constantly to prevent lumps.
Bring the mixture to a simmer, allowing it to cook for 5–7 minutes, or until it thickens to your desired consistency.
Step 4: Add Cream
Stir in the heavy cream to make the gravy richer and creamier.
Simmer for another 2–3 minutes.
Taste and adjust the seasoning with salt and pepper.
6. Tips for Perfect Stuffing Balls
Use day-old bread: Fresh bread can be too soft and soggy. Let your bread dry out for a firmer texture.
Add more herbs: Feel free to experiment with other herbs like rosemary, marjoram, or oregano for more flavor.
Do not overwork the mixture: Gently mix the ingredients to avoid making the stuffing too dense.
Bake on a parchment-lined sheet: This will help prevent sticking and make clean-up easier.
Use an ice cream scoop: It helps shape the balls evenly and ensures consistent cooking.
7. Flavor Variations
While this recipe is already delicious, there are plenty of ways to add new flavors to your stuffing balls. Here are some variations to try:
1. Sausage Stuffing Balls
Add cooked sausage (pork, turkey, or chicken) to the mixture for added protein and flavor.
2. Cranberry and Pecan Stuffing Balls
Mix in dried cranberries and chopped pecans for a sweet and nutty twist.
3. Apple and Sage Stuffing Balls
For a seasonal flavor, incorporate diced apples and extra sage into the stuffing mixture.
4. Mushroom Stuffing Balls
Sauté mushrooms along with the onions and celery for a savory, earthy flavor.
5. Cheddar and Bacon Stuffing Balls
Add cheddar cheese and crispy bacon bits for an indulgent twist.
8. Serving Suggestions
Stuffing balls with gravy are delicious on their own, but you can also serve them as part of a bigger meal. Here are a few ideas for serving:
Alongside roasted meats: These stuffing balls pair beautifully with roast chicken, turkey, or pork.
As a side to mashed potatoes: Serve the stuffing balls with mashed potatoes and pour extra gravy over both.
With steamed vegetables: Pair with roasted Brussels sprouts or green beans for a complete meal.
9. How to Store and Reheat Stuffing Balls
Storing:
Refrigerate: Once cooled, store the stuffing balls in an airtight container for up to 3–4 days in the fridge.
Reheating:
Oven: Reheat the stuffing balls in the oven at 350°F (175°C) for 10–15 minutes.
Microwave: Microwave on medium heat for 1–2 minutes per serving, but the texture may not be as crispy.
10. Nutritional Information (Per Serving)
Here’s an approximate breakdown of the calories and nutrients in one serving (3 stuffing balls with gravy):
| Nutrient | Amount (per serving) |
|---|---|
| Calories | 250 kcal |
| Protein | 7 g |
| Carbohydrates | 30 g |
| Fat | 14 g |
| Saturated Fat | 6 g |
| Fiber | 3 g |
| Sodium | 550 mg |
(Note: Nutritional values are approximate and may vary based on ingredients used.)
11. Final Thoughts
Stuffing balls with gravy are the ultimate comfort food: soft, savory stuffing formed into easy-to-eat portions, baked to crispy perfection, and smothered in rich, creamy gravy. They’re perfect for special occasions like Thanksgiving or any time you want a hearty, delicious meal. Whether you stick with the traditional recipe or add your own twists, these stuffing balls will surely impress your guests and become a go-to family favorite.
More Recipes You Might Like
-

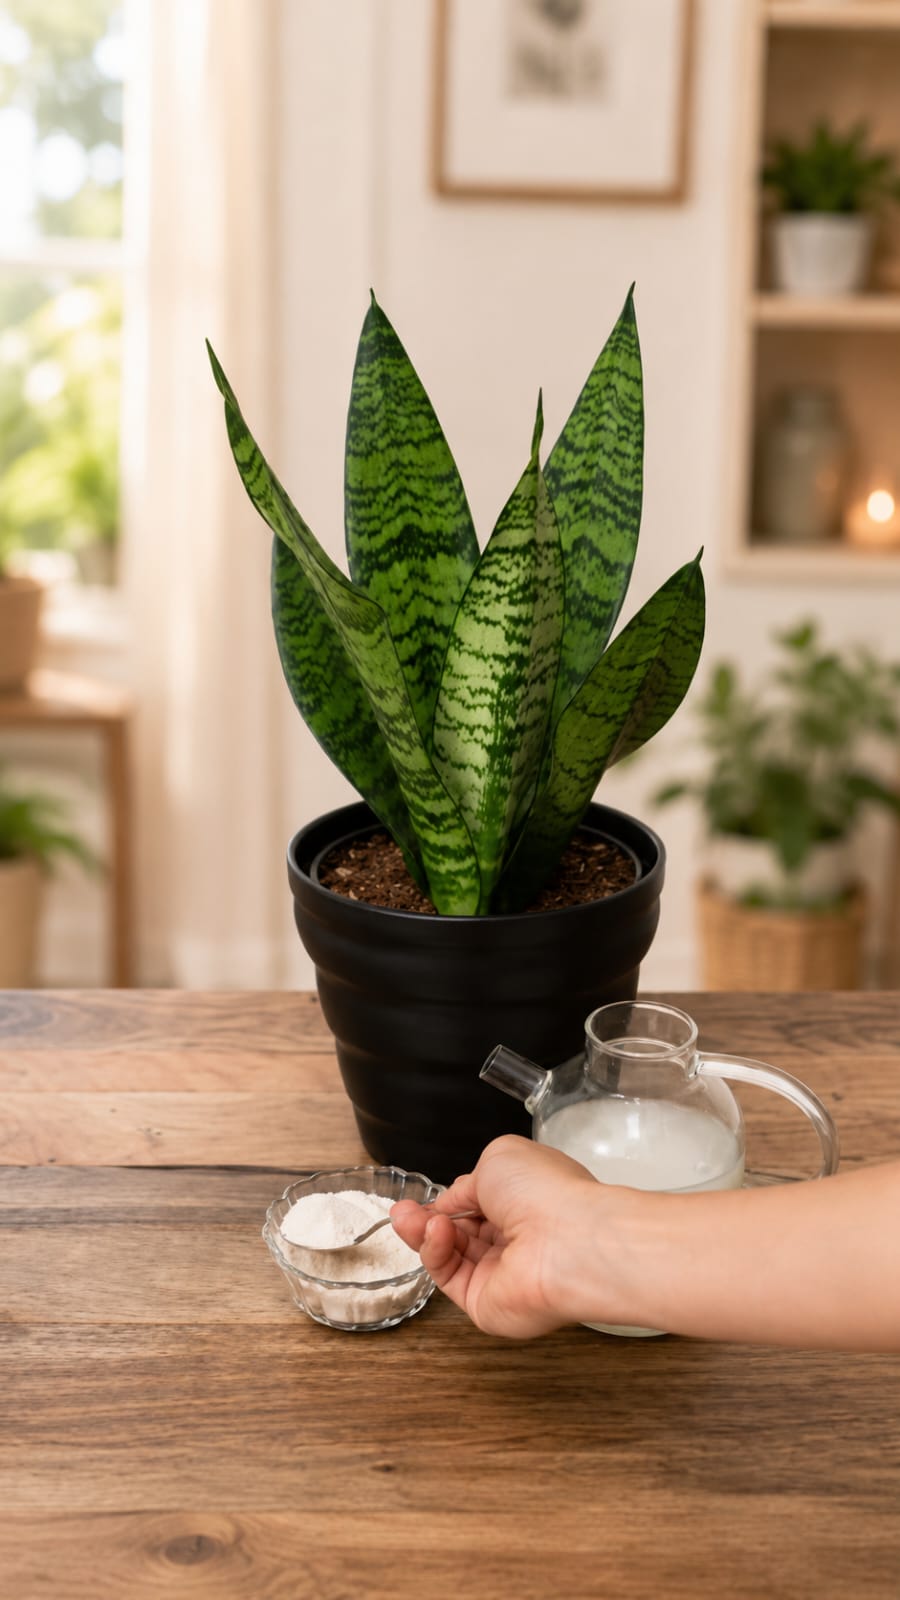
Why Homeowners Are Using a 3-Spoon White Liquid Snake Plant Soil Refresh Trick, Better Drainage Mix, Indoor Plant Fertilizer, and Ceramic Pot Styling to Support Stronger Leaves and Cleaner Growth
A healthy snake plant can make an indoor room feel cleaner, calmer, and more refined with very little effort. Its upright leaves bring structure, its green patterned surface adds natural contrast, and its low-maintenance habit makes it one of the easiest houseplants to style in apartments, bedrooms, offices, entryways, and modern living rooms. When the…
-
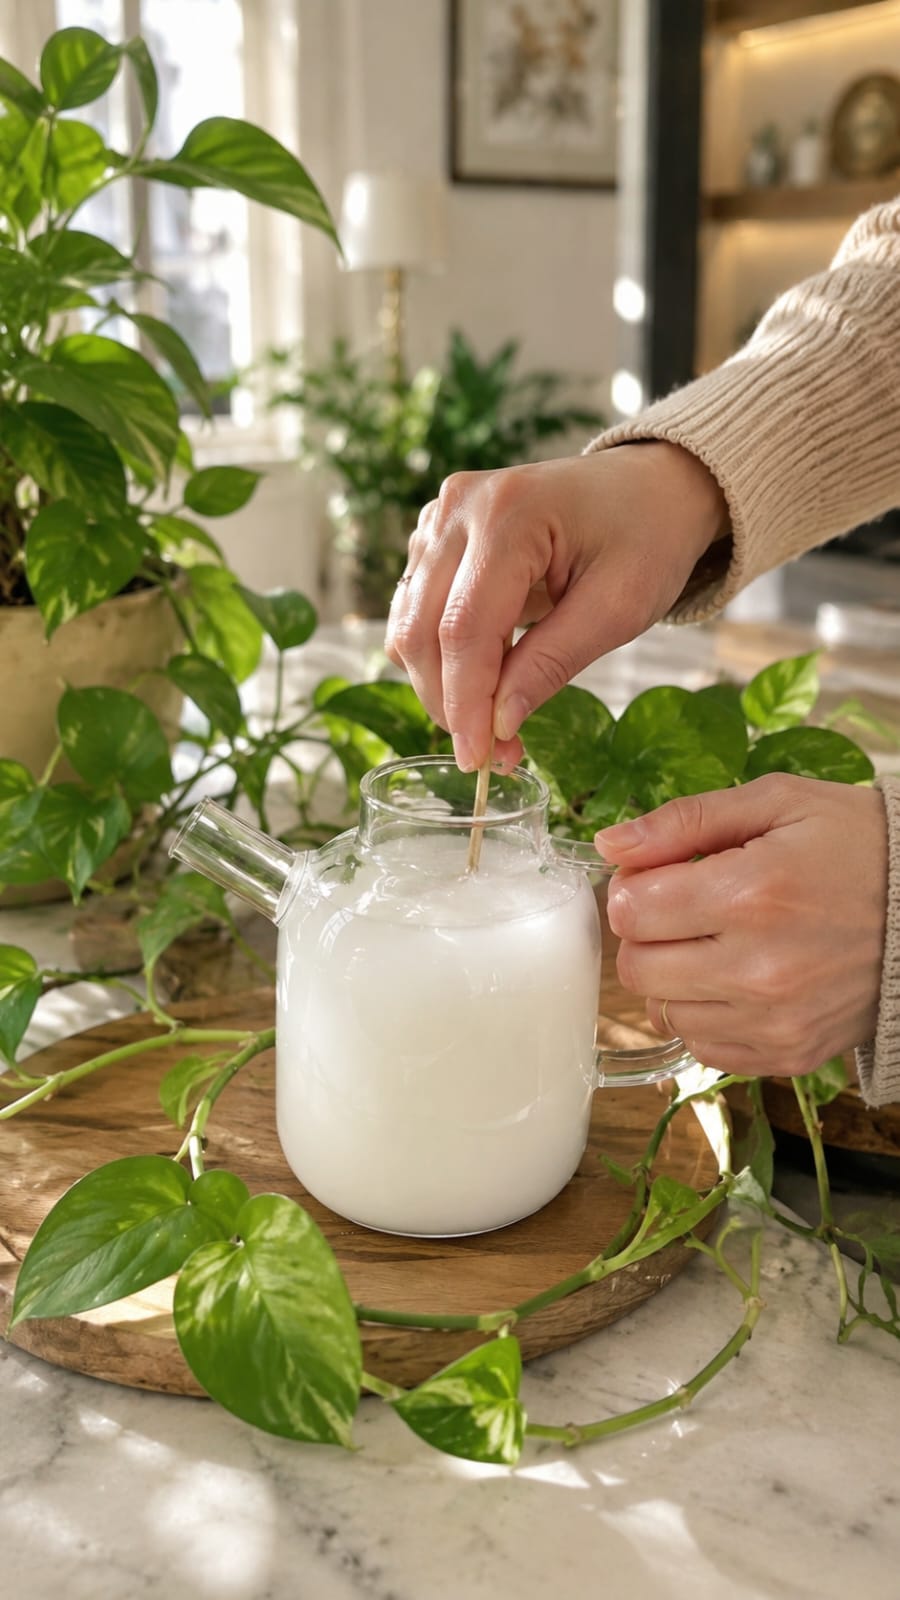
Why Homeowners Are Using a White Liquid Snake Plant Soil Refresh Trick, Better Drainage Mix, Indoor Plant Fertilizer, and Ceramic Pot Styling to Support Cleaner Growth and a More Refined Indoor Look
A healthy snake plant can make an indoor room feel cleaner, calmer, and more polished with very little effort. Its tall upright leaves add structure, its green banded pattern brings natural contrast, and its low-maintenance reputation makes it one of the most practical houseplants for apartments, bedrooms, home offices, entryways, and modern living rooms. When…
-
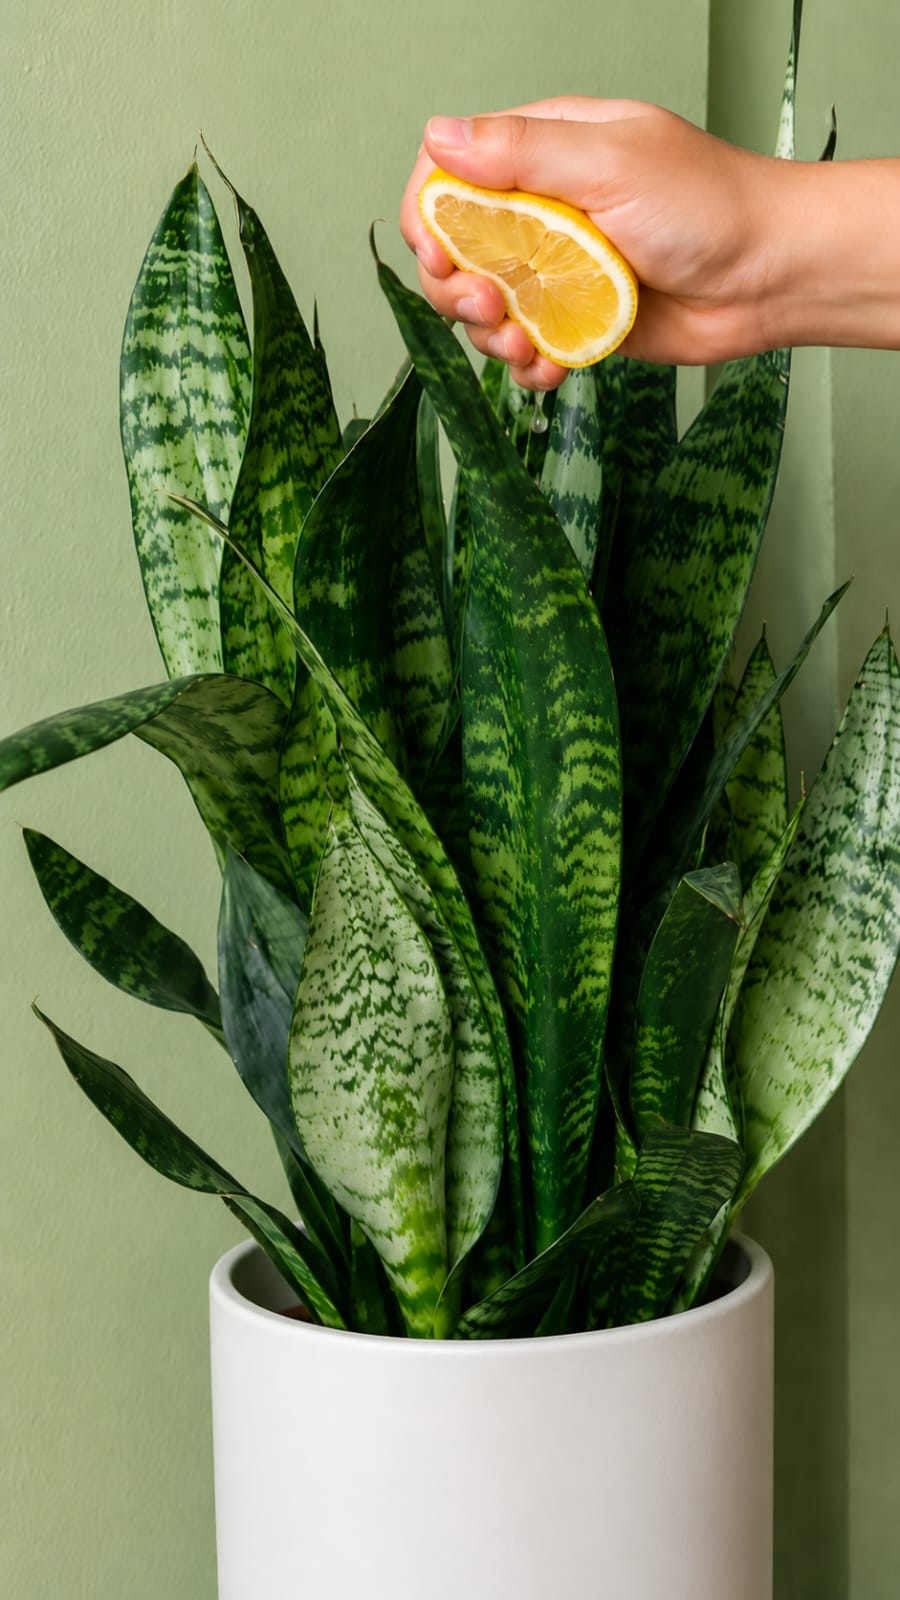
Why Homeowners Are Using a Light Lemon-Based Snake Plant Tonic, Better Drainage Mix, Indoor Plant Fertilizer, and Ceramic Pot Styling to Support Cleaner Leaves and a More Refined Indoor Look
A healthy snake plant can make an indoor room feel cleaner, calmer, and more expensive without demanding constant attention. Its upright leaves bring structure, its patterned green color adds natural contrast, and its simple shape works beautifully in bedrooms, apartments, home offices, entryways, and modern living rooms. When a snake plant looks full, firm, and…