There’s something incredibly satisfying about baking your own bread. The warm, comforting aroma of freshly baked bread filling the house, the crisp golden crust, and the soft, fluffy interior—it’s a sensory experience like no other. The best part? Making bread at home is easier than you think, and you don’t need a long list of ingredients or complicated steps to achieve that bakery-quality loaf.
In this post, we’ll walk you through a super simple, 4-ingredient homemade bread recipe that anyone can make. No fancy equipment or skills are required—just a few basic ingredients, a little patience, and you’ll have a homemade loaf of bread ready to enjoy!
1. Why This Bread is So Great
This 4-ingredient bread recipe is perfect for beginners or anyone looking for a quick and easy way to make homemade bread without a lot of hassle. Here’s why this recipe works so well:
Minimal Ingredients: With only four ingredients, this recipe keeps it simple. There’s no need for a bunch of extra additives or preservatives.
No Kneading Required: The dough comes together easily and doesn’t need to be kneaded. Just mix, let it rise, and bake.
Soft and Fluffy: The result is a beautiful loaf with a golden, crispy crust and a soft, airy interior—just like store-bought artisan bread.
Versatile: You can customize it by adding herbs, cheese, or even dried fruits and nuts to create your own variations.
2. Ingredients You’ll Need
To make this delicious homemade bread, you’ll need just four basic ingredients:
1 ½ cups warm water (370 ml): The water activates the yeast and helps the dough rise.
2 tablespoons dry yeast (10 g): Yeast is the key to making your bread rise and giving it that classic texture.
4 cups all-purpose flour (500 g): This is the base of your bread, giving it structure and texture.
1 teaspoon salt: Salt adds flavor and helps control the fermentation process of the yeast.
That’s it! Just four ingredients, and you’re ready to start baking.
3. How to Make the Easiest Homemade Bread
Step 1: Activate the Yeast
Start by combining the warm water and dry yeast in a bowl. Stir it gently to dissolve the yeast and then let it sit for about 5-10 minutes until it becomes frothy. This shows that the yeast is active and ready to work its magic on the dough.
Step 2: Mix the Ingredients
In a large mixing bowl, combine the flour and salt. Once the yeast is activated and bubbly, pour it into the flour mixture. Stir everything together until it forms a sticky dough. No need to overmix—just ensure all the ingredients are incorporated.
Step 3: Let the Dough Rise
Cover the bowl with a clean kitchen towel or plastic wrap and let the dough rise in a warm spot for about 1-2 hours, or until it has doubled in size. The yeast needs time to work and make the dough rise.
Step 4: Shape the Dough
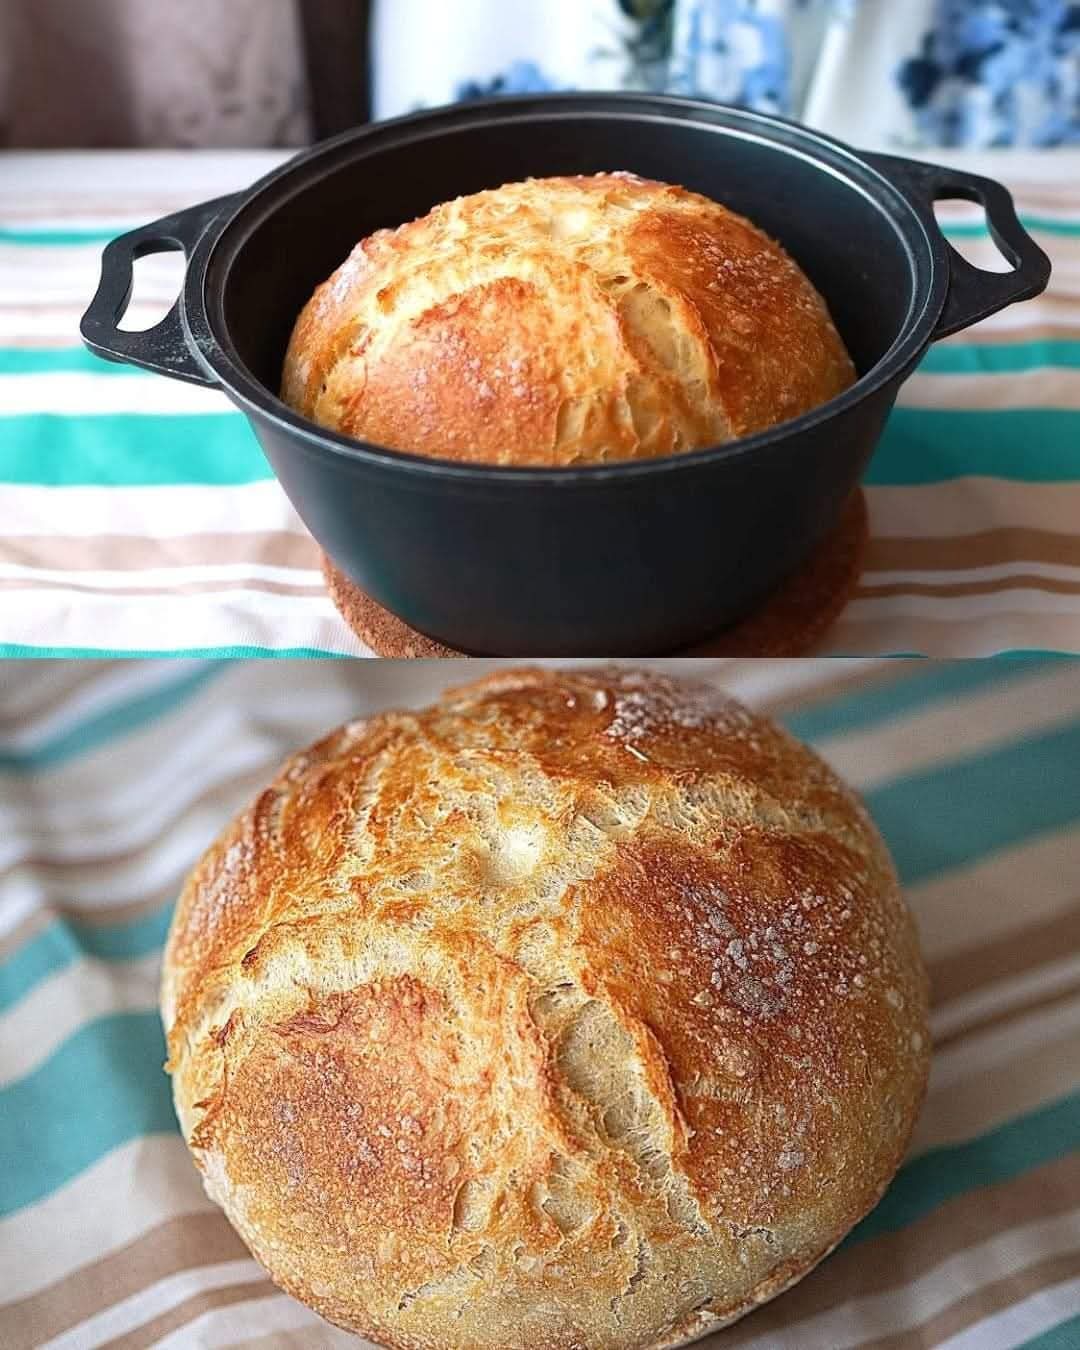
Once the dough has risen, punch it down gently to release the air. Transfer the dough to a greased baking pan or Dutch oven. Shape it into a round or oval loaf, depending on your preference. You don’t need to be perfect here—this bread is meant to be rustic and homemade!
Step 5: Bake the Bread
Preheat your oven to 375°F (190°C). Bake the dough for about 25-30 minutes, or until the bread has a golden, crispy crust and sounds hollow when tapped on the bottom. If you’re using a Dutch oven, you can cover it for the first 20 minutes and then uncover it to allow the top to brown.
Once baked, remove the bread from the oven and let it cool on a wire rack before slicing.
4. Tips for Success
Check the Water Temperature: The water should be warm but not too hot—around 100°F (37°C). Water that’s too hot can kill the yeast, while cold water won’t activate it properly.
Don’t Overwork the Dough: This recipe doesn’t require any kneading. Just mix until combined and let the yeast do its job.
Watch the Baking Time: Every oven is different, so start checking your bread around the 25-minute mark. You want a golden-brown crust and a hollow sound when tapped on the bottom.
5. Why You’ll Love This Bread
This bread is the perfect balance of simplicity and flavor. It’s the ideal loaf for beginners, and it’s so easy to make, even the most novice bakers can turn out a beautiful loaf. Here’s why you’ll love it:
No Fancy Tools Required: You don’t need a bread machine, mixer, or any special equipment. All you need is a bowl, a spoon, and your hands!
Perfect for Any Occasion: Whether you’re making it for dinner, to serve with soups or salads, or just because you’re craving fresh homemade bread, this recipe is versatile and delicious.
Customizable: Add herbs, garlic, or other flavors to make it your own. You can even make this recipe into a sweeter bread by adding honey or cinnamon.
6. Serving Ideas
Once your bread is baked and ready, the possibilities for serving are endless:
With Soup: Serve a warm slice alongside your favorite soup for a comforting meal.
As Toast: Toast a slice for breakfast and top with butter, jam, or avocado for a quick and tasty start to your day.
For Sandwiches: Use this soft, fluffy bread to make the perfect sandwich—whether it’s classic deli meats or a veggie-packed creation.
As a Side: Serve it with a dinner salad or as a side to roasted vegetables for a wholesome meal.
7. Final Thoughts
Making homemade bread doesn’t have to be complicated or time-consuming. With just four simple ingredients and a little patience, you can create a beautiful loaf of bread that’s perfect for any occasion. Whether you’re a seasoned baker or a beginner, this easy recipe will help you make fresh, delicious bread right in your own kitchen.
So, the next time you’re craving homemade bread, skip the store-bought loaves and give this simple recipe a try. You won’t regret it!
Conclusion
This 4-ingredient homemade bread is a game-changer. It’s easy, delicious, and doesn’t require any special equipment. Whether you’re baking for a family meal, a holiday gathering, or simply to enjoy fresh bread at home, this recipe will not disappoint. With its golden crust and soft, fluffy interior, this bread is sure to become a staple in your kitchen. Happy baking!
More Recipes You Might Like
-

Why Some Homeowners Are Using Onion Water Around Orchids and What Usually Helps More for Strong Roots, Healthy Leaves, and Long-Lasting Blooms
Orchids are among the most elegant indoor flowering plants for homeowners who want graceful stems, glossy green leaves, long-lasting blooms, and a refined decorative display that fits beautifully in living rooms, bedrooms, apartments, home offices, bright kitchens, windowsills, covered patios, commercial interiors, luxury home staging, and premium indoor plant styling. A healthy orchid can turn…
-

Why Some Homeowners Are Pouring Aloe Water Around Orchids and What Usually Helps More for Strong Roots, Healthy Leaves, and Long-Lasting Blooms
Orchids are among the most elegant indoor flowering plants for homeowners who want graceful blooms, sculptural roots, glossy leaves, and a premium decorative display that fits beautifully in living rooms, bedrooms, apartments, home offices, bright kitchens, balcony gardens, covered patios, commercial interiors, luxury home staging, and refined indoor plant styling. A healthy orchid can make…
-
Why Some Homeowners Are Adding Brown Powder Around Snake Plants and What Usually Helps More for Strong Roots, Fuller Growth, and Healthy Indoor Leaves
Snake plant is one of the most dependable indoor plants for homeowners who want strong upright leaves, bold green patterning, yellow-edged variegation, easy maintenance, and a clean decorative display that fits beautifully in living rooms, bedrooms, apartments, home offices, bright kitchens, entry corners, sunny windowsills, plant shelves, commercial interiors, luxury home staging, and premium indoor…


