There are few things in the world as comforting as the combination of chocolate and peanuts. The rich, creamy chocolate mixed with the crunch and savory taste of roasted peanuts creates a delicious treat that’s hard to resist. Chocolate peanut clusters are the ultimate indulgence, and the best part is that they only require three simple ingredients. If you’ve ever had the urge to create a homemade candy that’s incredibly easy, quick to prepare, and perfectly satisfying, then chocolate peanut clusters are just the thing you need.
These sweet and salty clusters are perfect for every occasion—from holiday celebrations and potlucks to a simple treat for a movie night. Not only are they a hit with friends and family, but they are also perfect for gifting. There’s no need for any special equipment or extensive cooking skills, just three ingredients and a little bit of patience while they set in the fridge.
Why You’ll Love These Chocolate Peanut Clusters
Before we jump into the step-by-step process of making these delightful treats, let’s talk about why they are so universally loved:
Simplicity: The recipe calls for just three basic ingredients: chocolate, peanuts, and something to hold the clusters together (usually a bit of melted chocolate). You can easily whip up a batch without spending hours in the kitchen.
Perfect Combination of Sweet and Salty: The saltiness of the peanuts perfectly balances the sweetness of the chocolate. It’s the kind of combo that makes you want to keep eating—salty, sweet, and utterly irresistible.
Customizable: You can customize these clusters by adding other ingredients. Feel free to mix in crushed pretzels for extra crunch, dried fruits for sweetness, or even a drizzle of caramel for richness. The possibilities are endless!
Perfect for Gifting: Whether you’re making a batch for Christmas, birthdays, or a small “just because” treat, chocolate peanut clusters make an excellent gift. Package them in a nice box or tin and watch the joy unfold as people dig into your homemade candy.
Quick and Easy: These clusters take very little time to prepare and are made with just a few steps. All you need is patience while the chocolate sets.
The Ingredients You’ll Need
As mentioned earlier, this recipe is incredibly simple and requires only three ingredients. Here’s what you’ll need:
1 cup of peanuts – You can use salted or unsalted peanuts, depending on your preference. Roasted peanuts work best as they add an extra crunch and bring out the full flavor. You can use whole peanuts, chopped peanuts, or even peanut halves if you like.
2 cups of chocolate chips – For the chocolate, you can use milk chocolate, dark chocolate, or semi-sweet chocolate chips. The choice of chocolate will change the overall flavor profile, so feel free to experiment based on your taste preferences. Some people even like a mixture of dark and milk chocolate for the perfect balance of sweetness and richness.
Optional: 1 tablespoon of vegetable oil or coconut oil – Adding a bit of oil can help make the chocolate smoother and shinier. If you like your clusters to have a glossy finish, adding oil to the melted chocolate is a great idea.
Step-by-Step Instructions for Making Chocolate Peanut Clusters
Now that we’ve gathered our ingredients, let’s dive into how to make these mouthwatering chocolate peanut clusters.
Step 1: Prepare Your Workstation
Before starting, prepare a baking sheet by lining it with parchment paper or wax paper. This will prevent the chocolate from sticking and make cleanup much easier once the clusters are set. Make sure the paper is well-secured so the clusters don’t slide off as they set.
Step 2: Melt the Chocolate
You have two options when it comes to melting your chocolate:
Microwave Method: Place the chocolate chips in a microwave-safe bowl. Microwave them in 30-second intervals, stirring after each interval, until the chocolate is completely melted and smooth. If the chocolate is too thick, you can add a small amount of vegetable oil or coconut oil to make it smoother and easier to work with. Be careful not to overheat the chocolate in the microwave, as it can burn quickly.
Stovetop Method: Alternatively, you can melt the chocolate using a double boiler. Place the chocolate chips in a heatproof bowl, and set the bowl over a pot of simmering water (not boiling). Stir the chocolate frequently until it’s completely melted and smooth.
Whether using the microwave or stovetop method, make sure to melt the chocolate slowly and stir it regularly to avoid scorching.
Step 3: Combine Peanuts with Melted Chocolate
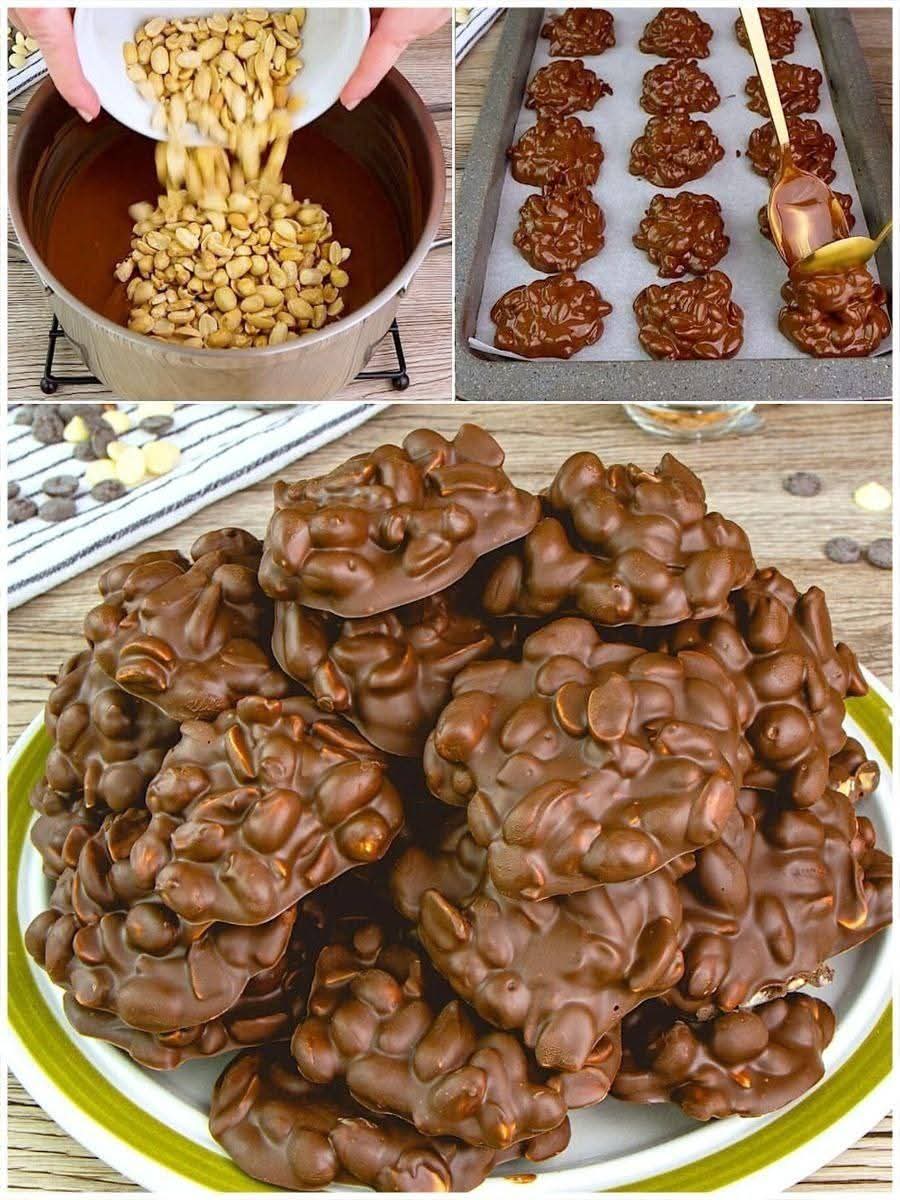
Once your chocolate is melted and smooth, it’s time to mix in the peanuts. Add your 1 cup of peanuts to the melted chocolate, and gently fold the peanuts into the chocolate until they are evenly coated. Make sure all the peanuts are fully coated in the melted chocolate, but don’t stir too aggressively, as you don’t want to break the peanuts.
Step 4: Form the Clusters
Using a spoon or a small ice cream scoop, scoop out spoonfuls of the chocolate and peanut mixture and drop them onto the prepared baking sheet. The clusters should be in small clumps, with each scoop containing a mixture of chocolate and peanuts. You can make the clusters as large or small as you like—just make sure they hold together and form a mound shape.
Step 5: Let the Clusters Set
Once you’ve formed the clusters, place the baking sheet in the refrigerator to let the chocolate harden. This will take about 30 minutes to an hour. If you want to speed up the process, you can also place the clusters in the freezer for about 15-20 minutes to set quickly.
Once the chocolate has hardened and the clusters have set, they’re ready to enjoy!
Customizing Your Chocolate Peanut Clusters
While this recipe is delicious as-is, you can make some fun variations based on your preferences. Here are a few ideas to customize your clusters:
Add Other Nuts
If you love the combination of chocolate and nuts, consider adding almonds, cashews, pecans, or even macadamia nuts to your clusters. Roasted nuts give the clusters extra texture and flavor, so don’t be afraid to mix and match.
Add Dried Fruits
For a bit of sweetness, add dried cranberries, raisins, or dried cherries to the mixture. The combination of the tart dried fruits with the rich chocolate and peanuts will give the clusters a new layer of flavor.
Make Them Spicy
If you like a little heat, try adding a sprinkle of cayenne pepper or chili powder to the melted chocolate. The spice will balance the sweetness of the chocolate and peanuts, creating a delicious contrast. A dash of cinnamon can also work well for a warm, aromatic flavor.
Drizzle with White Chocolate
For an extra decorative touch, melt some white chocolate chips and drizzle them over the top of the chocolate peanut clusters once they’ve set. This not only adds a beautiful visual effect but also a delicious contrast in flavor.
Use Different Types of Chocolate
Feel free to experiment with different types of chocolate. You can make these clusters with milk chocolate, dark chocolate, or even white chocolate. For a more intense chocolate flavor, try using bittersweet or semi-sweet chocolate.
Why Chocolate Peanut Clusters Are So Popular
Quick and Easy: The entire recipe only requires three ingredients, and you can make these clusters in under an hour, including the time to set in the fridge.
Perfect for Gifting: These clusters make a fantastic homemade gift. Package them in a cute tin or gift box, and they’ll be a hit during the holidays, birthdays, or any occasion.
A Classic Combination: Chocolate and peanuts are a match made in heaven. The sweet and salty flavor combination is timeless and appeals to almost everyone.
Customizable: You can add your favorite nuts, fruits, or spices to make these clusters uniquely your own. They’re versatile and easy to adapt to different tastes.
No-Bake: Since there’s no baking involved, these clusters are perfect for when you don’t want to turn on the oven or deal with complicated recipes.
Storage Tips
Store your chocolate peanut clusters in an airtight container at room temperature. They should stay fresh for about 2 weeks. If you want to extend their shelf life, you can keep them in the refrigerator for up to a month. To prevent the chocolate from becoming too hard or brittle, ensure they’re stored in a cool, dry place.
You can also freeze the clusters if you want to store them for a longer period. Just make sure to place them in an airtight container or freezer bag. When you’re ready to enjoy them, simply take them out of the freezer and let them sit at room temperature for a few minutes to soften slightly.
Conclusion:
These Chocolate Peanut Clusters are the perfect treat for anyone with a sweet tooth. They’re simple to make, customizable, and utterly delicious. With just three ingredients, you can create a dessert that’s sure to impress your family, friends, and guests. Whether you’re enjoying them during the holidays, as an after-school snack, or as a party treat, these clusters are always a hit.
So, next time you’re in the mood for something sweet, make these irresistible chocolate peanut clusters. You’ll be hooked from the first bite, and it won’t be long before you’re making them again and again! 🍫🥜
Happy snacking, and enjoy your homemade chocolate peanut clusters!
More Recipes You Might Like
-

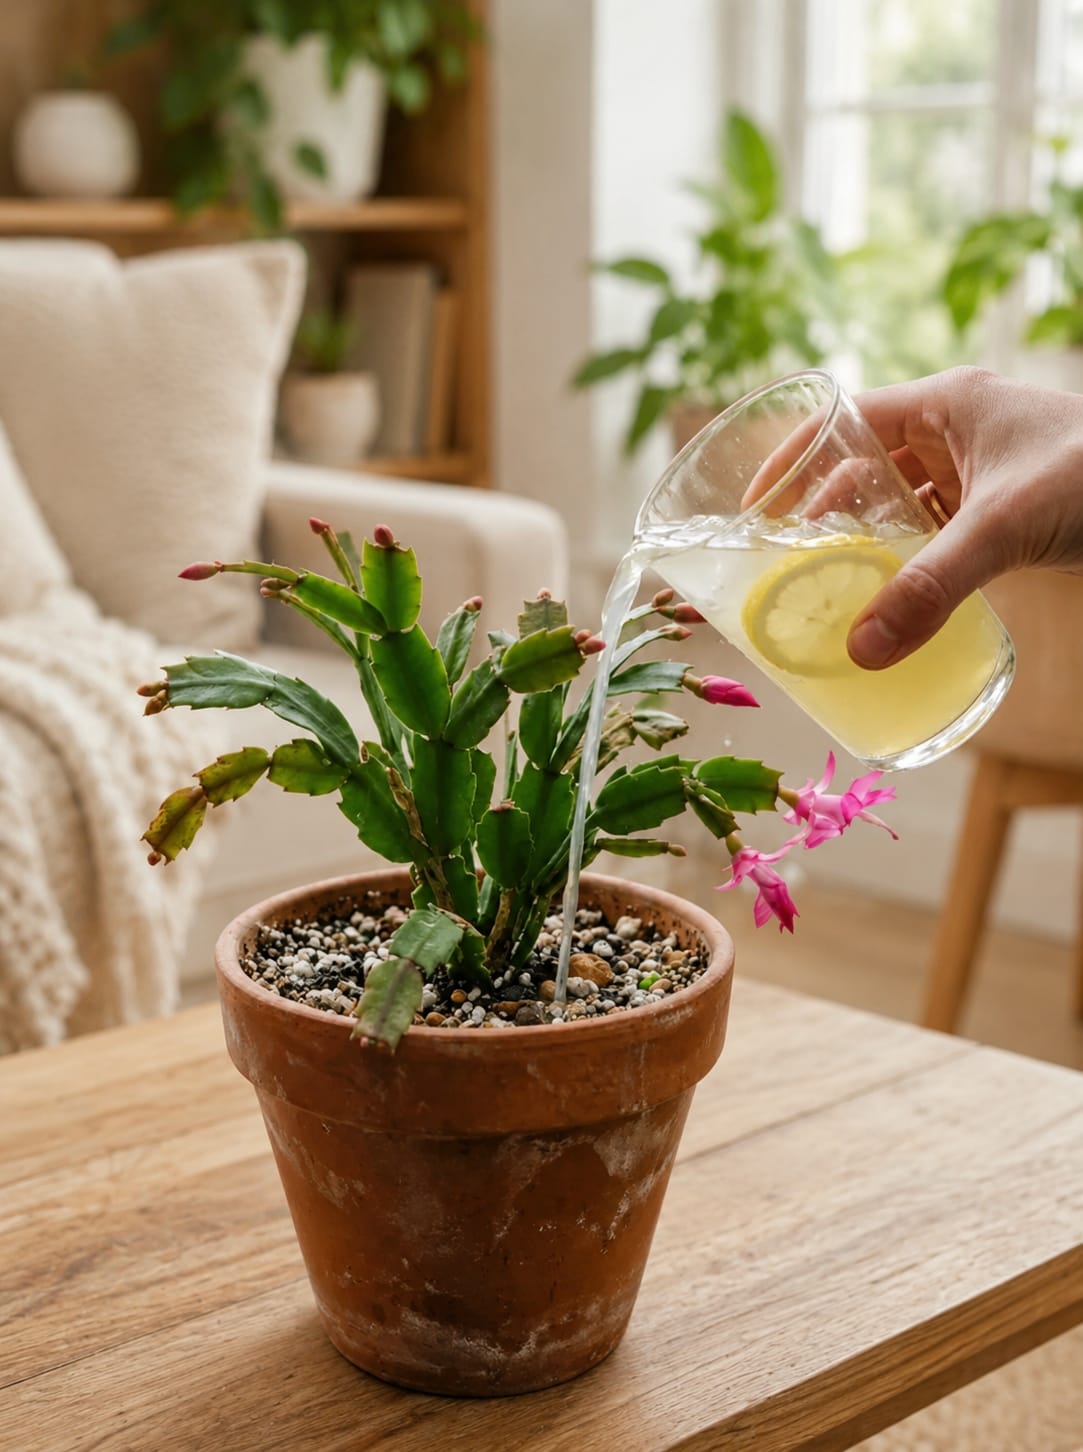
Christmas Cactus Care Guide: How to Use Lemon Water Safely Without Damaging Roots, Buds, or Beautiful Winter Blooms
Christmas cactus is one of the most charming flowering houseplants because it brings color at a time when many other indoor plants are quiet. Its flat green segments, arching shape, and bright flowers make it perfect for windowsills, shelves, hanging baskets, and cozy rooms. When the plant is healthy, the tips can fill with buds…
-

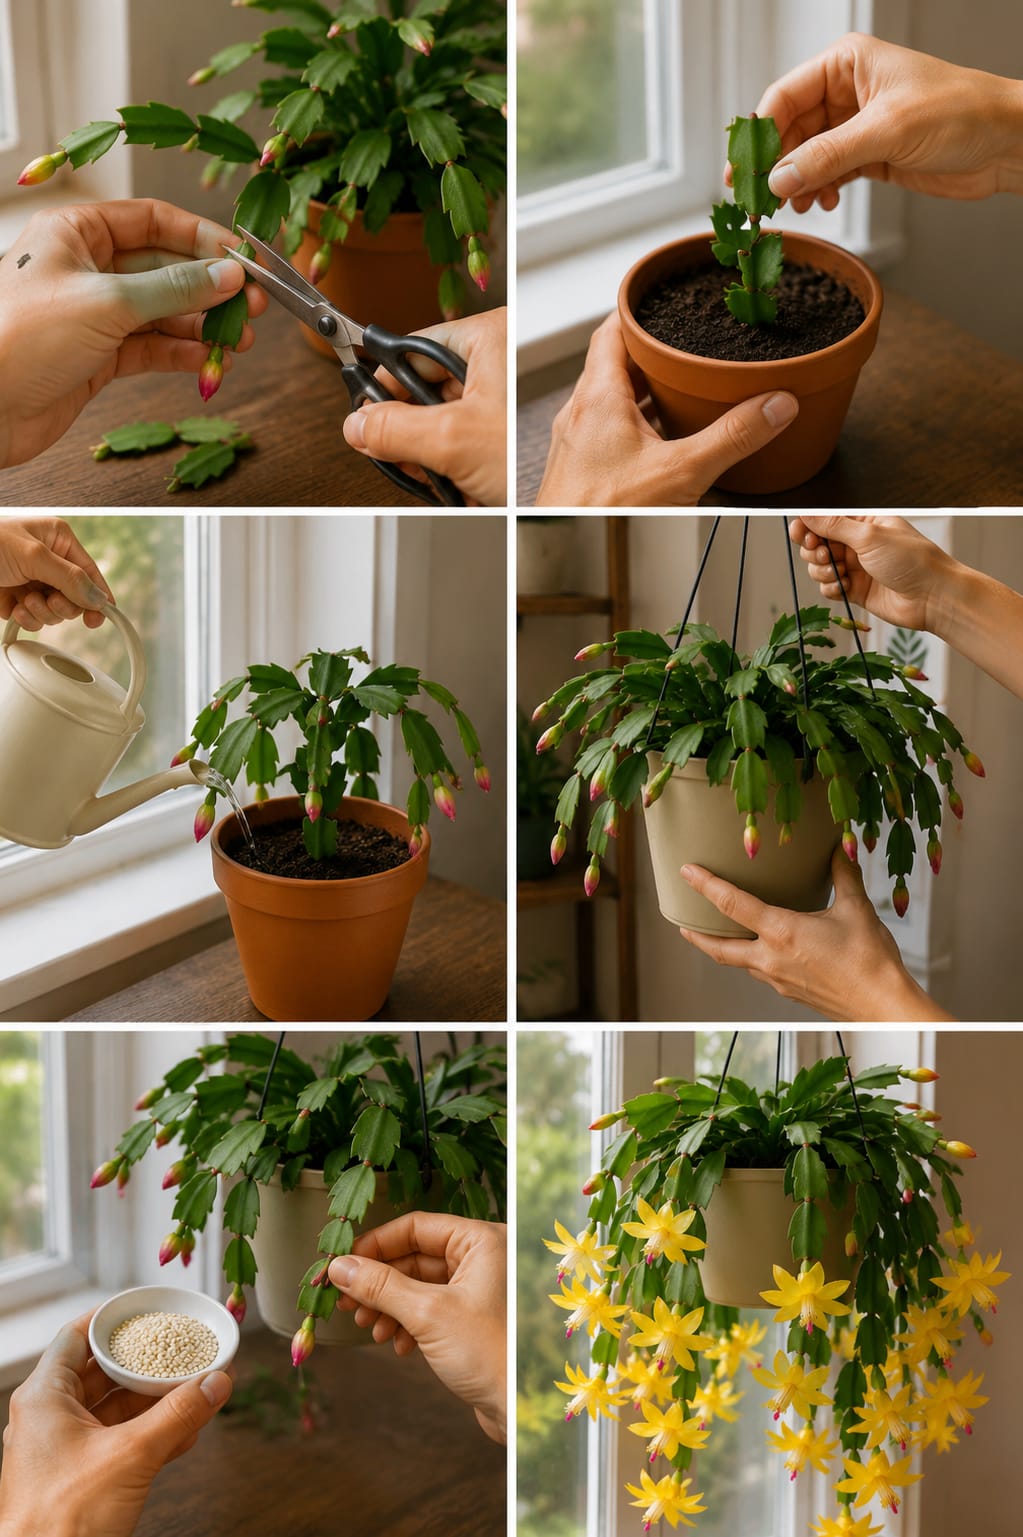
Christmas Cactus Care Guide: How to Grow a Full Hanging Basket With Healthy Segments, Strong Buds, and Bright Flowers
Christmas cactus is one of the most loved flowering houseplants because it can turn a quiet indoor corner into a bright display of color. Its soft green segmented stems hang gracefully over the edge of a pot, and when the plant is happy, the tips fill with buds that open into beautiful flowers. Many people…
-

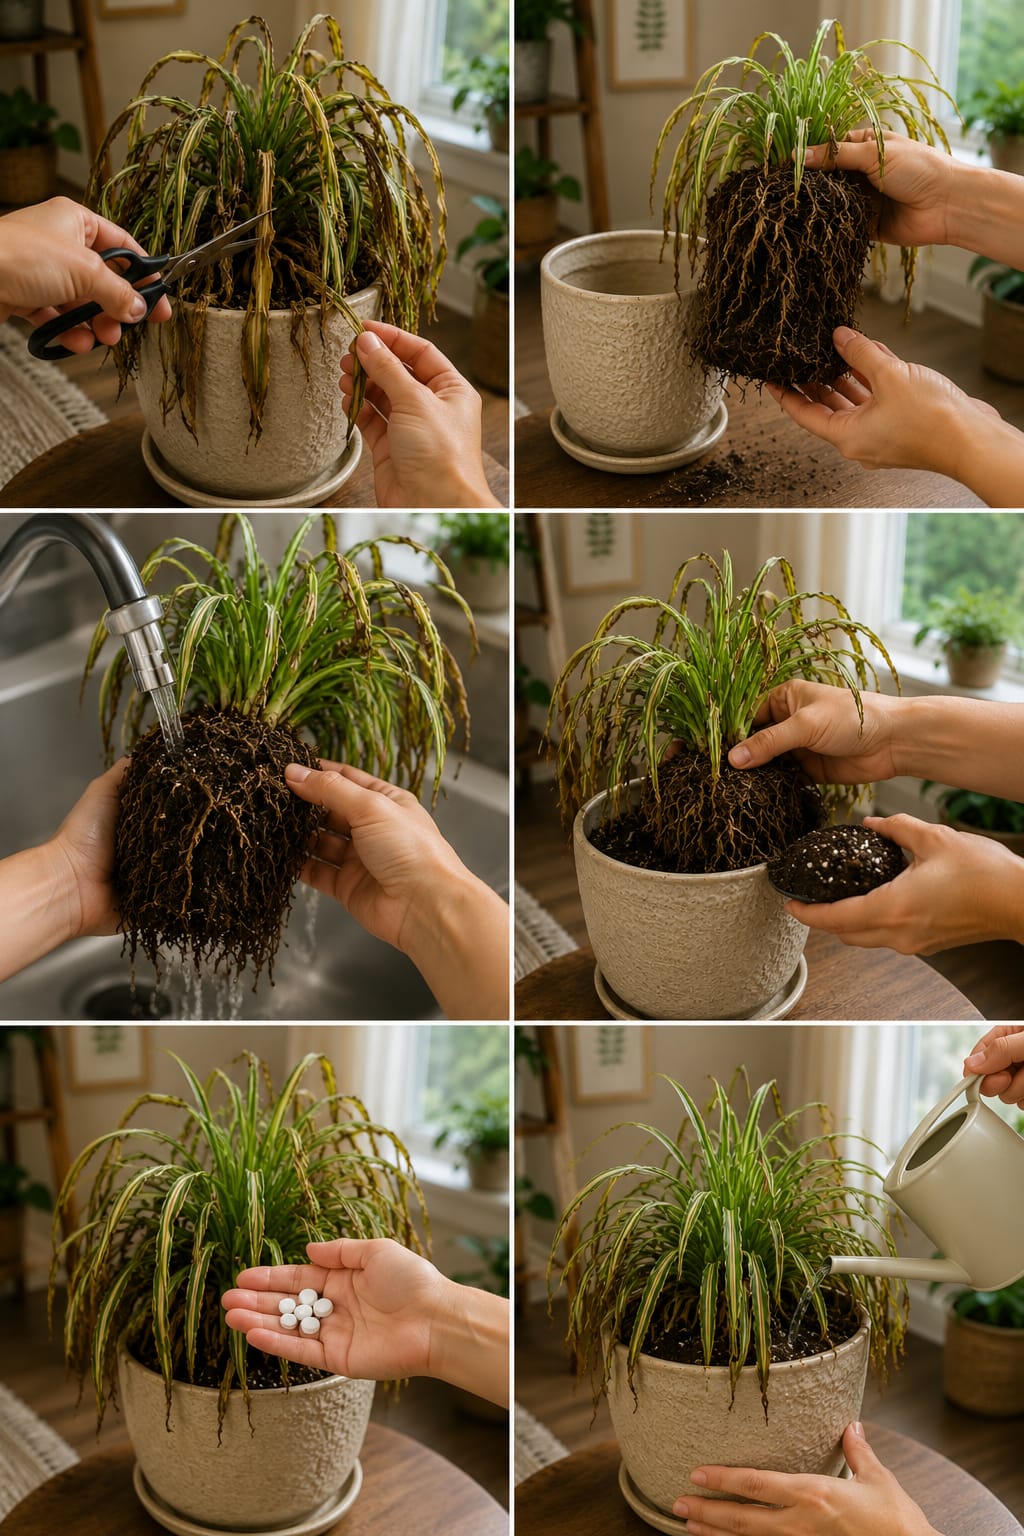
Spider Plant Rescue Guide: How to Revive a Tired Spider Plant With Pruning, Root Care, Fresh Soil, and Safe Watering
Spider plants are usually known as easy, forgiving, and fast-growing houseplants, but even this strong plant can begin to look tired when its roots, soil, water, and light are out of balance. The image shows a struggling spider plant with drooping leaves, brown tips, dry edges, and weak growth being rescued step by step. The…