There’s nothing quite like the taste and smell of fresh, homemade bread. And when it comes to sandwich bread, the golden, soft, and slightly tangy flavor of sourdough takes it to the next level. After making your own sourdough sandwich bread for the first time, you’ll never want to buy store-bought loaves again. The beauty of sourdough is in its depth of flavor, and when you bake it yourself, you have full control over the texture, taste, and freshness.
In this article, we’ll guide you through the process of making delicious sourdough sandwich bread, from preparing the dough to perfecting that glossy, golden crust. Whether you’re an experienced baker or just starting out, this recipe will make your homemade bread dreams come true.
1. Why Sourdough Sandwich Bread?
Sourdough sandwich bread is the ideal choice for a few reasons. It combines the tangy, slightly complex flavor of sourdough with the soft, airy texture needed for a perfect sandwich. The natural fermentation process of sourdough gives it a unique flavor profile and improves its texture. Plus, homemade sourdough bread is free from preservatives and additives, so you get a fresher, healthier option compared to store-bought varieties. Once you try it, you’ll never go back to pre-sliced bread!
2. Ingredients for Sourdough Sandwich Bread
Making sourdough sandwich bread requires just a few basic ingredients, but each one plays a vital role in creating that perfect loaf. Here’s what you’ll need:
Sourdough starter: This is the key to getting that tangy flavor. You can make your own starter or use a store-bought one.
All-purpose flour: Provides the structure of the bread and contributes to its soft texture.
Water: Hydrates the dough and activates the yeast in the sourdough starter.
Salt: Enhances the flavor and helps with the structure of the bread.
Sugar: A small amount of sugar helps feed the yeast and promotes better fermentation.
Olive oil (optional): Adds moisture and helps keep the bread soft.
3. How to Make the Dough for Sourdough Sandwich Bread
Making the dough for sourdough bread is simple, but requires patience. Here’s the step-by-step guide to get started:
Activate the starter: If you’re using a refrigerated starter, make sure to feed it 12 hours before you plan to bake. You’ll need an active, bubbly starter for the best rise.
Mix the ingredients: In a large bowl, combine your sourdough starter, flour, water, salt, and sugar. Stir everything together until the dough forms a shaggy mass.
Knead the dough: Turn the dough onto a floured surface and knead for about 10 minutes until it becomes smooth and elastic. If you’re using a stand mixer, you can knead it with the dough hook on medium speed for about 6-7 minutes.
Let it rest: Place the dough in a lightly greased bowl, cover it with a damp towel or plastic wrap, and let it rise for about 4-6 hours at room temperature or until it has doubled in size.
4. Shaping the Dough into a Loaf
Once the dough has risen, it’s time to shape it into a loaf. Here’s how to do it:
Punch down the dough: Gently deflate the dough to release any trapped air bubbles.
Shape the loaf: Roll the dough into a tight log shape, ensuring the edges are tucked in neatly. This will help give your loaf its desired sandwich shape.
Place the dough in a loaf pan: Grease a 9×5-inch loaf pan and place the shaped dough inside. Cover the pan with a damp towel and let it rise again for 2-3 hours, or until the dough has risen just above the top of the pan.
5. Baking Your Sourdough Sandwich Bread
The key to achieving a perfect crust on your sourdough sandwich bread is baking it at the right temperature. Here’s how to bake your loaf:
Preheat your oven: Preheat your oven to 375°F (190°C).
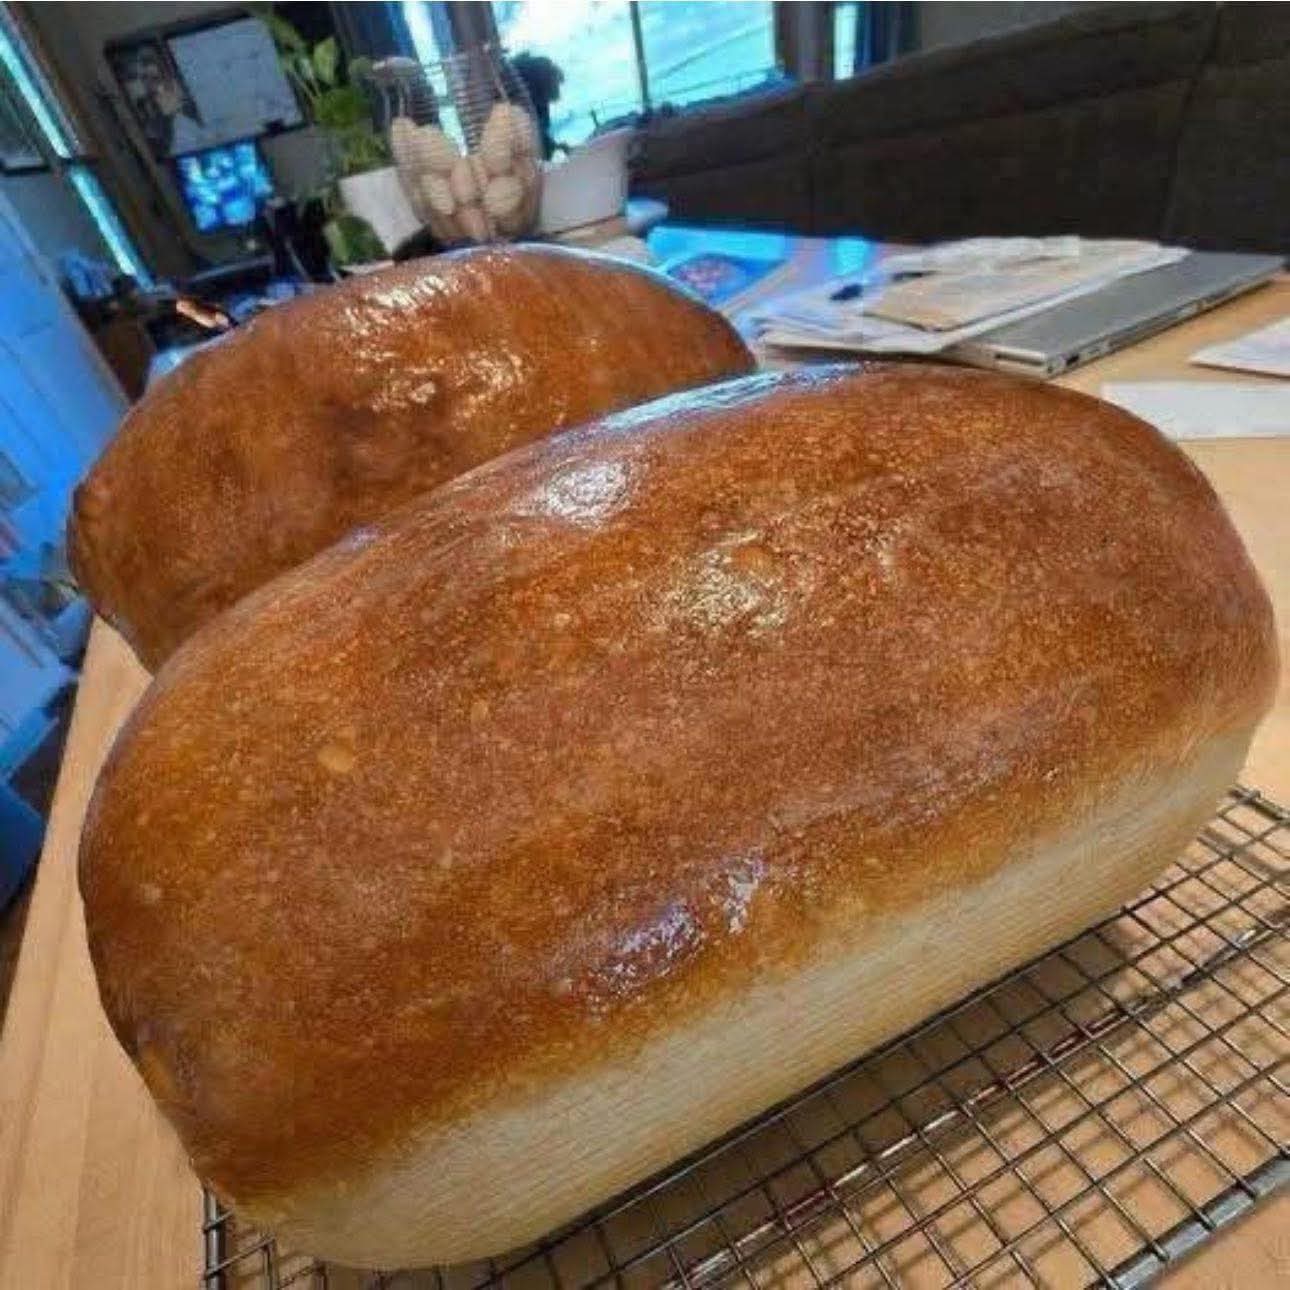
Bake the bread: Place the loaf pan in the oven and bake for 30-35 minutes, or until the bread is golden brown on top and sounds hollow when tapped on the bottom. For a glossy finish, you can brush the top with melted butter during the last 10 minutes of baking.
Cool the bread: Once baked, remove the bread from the pan and place it on a wire rack to cool completely. This step ensures the bread has the perfect texture and isn’t too moist on the inside.
6. Perfecting the Texture and Crust
To get the perfect texture and golden crust, follow these tips:
Hydration is key: Be mindful of the amount of water you add to the dough. It should be sticky but not overly wet. Adjust the flour or water if needed to achieve the right consistency.
Slashing the top: Before baking, you can score the top of the loaf with a sharp knife to allow for even expansion while it bakes.
Let it cool fully: It’s tempting to slice the bread right out of the oven, but letting it cool completely helps the interior set and enhances its texture.
7. Why You’ll Never Buy Sandwich Bread Again
Once you’ve made your first batch of sourdough sandwich bread, you’ll quickly realize how easy and rewarding it is to make at home. The taste is unmatched—rich, tangy, and perfectly soft in the middle with a crunchy crust. Plus, you’ll never have to deal with the preservatives or additives found in store-bought bread. Homemade sourdough is more nutritious and flavorful, and you can customize it to your liking.
8. Serving Suggestions for Sourdough Sandwich Bread
Now that you’ve got a fresh loaf of sourdough sandwich bread, here are some delicious ways to enjoy it:
Classic sandwiches: This bread is perfect for making hearty sandwiches. Try it with your favorite deli meats, cheeses, and veggies for a satisfying lunch.
French toast: Slice the bread thick and make a delicious batch of French toast for breakfast or brunch.
Toast with butter: For a simple and delicious snack, toast a slice and spread with butter or jam.
Bread and butter pudding: Use this sourdough to create a rich, comforting bread and butter pudding.
9. Storing Leftover Sourdough Sandwich Bread
If you happen to have leftover bread, store it in a breadbox or airtight container at room temperature for up to 3 days. For longer storage, you can freeze slices of the bread. Simply wrap the slices in plastic wrap and aluminum foil and store them in a freezer-safe bag. Thaw the slices at room temperature or toast them directly from frozen.
10. Final Thoughts: The Joy of Homemade Sourdough Sandwich Bread
Baking your own sourdough sandwich bread is not only rewarding, but it also fills your kitchen with the most delicious aromas. The slightly tangy flavor and perfect texture make it an ideal bread for sandwiches, toast, and more. Once you perfect this recipe, you’ll be making it regularly, and you’ll never go back to store-bought bread again. So, gather your ingredients and get baking—your homemade sourdough bread is waiting!
This article offers a step-by-step guide to making the perfect sourdough sandwich bread, from ingredients to baking tips, and emphasizes why it’s worth trying to make it yourself.
More Recipes You Might Like
-

Why Some Homeowners Are Using Onion Water Around Orchids and What Usually Helps More for Strong Roots, Healthy Leaves, and Long-Lasting Blooms
Orchids are among the most elegant indoor flowering plants for homeowners who want graceful stems, glossy green leaves, long-lasting blooms, and a refined decorative display that fits beautifully in living rooms, bedrooms, apartments, home offices, bright kitchens, windowsills, covered patios, commercial interiors, luxury home staging, and premium indoor plant styling. A healthy orchid can turn…
-

Why Some Homeowners Are Pouring Aloe Water Around Orchids and What Usually Helps More for Strong Roots, Healthy Leaves, and Long-Lasting Blooms
Orchids are among the most elegant indoor flowering plants for homeowners who want graceful blooms, sculptural roots, glossy leaves, and a premium decorative display that fits beautifully in living rooms, bedrooms, apartments, home offices, bright kitchens, balcony gardens, covered patios, commercial interiors, luxury home staging, and refined indoor plant styling. A healthy orchid can make…
-
Why Some Homeowners Are Adding Brown Powder Around Snake Plants and What Usually Helps More for Strong Roots, Fuller Growth, and Healthy Indoor Leaves
Snake plant is one of the most dependable indoor plants for homeowners who want strong upright leaves, bold green patterning, yellow-edged variegation, easy maintenance, and a clean decorative display that fits beautifully in living rooms, bedrooms, apartments, home offices, bright kitchens, entry corners, sunny windowsills, plant shelves, commercial interiors, luxury home staging, and premium indoor…


