There is a particular kind of culinary magic that happens in the space where flour, yeast, butter, and time come together. It’s the magic of a warm, homey kitchen filled with the irresistible, earthy scent of baking bread. And at the heart of that magic sits the humble, glorious Old-Fashioned Soft and Buttery Yeat Roll.
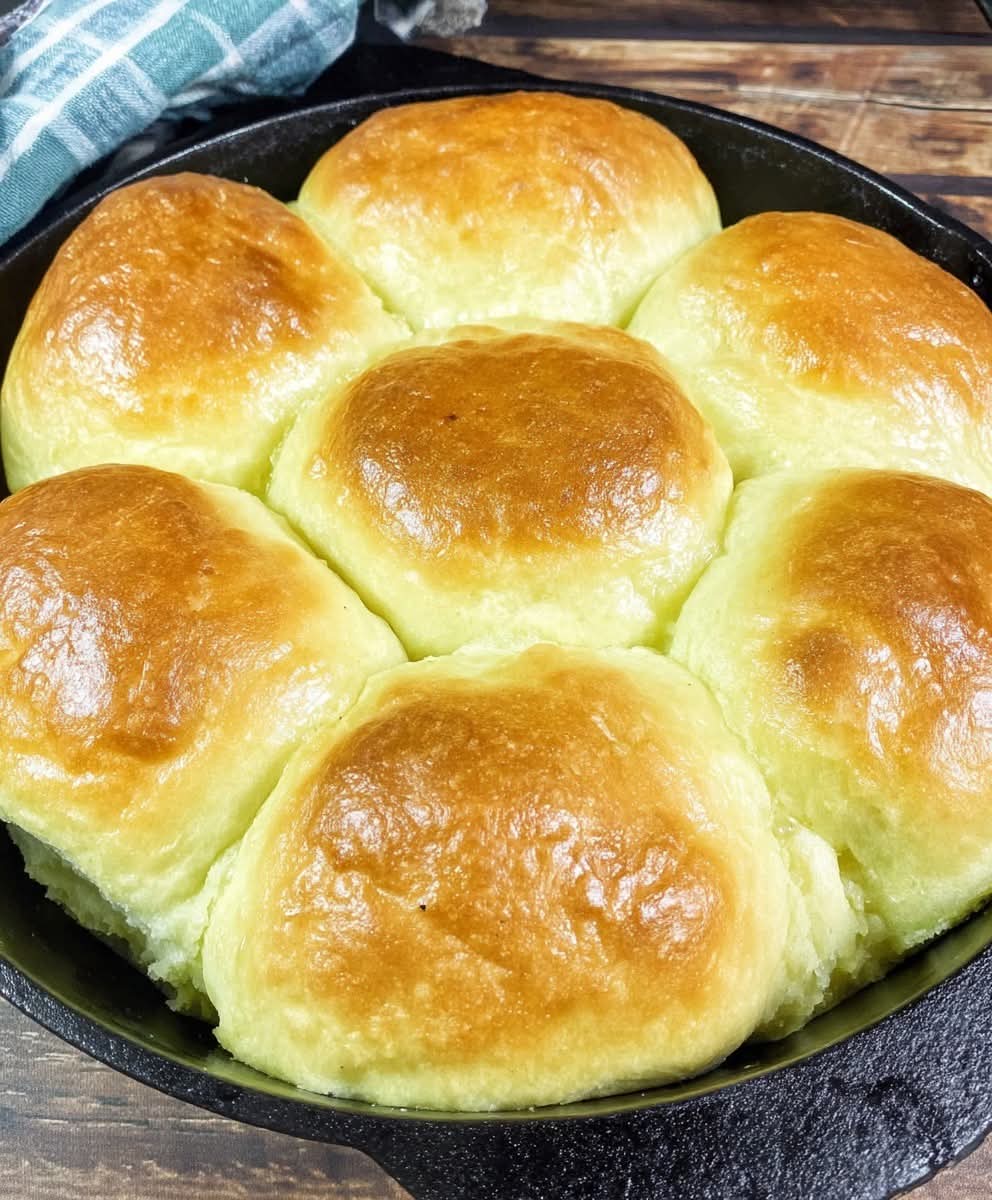
This isn’t just a dinner roll. This is a pillow of comfort, a cloud of buttery goodness, a tender, tearable masterpiece that evokes memories of grandmother’s kitchen, holiday feasts, and Sunday suppers. The exterior is delicately golden and just slightly firm, giving way to an interior so soft, fluffy, and moist it practically melts in your mouth.
Achieving this perfect texture—soft yet structured, rich but not heavy—is an art rooted in simple, time-honored techniques. This recipe is your foolproof guide to recreating that nostalgic, bakery-quality roll at home. We’ll walk through the science of yeast, the importance of patience, and the secrets to that signature buttery flavor and feather-light crumb. Let’s bake a batch of warmth and tradition.
Why This Recipe is the Ultimate Comfort Bake
Before we measure our flour, let’s talk about what makes this specific recipe a timeless classic.
· Unbeatable, Nostalgic Texture: The combination of specific ingredients and techniques yields a roll that is supremely soft the day you bake it and stays soft for days. It’s the epitome of a soft homemade dinner roll.
· The Rich, Signature Flavor: With butter in the dough, brushed on top, and often served with more on the side, these rolls are a celebration of rich, savory flavor. They are the definition of buttery yeast rolls.
· A Foundation for Mastery: Learning to make these rolls teaches you fundamental baking skills—activating yeast, kneading, proofing, shaping—that unlock a world of homemade bread.
· The Heart of Hospitality: Nothing says “welcome” or “I care” like presenting a basket of warm, homemade rolls. They are the ultimate comfort food side dish for any meal, from weeknight dinners to holiday banquets.
· Surprisingly Approachable: While yeast can intimidate, this recipe is detailed and forgiving. With a little patience and attention, even a first-time baker can achieve spectacular results.
The Science of Softness: Understanding the Ingredients’ Roles
The perfect soft roll is a careful balance. Let’s break down why each component is essential:
· Bread Flour: While all-purpose flour works, bread flour has a higher protein (gluten) content. This creates a stronger, more elastic network that can trap the gases released by the yeast, leading to a better rise and a chewier, yet still soft, structure.
· Instant Yeast: Our reliable leavening agent. “Instant” means it can be mixed directly into the dry ingredients, no proofing in water needed. It’s forgiving and consistent.
· Milk & Butter: The Tenderizers. These are the keys to softness. The fat in butter and milk coats the gluten strands, preventing them from forming an overly tight, tough network. Using whole milk and real, unsalted butter is non-negotiable for flavor and texture.
· Eggs: The Enricher. Eggs add richness, color, and help tenderize the crumb further. They also contribute to a beautiful, golden-brown crust.
· Sugar & Salt: The Flavor Balancers. Sugar feeds the yeast, promotes browning, and adds a subtle sweetness that balances the salt. Salt controls yeast activity and is crucial for enhancing all the other flavors.
Gathering Your Ingredients: The Foundation of Flavor
For the best results, use high-quality, fresh ingredients. Here’s what you’ll need for the perfect batch of easy homemade yeast rolls:
For the Dough:
· 4 ½ – 5 cups (540-600g) Bread Flour (plus more for dusting)
· ⅓ cup (67g) Granulated Sugar
· 2 packets (4 ½ tsp) Instant Yeast
· 1 ½ tsp Fine Sea Salt
· 1 cup (240ml) Whole Milk, warmed to about 110°F (43°C)
· ½ cup (120ml) Water, warmed to about 110°F (43°C)
· ⅓ cup (75g) Unsalted Butter, melted and slightly cooled
· 2 Large Eggs, at room temperature
For the Topping:
· 3 tbsp Unsalted Butter, melted
· Flaky Sea Salt (optional)
Step-by-Step Instructions: The Path to Perfect Rolls
Follow these steps carefully, respecting the time the dough needs to rest and rise. This is not a rushed process, and that’s where the magic happens.
Step 1: Combine the Dry Ingredients
In the bowl of a stand mixer fitted with a dough hook, whisk together 4 ½ cups of the bread flour, sugar, instant yeast, and salt.
Step 2: Create the Wet Mixture
In a separate bowl or large measuring cup, combine the warmed milk and water. Ensure the liquid is just warm to the touch (like bathwater), not hot, as high heat can kill the yeast. Whisk in the ⅓ cup of melted butter and the two eggs until smooth.
Step 3: Mix the Dough
With the mixer on low speed, gradually pour the wet ingredients into the dry ingredients. Mix until a shaggy dough forms. Increase the speed to medium and knead for 5-7 minutes. The dough should clear the sides of the bowl and form a smooth, slightly tacky ball. If it’s excessively sticky, add the remaining ½ cup of flour, one tablespoon at a time, until it reaches the right consistency.
Step 4: The First Rise (Bulk Fermentation)
Turn the dough out onto a lightly floured surface and shape it into a smooth ball. Place it in a large, lightly greased bowl. Cover the bowl tightly with plastic wrap or a damp kitchen towel.
Let the dough rise in a warm,draft-free place until it has doubled in size. This typically takes 1 to 1 ½ hours. The time is less important than the visual cue.
Step 5: Shape the Rolls
Punch down the risen dough to release the air. Turn it out onto a lightly floured surface. Divide the dough into 15 equal pieces (about 70-75g each if you want to use a scale).
To shape classic round rolls:cup your hand over a piece of dough and roll it in a tight, circular motion on an un-floured part of your counter until the top is smooth and taut. Place the shaped rolls into a generously buttered 9×13 inch baking pan, spacing them so they are just touching.
Step 6: The Second Rise (Proofing)
Cover the pan again with plastic wrap or a towel. Let the shaped rolls rise a second time until they are puffy and have filled the pan, about 30-45 minutes. They should look like pillowy clouds and will spring back slowly when gently poked.
Step 7: Bake to Golden Perfection
While the rolls proof, preheat your oven to 375°F (190°C).
Once proofed,bake the rolls for 18-22 minutes, or until the tops are a deep, golden brown and the internal temperature registers 190°F (88°C) on an instant-read thermometer.
Step 8: The Buttery Finish
As soon as the rolls come out of the oven, brush the tops generously with the 3 tablespoons of melted butter. This gives them a gorgeous shine, adds another layer of flavor, and keeps the crust soft. Sprinkle with flaky sea salt if desired.
Step 9: Serve Warm
Let the rolls cool in the pan for about 5 minutes before serving. They are best served warm, with extra butter on the side.
Expert Tips & Troubleshooting for Flawless Rolls
· Creating a Warm Proofing Spot: If your kitchen is cool, create a warm spot. Turn your oven on to its lowest setting (about 200°F) for one minute, then TURN IT OFF. Place the covered bowl or pan in the warm, turned-off oven to rise.
· How to Tell When Dough is Kneaded Enough: Perform the “Windowpane Test.” Take a small piece of dough and gently stretch it. If you can stretch it thin enough to see light through it without it tearing immediately, the gluten is well-developed.
· My Dough Didn’t Rise:
· Yeast was old or killed: Always check the expiration date. Ensure your liquids are warm, not hot.
· Environment was too cold: Use the warm oven method described above.
· For Ultra-Soft Rolls (The Tangzhong Method): For an even softer crumb that stays moist for days, use a Japanese technique called Tangzhong. Before you start, cook 3 tablespoons of the recipe’s bread flour with ½ cup of the recipe’s water into a thick paste. Let it cool, then add it with the wet ingredients. This gelatinizes the starches, resulting in an unbelievably tender roll.
· Make-Ahead Instructions: You can prepare the dough through the first rise, punch it down, then cover and refrigerate it overnight. The next day, let it sit at room temp for 30 minutes, then shape, proof, and bake.
Serving Suggestions: Beyond the Bread Basket
While these rolls are sublime on their own, they are incredibly versatile.
· The Ultimate Holiday Side: Serve with Thanksgiving dinner or Christmas ham to soak up all the glorious sauces and gravies.
· Slider Buns: Use them as soft, homemade buns for pulled pork, sloppy joes, or burgers.
· Breakfast Treats: Split and toast them, then slather with jam or use for breakfast sandwiches.
· Bread Pudding Base: Stale rolls make the most decadent, rich bread pudding.
Storage and Reheating Guide
· Storage: Once completely cool, store rolls in an airtight container or plastic bag at room temperature for up to 3 days.
· Freezing: These rolls freeze beautifully. Place cooled rolls in a freezer-safe bag for up to 3 months. Thaw at room temperature.
· Reheating: To restore that fresh-from-the-oven warmth and softness, wrap rolls in aluminum foil and warm in a 350°F oven for 10 minutes. For a single roll, microwaving for 10-15 seconds works in a pinch.
Frequently Asked Questions (FAQ)
Q: Can I make these by hand without a stand mixer?
A:Absolutely! Mix with a wooden spoon until it becomes too difficult, then turn out onto a floured surface and knead by hand for 8-10 minutes until smooth and elastic.
Q: Can I use all-purpose flour instead of bread flour?
A:Yes, but the rolls will be slightly less chewy and may not rise as high. The texture will be a bit more cake-like but still delicious.
Q: Why are my rolls dense and heavy?
A:The most common causes are: 1) Using old or dead yeast, 2) Letting the dough over-proof (it collapses on itself), or 3) Adding too much flour during kneading, making the dough too stiff.
Q: Can I make these into different shapes?
A:Of course! Shape them into knots, cloverleaf rolls (three small balls in a muffin tin), or crescent rolls by rolling the dough into a circle, cutting it into triangles, and rolling them up.
Q: Are these the same as Parker House rolls?
A:Similar, but classic Parker House rolls are folded over with a butter-brushed crease. The dough and soft texture are nearly identical. You can easily adapt this recipe by rolling the dough out, cutting it into rounds, brushing with butter, folding, and baking.
There you have it—the complete guide to baking Old-Fashioned Soft and Buttery Yeast Rolls. This recipe is more than just instructions; it’s an invitation to slow down, connect with a timeless tradition, and create edible warmth to share with those you love. The process is therapeutic, the results are deeply rewarding, and the first bite of a warm roll, fresh from your own oven, is pure, unadulterated joy.
Now, it’s your turn! Have you baked these rolls? What’s your favorite way to shape or serve them? Share your baking triumphs and photos in the comments below!
More Recipes You Might Like
-

Why Some Homeowners Are Using Onion Water Around Orchids and What Usually Helps More for Strong Roots, Healthy Leaves, and Long-Lasting Blooms
Orchids are among the most elegant indoor flowering plants for homeowners who want graceful stems, glossy green leaves, long-lasting blooms, and a refined decorative display that fits beautifully in living rooms, bedrooms, apartments, home offices, bright kitchens, windowsills, covered patios, commercial interiors, luxury home staging, and premium indoor plant styling. A healthy orchid can turn…
-

Why Some Homeowners Are Pouring Aloe Water Around Orchids and What Usually Helps More for Strong Roots, Healthy Leaves, and Long-Lasting Blooms
Orchids are among the most elegant indoor flowering plants for homeowners who want graceful blooms, sculptural roots, glossy leaves, and a premium decorative display that fits beautifully in living rooms, bedrooms, apartments, home offices, bright kitchens, balcony gardens, covered patios, commercial interiors, luxury home staging, and refined indoor plant styling. A healthy orchid can make…
-
Why Some Homeowners Are Adding Brown Powder Around Snake Plants and What Usually Helps More for Strong Roots, Fuller Growth, and Healthy Indoor Leaves
Snake plant is one of the most dependable indoor plants for homeowners who want strong upright leaves, bold green patterning, yellow-edged variegation, easy maintenance, and a clean decorative display that fits beautifully in living rooms, bedrooms, apartments, home offices, bright kitchens, entry corners, sunny windowsills, plant shelves, commercial interiors, luxury home staging, and premium indoor…


