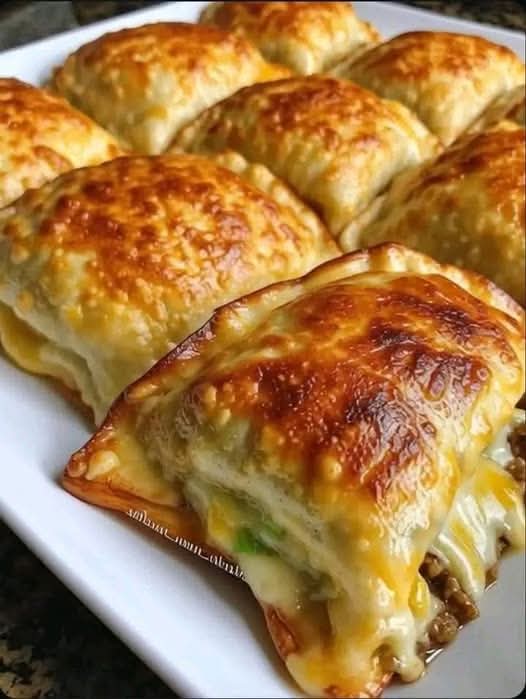
Imagine this: you take a flaky, golden-brown, buttery parcel of puff pastry, still warm from the oven. You break it open, and a rush of aromatic steam escapes, revealing a bubbling, hearty filling of perfectly seasoned ground beef, melty cheese, and savory vegetables. That, in one perfect handheld package, is the Cheesy Beef Puff Pastry Pocket. It’s a gourmet hot pocket, a savory turnover, and the most satisfying lunch, dinner, or snack you can make with minimal effort.
This recipe is the epitome of smart, delicious cooking. It leverages the magic of store-bought puff pastry to create a meal that looks and tastes like it came from a professional bakery. The contrast between the crisp, shattering layers of pastry and the rich, cheesy beef filling is nothing short of divine. Best of all, these pockets are incredibly versatile—perfect for a quick family dinner, a crowd-pleasing party appetizer, or a freezer-friendly meal prep lifesaver.
Whether you’re cooking for picky kids, needing a portable lunch, or simply craving a deeply satisfying comfort food fix, this recipe is your answer. Let’s dive into the simple art of creating these irresistible savory pockets.
Why This Recipe is a Weeknight Game-Changer
Before we brown the beef, let’s talk about what makes this recipe a permanent addition to your culinary arsenal.
· Unbeatable Convenience & Elegance: Using pre-made puff pastry is the ultimate shortcut to an impressive result. In under an hour, you transform simple ingredients into a meal that feels special.
· Perfect Portability: These are self-contained, mess-free, and delicious warm or at room temperature. They are ideal for lunchboxes, picnics, road trips, and on-the-go meals.
· Endlessly Customizable: The filling is a blank canvas. Swap beef for ground turkey, chicken, or lentils. Change up the cheese and veggies. It’s a fantastic clean-out-the-fridge recipe.
· Crowd-Pleasing for All Ages: The familiar flavors of seasoned beef and melted cheese are a universal win. Serve them whole for dinner or cut them into smaller triangles for the perfect party appetizer.
· Master Your Freezer: These pockets freeze beautifully before or after baking, giving you a stash of homemade “fast food” that’s miles better than anything from the freezer aisle.
The Secret to the Perfect Pocket: Puff Pastry Mastery
The star of the show is, without a doubt, the puff pastry. Here’s how to ensure it works its flaky magic:
· Keep It Cold: Puff pastry’s hundreds of delicate layers are created by folding butter into dough. If the butter melts before baking, you lose the flakiness. Work quickly and return the pastry to the fridge if it becomes soft.
· Thaw Properly: The best way is to thaw it overnight in the refrigerator. If you’re short on time, leave it on the counter for 30-40 minutes—just until it’s pliable but still cold.
· Seal It Tight: A good egg wash seal is non-negotiable. It acts as glue, preventing the pockets from bursting open and letting all the cheesy goodness escape in the oven.
· Vent Steam: Cutting a small slit or two in the top of each pocket is crucial. It allows steam to escape, preventing a soggy bottom and ensuring the pastry puffs up properly.
Gathering Your Ingredients: Simple Staples, Spectacular Result
This recipe is wonderfully adaptable. Here’s the classic blueprint.
For the Savory Beef Filling:
· 1 tbsp Olive Oil
· 1 lb Ground Beef (85/15 or 90/10 blend)
· 1 small Yellow Onion, finely diced
· 2 cloves Garlic, minced
· 1 tsp Dried Oregano
· 1 tsp Smoked Paprika
· ½ tsp Garlic Powder
· 1 tbsp Tomato Paste
· 1 tbsp Worcestershire Sauce
· Salt and Black Pepper to taste
· 1 cup shredded Cheese (a mix of cheddar and mozzarella is perfect)
· 2 tbsp Fresh Parsley, chopped
For Assembly & Baking:
· 1 box (2 sheets) Frozen Puff Pastry, thawed
· 1 large Egg, beaten with 1 tbsp water (for egg wash)
· Sesame seeds or Everything Bagel Seasoning for topping (optional)
Step-by-Step Instructions: Crafting Your Perfect Pockets
Follow these steps for beautifully sealed, golden-brown, and flaky pockets every time.
Step 1: Make the Filling
In a large skillet, heat olive oil over medium-high heat. Add the ground beef and onion. Cook, breaking up the beef with a spatula, until the beef is browned and the onion is soft (about 5-7 minutes). Drain any excess fat.
Add the minced garlic, oregano, paprika, and garlic powder. Cook for 1 minute until fragrant.
Stir in the tomato paste and Worcestershire sauce. Cook for another minute.
Remove from heat. Stir in the shredded cheese and fresh parsley. Season generously with salt and pepper. Let the filling cool completely before assembling. (A warm filling will melt the pastry butter and make it soggy.)
Step 2: Prepare the Pastry
Preheat your oven to 400°F (200°C). Line two baking sheets with parchment paper.
On a lightly floured surface, unfold one sheet of thawed puff pastry. Roll it out slightly to smooth any seams and create a rectangle about 10×12 inches.
Using a knife or pizza cutter, cut the sheet into 4 equal rectangles.
Step 3: Fill and Seal the Pockets
Place a heaping ¼ cup of the cooled beef filling onto one half of each rectangle, leaving a ½-inch border.
Brush the exposed borders lightly with the egg wash.
Fold the empty half of the pastry over the filling to create a rectangle. Press the edges firmly with your fingers to seal.
Crimp for Security: Use the tines of a fork to press down all around the sealed edges. This creates a classic, decorative seal that also ensures it’s airtight.
Transfer the sealed pockets to the prepared baking sheet. Repeat with the second sheet of pastry.
Step 4: Finish and Bake
Brush the tops of each pocket generously with the remaining egg wash. This gives them a deep golden, glossy finish.
Using a sharp knife, cut 2-3 small slits in the top of each pocket to allow steam to escape.
Sprinkle with sesame seeds or seasoning, if using.
Bake for 18-22 minutes, or until the pockets are puffed and a deep, golden brown all over.
Step 5: The Crucial Rest
Remove from the oven and let the pockets cool on the baking sheet for at least 5 minutes before serving. The filling will be molten lava hot straight out of the oven!
Expert Tips & Troubleshooting for Flawless Pockets
· The #1 Rule: Cool Filling. This cannot be overstated. A hot filling will ruin the pastry layers before they even hit the oven.
· Prevent Sogginess: Ensure your beef mixture isn’t too wet. Draining excess fat and letting the tomato paste cook out are key steps. If using vegetables like mushrooms, sauté them first to release water.
· Seal Tight, Bake Right: If your seal fails and a pocket bursts, it’s usually because the edges weren’t sealed well enough with egg wash, or the fork crimping wasn’t firm. Don’t rush this step.
· Customize Your Fillings:
· Philly Cheesesteak: Use sliced steak, sautéed peppers and onions, and provolone.
· Pizza Pocket: Use pepperoni, marinara, and mozzarella.
· Breakfast Pocket: Scrambled eggs, cooked sausage, and cheddar.
· Make Them Mini: For perfect party appetizers, cut each pastry sheet into 9 squares instead of 4. Fill with a tablespoon of filling and bake for 12-15 minutes.
Serving Suggestions
· For Dinner: Serve with a simple side salad or a bowl of tomato soup for dipping.
· For Lunch: Pack in a lunchbox with a piece of fruit—they’re great at room temperature.
· For a Party: Slice the large pockets in half diagonally or serve the mini versions on a platter with a side of ranch or marinara for dipping.
Storage, Freezing, and Reheating
· Refrigeration: Store baked leftovers in an airtight container in the fridge for up to 3 days.
· Freezing (Unbaked): This is the best method! Assemble pockets completely, place them on a parchment-lined tray, and freeze until solid. Then transfer to a freezer bag. Bake from frozen, adding 5-8 minutes to the bake time.
· Reheating: Reheat in a 350°F oven for 10-12 minutes until crisp and hot. Avoid the microwave, which will make the pastry soft.
Frequently Asked Questions (FAQ)
Q: Can I use pie crust instead of puff pastry?
A:You can, but the result will be different. Pie crust is more tender and crumbly, while puff pastry is airy and flaky. Both are delicious, but puff pastry creates that classic, impressive “pocket” texture.
Q: My pastry didn’t puff much. What happened?
A:The pastry may have gotten too warm before baking, causing the butter layers to melt together. Ensure everything is cold, and your oven is fully preheated.
Q: Can I make these gluten-free or low-carb?
A:Yes! Use a gluten-free puff pastry (available in some stores). For low-carb, you could use fathead dough or a low-carb tortilla as a wrap instead, though it won’t be a true puff pastry pocket.
Q: What’s the best way to reheat these to keep them crispy?
A:Always use the oven or a toaster oven. The air fryer is also excellent—reheat at 350°F for 3-5 minutes.
Q: Can I add other vegetables to the filling?
A:Absolutely! Finely diced bell peppers, corn, spinach (thoroughly wilted and drained), or mushrooms (sautéed first) are all great additions.
There you have it—the complete guide to creating delicious, versatile, and utterly satisfying Cheesy Beef Puff Pastry Pockets. This recipe is more than just a meal; it’s a template for creativity, a solution for busy days, and a guaranteed way to bring a smile to the table with minimal fuss.
Now, it’s your turn! What’s your favorite pocket filling combination? Do you have a genius tip for sealing or baking? Share your creations and ideas in the comments below!
More Recipes You Might Like
-

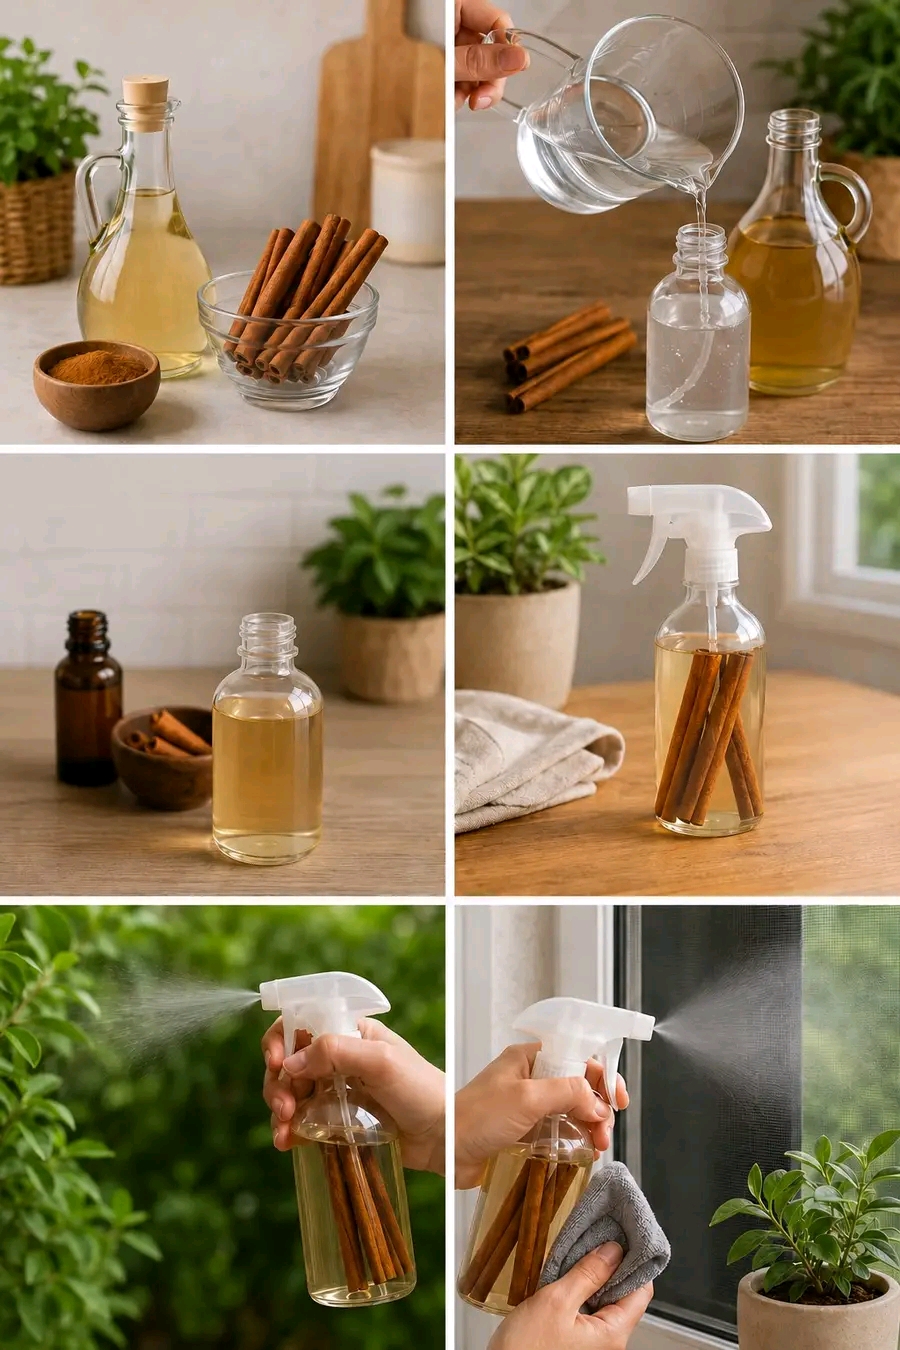
How to Use a Gentle Cinnamon Spray Around Houseplants Safely to Support Cleaner Leaves, Fresher Soil, and a More Elegant Indoor Plant Display
Cinnamon is one of the most familiar kitchen ingredients, but many homeowners also become curious about using it around indoor plants because it looks simple, natural, and inexpensive. A bottle filled with pale cinnamon water beside a bright windowsill can feel like an easy home-care upgrade for people who want cleaner foliage, fewer musty odors,…
-

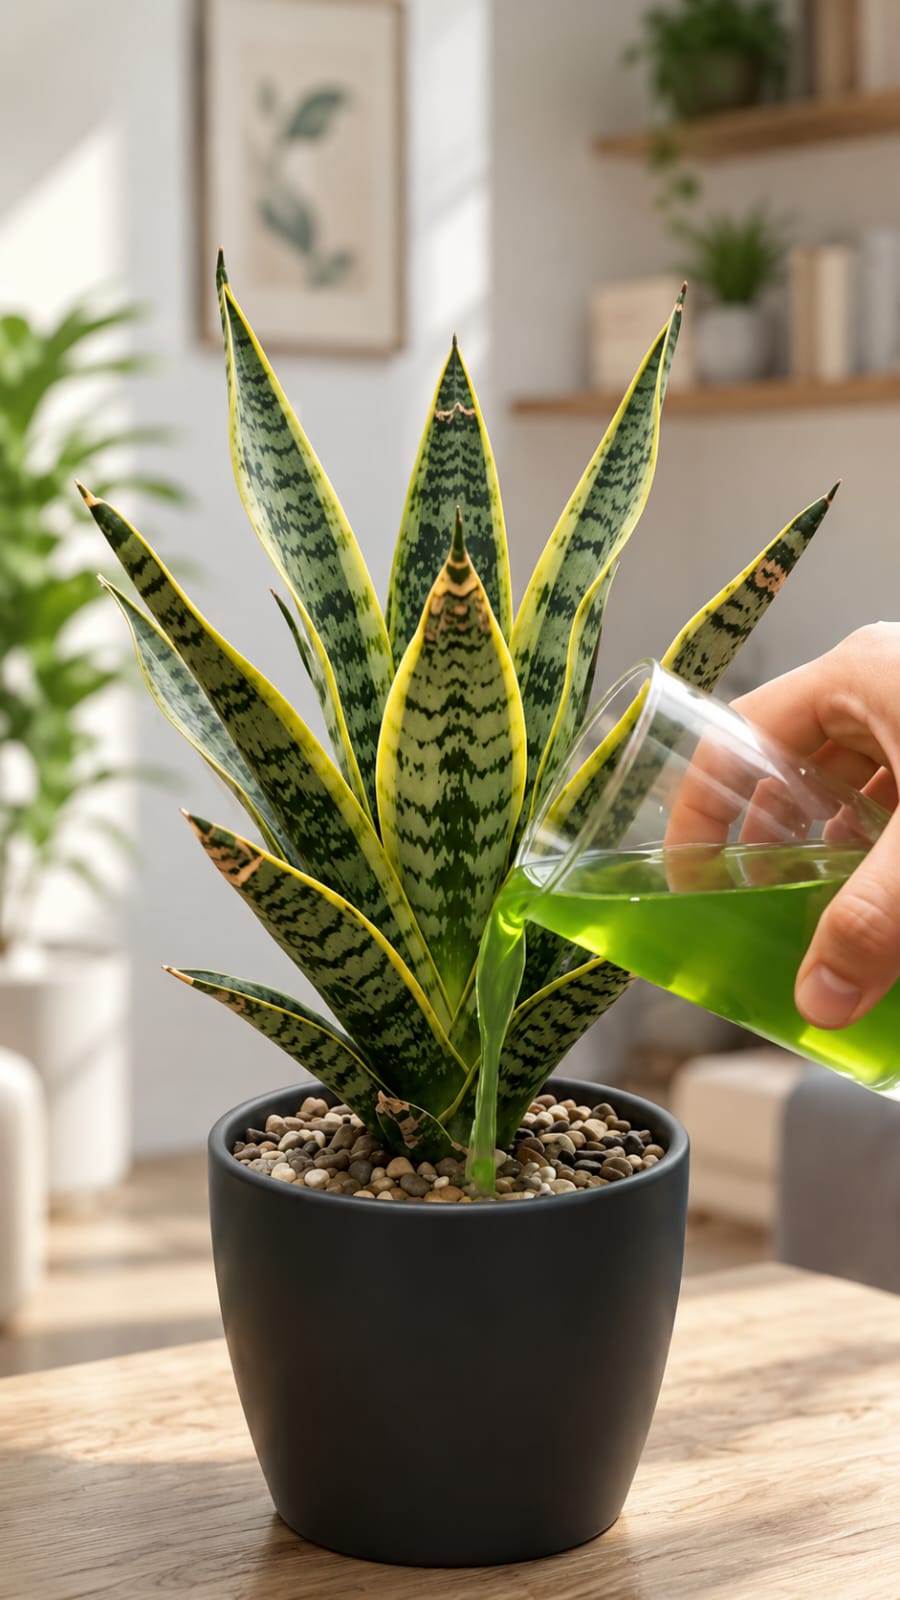
Why Some Homeowners Are Pouring a Green Liquid Around Snake Plants and What You Should Know Before Trying It for Cleaner Growth, Stronger Roots, and Healthier Indoor Leaves
Snake plant is one of the most dependable indoor plants for homeowners who want bold upright leaves, strong green patterns, yellow-edged variegation, simple care, and a clean decorative display that fits beautifully in living rooms, bedrooms, apartments, home offices, entryways, bright kitchens, plant shelves, commercial interiors, luxury home staging, and premium indoor plant styling. Its…
-

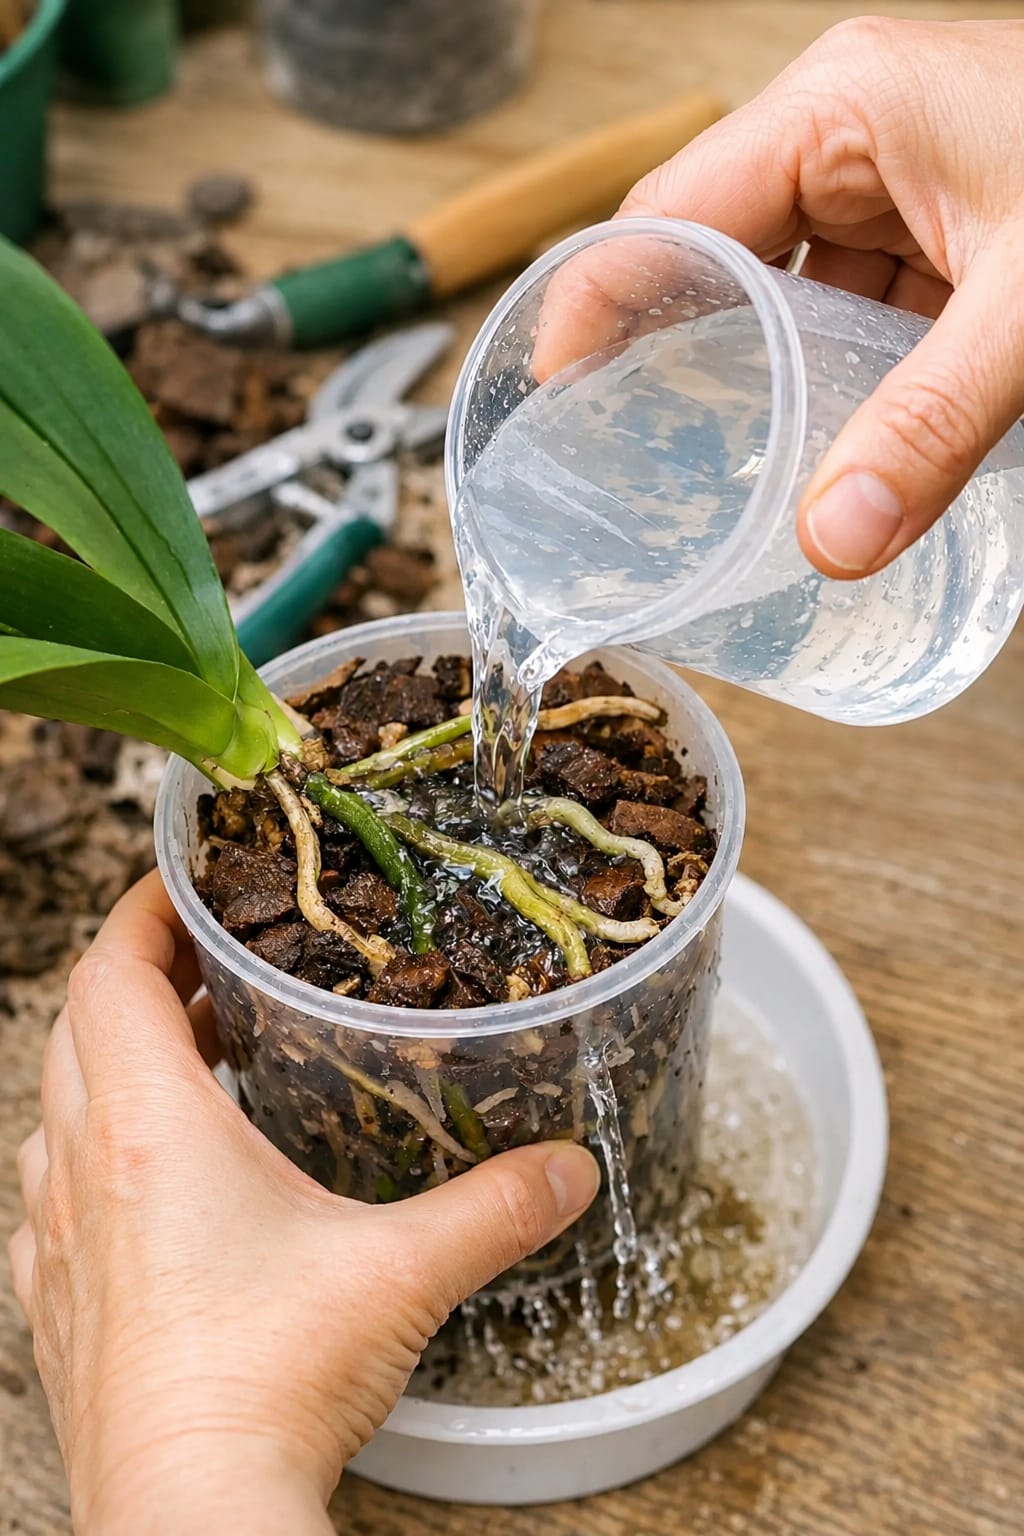
How to Use a Gentle Cleansing Mixture for Orchids Safely to Support Root Recovery, Cleaner Bark, Healthier Leaves, and a More Elegant Indoor Bloom Display
Orchids are some of the most graceful indoor plants for homeowners who want elegant flowers, sculptural stems, glossy leaves, silver-green roots, and a refined decorative display that fits beautifully in living rooms, bedrooms, bright kitchens, home offices, apartments, plant shelves, windowsills, commercial interiors, luxury home staging, and premium indoor plant styling. Their blooms can last…