Is your oven a window to a greasy, smoky past? Do you peek through the glass only to see layers of baked-on spills and carbonized grime from recipes gone by? You’re not alone. Oven cleaning is one of those dreaded tasks we often put off for… well, years. But a clean oven isn’t just about pride; it heats more evenly, prevents smoke alarms from sounding during dinner, and can even be a fire safety issue.
The good news? You don’t necessarily need a brigade of harsh chemical sprays. With a little patience and the right technique, you can restore your oven to a state of gleaming, like-new condition. Here is your ultimate, step-by-step guide to conquering the grime, using both highly effective natural methods and trusted commercial options.
Safety First: Pre-Cleaning Must-Dos
Before you attack the grime, take these critical safety steps:
Turn Off & Cool Down: Ensure the oven is completely OFF and has cooled to room temperature. If you have a gas oven, be extra mindful of the pilot light.
Ventilate: Open windows and turn on the kitchen exhaust fan. Good airflow is essential, especially if using commercial cleaners.
Protect Yourself: Wear rubber gloves (even for natural cleaners, as baking soda can dry out your skin) and safety glasses if spraying overhead.
Remove Racks & Accessories: Take out all oven racks, the broiler pan, and any pizza stones. These will be cleaned separately.
Check Your Manual: Some modern ovens (especially with self-cleaning cycles) have specific coatings that can be damaged by certain cleaners. A quick check of the manufacturer’s instructions is always wise.
Method 1: The Powerful, Natural Baking Soda Paste (The Viral Favorite)
This is the go-to method for a reason. It’s effective, non-toxic, fume-free, and perfect for moderate to heavy buildup.
What You’ll Need:
· Baking soda
· Water
· White vinegar (in a spray bottle)
· A dish or bowl for mixing
· A spatula or your gloved hands
· Microfiber cloths or non-scratch sponges
· A plastic scraper or old credit card (for stubborn spots)
The Step-by-Step “Paste & Rest” Process:
Step 1: Create the Cleaning Paste.
In your bowl,mix baking soda with just enough water to form a thick, spreadable paste. Think peanut butter or toothpaste consistency.
Step 2: Apply the Paste.
Using your spatula or hands,smear a thick, generous layer of the paste over every dirty surface inside the oven. Avoid the heating elements. Focus on the ceiling, walls, door, and floor. Don’t be shy—the more paste, the more absorbing power.
Step 3: Let the Magic Happen.
Let the paste sitovernight (at least 12 hours). The baking soda will work as a gentle abrasive and leach into the grease and grime, breaking it down and loosening its grip.
Step 4: Wipe and Scrape.
The next day,put your gloves back on. Use your spatula or plastic scraper to gently lift off the bulk of the now-dried paste. It should come off in sheets, taking a lot of the grease with it.
Step 5: The Vinegar Reaction.
Fill a spray bottle with plainwhite vinegar. Spray it liberally over any remaining paste and grime spots. It will fizz and bubble—this neutralizes the baking soda and further helps dissolve grease. Let it fizz for a few minutes.
Step 6: The Final Wipe-Down.
Use your damp microfiber cloths or non-scratch sponges to wipe everything clean.You may need to rinse your cloth frequently. For stubborn spots, a little extra paste and a gentle scrub will do the trick.
Step 7: Rinse (Optional but Recommended).
Go over all surfaces one last time with a cloth dipped in clean water to remove any residual baking soda or vinegar film.Dry with a clean towel.
Step 8: Clean the Racks Separately.
For the racks,you have two great options:
· The Bathtub Soak: Lay an old towel in your bathtub, place the racks on top, and cover them with the hottest water you can get. Add a generous scoop of powdered laundry detergent or dishwasher detergent and 1/2 cup of white vinegar. Let soak for 4-6 hours or overnight, then scrub with a non-scratch sponge.
· The Trash Bag Method: Place each rack in a heavy-duty garbage bag. Add 1/2 cup of ammonia (use in a well-ventilated area and wear gloves!). Seal the bag tightly and leave it outside or in the garage overnight. The next day, open the bag carefully (avoid inhaling fumes), remove the rack, and rinse thoroughly. The grime will wipe right off.
Method 2: The Heavy-Duty Commercial Cleaner (For Extreme, Neglected Grime)
If the natural method feels daunting for years of neglect, a commercial oven cleaner can be a powerful ally. Use with caution and respect.
What You’ll Need:
· Heavy-duty oven cleaner (like Easy-Off)
· Extra heavy-duty gloves (chemical-resistant)
· Safety glasses
· Plastic scraper
· Lots of paper towels and microfiber cloths
The Step-by-Step Chemical Process:
Step 1: Protect & Ventilate.
Open all windows.Put on your chemical-resistant gloves and safety glasses. Remove oven racks.
Step 2: Apply the Cleaner.
Shake the can well.Holding it at the recommended distance, spray a thick, even layer over all interior surfaces, avoiding heating elements and any holes/vents. The foam should cling to vertical surfaces.
Step 3: Wait (But Not Too Long).
Let the cleaner work for the time specified on the label—usually20-30 minutes, NOT overnight. Leaving it too long can damage seals and coatings.
Step 4: Wipe and Scrape.
After the time is up,use a wad of paper towels to wipe away the bulk of the dissolved grime and cleaner. Use your plastic scraper for stubborn patches. Do not let the cleaner touch your skin.
Step 5: The Crucial Rinse.
This step is vital to remove all chemical residue.Use a bucket of clean water and multiple microfiber cloths to wipe down the oven interior 3-4 times until no slick or soapy residue remains.
Step 6: Air It Out.
Leave the oven door open and the kitchen ventilated for several hours to completely air out any lingering fumes before using it to cook.
The Grand Finale: Maintenance & Shine
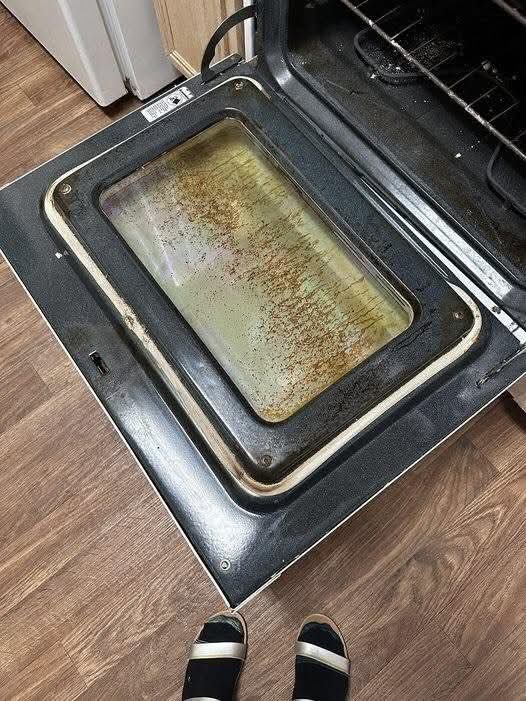
For the Oven Door Glass: If grime is baked between the glass panels, a paste of baking soda and vinegar applied along the inner edge can help seep in and loosen it. For the exterior, a simple mix of dish soap and water works perfectly.
The Final Polish: Once everything is clean and dry, make your oven shine. A light buff with a dry microfiber cloth does wonders. For stainless steel exteriors, use a dedicated stainless steel cleaner to remove fingerprints and streaks.
Keep It Clean: The best defense is a good offense!
· Use a Liner: Place a silicone baking mat or disposable aluminum foil liner on the oven floor to catch drips.
· Wipe Spills Immediately: Once the oven is cool, quickly wipe up any spills or splatters before they bake on.
· The Monthly “Quick Clean”: Once a month, when the oven is cool, wipe down the interior with a damp cloth and a little dish soap to prevent major buildup.
Conquering the Grime: You’ve Got This!
Cleaning a neglected oven is a project, but the payoff is immense. Walking into a kitchen with a sparkling oven just feels better. It makes you want to bake, roast, and create. Whether you choose the slow-and-steady natural paste or the heavy-duty commercial assist, the key is patience, safety, and the glorious moment when you reveal the shiny surface underneath.
So arm yourself with baking soda, vinegar, or your cleaner of choice, put on your gloves, and reclaim your oven. Your future, smoke-free, evenly-baked dinners will thank you. Happy cleaning
More Recipes You Might Like
-

Why Some Homeowners Are Using Onion Water Around Orchids and What Usually Helps More for Strong Roots, Healthy Leaves, and Long-Lasting Blooms
Orchids are among the most elegant indoor flowering plants for homeowners who want graceful stems, glossy green leaves, long-lasting blooms, and a refined decorative display that fits beautifully in living rooms, bedrooms, apartments, home offices, bright kitchens, windowsills, covered patios, commercial interiors, luxury home staging, and premium indoor plant styling. A healthy orchid can turn…
-

Why Some Homeowners Are Pouring Aloe Water Around Orchids and What Usually Helps More for Strong Roots, Healthy Leaves, and Long-Lasting Blooms
Orchids are among the most elegant indoor flowering plants for homeowners who want graceful blooms, sculptural roots, glossy leaves, and a premium decorative display that fits beautifully in living rooms, bedrooms, apartments, home offices, bright kitchens, balcony gardens, covered patios, commercial interiors, luxury home staging, and refined indoor plant styling. A healthy orchid can make…
-
Why Some Homeowners Are Adding Brown Powder Around Snake Plants and What Usually Helps More for Strong Roots, Fuller Growth, and Healthy Indoor Leaves
Snake plant is one of the most dependable indoor plants for homeowners who want strong upright leaves, bold green patterning, yellow-edged variegation, easy maintenance, and a clean decorative display that fits beautifully in living rooms, bedrooms, apartments, home offices, bright kitchens, entry corners, sunny windowsills, plant shelves, commercial interiors, luxury home staging, and premium indoor…


