These Sourdough Chocolate Chip Cookie Bars are thick, chewy & packed with flavor! Use active starter or discard for the ultimate easy dessert. No chilling required!
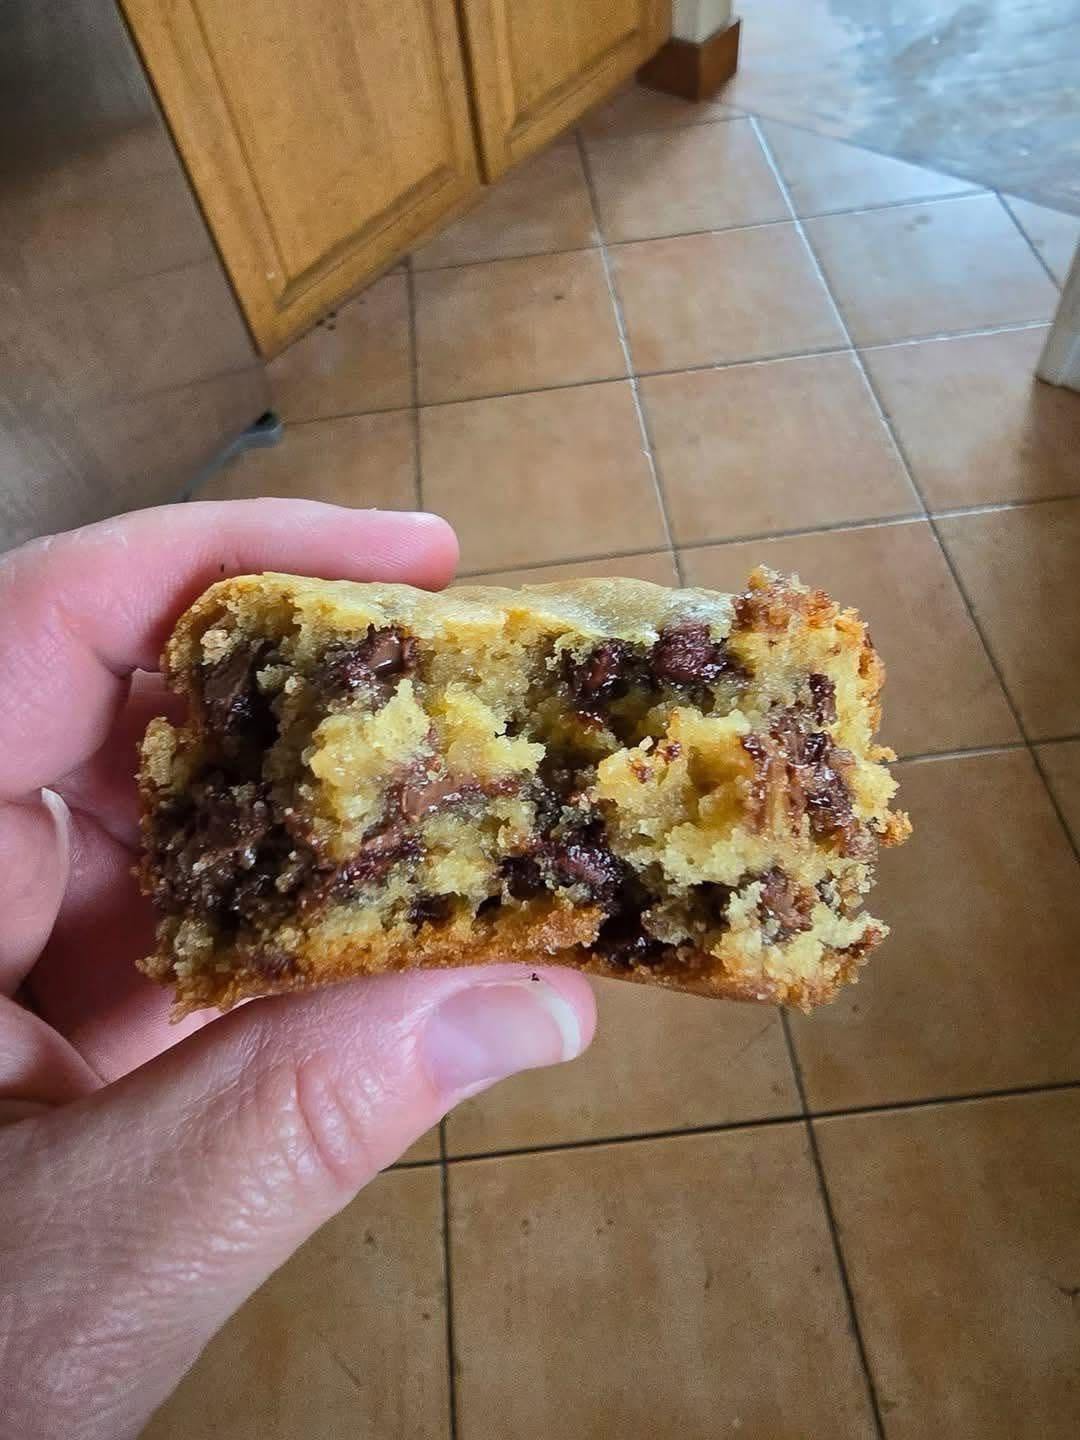
Imagine the deep, complex tang of a perfect sourdough loaf meeting the classic, soul-warming comfort of a gooey chocolate chip cookie—all in one irresistible, pan-baked bar. If you’ve ever stared at your jar of sourdough starter (whether bubbly and active or languishing as discard) and dreamed beyond bread, you’ve found your recipe. These Sourdough Chocolate Chip Cookie Bars are a game-changer: a one-bowl dessert that’s fudgy, chewy, and slightly crispy-edged, with a nuanced flavor profile that makes ordinary cookie bars taste, well, ordinary.
For the sourdough enthusiast, this recipe is a brilliant, delicious way to use your sourdough discard, transforming it into a treat that feels both thrifty and extravagant. For the cookie lover, it’s a revelation—a bakery-style cookie bar with an unexpected depth of flavor that keeps everyone coming back for one more square. They require no chilling time, come together in under 10 minutes of active work, and fill your kitchen with an aroma that’s equal parts nostalgic and intriguing.
Whether you’re deep into your sourdough journey or just looking for the best chewy chocolate chip cookie bar recipe you’ll ever make, this is your destination. It’s the perfect intersection of artisan baking and easy weeknight treat, yielding a pan of bars that are soft-baked, packed with melty chocolate, and impossible to resist. Let’s dive into why this is the only cookie bar recipe you’ll ever need.
Why These Sourdough Cookie Bars Are a Baking Revelation
Before we measure our flour, let’s unpack the magic. First, the sourdough starter (active or discard) is the secret weapon. Its natural acidity tenderizes the gluten, resulting in an incredibly soft and tender crumb that stays moist for days. It also introduces a subtle tang that perfectly balances the sweetness of the brown sugar and chocolate, creating a more sophisticated, less cloyingly sweet dessert.
Second, this recipe is engineered for maximum ease and reliability. By using a square baking pan, we eliminate the fuss of scooping individual cookies and ensure every piece has the ideal ratio of edge to center. The no-chill dough means instant gratification—from craving to eating in about an hour.
Finally, the texture is pure perfection. We’re using a blend of techniques—brown butter (optional but recommended), an extra egg yolk, and the unique hydration of the starter—to achieve a bar that’s dense and fudgy like a blondie, yet chewy and light like the perfect cookie. This isn’t just another cookie recipe; it’s a masterclass in texture and flavor engineering.
Gathering Your Ingredients: The Anatomy of a Perfect Bar
Every ingredient plays a specific role in creating the final texture and flavor. Here’s what you’ll need for these family-friendly sourdough treats:
For the Brown Butter (The Flavor Booster – Optional but Highly Recommended):
· 1 cup (2 sticks / 227g) unsalted butter
· Alternative: Use 1 cup of melted, cooled unsalted butter.
For the Cookie Bar Dough:
· 1 cup (215g) light or dark brown sugar, packed
· 1/2 cup (100g) granulated sugar
· 2 large eggs, at room temperature plus 1 extra egg yolk
· 1/2 cup (120g) sourdough starter (100% hydration), active or discard
· 2 teaspoons pure vanilla extract
· 2 ½ cups (312g) all-purpose flour, spooned and leveled
· 1 teaspoon baking soda
· 1 teaspoon fine sea salt
· 2 cups (340g) semi-sweet chocolate chips (plus more for topping)
· 1 cup (115g) chopped walnuts or pecans (optional)
Ingredient Spotlight & Pro Substitutions
· Sourdough Starter: This recipe is flexible! Use active sourdough starter for a slight lift and more pronounced tang, or sourdough discard straight from the fridge for convenience and a milder flavor. Just ensure it’s at 100% hydration (equal parts flour and water by weight).
· Brown Butter: Taking 10 minutes to brown the butter adds an incredible nutty, caramelized depth that pairs beautifully with the sourdough tang. It’s the #1 upgrade you can make.
· The Extra Egg Yolk: This is the key to an ultra-rich, chewy bakery texture. Don’t skip it.
· Chocolate: A mix of chocolate chips and chunks gives you pockets of melt and distinct chips. For a professional touch, use a high-quality chopped chocolate bar.
· Flour: Measure correctly! Spoon flour into your measuring cup and level it off with a knife. Too much flour is the enemy of a chewy bar.
Essential Kitchen Tools: The Equipment for Bar-Making Bliss
You don’t need specialty gear, but the right tools ensure perfect mixing, baking, and cutting. Here’s your baking equipment checklist for flawless results.
- The Baking Vessel: Your Pan
A 9×13 inch metal baking pan is the ideal size for thick, bakery-style bars. For best results, line it with parchment paper, leaving an overhang on two opposite sides. This creates a “sling” that allows you to lift the entire slab of cookie bars out for clean, easy cutting. Glass or ceramic pans will work but may alter baking time and browning.
- The Mixing & Prep Station:
· Large Mixing Bowl: A must for combining all your ingredients. A sturdy glass or stainless steel bowl is perfect.
· Whisk & Rubber Spatula: Use a whisk to vigorously cream the butter and sugars, and to incorporate the eggs and starter. A flexible rubber spatula is essential for folding in the flour and chocolate chips without overmixing.
· Medium Saucepan: For browning the butter, if you choose that route.
· Measuring Cups & Spoons: For accuracy. A digital kitchen scale is highly recommended for baking precision, especially with the flour and starter.
- The Helpful Extras:
· Cooling Rack: Allows air to circulate under the pan of baked bars, cooling them evenly and preventing a soggy bottom.
· Sharp Chef’s Knife or Bench Scraper: For cutting the cooled slab into clean, beautiful squares. Run the knife under hot water and wipe it dry between cuts for the cleanest slices.
· Instant-Read Thermometer: The most reliable way to test for doneness. The bars are ready when the internal temperature reaches 190-200°F (88-93°C) in the center—this gives you a moist, fudgy center without being underbaked.
Step-by-Step Instructions: How to Bake Perfect Sourdough Cookie Bars
Follow this sequence for a foolproof process. Remember, do not overmix the dough once the flour is added.
Step 1: Brown & Prepare the Butter
Brown the Butter (Optional): In a medium saucepan over medium heat, melt the butter. It will foam, then crackle. Swirl the pan frequently. Once the crackling subsides and you see golden brown milk solids at the bottom with a nutty aroma, immediately pour it into your large mixing bowl to stop the cooking. Let it cool for 15-20 minutes until just warm to the touch.
Or Simply Melt: If not browning, simply melt the butter and let it cool.
Step 2: Make the Dough (No Mixer Needed!)
Cream Butter & Sugars: To the cooled brown butter (or melted butter) in the large bowl, add the brown sugar and granulated sugar. Whisk vigorously for 1-2 minutes until well combined and slightly smooth.
Add Wet Ingredients: Add the 2 whole eggs, the extra egg yolk, sourdough starter, and vanilla extract. Whisk again until the mixture is completely smooth, emulsified, and glossy.
Incorporate Dry Ingredients: Add the flour, baking soda, and salt directly into the wet ingredients. Use your rubber spatula to fold the mixture just until the last streaks of flour disappear. Do not overmix.
Fold in Mix-Ins: Gently fold in the chocolate chips and nuts (if using), just until evenly distributed.
Step 3: Pan, Bake & Cool
Prepare the Pan: Preheat your oven to 350°F (175°C). Line your 9×13 pan with parchment paper.
Spread the Dough: Transfer the thick, sticky dough to the prepared pan. Using your spatula or lightly wet hands, press it into a smooth, even layer. Sprinkle a handful of extra chocolate chips on top for a professional look.
Bake: Bake for 22-28 minutes. The key is to underbake slightly. The edges will be golden brown and set, and the center will look puffed and just set—it may still seem a tiny bit soft if you press it. The internal temperature should read 190-200°F. A toothpick inserted near the center will have a few moist crumbs, not wet batter.
Cool Completely: This is critical! Let the pan cool on a wire rack for at least 1 hour. Then, use the parchment sling to lift the entire slab onto the rack to cool completely, another 1-2 hours. Cutting into warm bars will result in a gooey mess.
Step 4: Cut & Serve
Cut: Once completely cool, use a sharp knife to cut into squares. For clean cuts, wipe the knife clean between slices.
Serve: Enjoy at room temperature. The flavor and texture are best the day after baking!
Chef’s Pro-Tips for Bakery-Quality Results
· The Doneness Test: Trust the internal temperature more than the clock or color. Removing at 190°F yields a supremely fudgy, moist bar. For a slightly cakier texture, aim for 200°F.
· Room Temperature Eggs: They incorporate more easily and create a better emulsion with the butter and sugar, leading to a better texture.
· The Salt Finish: Sprinkle the top of the bars with a tiny pinch of flaky sea salt immediately after removing them from the oven. It amplifies all the flavors.
· Starter Hydration: If your discard is thicker than pancake batter (e.g., a stiff starter), adjust by adding a teaspoon of water to the wet ingredients to compensate.
· Avoid a Cakey Texture: The #1 cause is overmixing after adding the flour. Mix until just combined.
Serving Suggestions & Next-Level Variations
These bars are sublime on their own, but here’s how to elevate them:
· A La Mode: Serve a warm square with a scoop of vanilla bean ice cream for the ultimate easy dessert.
· Gourmet Gift: Stack them in a clear bag tied with twine for a thoughtful homemade food gift.
· Flavor Twists:
· Salted Caramel: Drizzle with salted caramel sauce before serving.
· Espresso: Add 1 tablespoon of instant espresso powder to the dry ingredients.
· Candy Bar: Swap 1 cup of chocolate chips for chopped peanut butter cups or toffee bits.
How to Store & Freeze for Lasting Freshness
· Storage: Keep in an airtight container at room temperature for up to 4 days. The sourdough helps them stay soft!
· Freezing: These bars freeze exceptionally well. Wrap individual bars or the whole slab tightly in plastic wrap, then in foil or a freezer bag. Freeze for up to 3 months. Thaw at room temperature.
Final Thoughts: The Bar That Will Make You a Believer
Sourdough Chocolate Chip Cookie Bars are more than a recipe; they’re a delicious argument for the versatility and magic of sourdough. They prove that a jar of starter is a passport to not just amazing bread, but to a world of elevated, thoughtful baking. They are the perfect treat—humble enough for a Tuesday, yet special enough to share with friends.
So, feed your starter a little extra this week, save that discard, and bake a pan of these bars. Get ready for the moment when someone takes a bite, their eyes widen, and they ask, “What is that amazing flavor?” That’s the taste of baking alchemy.
Don’t forget to pin this recipe, rate it, and leave a comment below telling me how your sourdough journey is going! What’s your favorite way to use discard?
More Recipes You Might Like
-

Why Some Homeowners Are Using Onion Water Around Orchids and What Usually Helps More for Strong Roots, Healthy Leaves, and Long-Lasting Blooms
Orchids are among the most elegant indoor flowering plants for homeowners who want graceful stems, glossy green leaves, long-lasting blooms, and a refined decorative display that fits beautifully in living rooms, bedrooms, apartments, home offices, bright kitchens, windowsills, covered patios, commercial interiors, luxury home staging, and premium indoor plant styling. A healthy orchid can turn…
-

Why Some Homeowners Are Pouring Aloe Water Around Orchids and What Usually Helps More for Strong Roots, Healthy Leaves, and Long-Lasting Blooms
Orchids are among the most elegant indoor flowering plants for homeowners who want graceful blooms, sculptural roots, glossy leaves, and a premium decorative display that fits beautifully in living rooms, bedrooms, apartments, home offices, bright kitchens, balcony gardens, covered patios, commercial interiors, luxury home staging, and refined indoor plant styling. A healthy orchid can make…
-
Why Some Homeowners Are Adding Brown Powder Around Snake Plants and What Usually Helps More for Strong Roots, Fuller Growth, and Healthy Indoor Leaves
Snake plant is one of the most dependable indoor plants for homeowners who want strong upright leaves, bold green patterning, yellow-edged variegation, easy maintenance, and a clean decorative display that fits beautifully in living rooms, bedrooms, apartments, home offices, bright kitchens, entry corners, sunny windowsills, plant shelves, commercial interiors, luxury home staging, and premium indoor…


