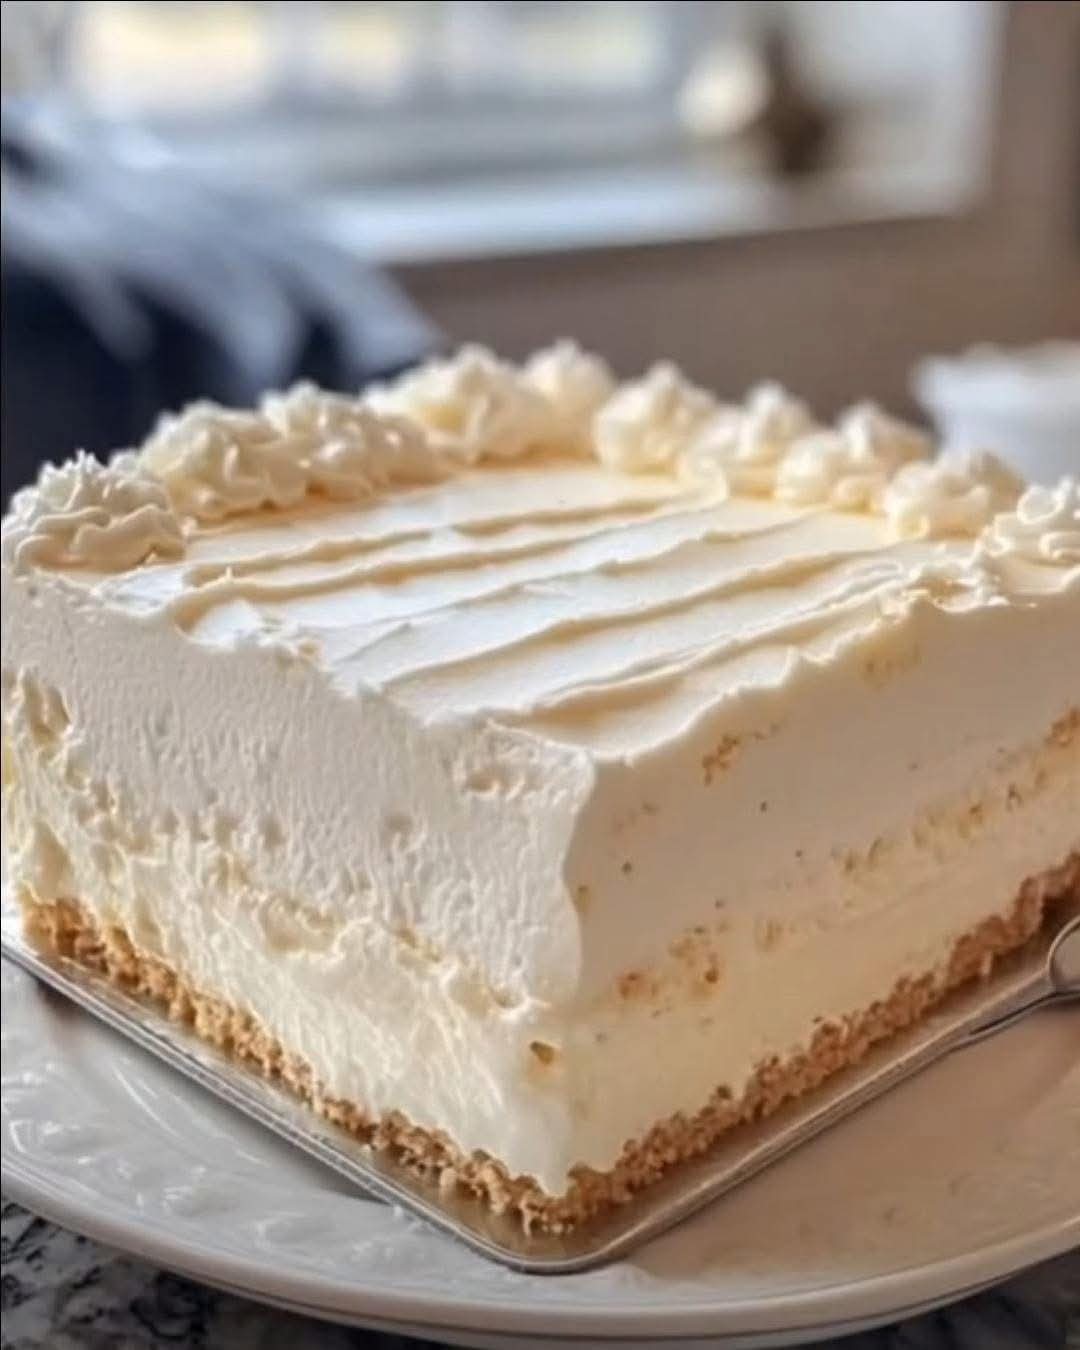
This Heavenly White Snack Cake is incredibly light, moist & fluffy! A simple one-layer vanilla cake perfect for any snack, potluck, or last-minute dessert. Ready in under an hour!
Imagine a cake so ethereally light and tender it practically dissolves on your tongue, with a fine, velvety crumb and a pure, sweet vanilla flavor that feels like a cloud of comfort. This is the magic of a Heavenly White Snack Cake—the ultimate easy one-layer cake that earns its celestial name with every single, perfect bite. If you’re searching for a simple dessert recipe that’s versatile enough for a Wednesday afternoon snack yet elegant enough for a birthday, a moist and fluffy cake that requires no layers or fussy frosting, or just a fail-proof baking project that always delivers, you’ve found your baking soulmate.
In the realm of homemade cakes, the white snack cake is a humble hero. It’s the cake you whip up when the kids get home from school, the cake you bring to a neighbor, the cake that fills the kitchen with a warm, buttery, vanilla-scented aroma that promises simple joy. Unlike dense pound cakes or rich chocolate tortes, this cake is defined by its delicate texture and understated elegance. It’s a crowd-pleasing dessert that appeals to every age and palate, a blank canvas for berries, whipped cream, or a simple dusting of powdered sugar.
Whether you’re a beginner baker looking for a confidence-building win, a busy parent in need of a quick family-friendly dessert, or a seasoned cook who appreciates the beauty of a classic, perfected recipe, this cake is your answer. It’s the epitome of uncomplicated baking with breathtaking results. Let’s walk through how to create this timeless, heavenly treat.
Why This White Snack Cake Recipe is Truly Divine
Before we preheat the oven, let’s talk about what makes this specific recipe a cut above. First, it’s engineered for a perfect, tender crumb. We use a combination of techniques—creaming butter and sugar for structure, and incorporating buttermilk for acidity and tenderness—to achieve a cake that is simultaneously light, moist, and sturdy enough to hold its shape. This is the ultimate fluffy vanilla cake.
Second, its simplicity is its superpower. With just one layer and a straightforward mixing method, this cake is virtually foolproof. There’s no splitting layers, no crumb coat, no advanced decorating skills required. The beauty is in its rustic, homemade appearance, making it the perfect last-minute dessert idea.
Finally, its versatility is legendary. Enjoy it plain, dress it up with fruit and cream, or turn it into a stunning strawberry shortcake. It’s a master recipe that can be adapted with citrus zest, almond extract, or even fresh berries folded into the batter. This isn’t just a cake recipe; it’s a foundational skill and a reliable friend in the kitchen.
Gathering Your Ingredients: The Pillars of a Perfect Cake
The quality and temperature of your ingredients are the secret to this cake’s heavenly texture. Here’s your list for this simple family dessert:
For the Cake Batter:
· 1 ½ cups (188g) all-purpose flour, spooned and leveled
· 1 ½ teaspoons baking powder
· ¼ teaspoon baking soda
· ½ teaspoon salt
· ½ cup (1 stick / 113g) unsalted butter, softened to room temperature
· 1 cup (200g) granulated sugar
· 2 large egg whites, at room temperature
· 1 teaspoon pure vanilla extract (clear for pure white color, if desired)
· ½ teaspoon pure almond extract (optional, but highly recommended for depth)
· ½ cup (120ml) full-fat sour cream or plain Greek yogurt, room temperature
· ½ cup (120ml) buttermilk, room temperature *
For the Simple Glaze (Optional):
· 1 cup (120g) powdered sugar, sifted
· 2-3 tablespoons whole milk or heavy cream
· ½ teaspoon vanilla extract
· A pinch of salt
*Buttermilk Hack: No buttermilk? Mix ½ cup milk with 1 ½ teaspoons of white vinegar or lemon juice. Let sit for 5 minutes before using.
Ingredient Spotlight & Pro Substitutions
· Room Temperature Ingredients: This is non-negotiable for a smooth, emulsified batter that traps air and bakes evenly. Cold ingredients can cause the batter to curdle and result in a dense cake.
· Egg Whites: Using only egg whites is what gives this cake its signature snow-white color and exceptionally light texture. Save the yolks for custard or carbonara!
· Sour Cream/Yogurt: This is the secret ingredient for moist cake. The fat and acidity create an incredibly tender crumb that stays soft for days.
· Buttermilk: Another acidity powerhouse that tenderizes gluten and activates the baking soda for a perfect rise.
· Almond Extract: A tiny amount enhances the vanilla flavor with a nuanced, bakery-quality depth. You can omit it for pure vanilla.
Essential Kitchen Tools: The Simple Equipment for Baking Success
You don’t need a professional kitchen, but a few key tools ensure a smooth process and perfect results.
The Baking Vessel: Your Cake Pan
An 8-inch square or 9-inch round metal baking pan is ideal. For guaranteed release and easy cleanup, line the pan with parchment paper, leaving an overhang on two sides. This creates a sling to lift the entire cake out. A light-colored metal pan promotes even baking and browning. Avoid dark non-stick pans, which can cause over-browning.
The Mixing & Prep Station:
Stand Mixer or Hand Mixer: A stand mixer with the paddle attachment is ideal for creaming butter and sugar to the perfect light and fluffy stage. A good hand mixer works just as well.
Medium Mixing Bowls: Two are helpful: one for whisking dry ingredients, and one for separating eggs/combining wet ingredients like buttermilk and sour cream.
Whisk and Rubber Spatula: A whisk for blending dry ingredients and for making the glaze. A flexible rubber spatula for scraping the bowl and ensuring every bit of batter is incorporated.
Fine-Mesh Sieve: For sifting the powdered sugar for the glaze and for sifting the dry ingredients together to ensure a lump-free, light batter.
Helpful Extras:
· Kitchen Scale: The most accurate way to measure flour. If using cups, use the “spoon and level” method.
· Cooling Rack: Allows air to circulate under the cake, preventing a soggy bottom.
· Toothpick or Cake Tester: The best tool to check for doneness without overcooking.
· Pastry Brush (Optional): For brushing a simple syrup on the warm cake for extra moisture, or for applying a glaze evenly.
Step-by-Step Instructions: How to Bake a Cloud-Like Cake
Follow this sequence for a flawless, tender crumb. The key is gentle mixing once the flour is added.
Step 1: Prep the Pan & Oven
Preheat & Prepare: Preheat your oven to 350°F (175°C). Grease your cake pan, line the bottom with parchment paper, and grease the parchment. Lightly flour the pan, tapping out excess.
Step 2: Combine Dry Ingredients & Wet Mix-Ins
Sift Dry Ingredients: In a medium bowl, whisk together the flour, baking powder, baking soda, and salt. Set aside.
Combine Sour Cream & Buttermilk: In a separate small bowl or measuring cup, stir together the sour cream (or yogurt) and buttermilk until smooth. Set aside.
Step 3: Cream Butter & Sugar (The Foundation)
Cream: In the bowl of your stand mixer fitted with the paddle attachment (or using a hand mixer), beat the softened butter on medium speed for 1 minute until smooth. Add the sugar and beat on medium-high for 3-4 full minutes, until the mixture is very pale, fluffy, and light. Scrape down the bowl.
Step 4: Incorporate Egg Whites & Flavor
Add Egg Whites: Add the room temperature egg whites, one at a time, beating well after each addition and scraping the bowl as needed. The mixture may look slightly curdled—this is okay.
Add Extracts: Beat in the vanilla and almond extracts.
Step 5: Alternate Dry & Wet Ingredients
Add Dry/Wet in Batches: With the mixer on low speed, add ⅓ of the dry ingredients and mix until just combined. Then add ½ of the sour cream/buttermilk mixture. Repeat with another ⅓ of dry, the remaining wet, and finally the last ⅓ of dry. Mix each addition only until just incorporated. Do not overmix. Use a spatula to give one final fold, ensuring no dry pockets remain.
Step 6: Bake & Cool
Transfer to Pan: Pour the thick, silky batter into the prepared pan and smooth the top with your spatula.
Bake: Bake for 30-35 minutes. The cake is done when the top is lightly golden, springs back when gently pressed, and a toothpick inserted into the center comes out clean or with a few moist crumbs.
Cool in Pan: Let the cake cool in the pan on a wire rack for 15 minutes.
Release & Cool Completely: Run a knife around the edge, then use the parchment sling to lift the cake onto the rack. Peel off the parchment and let the cake cool completely before glazing or serving (about 1-2 hours).
Step 7: Glaze (Optional) & Serve
Make Glaze: Whisk together the sifted powdered sugar, milk, vanilla, and salt until smooth. Adjust milk for desired thickness.
Glaze: Drizzle the glaze over the completely cooled cake. Let set for 15 minutes before slicing.
Chef’s Pro-Tips for a Truly Heavenly Cake
· The Room Temp Rule: Take butter, eggs, sour cream, and buttermilk out of the fridge at least 1 hour before baking.
· Don’t Overmix: Once the flour is added, mix only until the last streak disappears. Overmixing develops gluten, leading to a tough, dense cake.
· Proper Creaming: Cream the butter and sugar for the full time. This incorporates air, which is your leavening agent and creates the light texture.
· Check for Doneness Early: Ovens vary. Start checking at 28 minutes. An overbaked cake loses its magical moisture.
· Cool Completely: The cake’s structure sets as it cools. Slicing it warm will cause it to crumble. Patience yields perfect slices.
Serving Suggestions & Stunning Variations
This cake is elegant on its own, but here’s how to make it sing:
· Classic & Simple: A dusting of powdered sugar and fresh berries on the side.
· Strawberry Shortcake Style: Split the cake horizontally, fill with sweetened whipped cream and sliced strawberries.
· With a Scoop: Serve a square warm with a scoop of vanilla bean ice cream and hot fudge.
· Flavor Twists:
· Lemon Blueberry: Add zest of 1 lemon to batter and fold in 1 cup fresh blueberries (tossed in 1 tbsp flour).
· Coconut Dream: Fold in 1 cup toasted coconut and top with a coconut glaze.
· Funfetti: Fold in ½ cup rainbow sprinkles for a birthday feel.
How to Store, Freeze, and Make-Ahead
· Storage: Store covered with plastic wrap or in an airtight container at room temperature for 2 days, or in the refrigerator for up to 5 days. Let come to room temperature before serving for best texture.
· Freezing: Wrap the unglazed, cooled cake tightly in plastic wrap, then in foil. Freeze for up to 3 months. Thaw overnight in the refrigerator, then bring to room temperature and glaze.
· Make-Ahead: This is the ultimate make-ahead dessert. Bake it a day or two before—the flavor improves as it sits.
Final Thoughts: The Cake That Feels Like a Hug
The Heavenly White Snack Cake is more than a recipe; it’s a reminder of the pure joy that simple, well-made food can bring. It’s not about extravagance, but about perfection in the basics—tenderness, flavor, and the love baked into every step. It’s the cake you’ll make again and again, the one that will become your family’s “favorite snack cake.”
So, the next time you need a little sweetness, a touch of comfort, or a simple dessert to share, remember this cake. In under an hour, you can create a slice of heaven right in your own kitchen.
Don’t forget to pin this recipe, rate it, and leave a comment below telling me how you enjoyed your heavenly creation! What’s your favorite way to enjoy a simple snack cake?
More Recipes You Might Like
-

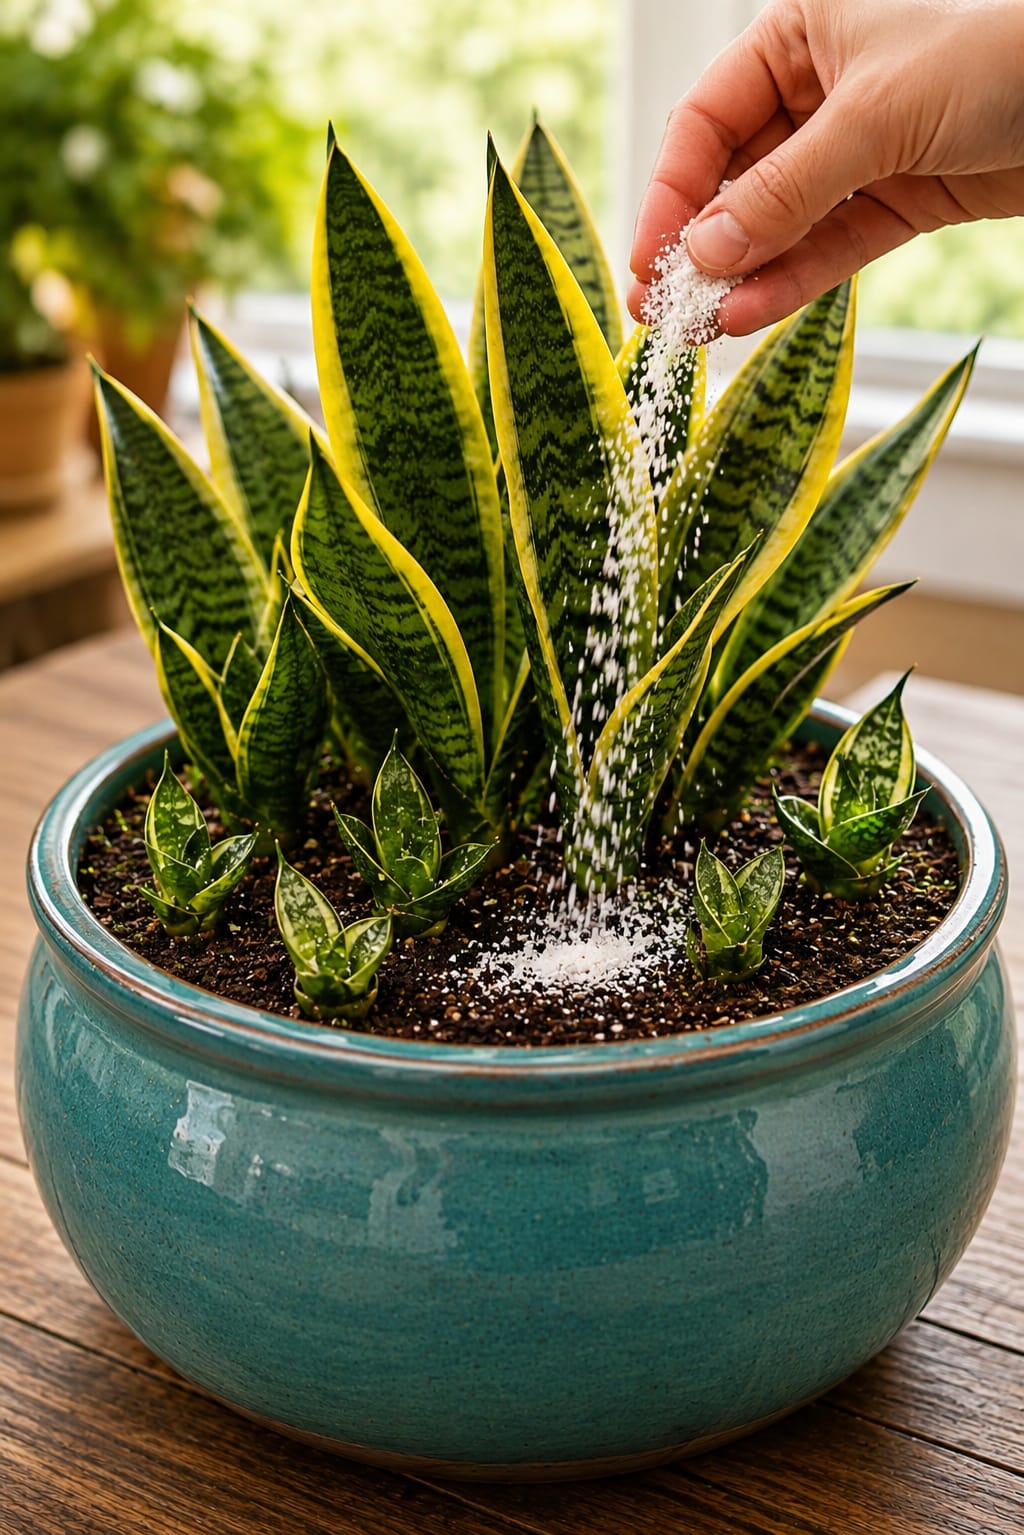
White Powder for Snake Plants: A Complete Guide for Strong Roots, Healthy Leaves, Baby Shoots, Better Soil, and Safe Indoor Plant Care
Snake plants are among the easiest and most stylish houseplants you can grow indoors. Their tall sword-like leaves, bold green patterns, yellow edges, and strong upright shape make them perfect for living rooms, bedrooms, offices, hallways, shelves, sunny windowsills, and modern plant corners. They are famous for being low-maintenance, drought-tolerant, and beginner-friendly. The image shows…
-

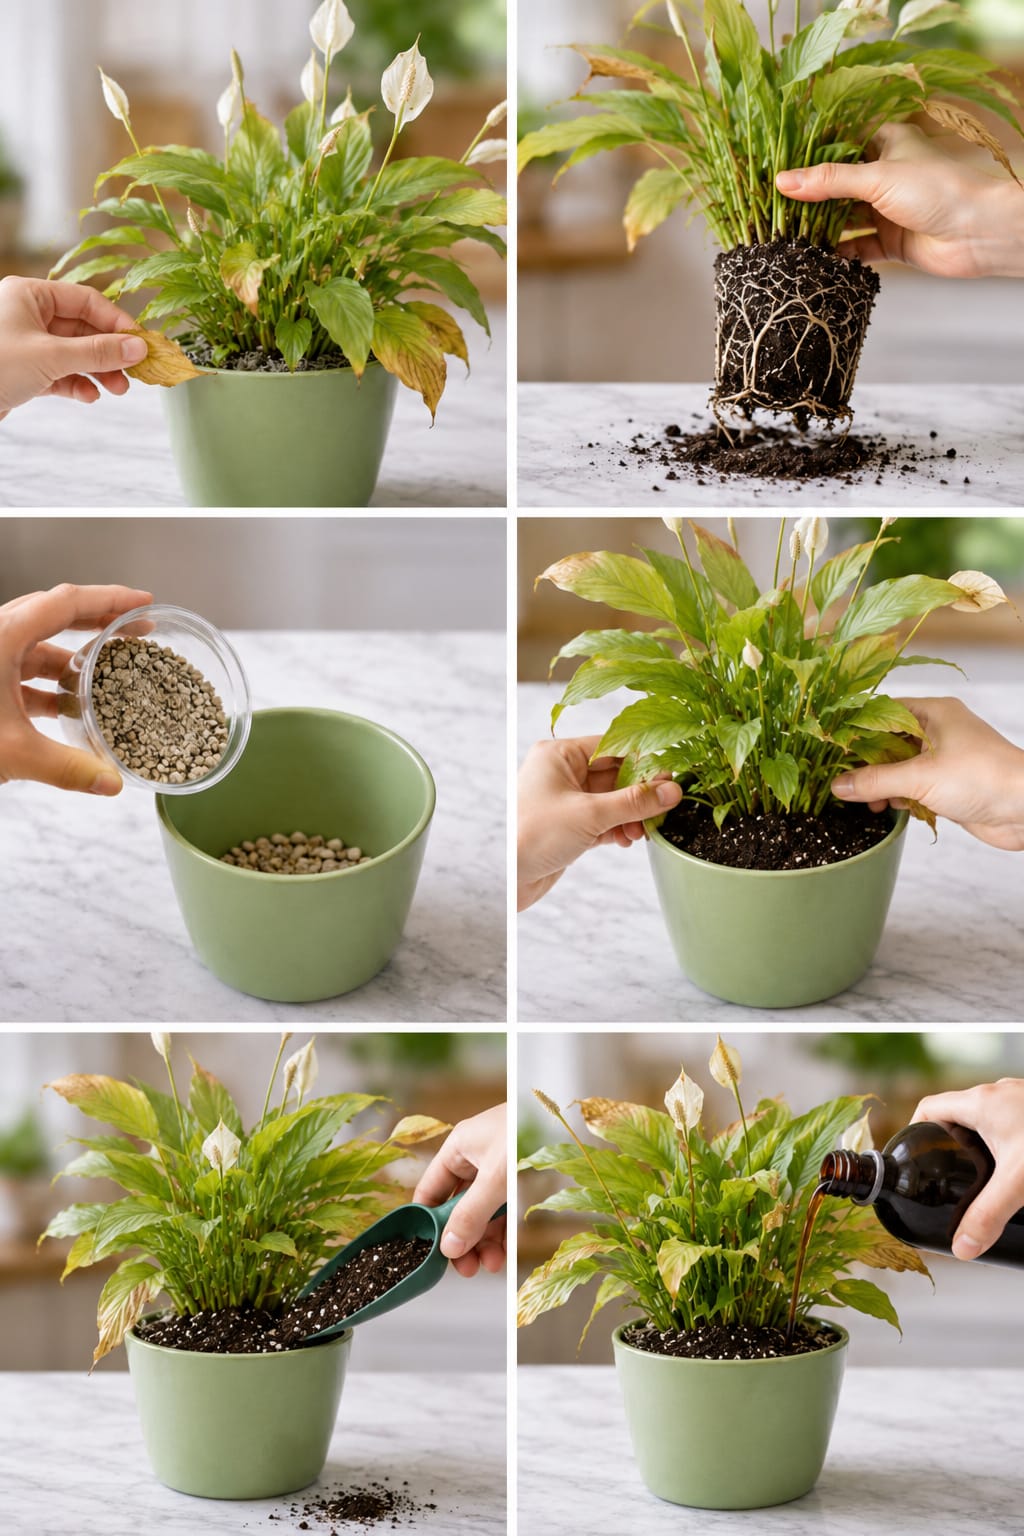
How to Repot and Revive a Weak Peace Lily: A Complete Guide for Yellow Leaves, Strong Roots, Fresh Soil, Healthy Blooms, and Better Indoor Growth
Peace lilies are beautiful indoor plants, but they can quickly look tired when their roots are crowded, the soil is old, or the watering routine is not right. A peace lily with yellow leaves, pale growth, weak flowers, dry tips, or drooping stems is usually not asking for one magic ingredient. It is asking for…
-

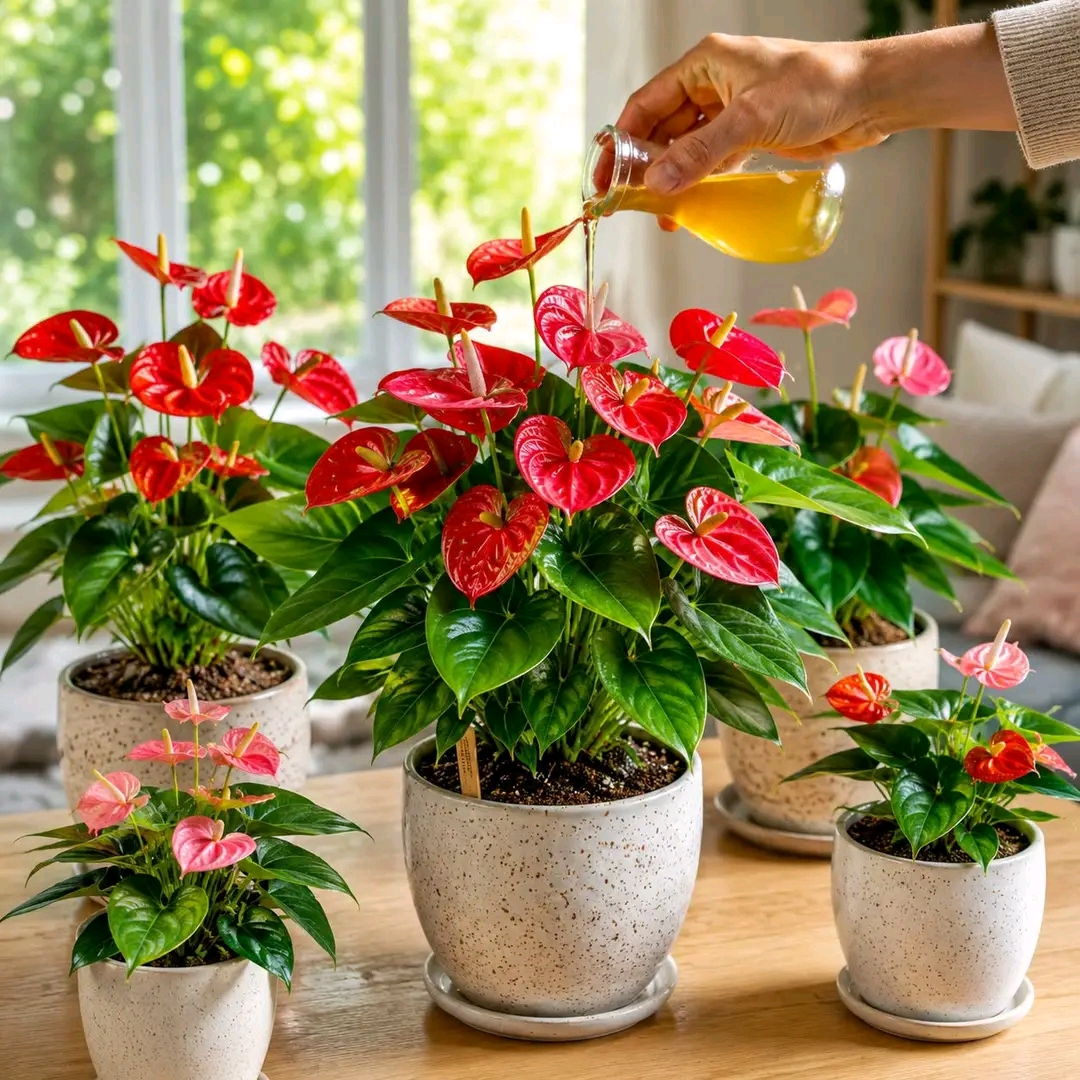
Natural Liquid Fertilizer for Anthuriums: A Complete Guide for Bright Red Blooms, Glossy Leaves, Strong Roots, and Healthy Indoor Growth
Anthuriums are some of the most beautiful flowering houseplants you can grow indoors. Their glossy heart-shaped leaves and bright red, pink, white, or coral spathes make them look tropical, elegant, and expensive. A healthy anthurium can brighten a living room, bedroom, office, kitchen corner, plant shelf, or sunny window area with very little space. The…