Master this classic Old Fashioned 7-Minute Frosting! A light, fluffy, marshmallow-like cooked frosting that’s perfect for cakes, cupcakes, and vintage desserts. Easy step-by-step guide.
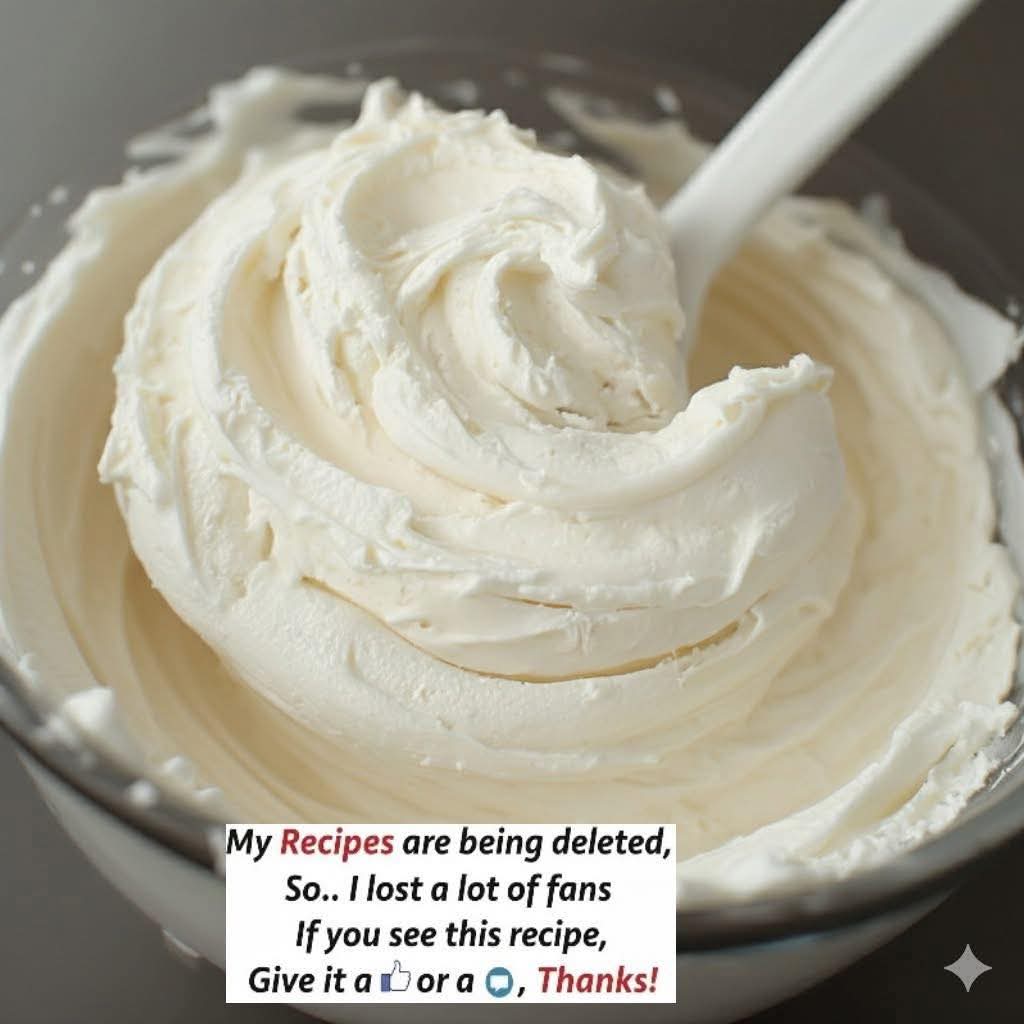
Close your eyes and picture the quintessential celebration cake from a mid-century cookbook or your grandmother’s kitchen. It’s towering, beautiful, and crowned not with heavy buttercream, but with a magnificent, cloud-like swirl of pure white frosting—so fluffy it looks like edible satin, so sweet it melts on your tongue with the delicate flavor of a marshmallow. This is Old Fashioned 7-Minute Frosting, a vintage dessert topping that is experiencing a well-deserved renaissance. If you’re searching for a light frosting recipe that’s not too sweet, a sturdy yet ethereal topping for your angel food or birthday cake, or want to master a classic baking technique, this timeless recipe is your gateway to a world of nostalgic elegance.
In an era of fondant and ultra-sweet American buttercream, 7-minute frosting stands out for its uniquely fluffy and light texture. It’s a cooked frosting, meaning egg whites and sugar are heated together over simmering water (a double boiler) while being whipped continuously. This process creates a safe, stable, and spectacularly voluminous meringue that’s as sturdy as it is soft. Unlike its modern counterparts, it’s fat-free, making it a wonderfully light cake frosting that pairs perfectly with rich, dense cakes like devil’s food or delicate sponges.
But don’t let the “old fashioned” name fool you—this frosting is a versatile dessert topping for the modern baker. It pipes beautifully, holds its shape for days, and provides a stunning, snow-white canvas for sprinkles, fresh berries, or a drizzle of chocolate. It’s the secret behind the iconic look of Boston cream pie, coconut layer cakes, and holiday divinity frosting. Let’s rediscover the magic of this easy homemade frosting and bring a touch of vintage grace to your next baking project.
Why This 7-Minute Frosting Recipe is a Timeless Baking Essential
Before we set up our double boiler, let’s explore what makes this frosting so special and why it deserves a spot in every baker’s repertoire. First, it offers a textural experience unlike any other. The final product is a smooth, glossy, and incredibly light meringue that’s simultaneously stable and melt-in-your-mouth tender. It provides a fluffy cake topping that won’t weigh down the lightest chiffon or sponge.
Second, its stability and versatility are impressive. When made correctly, this frosting forms stiff, glossy peaks that are perfect for piping tall rosettes, swoops, and borders. It crusts lightly on the outside while staying soft within, and it holds up remarkably well at room temperature for celebrations, making it an ideal frosting for layer cakes. It’s also a fantastic cupcake frosting that offers a delightful alternative to buttercream.
Finally, mastering it is a rite of passage for bakers. It teaches the foundational skill of working with a double boiler and the visual cues for perfect meringue. This knowledge opens doors to other classic recipes like Italian meringue buttercream, soufflés, and homemade marshmallows. This isn’t just a frosting recipe; it’s a building block of classic pastry arts.
Gathering Your Ingredients: The Simple Alchemy of Sugar & Air
The ingredient list is beautifully minimal, but precision and quality are paramount.
The Core Ingredients:
· 2 large egg whites, at room temperature
· 1 ½ cups (300g) granulated sugar
· ⅓ cup (80ml) cold water
· 2 teaspoons light corn syrup OR ¼ teaspoon cream of tartar (the stabilizer)
· 1 teaspoon pure vanilla extract (clear for pure white frosting)
Optional Add-Ins for Flavor & Stability:
· 1-2 tablespoons powdered sugar (sifted, added at the end for extra body)
· Flavor variations: ½ teaspoon almond extract, citrus zest, or 2 ounces of melted and cooled bittersweet chocolate drizzled in at the end.
Ingredient Spotlight & The Science Behind Them
· Egg Whites, Room Temperature: This is non-negotiable. Cold egg whites won’t whip to their maximum volume. Ensure no trace of yolk is present, as fat will prevent the whites from foaming properly.
· Granulated Sugar: Fine granulated sugar dissolves best during the cooking process. Do not attempt to substitute with powdered sugar, as it contains cornstarch and will create a grainy texture.
· The Stabilizer (Corn Syrup or Cream of Tartar): This is the secret to stable 7-minute frosting. Corn syrup interferes with sugar crystallization, ensuring a smooth, glossy finish. Cream of tartar, an acid, stabilizes the egg white foam. You must use one of these.
· Cold Water: Helps dissolve the sugar evenly before heating begins.
· Pure Vanilla Extract: Adds the classic, warm flavor. Use clear vanilla if you want a stark white frosting.
Essential Kitchen Tools for Foolproof Frosting
Having the right equipment is 80% of the success for this recipe. You cannot make authentic 7-minute frosting without a proper double boiler setup.
- The Double Boiler: Your Most Crucial Tool
You have two options:
· A dedicated double boiler pot.
· A DIY Double Boiler: This is what most home bakers use. You will need a heatproof glass or stainless steel mixing bowl that fits snugly over a medium saucepan without touching the water below. This is your essential frosting equipment.
- The Powerhouse: Your Hand Mixer or Stand Mixer
A handheld electric mixer is the traditional and most practical tool for this recipe, as you need to hold it continuously over the double boiler. A stand mixer can be used if you have a bowl that fits over your saucepan, but it’s often less maneuverable. You cannot make this frosting by hand with a whisk.
- The Supporting Cast:
· Instant-Read Thermometer (Highly Recommended): For absolute precision. The frosting is ready when it reaches 160°F (71°C), the safe temperature for egg whites.
· Flexible Rubber Spatula: For scraping down the bowl and later folding in vanilla.
· Measuring Cups & Spoons: For accuracy.
· Pastry Brush & Small Bowl of Water (optional but helpful): To brush down any sugar crystals on the side of the bowl during cooking.
Step-by-Step Instructions: The 7-Minute Magic (Closer to 12, Honestly)
The process is straightforward but requires constant attention. Have all your ingredients measured and equipment ready before you begin.
Step 1: Set Up Your Double Boiler
Simmer, Don’t Boil: Fill your medium saucepan with 1-2 inches of water. Bring it to a gentle simmer over medium heat, then reduce to low. The water should not touch the bottom of your mixing bowl when it’s placed on top.
Combine in the Bowl: Off the heat, in your heatproof mixing bowl, combine the egg whites, granulated sugar, cold water, and corn syrup (or cream of tartar). Whisk briefly by hand just to combine.
Step 2: The Cook & Whip Phase
Place Over Simmering Water: Set the bowl over your saucepan of gently simmering water. Ensure the simmer is low and steady, not a rolling boil.
Start Whipping Immediately: Using your handheld electric mixer, start beating the mixture on low speed. Gradually increase to high speed. You must beat continuously for the entire cooking time.
Beat to Safe Temperature & Stiff Peaks: Whip for 5-7 minutes. The mixture will become frothy, then opaque, and finally thick, white, and glossy. It is done when:
· It reaches 160°F (71°C) on a thermometer, AND
· It forms stiff, glossy peaks when you lift the beaters. The frosting should hold its shape firmly and the sugar should be completely dissolved (rub a bit between your fingers; it should feel smooth, not gritty).
· Total time is usually 7-12 minutes, depending on your bowl, heat, and mixer.
Step 3: The Final Whip & Flavor
Remove from Heat: Carefully lift the bowl off the saucepan (it will be hot!). You can continue beating off the heat for another 1-2 minutes to help it cool slightly and increase stability.
Add Vanilla: Beat in the vanilla extract until just incorporated.
Use Immediately: This frosting sets quickly and is best used while still slightly warm and very spreadable. It will continue to firm up as it sits.
Chef’s Pro-Tips for Perfect, Stable Frosting Every Time
· Cleanliness is Key: Ensure your bowl and beaters are impeccably clean and free of any grease. Even a tiny bit of fat (like yolk) can prevent the whites from whipping.
· Control Your Heat: The steam should be gentle. Too much heat will cook the egg whites too quickly, creating grainy, scrambled flecks.
· Beat Continuously: Do not stop beating during the cooking process. Constant motion prevents the eggs from cooking in spots and incorporates maximum air.
· The Stiff Peak Test is Crucial: Don’t under-whip. True stiff peaks mean the peak stands straight up when you lift the beater. This is what gives the frosting its piping structure.
· Fixing a Runny Frosting: If your frosting is too soft, it was likely under-whipped. You can try placing the bowl back over the simmering water for another minute while beating, then re-test.
· Fixing Grainy Frosting: This means the sugar didn’t fully dissolve. Next time, ensure you start with a lower heat, beat constantly, and use corn syrup. For a salvage attempt, you can try beating in a tablespoon of hot water.
Serving Suggestions & Classic Pairings
This frosting is the crowning glory for specific classic cakes:
· The Iconic Duo: Devil’s Food Cake with 7-minute frosting is a match made in heaven.
· Birthday Classic: A tall yellow layer cake with this fluffy white frosting and rainbow sprinkles.
· Coconut Perfection: Frost any layer cake and cover it immediately with a blizzard of sweetened shredded coconut.
· Boston Cream Pie: Use it as the top layer on a custard-filled sponge cake.
· Angel Food or Chiffon Cake: The light-on-light pairing is ethereal.
How to Store & Can You Make It Ahead?
· Storage: This frosting does NOT do well in the refrigerator, as it can become sticky and weep. It is best used the day it is made.
· On a Cake: A cake frosted with 7-minute frosting can be kept, uncovered, at cool room temperature for up to 2 days. Do not cover it with plastic wrap, as it will stick and deflate the frosting.
· Make-Ahead: It is not recommended. The frosting is best made and used immediately.
Frequently Asked Questions (FAQ)
· Is it safe to eat? Yes! Cooking the egg whites to 160°F pasteurizes them, making them safe to consume.
· Can I use this for piping? Absolutely! It pipes beautifully into tall, stable peaks and rosettes. Use it immediately after making while still pliable.
· Why did my frosting deflate or become runny? The most common causes are under-whipping, under-cooking (not reaching stiff peaks/160°F), or getting even a speck of fat/yolk in the mix.
· What’s the difference between this and Swiss Meringue Buttercream? 7-Minute Frosting is just the meringue (egg whites, sugar, stabilizer). Swiss Meringue Buttercream adds a large amount of butter to the cooled meringue, creating a rich, silky, and more stable frosting.
· Can I fix weeping or beading (little drops of moisture on the surface)? This can happen in humid conditions. It’s often due to undissolved sugar or extreme humidity. Using corn syrup helps prevent this.
Final Thoughts: A Vintage Technique Worth Preserving
Mastering Old Fashioned 7-Minute Frosting is more than learning a recipe; it’s connecting with a lineage of bakers who valued technique, simplicity, and sublime texture. In a world of instant gratification, it rewards patience and attention with a creation that is both beautiful and deliciously nostalgic. It’s a reminder that some of the best things in baking—and in life—are worth the extra few minutes of care.
So, set up that double boiler, break out the hand mixer, and prepare to create a cloud of sweet, vintage magic. Your cakes will thank you, and you’ll have added a classic, invaluable skill to your baking toolkit.
Don’t forget to pin this recipe, rate it, and leave a comment below telling us which classic cake you’ll crown with this fluffy frosting first!
More Recipes You Might Like
-

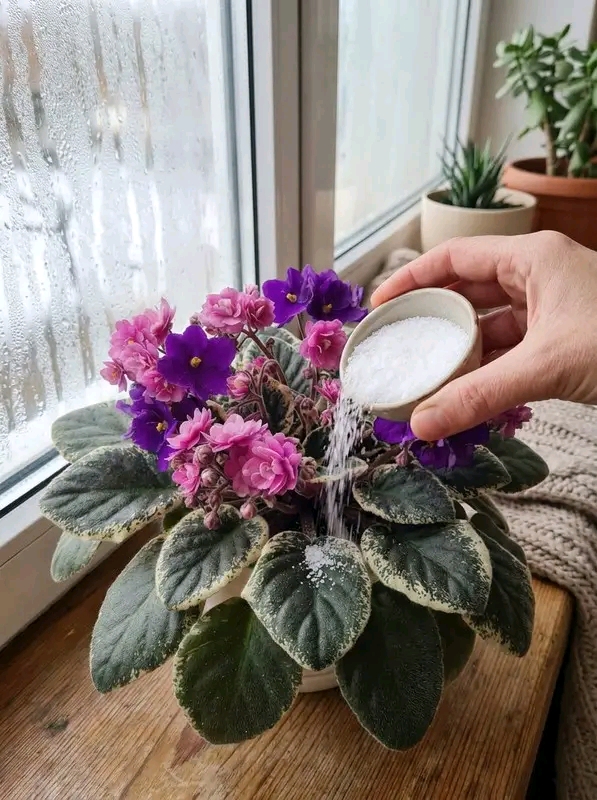
Easy African Violet Care: Simple Tips for Lush Growth and Vibrant Blooms
African violets are small, elegant, and full of charm. Their soft fuzzy leaves, compact shape, and bright purple, pink, white, blue, or double flowers make them one of the most loved indoor flowering plants. They look beautiful on windowsills, shelves, kitchen counters, bedroom tables, office desks, and cozy plant corners. Even one healthy African violet…
-

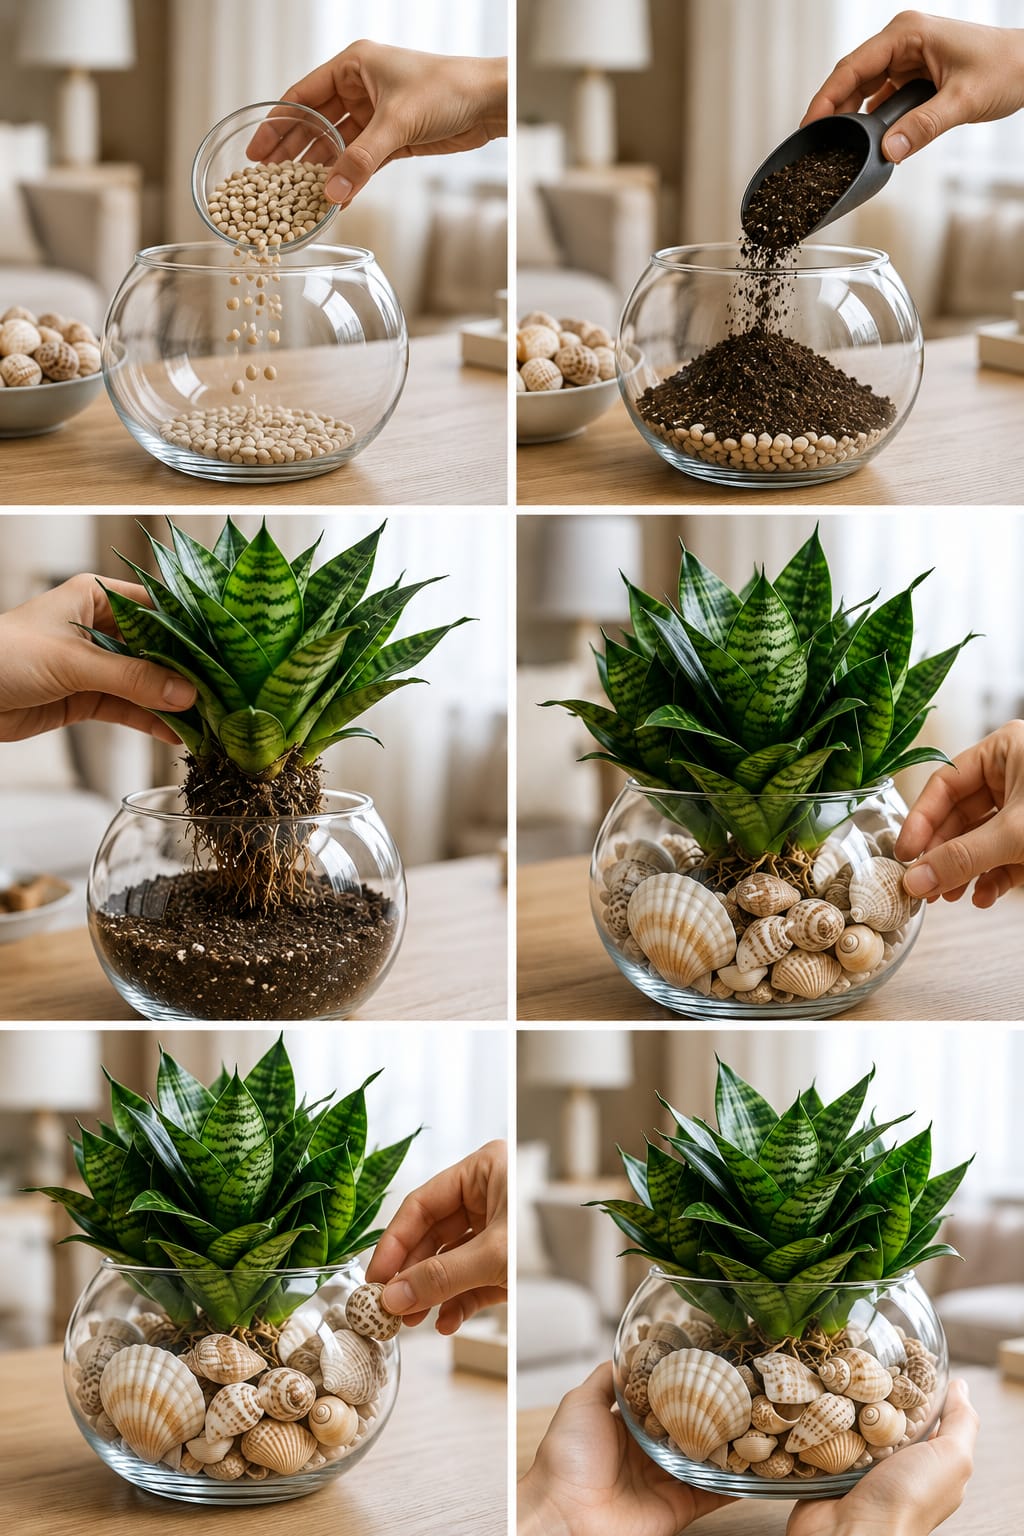
Bird’s Nest Snake Plant Fishbowl Garden: A Complete Guide to Creating a Beautiful Glass Bowl Display With Shells, Strong Roots, Healthy Leaves, and Stylish Indoor Decor
Bird’s Nest Snake Plant is one of the most beautiful compact houseplants for small indoor spaces. Its short rosette shape, thick patterned leaves, and elegant green form make it perfect for tables, shelves, desks, windowsills, bedrooms, offices, and living room displays. Unlike tall snake plants that grow like upright swords, Bird’s Nest Snake Plant grows…
-

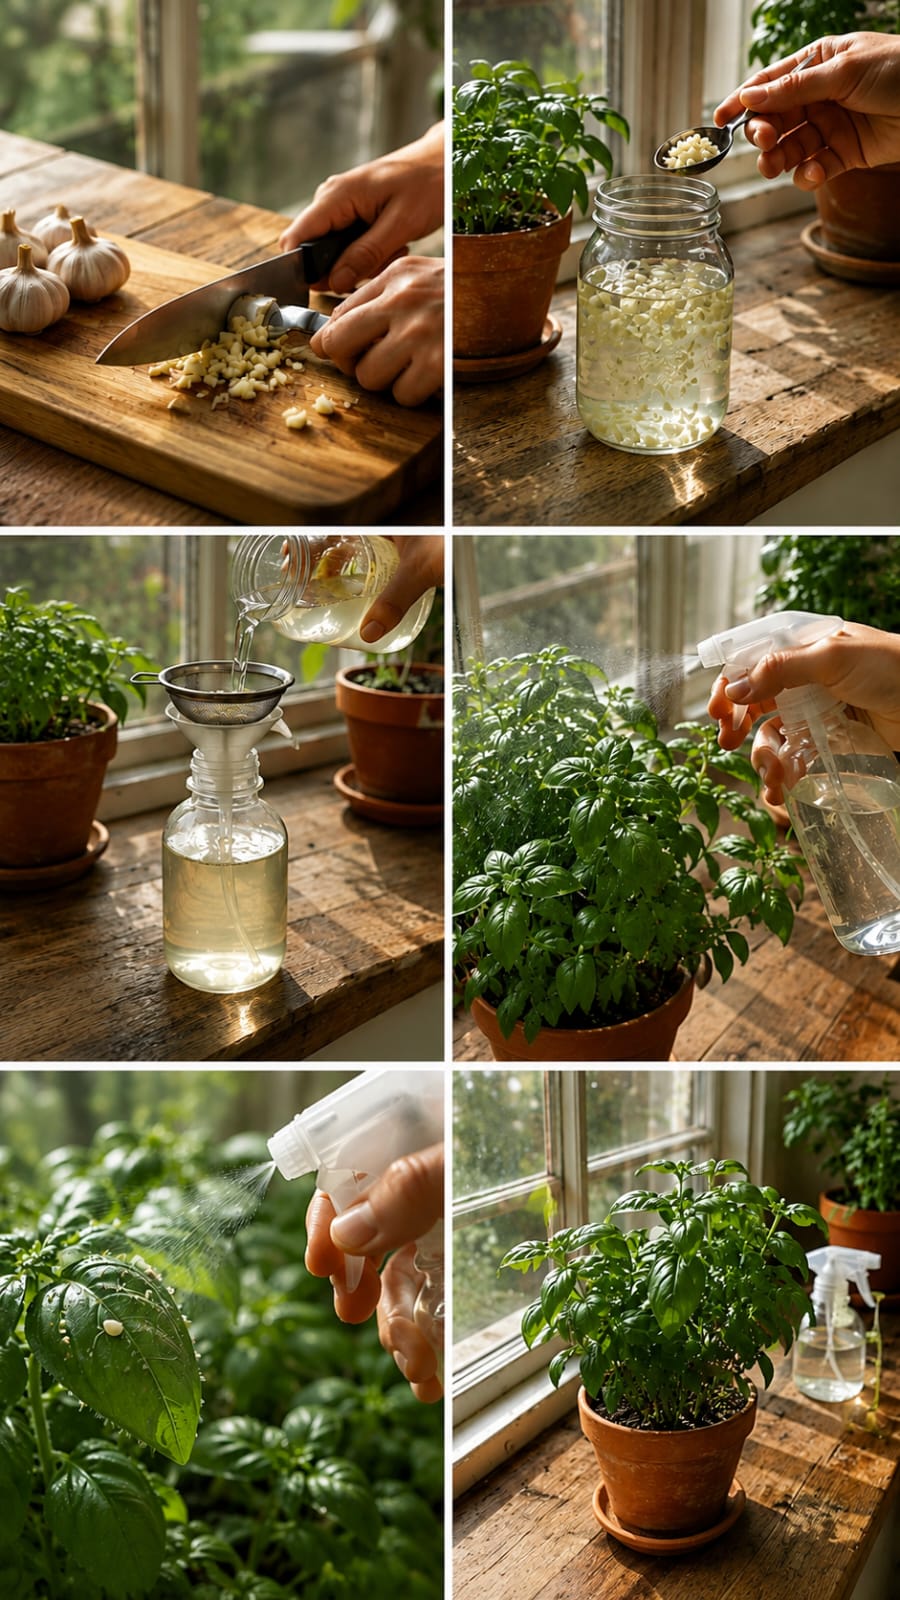
Garlic Spray for Indoor Plants: A Complete Guide to Making a Natural Garlic Water Spray for Basil, Herbs, Houseplants, Pest Prevention, Leaf Care, and Healthy Indoor Growth
Indoor plants bring freshness, color, scent, and life into the home. A sunny windowsill filled with basil, mint, parsley, pothos, peppers, flowers, and leafy houseplants can make any room feel warmer and more natural. But indoor plants also face problems. Leaves can become dusty. Tiny pests can appear. Soil can stay too wet. Basil can…