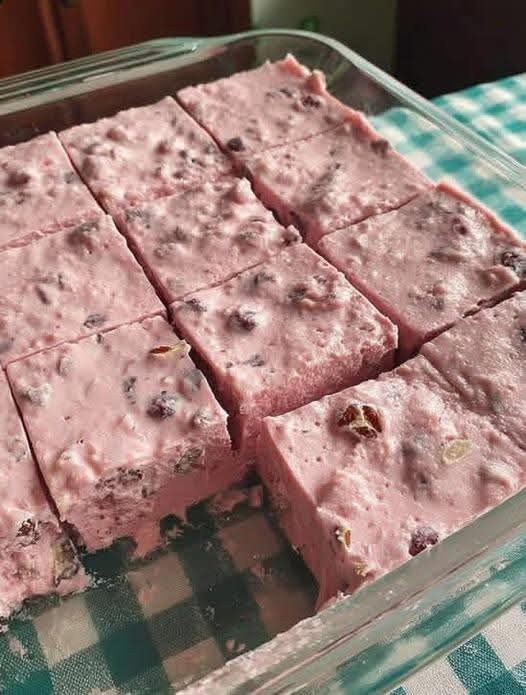
Step into any church potluck, family reunion, or holiday buffet across the Midwest and the South, and you’ll likely spot it: a shimmering, ruby-red dish that promises a perfect bite of sweet, creamy, and fruity nostalgia. Black Cherry Jello Salad is more than just a recipe; it’s a edible heirloom, a conversation starter, and arguably the best make-ahead potluck dish you can bring to any table. This isn’t the wobbly, plain Jello of childhood sick days. This is Jello salad in its most glorious, elevated form—a harmonious blend of tart cherry gelatin, luxurious sweetness, creamy texture, and delightful crunch.
Perfect for easy holiday entertaining, a refreshing summer side dish, or a simple family dinner sweet treat, this salad walks the beautiful line between dessert and side. It’s the kind of retro recipe that experiences a well-deserved revival, charming new generations with its simplicity and crowd-pleasing power. In this comprehensive guide, we’ll dive into the classic recipe, explore its charming history, and unlock all the tips, variations, and secrets to making the perfect Black Cherry Jello Salad that will have everyone asking for the recipe.
Why This Black Cherry Jello Salad Deserves a Spot on Your Table
Before we gather our ingredients, let’s talk about why this specific recipe is a timeless winner:
· Unbeatable Flavor & Texture Contrast: The tartness of the black cherry gelatin, the sweetness of the fruit and marshmallows, the creaminess of the topping, and the crunch of the nuts create a symphony in every spoonful.
· Make-Ahead Marvel: This is the quintessential do-ahead potluck recipe. It requires chilling time, meaning you can prepare it a day (or even two) in advance, freeing up precious time on the day of your event.
· Feeds a Crowd: One recipe yields a generous 9×13 pan, making it ideal for family reunion dishes and holiday feast planning.
· Nostalgia Factor: It evokes warm, happy memories for many, making it a surefire hit at multi-generational gatherings.
· Surprisingly Versatile: Serve it as a side with ham or turkey, or as a light dessert. It’s also incredibly adaptable to different dietary needs and ingredient preferences.
Classic Black Cherry Jello Salad Ingredients
This recipe is built in two distinct layers: the glorious jewel-toned base and the dreamy creamy topping. Here’s what you’ll need:
For the Jello Layer:
· 2 (6 oz) packages Black Cherry Jell-O (this is the classic, non-negotiable star)
· 2 cups boiling water
· 1 (20 oz) can crushed pineapple in juice, UNDRAINED (the juice is key for flavor and setting)
· 1 (21 oz) can cherry pie filling
· 1 cup miniature marshmallows (optional, but traditional for added texture)
For the Creamy Topping Layer:
· 1 (8 oz) package full-fat cream cheese, softened to room temperature
· 1 (8 oz) container frozen whipped topping (like Cool Whip), thawed
· 1/2 cup granulated sugar
· 1 cup chopped pecans or walnuts, plus more for garnish
Step-by-Step Instructions for the Perfect Layered Salad
Step 1: Dissolve the Jello
In a large heatproof bowl(a 4-cup measuring cup with a spout is ideal for pouring later), empty both packets of black cherry Jell-O. Pour the 2 cups of boiling water over the powder. Whisk vigorously for 2 full minutes, until the gelatin is completely dissolved and no granules remain.
Step 2: Create the Base Layer
To the hot,dissolved Jell-O, immediately add the entire can of crushed pineapple with its juice and the entire can of cherry pie filling. Stir gently but thoroughly until everything is well combined. The mixture will be a beautiful, deep red. If using, fold in the cup of miniature marshmallows now—they might float, but that’s okay.
Pro Tip:Adding the cold fruit to the hot Jell-O slightly cools the mixture, helping it set with the fruit evenly suspended.
Step 3: Chill and Set the First Layer
Carefully pour the Jello mixture into a 9×13-inch glass baking dish.Using a spatula, spread it into an even layer. Place the dish, uncovered, in the refrigerator. Chill for at least 3-4 hours, or until completely firm to the touch. You can do this step up to a day in advance.
Step 4: Prepare the Creamy Topping
While the base sets,make the topping. In a medium mixing bowl, beat the softened cream cheese and granulated sugar together with a hand mixer or stand mixer on medium speed until completely smooth and creamy, about 2-3 minutes. Scrape down the sides of the bowl.
Using a spatula,gently fold in the entire container of thawed whipped topping. Continue folding until no white streaks remain and the mixture is uniform. Finally, fold in the 1 cup of chopped nuts.
Step 5: Assemble the Final Layer
Once the Jello base is completely set,retrieve it from the fridge. Dollop the creamy topping mixture over the entire surface. Using a spatula, gently spread it into a smooth, even layer that covers the red Jello completely, sealing it to the edges of the dish.
Step 6: Final Chill and Serve
Return the assembled dish to the refrigerator and chill foranother 1-2 hours to allow the topping layer to firm up slightly. Just before serving, you can sprinkle a handful of extra chopped nuts over the top for a beautiful garnish. Cut into squares and serve chilled.
Pro Tips, Tricks, and Flavor Variations
· The Setting Secret: Ensure your first layer is 100% firm before adding the topping. If it’s even slightly sticky, the topping will mix and turn pink. Patience is key!
· Cream Cheese is Key: Full-fat, brick-style cream cheese is essential for a stable, non-runny topping. Do not use whipped or spreadable cream cheese from a tub. Ensure it’s truly softened to avoid lumps.
· Nut Notes: Toasting your pecans or walnuts before chopping adds a deep, incredible flavor. Spread them on a baking sheet and toast at 350°F for 5-8 minutes until fragrant.
· Fruit Variations: While the classic is perfect, you can experiment! Try using black cherry pie filling for an even deeper cherry flavor, or add a drained 11 oz can of mandarin oranges to the Jello layer along with the other fruit.
· Lighter Version: Use sugar-free black cherry Jell-O, reduced-fat or fat-free cream cheese, and light whipped topping. The texture will be slightly less rich but still delicious.
· Make it a “Salad”: For a more “salad” feel, fold 1-2 cups of miniature marshmallows into the creamy topping instead of (or in addition to) the Jello layer.
Your Jello Salad Toolkit: Essential Equipment for Success
Having the right tools makes this nostalgic recipe effortless and ensures picture-perfect layers.
Equipment You’ll Need
9×13-inch Glass Baking Dish: Glass is ideal because it shows off the beautiful layers, doesn’t retain odors, and allows you to see when the bottom layer is fully set. A clear dish is a must for presentation.
Large Heatproof Bowl & Whisk: A bowl with a pouring spout is incredibly helpful for mixing and pouring the hot Jell-O base without spills. A sturdy whisk is key for fully dissolving the gelatin powder.
Hand Mixer or Stand Mixer: While you can mix the topping by hand, an electric mixer is the only way to achieve a perfectly smooth, lump-free cream cheese and sugar base. A stand mixer frees up your hands.
Flexible Silicone Spatula: This is your best friend for folding the whipped topping gently (to keep it airy), scraping bowls clean, and spreading layers smoothly without scratching your glass dish.
Measuring Cups & Spoons: Accuracy matters for the correct Jell-O setting. Use liquid measuring cups for the water and dry measuring cups for the sugar and nuts.
Can Opener & Colander (Optional): You’ll need to open the cans. Remember, you do NOT drain the pineapple. A colander is only needed if you choose to add other drained fruits like mandarin oranges.
This simple toolkit is standard in most kitchens and is perfect for mastering not just this recipe, but a whole world of easy no-bake desserts and simple cold salads.
Serving, Storing, and Make-Ahead Guide
· Serving Suggestions: This salad is incredibly versatile.
· As a Side Dish: It’s the classic companion to holiday ham, roasted turkey, fried chicken, or pork chops. Its sweetness cuts through savory, salty meats perfectly.
· As a Dessert: Serve it in smaller portions alongside cookies or on its own as a light, fruity end to a heavy meal.
· Garnish Ideas: Top with extra nuts, a maraschino cherry, or a tiny sprinkle of orange zest.
· Make-Ahead Instructions: This salad’s superpower is its make-ahead nature. You have two options:
Full Make-Ahead: Complete the entire recipe, including the topping, up to 24-48 hours in advance. Cover tightly with plastic wrap and store in the fridge.
Staged Prep: Make the Jello base up to 2 days ahead. Prepare the topping 1 day ahead, store it separately in a sealed container, and spread it on the set base a few hours before serving.
· Storage: Store any leftovers covered tightly with plastic wrap or in an airtight container in the refrigerator for 3-4 days. The layers will remain distinct, though the bottom may begin to soften slightly underneath the topping.
Conclusion: A Timeless Treat for a New Generation
The Black Cherry Jello Salad is a testament to the enduring power of simple, joyful food. It doesn’t require gourmet techniques or exotic ingredients, yet it consistently delivers a moment of pure, shared pleasure. It’s a dish that connects us to family traditions while creating new memories at every potluck and holiday table.
In a world of complex cooking trends, this salad stands proud as a beloved retro classic, reminding us that sometimes the most memorable dishes are the ones served with a side of nostalgia and a big scoop of love. So, embrace the tradition, whisk up that glossy red Jello, and get ready to present a dish that will spark stories, satisfy sweet tooths, and likely leave you with an empty pan to take home.
Ready to make a classic? Grab those boxes of black cherry Jell-O and get ready for the compliments to roll in. And when they do, you’ll know the secret: the best crowd-pleasing recipes are often the ones steeped in shared history and simple, sweet goodness.
More Recipes You Might Like
-

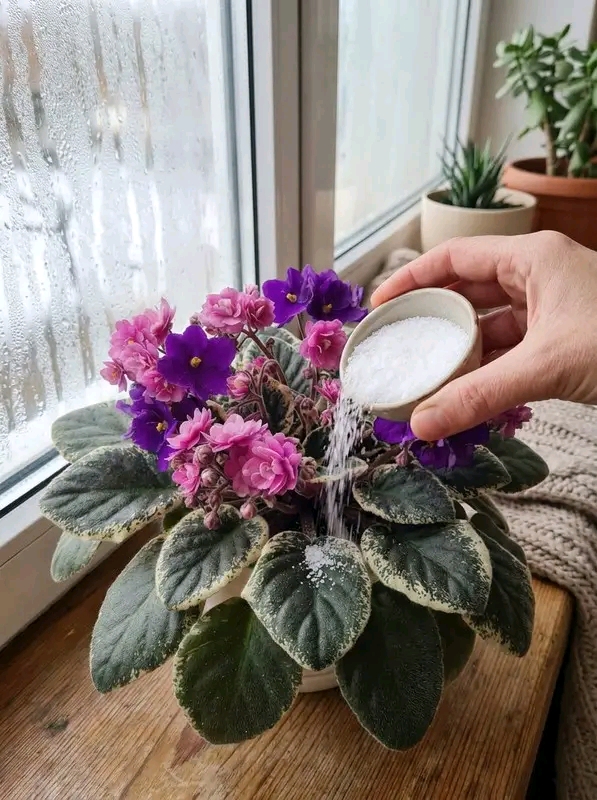
Easy African Violet Care: Simple Tips for Lush Growth and Vibrant Blooms
African violets are small, elegant, and full of charm. Their soft fuzzy leaves, compact shape, and bright purple, pink, white, blue, or double flowers make them one of the most loved indoor flowering plants. They look beautiful on windowsills, shelves, kitchen counters, bedroom tables, office desks, and cozy plant corners. Even one healthy African violet…
-

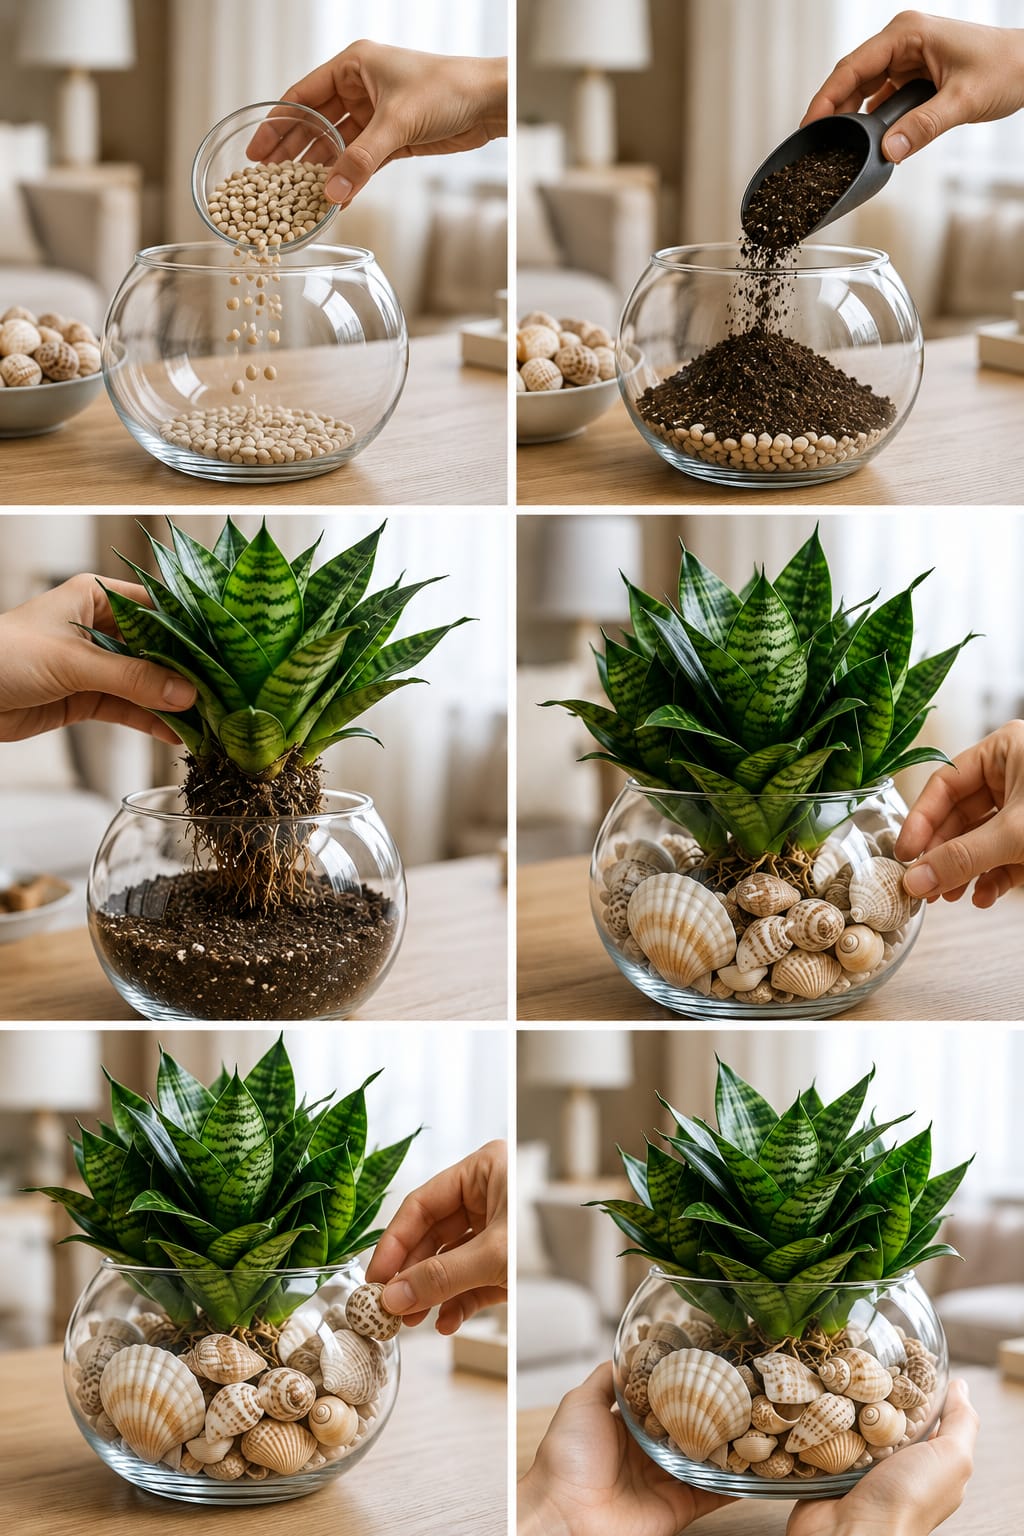
Bird’s Nest Snake Plant Fishbowl Garden: A Complete Guide to Creating a Beautiful Glass Bowl Display With Shells, Strong Roots, Healthy Leaves, and Stylish Indoor Decor
Bird’s Nest Snake Plant is one of the most beautiful compact houseplants for small indoor spaces. Its short rosette shape, thick patterned leaves, and elegant green form make it perfect for tables, shelves, desks, windowsills, bedrooms, offices, and living room displays. Unlike tall snake plants that grow like upright swords, Bird’s Nest Snake Plant grows…
-

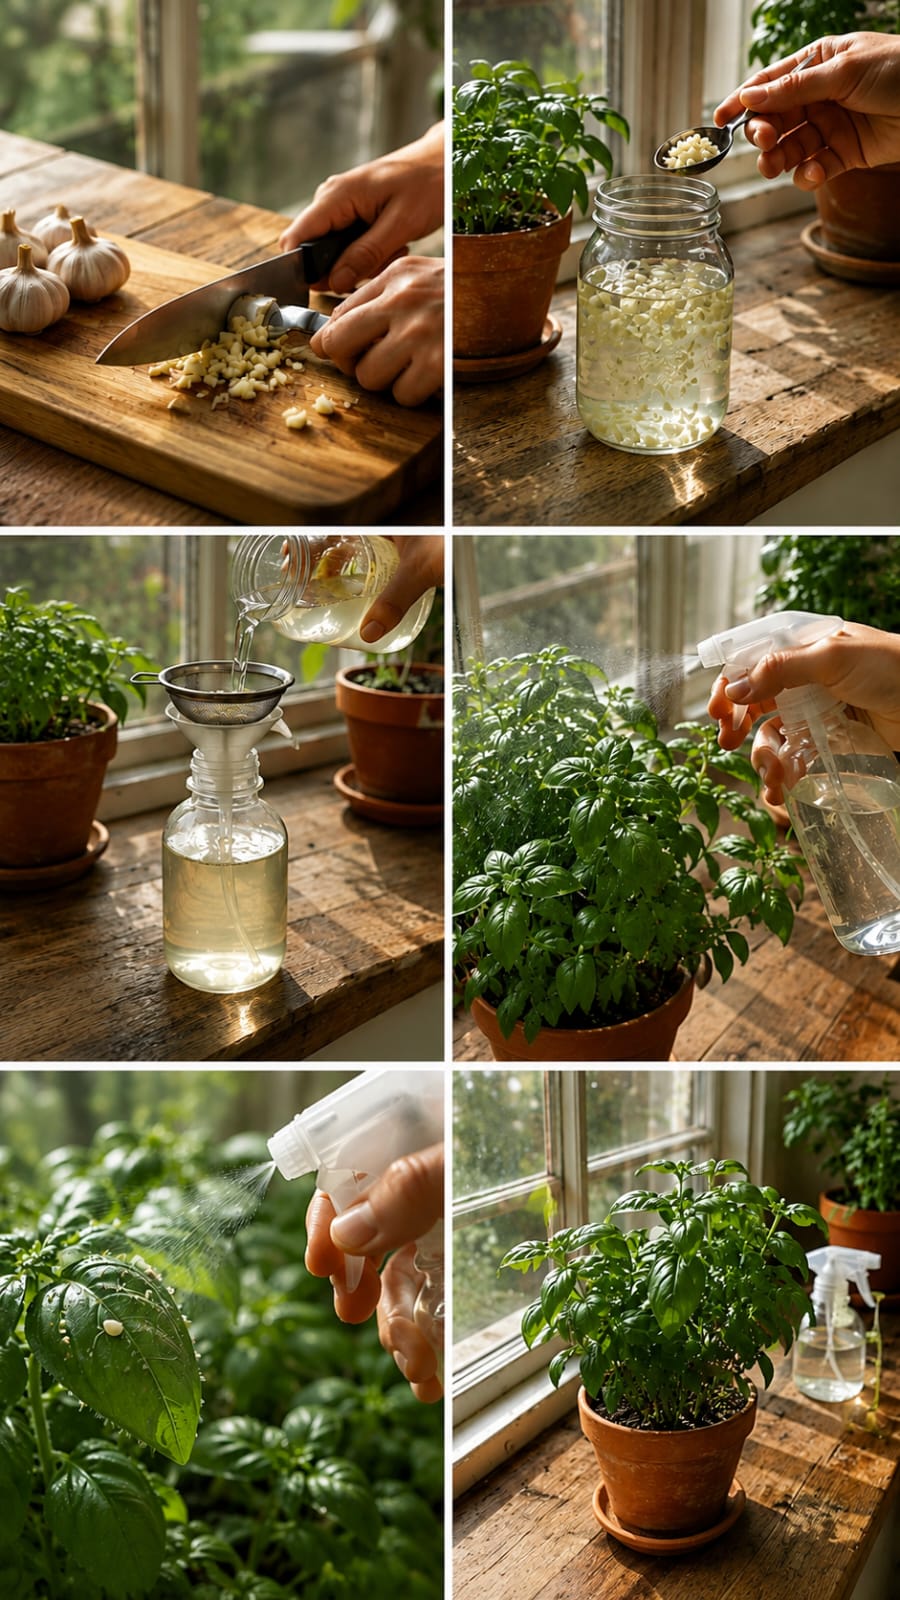
Garlic Spray for Indoor Plants: A Complete Guide to Making a Natural Garlic Water Spray for Basil, Herbs, Houseplants, Pest Prevention, Leaf Care, and Healthy Indoor Growth
Indoor plants bring freshness, color, scent, and life into the home. A sunny windowsill filled with basil, mint, parsley, pothos, peppers, flowers, and leafy houseplants can make any room feel warmer and more natural. But indoor plants also face problems. Leaves can become dusty. Tiny pests can appear. Soil can stay too wet. Basil can…