
Imagine a candy so visually striking, so perfectly balanced in texture and flavor, that it feels like a decadent gift from a specialty chocolatier—yet it’s made with just three simple ingredients in under 20 minutes. Welcome to the world of Amish Zebra Cashew Clusters, the no-bake confection that’s about to become your secret weapon for gifting, holiday platters, and satisfying your own sweet tooth.
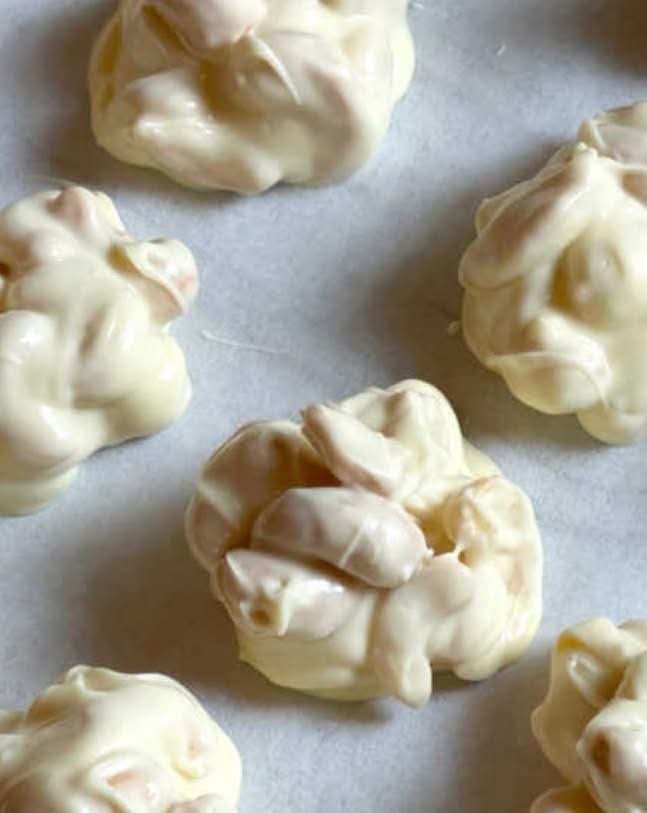
These aren’t your average nut clusters. Each one is a masterpiece of contrast: a generous mound of buttery, salty roasted cashews, enrobed in a rich pool of dark chocolate, and then elegantly streaked with pure white chocolate in a stunning “zebra stripe” pattern. The result is a treat that delights the eye before you even taste it. With one bite, you experience the satisfying crunch of the cashew, the deep, sophisticated bitterness of the dark chocolate, and the sweet, creamy finish of the white chocolate—all in perfect harmony.
This recipe captures the Amish spirit of simple, wholesome, and community-oriented cooking. It requires no special equipment, no tempering fears, and yields impressive results every time. Whether you need a last-minute homemade gift, a standout addition to your holiday cookie tray, or a simple dessert for book club, these clusters are your answer. They are the very definition of minimalist elegance in the kitchen.
Let’s gather our few ingredients and create something beautiful.
Why This Recipe is a Candy-Making Game Changer
Before we melt our first piece of chocolate, let’s talk about why this specific treat deserves a prime spot in your recipe collection.
· Maximum Impact, Minimal Effort: With only 3 core ingredients and a process that takes less time than a TV episode, this is the ultimate easy homemade candy. The “zebra” technique looks professionally complex but is surprisingly foolproof.
· The Perfect Flavor & Texture Trio: This recipe masterfully balances sweet, salty, bitter, and creamy. The luxurious cashew is the ideal canvas for the two-chocolate contrast, creating a more sophisticated flavor profile than a single-chocolate cluster.
· Gift-Giving Gold: Handmade food gifts carry heart. Presented in a simple glassine bag or a pretty tin, these clusters communicate care and craftsmanship. They are a budget-friendly gift that feels incredibly luxurious.
· Naturally Crowd-Pleasing: Its stunning appearance draws people in, and the universally loved flavors ensure everyone enjoys it. It’s a guaranteed hit at parties and potlucks.
· Allergy-Friendly Flexibility: While this version uses cashews, the method works with virtually any nut or even pretzels or dried fruit, making it easily adaptable.
The Art of the “Zebra”: It’s Simpler Than You Think
The signature look might seem intimidating, but the technique is wonderfully simple. We are not doing intricate piping or careful dipping. The magic lies in a single, confident drag of a toothpick through opposing dots of chocolate.
By placing small dots of white chocolate onto the still-wet dark chocolate base and then dragging through them, we create organic, artistic stripes that are unique to every cluster. This method embraces imperfection—no two stripes will be alike, and that’s part of their handmade charm. It’s a technique that empowers even the most novice candy-maker to create something breathtaking.
Gathering Your Ingredients: Quality is Everything
With so few components, the quality of each one shines through brilliantly. This is not the time for bargain-bin chocolate.
The Core Trinity:
· 2 cups (about 10 oz) Whole Roasted & Salted Cashews: The star. Use the best you can find. Salted is crucial—the salt heightens all the other flavors. Ensure they are at room temperature and dry.
· 10 oz (about 1 ⅔ cups) High-Quality Dark Chocolate Chips or Chopped Bar (54-70% cacao): A good bar of chocolate will melt more smoothly than chips (which contain stabilizers), but chips are more convenient. Choose a brand you enjoy eating on its own.
· 4 oz High-Quality White Chocolate Chips or Chopped Bar: True white chocolate should list cocoa butter as a primary ingredient, not palm or vegetable oil. This ensures proper melting and a rich flavor.
Optional but Recommended:
· 1 tsp Coconut Oil or Vegetable Shortening (divided): A tiny amount added to each chocolate when melting helps create a smoother, glossier finish and perfect dipping consistency.
· Flaky Sea Salt: For a final gourmet touch on the dark chocolate.
Step-by-Step Instructions: Creating Your Candy Masterpieces
Follow these steps for perfectly formed, beautifully striped clusters every single time.
Step 1: Prepare Your Workspace
Line two large baking sheets with parchment paper or silicone baking mats. Have all your ingredients measured and ready. This is a fast process once the chocolate is melted.
Step 2: Melt the Dark Chocolate
Create a double boiler: Fill a small saucepan with 1-2 inches of water and bring to a bare simmer. Place a heatproof bowl (glass or metal) on top, ensuring the bottom does not touch the water.
Add the dark chocolate(and ½ tsp of coconut oil, if using) to the bowl. Stir gently and constantly with a silicone spatula until the chocolate is completely smooth and fluid. Remove the bowl from the heat and wipe the bottom dry to prevent steam droplets from getting into your chocolate.
Step 3: Form the Clusters
Working quickly, drop scant tablespoons of melted dark chocolate onto the prepared baking sheets, spacing them a few inches apart. You should have 16-20 puddles.
Immediately place a small mound of cashews(about 6-8 nuts) onto the center of each chocolate puddle, gently pressing them down so they nestle into the chocolate. The chocolate should act as “glue” and peek out around the edges. Let these sit while you prepare the white chocolate.
Step 4: Melt the White Chocolate & Create the Zebra Stripes
Clean your bowl and spatula thoroughly. Any trace of dark chocolate will muddy the white. Repeat the double boiler process with the white chocolate (and remaining ½ tsp coconut oil), melting until perfectly smooth.
Now,for the artistic flourish: Using a teaspoon, drizzle or dot small amounts of melted white chocolate over each dark chocolate cluster. Don’t overthink it—a few random dots or a small zigzag is perfect.
Immediately,take a toothpick. Starting from one side of the cluster, drag the tip of the toothpick straight through the white chocolate dots to the other side. Wipe the toothpick clean and repeat, dragging in the opposite direction or at a different angle. This simple drag is what creates the beautiful, marbled zebra effect.
Step 5: Set to Perfection
If desired, sprinkle a tiny pinch of flaky sea salt onto the dark chocolate areas before the clusters set.
Allow the clusters to set completely at room temperature.This can take 1-2 hours. For faster setting, you can place the trays in the refrigerator for 20-30 minutes. Store in an airtight container once set.
Expert Tips & Troubleshooting for Candy Success
· The Golden Rule: No Water! Even a single drop of water can cause melted chocolate to “seize,” turning it into a grainy, unusable mass. Ensure all bowls, spatulas, and nuts are completely dry.
· Chocolate Too Thick? If your melted chocolate is stiff, it may be overheating. The water should be simmering, not boiling. A small amount of coconut oil (not butter or milk) will thin it perfectly without altering the setting quality.
· Preventing Bloom: That white, dusty appearance on set chocolate is fat bloom, often caused by temperature fluctuations. Setting at room temperature is best. If you must refrigerate, let them come to room temperature in the container before opening to prevent condensation.
· For Perfect Stripes: Work on one baking sheet at a time. The dark chocolate must still be wet for the white chocolate to blend into it. If it starts to set, you’ll get defined layers instead of blended stripes.
· Double the Flavor: For an extra layer, you can lightly toast the cashews in a dry pan for 2-3 minutes before using. Let them cool completely.
Creative Variations to Make It Your Own
· The Nutty Trio: Use a mix of cashews, almonds, and pecans.
· Peppermint Zebra: Add a drop of peppermint extract to the dark chocolate and crush candy canes over the top with the flaky salt.
· Salted Caramel Drizzle: Before striping, drizzle a little store-bought thick caramel sauce over the clusters.
· Orange Zest: Add a teaspoon of orange zest to the dark chocolate for a sophisticated citrus twist.
Serving, Gifting & Storage
· Serving: Arrange on a platter as part of a dessert spread, or package individually as sweet favors.
· Gifting: Place clusters in small candy cups inside a decorative box or tin. Separate layers with parchment paper.
· Storage: Store in a single layer in an airtight container at cool room temperature for up to 2 weeks. They can be refrigerated for longer storage but may lose some shine.
Frequently Asked Questions (FAQ)
Q: Can I use almond bark or candy melts instead of real chocolate?
A:You can, and they are more forgiving (no tempering required). However, the flavor will be sweeter and less complex than using real chocolate. Follow the melting instructions on the package.
Q: Why are my stripes not blending, just sitting on top?
A:This means the dark chocolate had already begun to set before you added the white. Work more quickly, or ensure your kitchen isn’t too cold. The dark chocolate should still look wet and glossy when you dot the white on.
Q: Can I make these with milk chocolate?
A:Absolutely! Use milk chocolate as your base and pair it with the white chocolate for a sweeter, milder cluster. The contrast will still be beautiful.
Q: My white chocolate got chunky when melting. Can I fix it?
A:White chocolate is very heat-sensitive. If it seizes, try stirring in a teaspoon of warm coconut oil to see if it smooths out. Often, it’s easier to start over with a fresh batch on lower heat.
Q: Are these gluten-free?
A:Yes, as long as you use certified gluten-free chocolate and ensure no cross-contamination, this recipe is naturally gluten-free.
There you have it—the complete guide to creating stunning, delicious Amish Zebra Cashew Clusters. This recipe proves that with a little simplicity and a touch of artistry, you can create edible gifts that speak volumes. So, melt that chocolate, grab your toothpick, and prepare to make something truly special.
Now, it’s your turn! What nut or flavor combination will you try first? Share your creations and creative twists in the comments below!
More Recipes You Might Like
-
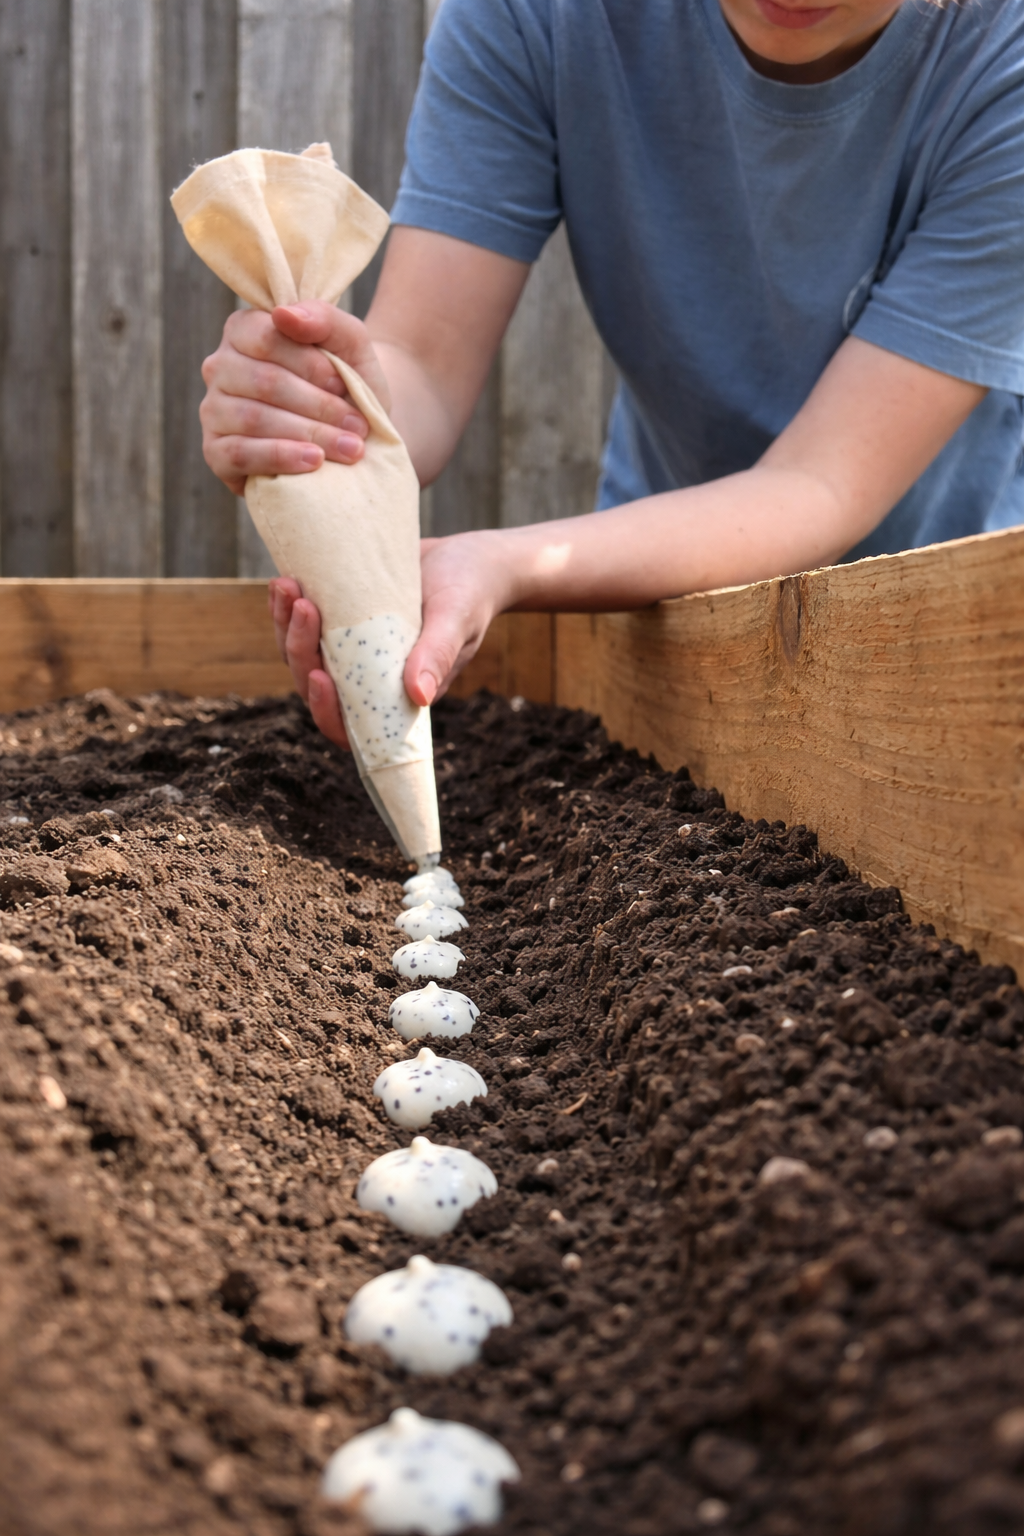
The Easy Garden Hack That Guarantees Straight, Healthy Carrots
Say goodbye to crooked, stunted carrots! Discover the simple seed paste hack that ensures perfect spacing and straight roots. This easy planting technique will transform your carrot harvest. Let me tell you about the gardening trick that turned my carrot patch from a tangle of twisted roots into a picture-perfect harvest. I love growing carrots.…
-

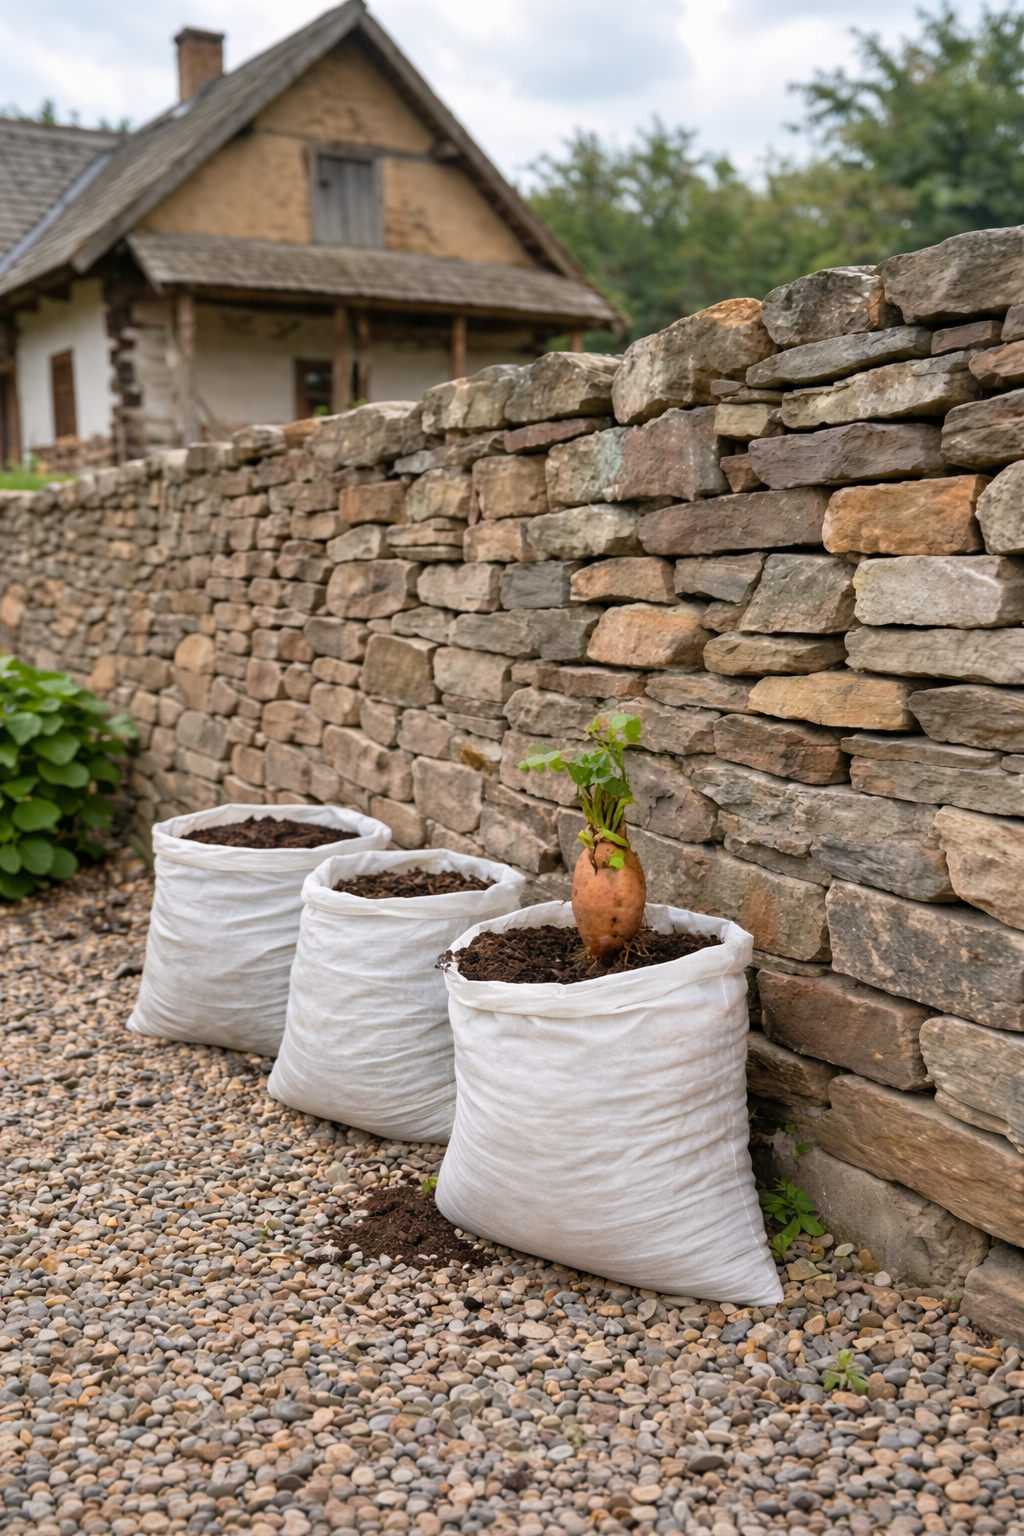
Grow 3X More Sweet Potatoes at Home with This Simple Soil Bag Trick
Want to grow 3 times more sweet potatoes in a small space? This clever soil bag trick is a game-changer. Learn how to plant sweet potatoes in bags for a massive harvest—perfect for small gardens and patios. Let me tell you about the gardening trick that turned my tiny patio into a sweet potato factory.…
-
Grow 3X More Sweet Potatoes at Home with This Simple Soil Bag Trick
Want to grow 3 times more sweet potatoes in a small space? This clever soil bag trick is a game-changer. Learn how to plant sweet potatoes in bags for a massive harvest—perfect for small gardens and patios. Let me tell you about the gardening trick that turned my tiny patio into a sweet potato factory.…