
Garlic is a staple ingredient in many kitchens, prized not only for its rich flavor but also for its numerous health benefits. Packed with vitamins A, B, C, and E, antioxidants, calcium, potassium, zinc, selenium, and allicin (a potent natural antibiotic), garlic truly earns its status as a superfood. While garlic is often associated with folklore and warding off vampires, its real value lies in its culinary and health benefits. Despite its popularity, store-bought garlic can be relatively expensive. Fortunately, you can grow garlic at home in a pot, ensuring an endless supply with minimal effort.
What You Need:
- Potting soil
- A head of garlic
- A pot (preferably with drainage holes)
Steps for Growing Potted Garlic:
1. Choose the Right Pot
Select a sizable pot with good drainage. The pot should be at least 8-10 inches deep to accommodate the garlic roots and provide enough space for growth.
2. Prepare the Soil
Fill the pot with high-quality potting soil. Garlic thrives in well-draining, nutrient-rich soil, so make sure to choose a potting mix that supports healthy growth.
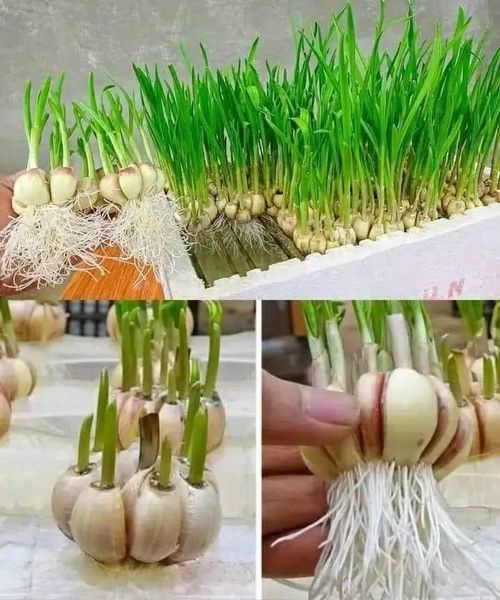
3. Separate the Cloves
Carefully separate the cloves from the garlic head. Ensure the cloves are fresh, plump, and undamaged. Each clove will sprout into a new garlic bulb, so select the healthiest cloves for planting.
4. Plant the Cloves
- Depth: Plant each clove about 2.5 cm (1 inch) deep with the pointed tip facing up.
- Spacing: Maintain a 10 cm (4 inches) distance between each clove to give them enough room to grow. Add a thin layer of potting soil on top, about 1 cm (0.4 inches) thick, ensuring the tips are barely covered.
5. Find the Right Spot
Place the pot in a sunny spot where the garlic will receive at least 6 hours of direct sunlight daily. Garlic loves the sun, so a bright location is crucial for optimal growth.
6. Watering
Garlic requires minimal watering. Keep the soil slightly moist but avoid overwatering, as this can lead to rot. Water the garlic lightly, ensuring the soil remains damp but not soggy.
7. Monitor Growth
As the garlic grows, you will notice shoots emerging from the soil. If the plants start to produce blossoms, remove them promptly. This step helps preserve the flavor of the garlic bulbs.
8. Harvest Time
Garlic is ready to harvest when the plants have developed 5 or 6 leaves, and the foliage begins to yellow and wither. This typically takes about 8 to 10 months. Gently lift the bulbs from the soil using a trowel.
9. Cure the Garlic
Once harvested, dry the garlic in a cool, dry place for about a week. This could be a garage, cellar, or any area with good air circulation. Curing helps to extend the shelf life of your garlic and enhances its flavor.
10. Utilize Green Stems
Don’t forget that the green stems of garlic, often referred to as garlic scapes, are also edible. They can be used like chives to add a mild garlic flavor to your dishes.
Additional Tips for Successful Garlic Cultivation
- Optimal Planting Periods: Plant garlic in early spring or fall for the best results. Fall planting allows the cloves to establish roots before winter, leading to larger bulbs.
- Continuous Supply: Each harvested garlic bulb will provide you with new cloves to plant, ensuring a perpetual supply of garlic.
- Fertilization: If desired, you can feed the garlic with a balanced fertilizer according to the package instructions to promote robust growth.
By following these straightforward steps, you can enjoy a continuous supply of fresh, homegrown garlic, saving money and enhancing your culinary creations with homegrown goodness. Happy gardening!