
My snake plant was dying—yellow leaves, drooping, no growth. Then I tried this easy homemade organic liquid fertilizer. Within weeks, it came back stronger than ever! Here’s exactly how I did it.
Let me tell you about the plant that almost broke my heart—and my confidence as a plant parent.
My snake plant (Sansevieria trifasciata) had been with me for years. It was my first houseplant, the one that survived my early “learning experiences” with overwatering and neglect. It was supposed to be indestructible. Everyone says snake plants are impossible to kill.
So why was mine dying?
The leaves that once stood tall and proud were turning yellow at the tips. Some had developed soft, mushy spots near the base. New growth had completely stopped—not a single pup in over eight months. The plant that should have been thriving looked like it was slowly giving up.
I tried everything. I adjusted my watering schedule (maybe I was overwatering? underwatering?). I moved it to different spots with varying light conditions. I checked for pests. Nothing seemed to help. The decline continued, slow but steady.
Then, a friend who runs a small nursery shared a secret with me. “Stop buying expensive fertilizers,” she said. “The best thing for a struggling snake plant is probably already in your kitchen.”
She taught me how to make a simple, organic liquid fertilizer using everyday ingredients. I was skeptical—could banana peels and rice water really save my dying plant? But I was desperate, so I tried it.
The results shocked me. Within two weeks, my snake plant showed signs of new growth. Within a month, the yellowing stopped, and the leaves regained their firm, upright posture. Now, six months later, my snake plant has produced three new pups and looks healthier than it has in years.
In this guide, I’ll share exactly how I revived my snake plant using this easy homemade organic liquid fertilizer. No expensive products, no complicated science—just simple kitchen scraps and a little patience. Whether your snake plant is struggling or you just want to give it a boost, this method works.
Why My Snake Plant Was Struggling
Before we dive into the solution, let’s talk about why snake plants sometimes struggle—even when we think we’re doing everything right.
Common Snake Plant Problems
Snake plants are hardy, but they’re not invincible. Here are the most common issues:
Problem Signs Common Cause
Overwatering Yellow, mushy leaves; soft stems Soil stays wet too long
Underwatering Brown, crispy leaf tips; wrinkled leaves Not enough water
Nutrient Deficiency Slow growth, pale leaves, no new pups Depleted soil, no fertilizer
Root Rot Foul smell, black mushy roots, collapsing leaves Overwatering + poor drainage
Root Bound Roots circling pot, pushing through drainage holes, stunted growth Pot too small
In my case, my snake plant showed a combination of pale leaves, extremely slow growth, and a general lack of vigor. The soil was old—I hadn’t repotted in years—and the plant had likely exhausted all available nutrients. It wasn’t dying from water issues; it was starving.
The Importance of Fertilizing Snake Plants
Here’s something many people don’t realize: snake plants do need fertilizer. Yes, they’re tough and can survive in poor conditions, but “survive” isn’t the same as “thrive.” If you want your snake plant to grow, produce pups, and look its best, it needs nutrients .
The problem is that many commercial fertilizers are too harsh for snake plants. They’re formulated for heavy feeders and can burn sensitive roots, especially if you apply them too often or at full strength. That’s why homemade organic fertilizers are such a game-changer—they’re gentle, natural, and provide exactly what your plant needs without the risk of chemical burn .
The Easy Homemade Organic Liquid Fertilizer Recipe
After researching and experimenting, I settled on a combination of two powerful, nutrient-rich ingredients that work synergistically to revive struggling snake plants.
Ingredient #1: Banana Peel Water
Banana peels are packed with potassium, phosphorus, and calcium—three nutrients essential for plant health .
· Potassium: Promotes overall plant vigor, helps with water uptake, and strengthens cell walls
· Phosphorus: Supports root development and energy transfer
· Calcium: Essential for cell wall structure and growth
Ingredient #2: Rice Water
When you wash rice, the water becomes cloudy with starches, vitamins, and minerals that rice grains absorb from the soil .
· Starches: Feed beneficial soil microorganisms
· B vitamins: Support root growth and overall plant health
· 微量 minerals: Including nitrogen, phosphorus, and potassium in small amounts
The Recipe: Banana Peel and Rice Water Fertilizer
Here’s exactly how I make my miracle fertilizer:
Ingredients:
· 2-3 organic banana peels (organic is important to avoid pesticide residues)
· 2 cups uncooked rice (any type—white, brown, jasmine—all work)
· 4 cups water (filtered or dechlorinated is best)
· 1-gallon container with lid (like an old milk jug or juice container)
Step-by-Step Instructions:
Step 1: Make Rice Water
- Place 2 cups of uncooked rice in a fine-mesh strainer.
- Rinse the rice under running water, catching the water in a bowl below. This first rinse water is your gold.
- Collect about 2 cups of this rice rinse water. Set aside.
- (You can cook the rice as usual—no waste!)
Step 2: Prepare Banana Peels
- Take your 2-3 banana peels and cut them into small pieces (about 1-inch squares). Smaller pieces break down faster.
- Place the peel pieces in your 1-gallon container.
Step 3: Combine and Ferment
- Pour the rice water into the container with the banana peels.
- Add an additional 2 cups of plain water (so total liquid is about 4 cups).
- Close the lid tightly and give it a good shake.
- Store the container in a cool, dark place (like a cupboard) for 3-5 days. You’ll notice the water becoming cloudy and perhaps a little bubbly—that’s fermentation, which releases nutrients .
Step 4: Strain and Store
- After 3-5 days, strain the liquid through a fine-mesh sieve or cheesecloth into a clean container. Discard the fermented peels (compost them if you have one).
- Your fertilizer concentrate is now ready. It should smell slightly earthy and fermented—not rotten. If it smells truly awful (like sulfur or rot), something went wrong and you should discard it .
Step 5: Dilute Before Using
- This concentrate is too strong to use directly. Dilute it with water at a ratio of 1 part fertilizer to 5 parts water .
- For a standard watering can, that’s about 1 cup of fertilizer concentrate mixed with 5 cups of water.
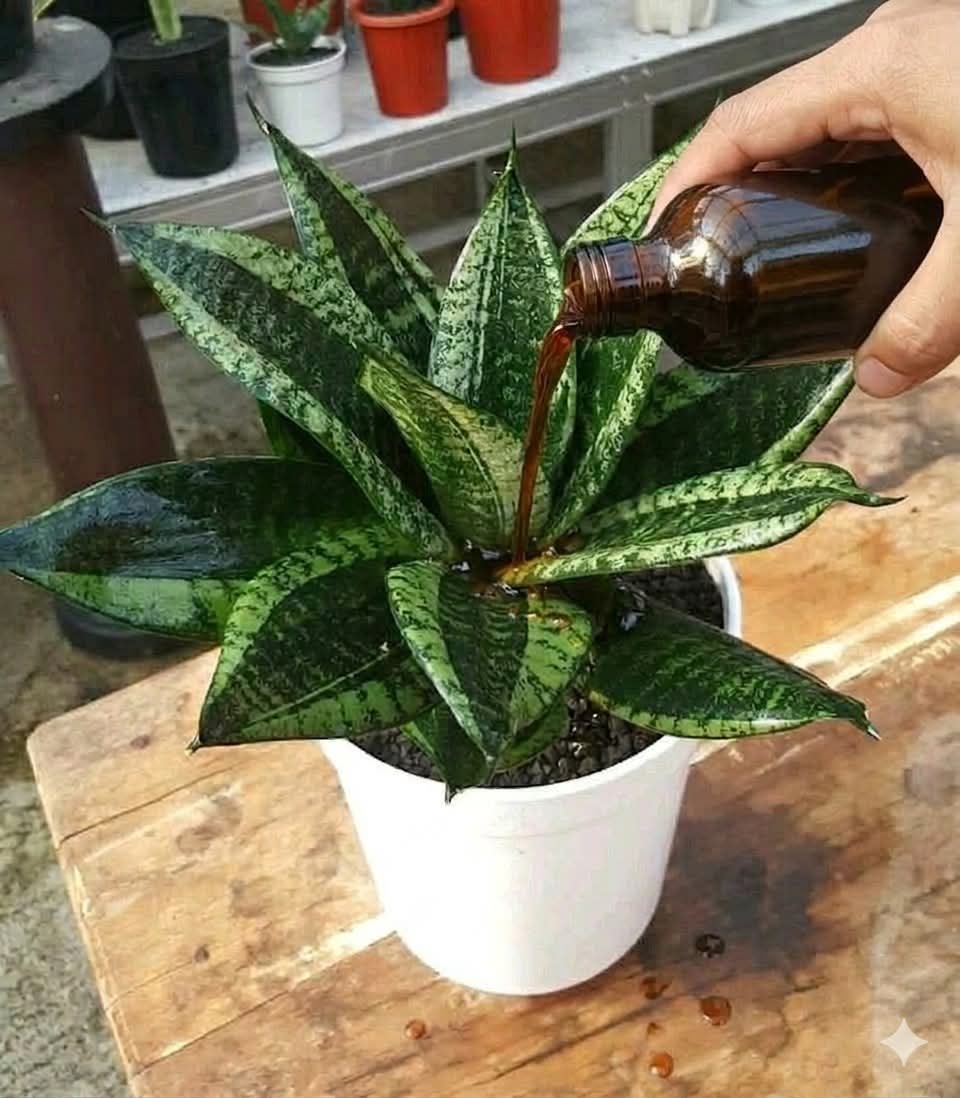
How I Applied the Fertilizer to My Dying Snake Plant
Now for the most important part: how I actually used this fertilizer to revive my struggling snake plant.
Step 1: Assess the Damage
Before applying anything, I removed my snake plant from its pot to check the roots. This is crucial—if root rot is present, fertilizer can actually make things worse by encouraging bacterial growth .
Healthy roots should be firm and light-colored (white, cream, or orange, depending on variety). Rotting roots are brown, black, mushy, and often smell bad.
My plant had some healthy roots but also some old, dead ones. I trimmed away the dead roots with sterilized scissors and repotted in fresh, well-draining succulent mix before fertilizing.
Step 2: Water First, Fertilize Second
This is a golden rule of fertilizing: never apply fertilizer to dry soil. It can burn the roots. Always water your plant thoroughly first, then apply diluted fertilizer .
I gave my repotted snake plant a good drink of plain water and waited a day. The next day, I used my diluted banana peel and rice water fertilizer.
Step 3: Apply During Growing Season
The best time to fertilize snake plants is during their active growing season—spring and summer . During fall and winter, snake plants enter a rest period and don’t need (or want) extra nutrients .
Since I started this revival in early spring, the timing was perfect. The plant was naturally gearing up for growth, and the fertilizer provided the fuel it needed.
Step 4: Frequency Matters
I applied the diluted fertilizer once every 4 weeks during the growing season. More frequent applications can lead to nutrient buildup and potentially harm the plant .
Step 5: Observe and Adjust
After each application, I watched my plant closely. Within two weeks, I noticed tiny new growth at the base—the first sign of life in months! The existing leaves gradually became firmer and greener.
The Results: My Snake Plant’s Amazing Transformation
The before-and-after difference was nothing short of remarkable.
Week 1-2: First Signs of Life
· Existing leaves stopped yellowing
· Leaf color began deepening from pale green to richer green
· Tiny green bumps appeared at the soil surface—new growth!
Week 3-4: Visible Growth
· New shoots (pups) began emerging from the soil
· Old leaves became noticeably firmer and more upright
· Overall plant appearance went from “sad” to “healthy”
Month 2-3: Thriving Plant
· Multiple pups grew to several inches tall
· Original leaves regained deep green color with characteristic patterns
· Plant looked fuller and more vibrant than it had in years
Month 6: Fully Revived
· Three mature pups now stand alongside the original plant
· No yellowing leaves, no drooping
· The plant has doubled in size and looks absolutely thriving
Why This Homemade Fertilizer Works So Well
Let’s dive deeper into the science of why this simple mixture is so effective for snake plants.
Nutrient Profile
Banana peels are rich in potassium—the nutrient responsible for overall plant vigor, disease resistance, and water regulation . Snake plants use potassium to maintain their upright structure and produce strong, healthy leaves .
Rice water provides 微量淀粉 and B vitamins that feed the beneficial microorganisms in the soil . A healthy soil microbiome helps roots absorb nutrients more efficiently and protects against pathogens .
Gentle, Slow-Release Action
Unlike synthetic fertilizers that deliver a sudden blast of chemicals, homemade organic fertilizers break down slowly, providing a steady, gentle supply of nutrients . This is perfect for snake plants, which evolved to survive in low-nutrient environments and can be sensitive to fertilizer burn .
Improved Soil Structure
The organic matter in this fertilizer helps improve soil structure over time, promoting better drainage and aeration—exactly what snake plants need to prevent root rot .
Pro Tips for Maximum Success
Want to ensure your snake plant revival is as successful as mine? Here are some expert tips:
- Always Dilute
Never use the fertilizer concentrate full-strength. Diluting protects sensitive roots and prevents nutrient buildup. When in doubt, err on the side of weaker rather than stronger .
- Use Organic Bananas
Conventionally grown bananas may have pesticide residues on the peels. Organic bananas ensure you’re not adding chemicals to your soil .
- Don’t Over-Fertilize
More is not better. Stick to once every 4-6 weeks during growing season. Over-fertilizing can cause brown leaf tips, salt buildup in soil, and even kill your plant .
- Check Soil Moisture First
Only fertilize when the soil is slightly moist. If the soil is bone dry, water first and wait a day before fertilizing.
- Flush Soil Occasionally
Every few months, water your snake plant thoroughly with plain water until it runs out the drainage holes. This flushes out any accumulated salts from fertilizers .
- Stop in Winter
Cease all fertilization during fall and winter when your snake plant is resting. Resuming too early can disrupt its natural cycle .
Other Homemade Fertilizers That Work
While my banana peel and rice water combination worked wonders, there are other excellent homemade fertilizers you can try:
- Eggshell Water
Rinse and crush eggshells, then soak in water for 24-48 hours. The water becomes rich in calcium, which strengthens cell walls .
- Molasses Fertilizer
Mix 1 tablespoon of unsulfured molasses with 1 gallon of water. Molasses feeds soil microbes and provides微量 minerals .
- Compost Tea
Steep a handful of finished compost in water for 24-48 hours, then strain and use. This provides a wide spectrum of nutrients and beneficial microbes .
- Green Tea Fertilizer
Use cooled, unsweetened green tea. It contains微量 nitrogen and tannins that can benefit acid-loving plants .
General Snake Plant Care Tips for Long-Term Health
Reviving your snake plant is just the first step. Here’s how to keep it thriving for years to come.
Light
Snake plants are incredibly adaptable but prefer bright, indirect light . They’ll survive in low light, but they won’t grow much, and their colors may fade. For best growth, place them near an east or north-facing window .
Watering
This is where most snake plant problems start. Follow these rules:
· Allow soil to dry completely between waterings
· In low light, you may only need to water once every 3-6 weeks
· In brighter light, water every 2-3 weeks
· Always check soil moisture before watering—stick your finger in!
Soil
Use a well-draining potting mix. Cactus and succulent mixes work perfectly. You can also make your own by mixing regular potting soil with perlite or coarse sand (about 2:1 ratio) .
Temperature
Snake plants prefer temperatures between 60-85°F (15-29°C) . Protect them from cold drafts and temperatures below 50°F .
Pot and Repotting
Snake plants actually bloom better when slightly root-bound. Repot only every 3-5 years, or when roots are visibly crowding the pot. Choose a pot with drainage holes and only go up one size .
Cleaning
Dust can accumulate on snake plant leaves, blocking light absorption. Wipe leaves gently with a damp cloth every few months .
Frequently Asked Questions (FAQs)
Q: How often should I fertilize my snake plant with homemade fertilizer?
A: During spring and summer, fertilize once every 4-6 weeks. Stop completely during fall and winter .
Q: Can I use this fertilizer on other houseplants?
A: Absolutely! This gentle, organic fertilizer works well for most houseplants, including pothos, peace lilies, spider plants, and ZZ plants. Just adjust frequency based on each plant’s needs.
Q: My snake plant has yellow leaves. Should I fertilize?
A: First, determine the cause of yellowing. If it’s overwatering or root rot, fertilizing will make it worse. If the plant is pale and not growing but the soil is dry, a gentle fertilizer may help .
Q: Can I use bottled water instead of tap water?
A: Yes, filtered or dechlorinated water is best. If using tap water, let it sit out overnight to allow chlorine to evaporate .
Q: How long does homemade fertilizer last?
A: Store your diluted fertilizer in the refrigerator for up to two weeks. The concentrate can last up to a month in the fridge. Discard if it develops an unpleasant odor .
Q: Can I use this fertilizer on snake plant cuttings I’m propagating?
A: Not until they have well-established roots. Cuttings rooting in water don’t need fertilizer. Once you pot them and see new growth, you can begin a gentle fertilizing schedule .
Q: Why are my snake plant leaves curling?
A: Curling can indicate underwatering, pest issues, or temperature stress. Check soil moisture and inspect for pests before fertilizing .
Q: Is this fertilizer safe for pets?
A: The ingredients themselves (banana, rice) are non-toxic, but fermented plant material could cause mild digestive upset if ingested in large amounts. Keep plants out of reach of curious pets .
Troubleshooting: When Homemade Fertilizer Isn’t Enough
Sometimes, a struggling snake plant needs more than just nutrients. Here are other issues to consider:
Root Rot
If your plant has mushy, yellowing leaves and the soil smells bad, root rot may be the culprit. Remove the plant, trim away all rotted roots (black/brown and mushy), and repot in fresh, dry soil. Do not water for at least a week, and definitely do not fertilize until the plant shows signs of recovery .
Pest Infestation
Mealybugs, spider mites, and scale can weaken snake plants. Inspect regularly, especially in leaf crevices. Treat with rubbing alcohol on a cotton swab or insecticidal soap before fertilizing .
Pot Bound
If roots are circling the pot and pushing through drainage holes, your plant may need more space. Repot in a slightly larger container with fresh soil before resuming fertilizer .
My Final Thoughts
Reviving my snake plant with homemade organic fertilizer taught me something important: sometimes the simplest solutions are the most powerful. We’re conditioned to think we need expensive products and complicated formulas to help our plants thrive. But nature provides everything we need, often in the form of kitchen scraps we’d otherwise throw away.
This experience also reminded me that plants are resilient. Given the right conditions and a little help, they want to survive. My snake plant wasn’t dying because it had given up—it was dying because it was starving. Once I provided the nutrients it needed, it responded with gratitude in the form of lush, vibrant growth.
If your snake plant is struggling, I encourage you to try this method. It costs nothing, takes minimal effort, and might just save your plant’s life. And even if your plant is healthy, a little homemade fertilizer during the growing season will help it reach its full potential.
Have you tried making your own plant fertilizer? Do you have other homemade recipes that work well? I’d love to hear about your experiences in the comments below! And if you’re looking for more plant care guides, be sure to check out our articles on How to Propagate Snake Plants in Water, The Garlic Trick for Snake Plants, and Reviving a Dying Orchid.
Here’s to happy, healthy plants and the simple joy of watching them thrive! 🌿
Did this guide help you revive your snake plant? Share your before-and-after photos with us on social media—we’d love to celebrate your success!
More Ideas You Might Like
-
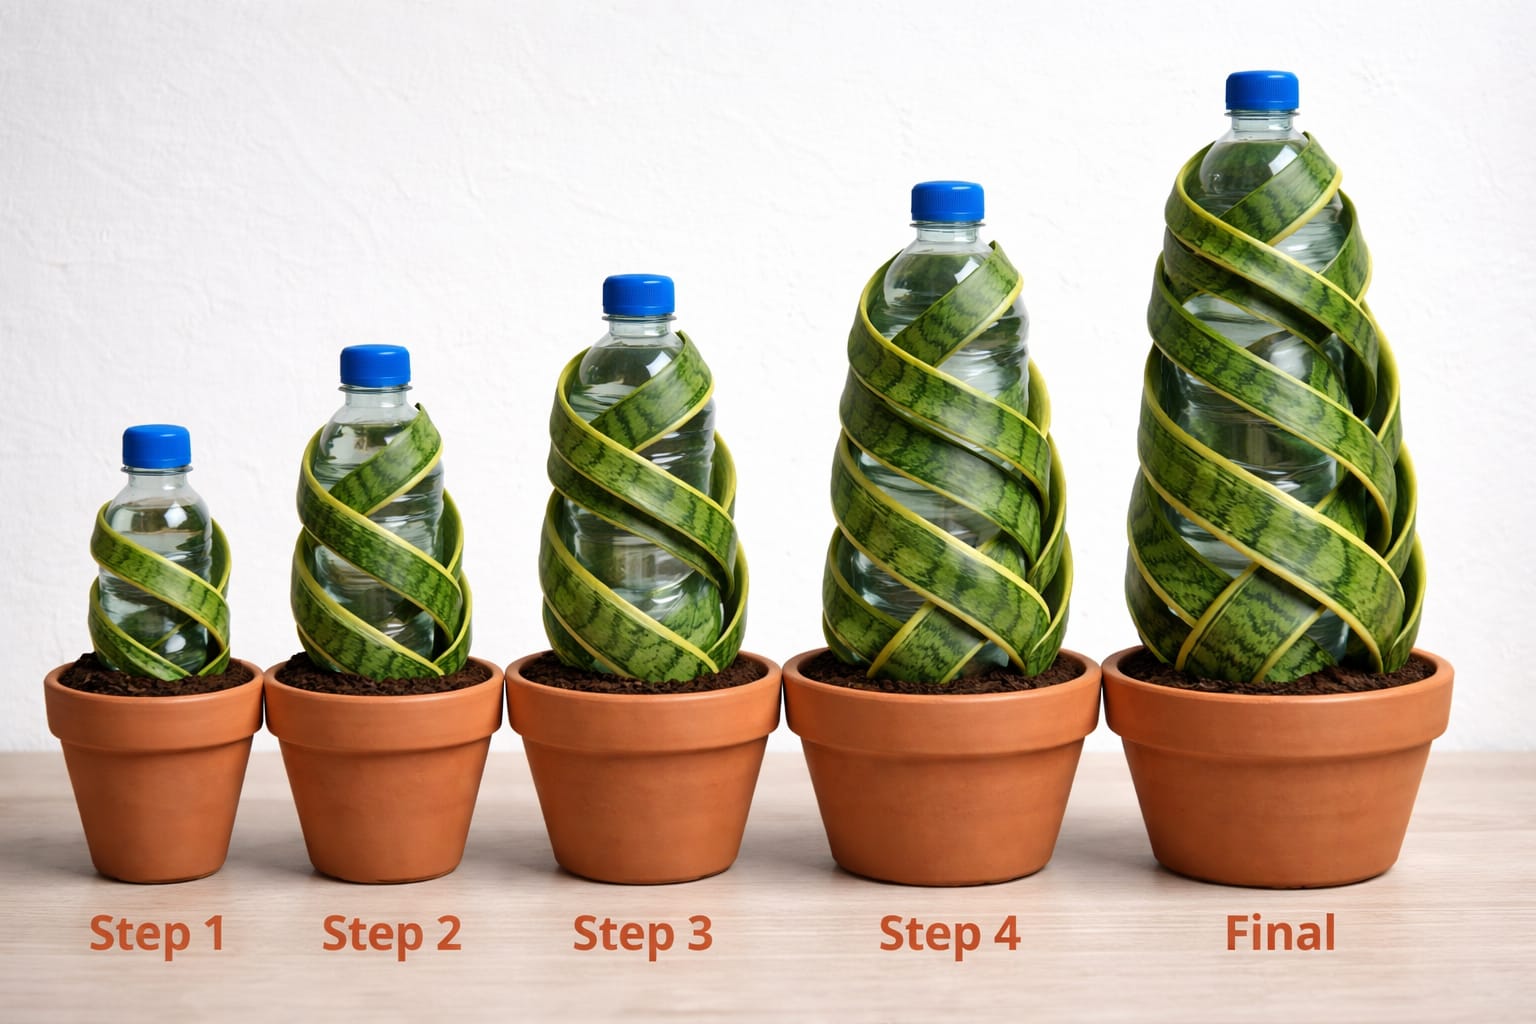
Gardeners Are Quietly Shaping Snake Plants Using This Simple Bottle Method
Discover the secret bottle method that turns ordinary snake plants into stunning spiral sculptures. Learn how to shape your Sansevieria with patience and a simple household item. Let me share a gardening secret that’s quietly making the rounds among plant lovers: you can shape your snake plant into a beautiful spiral using nothing more than…
-
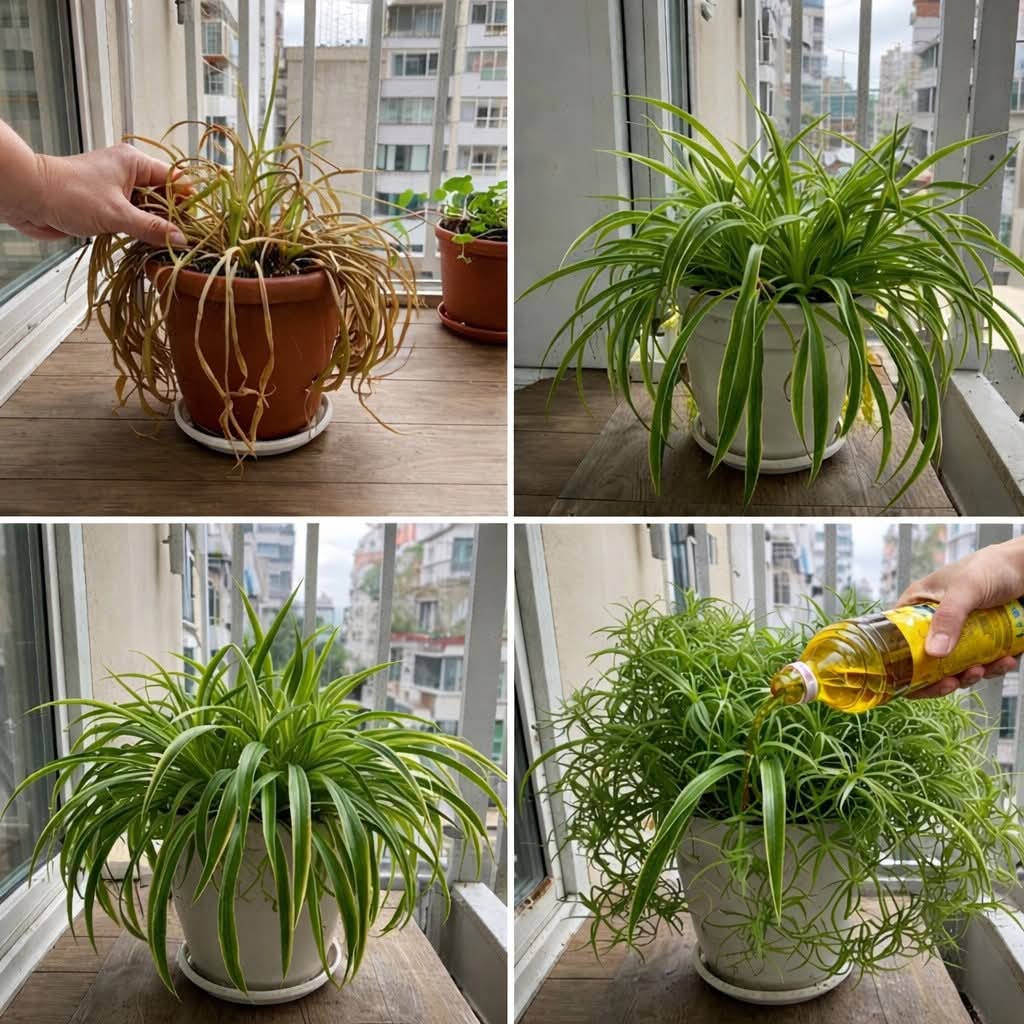
How to Revive a Struggling Spider Plant and Turn It Full, Green, and Bushy Again
Is your spider plant looking thin, yellow, or sad? Learn how to revive it with simple steps—repotting, proper watering, lighting, and pruning tips to turn it lush and bushy again. Let me tell you about the spider plant that almost ended up in the compost bin—and now sits in my living room, overflowing with healthy…
-
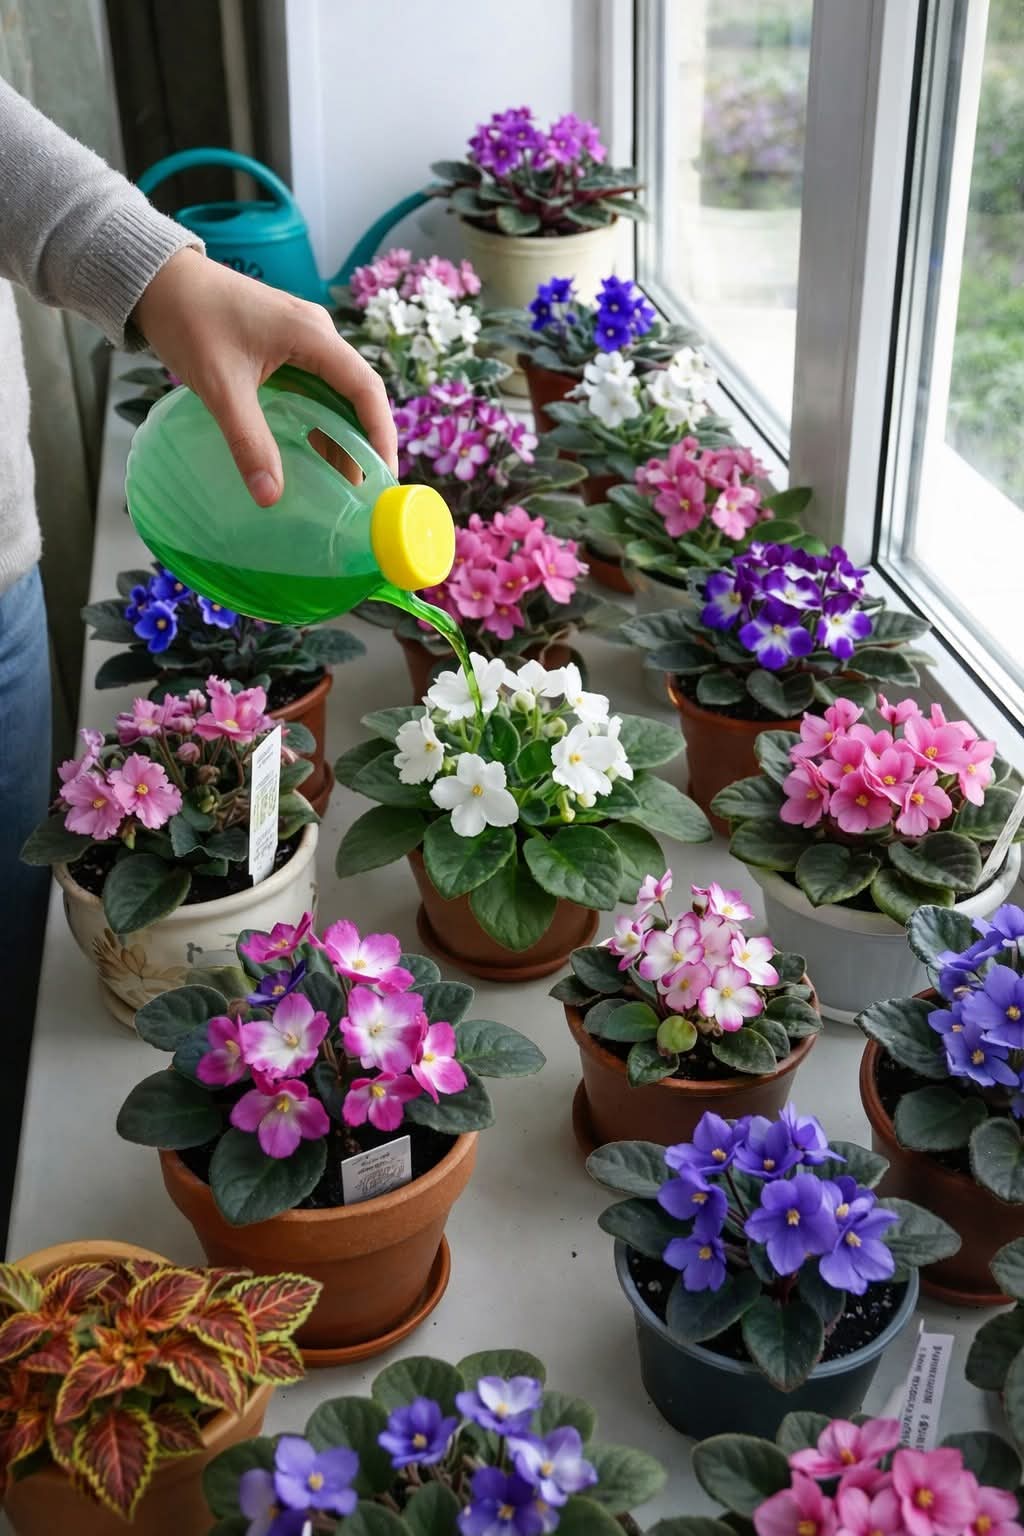
All You Need to Know About the Secrets to Make African Violets Bloom Abundantly
Unlock the secrets to abundant African violet blooms! Learn expert tips on light, water, fertilizer, soil, and care to enjoy vibrant flowers year-round. Perfect for beginners and experienced growers alike. Let me share the journey that turned my shy, leaf‑only African violets into nonstop blooming beauties. African violets (Saintpaulia) are among the most charming and…