
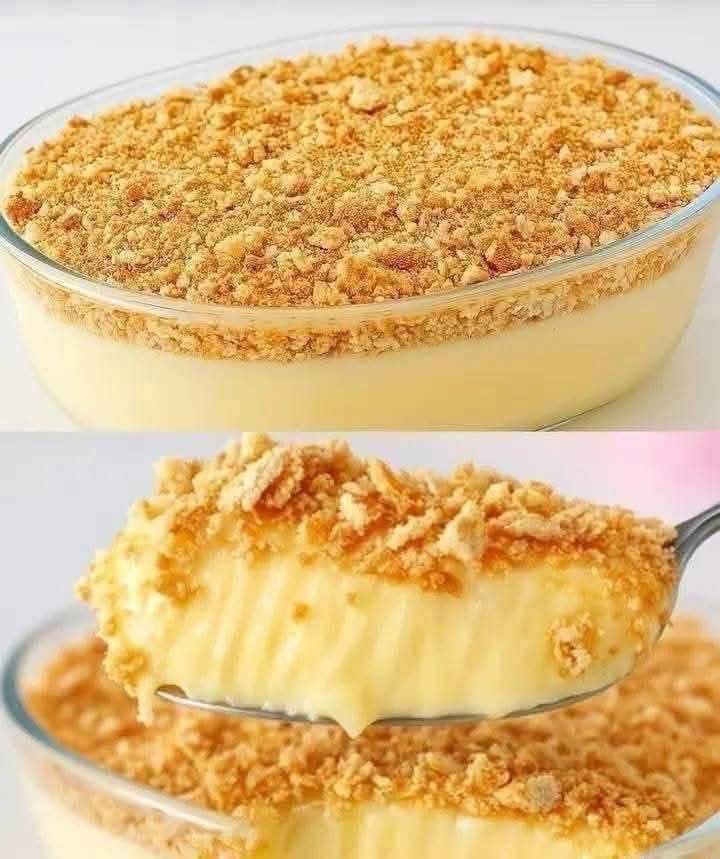
There exists a magical category of desserts that seem to transcend borders, appearing at potlucks from Mumbai to Manchester, at family dinners from Cairo to Cape Town. They require no oven, demand no technical skill, and yet deliver a result that feels like a warm embrace. This is the world of No-Bake Biscuit Pudding—a sublime construction of silky, vanilla-speckled custard and layers of humble biscuits that transform into tender, cake-like strata overnight. It is the quintessential easy no-bake dessert, a masterpiece of texture and comfort that proves luxury isn’t complicated; it’s just layers of simple things done right.
This guide is your passport to mastering this global classic. We’ll explore the beautiful science behind its self-assembly, detail the essential kitchen equipment that ensures silky custard and perfect layers, and provide a master recipe that serves as a canvas for endless creativity. Whether you’re soothing a sweet craving or feeding a crowd with minimal effort, this pudding is your delicious, fail-safe answer.
The No-Bake Artisan’s Toolkit: Equipment for Silky Custard and Clean Layers
Without the structure provided by baking, this dessert’s success hinges on precision in cooking, cooling, and assembly. The right tools guarantee a lump-free custard, distinct layers, and a stunning presentation.
The Heavy-Bottomed Saucepan and Whisk: The Custard Command Center
A3-quart heavy-bottomed saucepan (like those from All-Clad or Cuisinart) is non-negotiable for the custard. Its even heat distribution prevents scorching, which is critical when cooking a cornstarch-thickened mixture. Pair it with a flexible silicone whisk—its shape conforms to the corners of the pan, ensuring you incorporate every bit of cornstarch initially and prevent lumps during the crucial thickening phase.
The Fine-Mesh Sieve: The Guarantor of Silken Perfection
This is the most underrated tool in dessert making.Before you even begin cooking, whisking your cornstarch into the milk is not enough. Pouring the mixed milk and cornstarch through a fine-mesh sieve into the saucepan catches any stubborn granules or lumps, guaranteeing a flawlessly smooth custard from the start. It’s a 10-second step with a monumental impact on texture.
The Digital Kitchen Scale and Instant-Read Thermometer: Tools of Precision
While the recipe uses cups,a digital kitchen scale ensures you use the exact right amount of biscuits for even layers. Weighing your biscuit packets avoids guesswork. More importantly, an instant-read thermometer takes the anxiety out of cooking the custard. Cook it to 203-205°F (95-96°C). At this temperature, the cornstarch is fully activated, yielding a thick, lush pudding that sets perfectly without being gummy.
The Right Baking Dish and Offset Spatula: For Architectural Beauty
A2-quart clear glass baking dish (like a Pyrex 8×8-inch pan) is ideal. The transparency showcases the beautiful layers, making the dessert part of the presentation. An offset spatula is the secret weapon for spreading the warm custard over the delicate biscuit layers without displacing them. Its angled blade gives you control and a smooth, professional finish on the top layer.
The Food Processor and Airtight Container: For Texture and Freshness
For the optional crumb topping,a small food processor creates perfectly uniform, sandy biscuit crumbs in seconds. For storing the pudding, an airtight glass container (or the baking dish with a snap-on lid) is essential. It prevents the dessert from absorbing other refrigerator odors and keeps the biscuits perfectly moist.
The Essential No-Bake Assembly Line:
- · Heavy-bottomed 3-quart saucepan (buy it from here)
- · Silicone whisk & fine-mesh sieve (buy it from here)
- · Digital scale & instant-read thermometer (buy it from here)
- · 2-quart clear glass baking dish (buy it from here)
- · Offset spatula (buy it from here)
- · Food processor (for crumbs) (buy it from here)
- · Airtight storage lid (buy it from here)
The Master Recipe: Silky No-Bake Biscuit Pudding
This recipe optimizes the custard for a lush, sliceable texture and ensures the biscuits soften to a perfect, tender consistency without becoming mushy.
Prep Time: 20 minutes | Chill Time: 6 hours minimum (overnight ideal) | Serves: 9-12
Ingredients & Their Strategic Roles:
For the Custard Layer:
· 3 cups (700ml) whole milk: The primary liquid. Whole milk provides the necessary fat for richness.
· 1 can (14 oz/396g) sweetened condensed milk: The sweetener and thickener. Its concentrated milk solids and sugar provide body, sweetness, and a distinct, creamy flavor that defines the pudding.
· 4 tablespoons (32g) cornstarch: The primary thickening agent. When heated, its starch granules swell and burst, creating a glossy, thick pudding. Must be fully dissolved and cooked to the correct temperature to activate.
· 1 tsp pure vanilla extract: For aromatic depth. Use the best quality you can afford.
· ¼ cup (57g) unsalted butter, cubed: Added at the end for richness and a sublime, silky mouthfeel. The fat coats the starch molecules, creating a smoother texture.
For the Biscuit Layers:
· 2 packets (approx. 400g) digestive biscuits or graham crackers: The structural sponge. Digestive biscuits (like McVitie’s) have a slightly sweet, wheaty flavor and ideal absorbency. Graham crackers are the common North American substitute, offering a honeyed, cinnamon note.
For the Topping & Garnish:
· Crushed biscuits, chocolate shavings, toasted nuts (e.g., almonds, pistachios), whipped cream, or cocoa powder.
Step-by-Step Instructions:
PART 1: CRAFT THE FLAWLESS CUSTARD (The Heart of the Dish)
Dissolve & Strain: In your heavy-bottomed saucepan, whisk the cold milk, sweetened condensed milk, and cornstarch until it seems smooth. For absolute insurance, pour this mixture through a fine-mesh sieve into the pan to catch any undissolved cornstarch lumps.
Cook with Precision: Place the saucepan over medium heat. Cook, stirring constantly with your silicone whisk, making sure to scrape the bottom and corners. After 6-10 minutes, the mixture will begin to thicken noticeably. Continue cooking and stirring until it reaches a low boil and your instant-read thermometer reads 203°F (95°C). It should be the consistency of a very thick pastry cream.
Finish the Base: Immediately remove from heat. Whisk in the vanilla extract and the cubed butter until the butter is fully melted and incorporated. The custard will be glossy and thick.
PART 2: ASSEMBLE THE LAYERS (Architecture of Comfort)
Prep the Dish: Lightly grease your clear glass baking dish. Place a single, snug layer of whole biscuits on the bottom, breaking some to fill any gaps. Do not dip them in milk.
Layer with Care: While the custard is still very warm (but not scalding hot), pour about one-third of it over the first biscuit layer. Use your offset spatula to spread it gently into an even layer, taking care not to disturb the biscuits.
Repeat: Add a second layer of biscuits, then another third of the custard. Repeat with a final layer of biscuits and the last of the custard, smoothing the top beautifully.
PART 3: FINISH, CHILL, AND TRANSFORM
Add Toppings: Immediately sprinkle the top with crushed biscuit crumbs or your chosen garnish (except fresh whipped cream, add that just before serving). This seals the surface and adds textural contrast.
The Crucial Chill: Cover the dish tightly with plastic wrap, pressing it directly onto the surface of the custard to prevent a skin from forming. Refrigerate for at least 6 hours, but ideally 12-24 hours. This patient waiting period is not optional; it is the alchemy. The warm custard slowly penetrates the biscuits, softening them to a uniform, tender, cake-like consistency while the pudding itself sets firm.
Serve: Cut into clean squares. The layers should hold beautifully. Add a dollop of whipped cream or a berry compote just before serving if desired.
The Science of the Softening: Why It Works Without Pre-Soaking
This recipe defies the logic of similar desserts like tiramisu, where biscuits are dipped in liquid. Here, physics and time do the work:
· Thermal Conductivity: The warm custard is poured over the biscuits. This heat energy transfers to the biscuits, slightly warming their fats and making them more receptive to moisture.
· Osmosis and Diffusion: Over the long chill, the water content in the thick custard slowly migrates (diffuses) into the drier biscuits due to the concentration gradient. The sugar in the custard also migrates inward, sweetening the biscuit layers from within.
· Starch Gelatinization: The starches in the biscuits themselves absorb this liquid and swell, softening the entire structure without dissolving it. The result is a distinct, tender layer that maintains its identity within the pudding.
Creative Variations: A Global Tour in a Dish
· Chocolate Malt: Add ½ cup of malted milk powder and ¼ cup of cocoa powder to the custard mix. Use chocolate-covered digestives for the layers.
· Coffee & Cardamom: Infuse the milk with 2 tbsp of instant coffee granules and 6 crushed cardamom pods (strain before adding cornstarch). Perfect with plain tea biscuits.
· Tropical: Add ½ cup of coconut cream to the custard and layer with toasted coconut flakes and crushed ginger snaps.
· Berry Compote Layering: Between custard and biscuit layers, add thin layers of strained raspberry or strawberry compote.
· Salted Caramel: Drizzle salted caramel sauce over each custard layer before adding the next biscuit layer.
Troubleshooting & FAQ
· My custard is lumpy. The cornstarch was not fully dissolved before heating, or the heat was too high causing rapid, uneven gelatinization. Always strain the initial mixture and cook over medium heat with constant stirring. If lumps form, immediately blend with an immersion blender or force through a sieve.
· My biscuits are still crunchy/hard. The pudding was not chilled long enough, or the custard was too cool when assembled. Ensure the custard is warm (not hot) and give it the full, preferably overnight, chill. The biscuits will soften.
· The pudding is too runny/won’t set. The custard was undercooked and the cornstarch not fully activated. It must come to a full boil (203°F) to achieve its full thickening power. If already assembled, you can carefully scoop the layers back into a pan, re-cook the custard to the correct temp, and re-assemble.
· Can I use different biscuits? Yes, but avoid biscuits that are too buttery or short (like shortbread), as they can become greasy and disintegrate. Marie biscuits, ladyfingers (savoiardi), or arrowroot cookies are all excellent alternatives.
· How long does it keep? Covered tightly in the refrigerator, it will keep for 3-4 days. The texture and flavor often improve on the second day.
· Can I freeze it? It’s not recommended. The custard can become watery and grainy upon thawing, and the biscuit texture will suffer.
Conclusion: The Elegance of Patience and Simplicity
No-Bake Biscuit Pudding is a lesson in humble ingredients and transformative patience. It asks for your attention for only 20 minutes, but in return, it requires your trust to work its magic quietly in the cold of your refrigerator. It is the dessert that proves you don’t need complex techniques or expensive equipment to create something that feels both nostalgic and celebratory.
So, whisk your custard to silken perfection, layer your biscuits with care, and practice the gentle discipline of waiting. When you finally slice into that firm, layered square and taste the harmony of creamy custard and tender biscuit, you’ll understand—this is more than a dessert. It’s a testament to the quiet, delicious power of simplicity, a perfect shareable joy that is always worth the wait.
More Recipes You Might Like
-
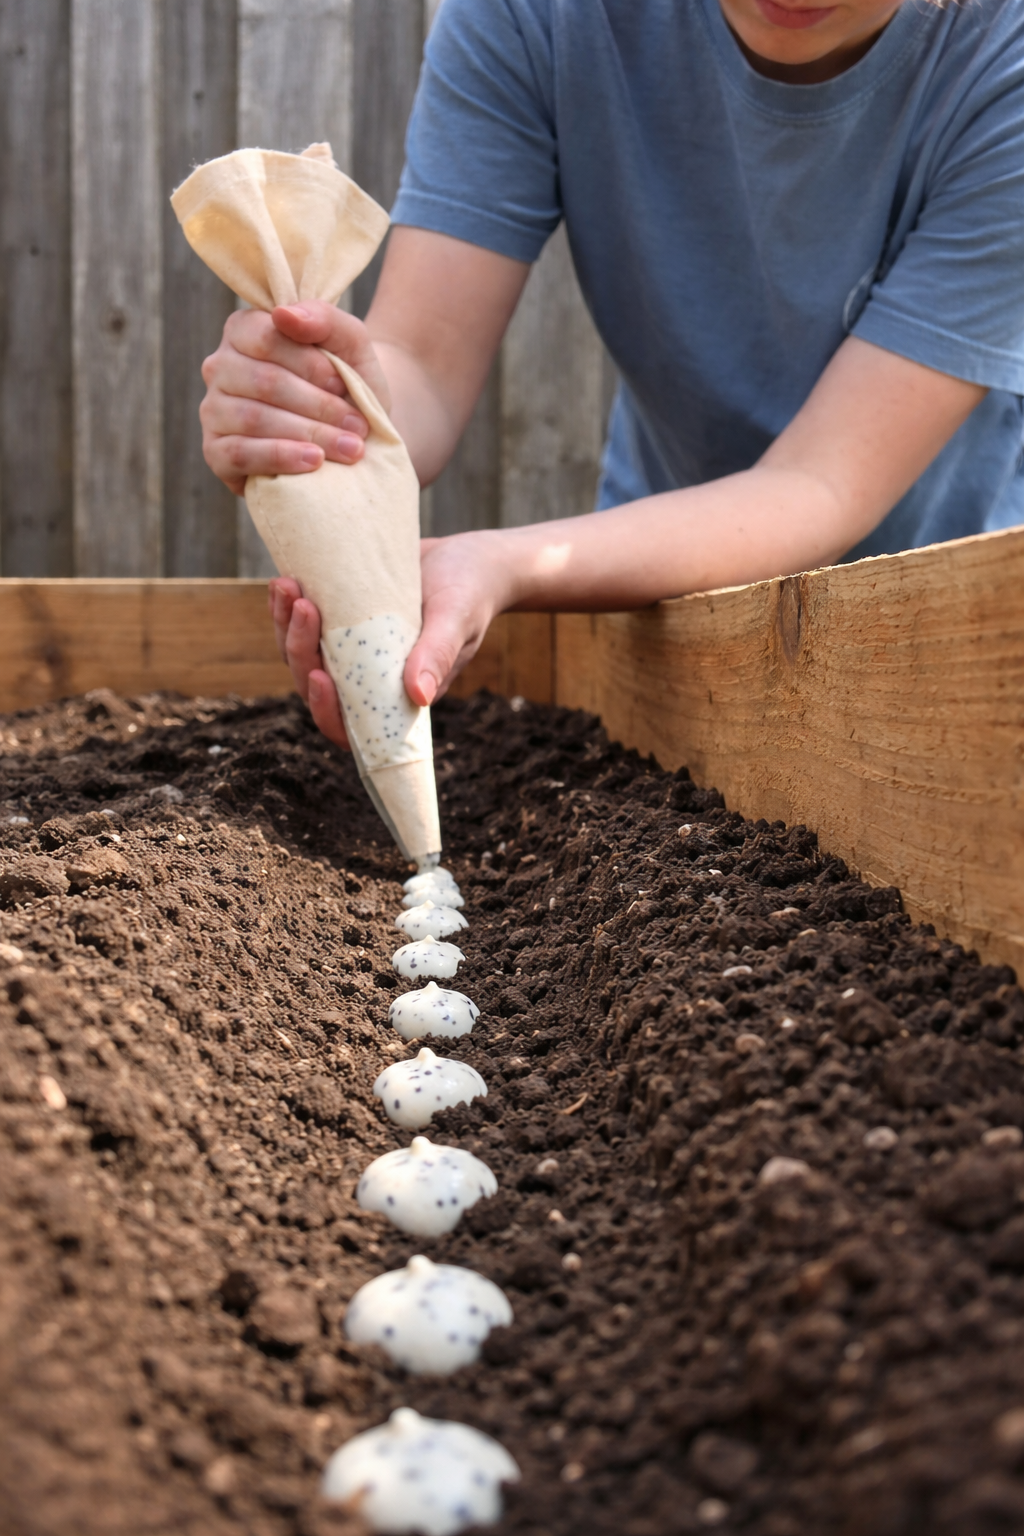
The Easy Garden Hack That Guarantees Straight, Healthy Carrots
Say goodbye to crooked, stunted carrots! Discover the simple seed paste hack that ensures perfect spacing and straight roots. This easy planting technique will transform your carrot harvest. Let me tell you about the gardening trick that turned my carrot patch from a tangle of twisted roots into a picture-perfect harvest. I love growing carrots.…
-

Grow 3X More Sweet Potatoes at Home with This Simple Soil Bag Trick
Want to grow 3 times more sweet potatoes in a small space? This clever soil bag trick is a game-changer. Learn how to plant sweet potatoes in bags for a massive harvest—perfect for small gardens and patios. Let me tell you about the gardening trick that turned my tiny patio into a sweet potato factory.…
-
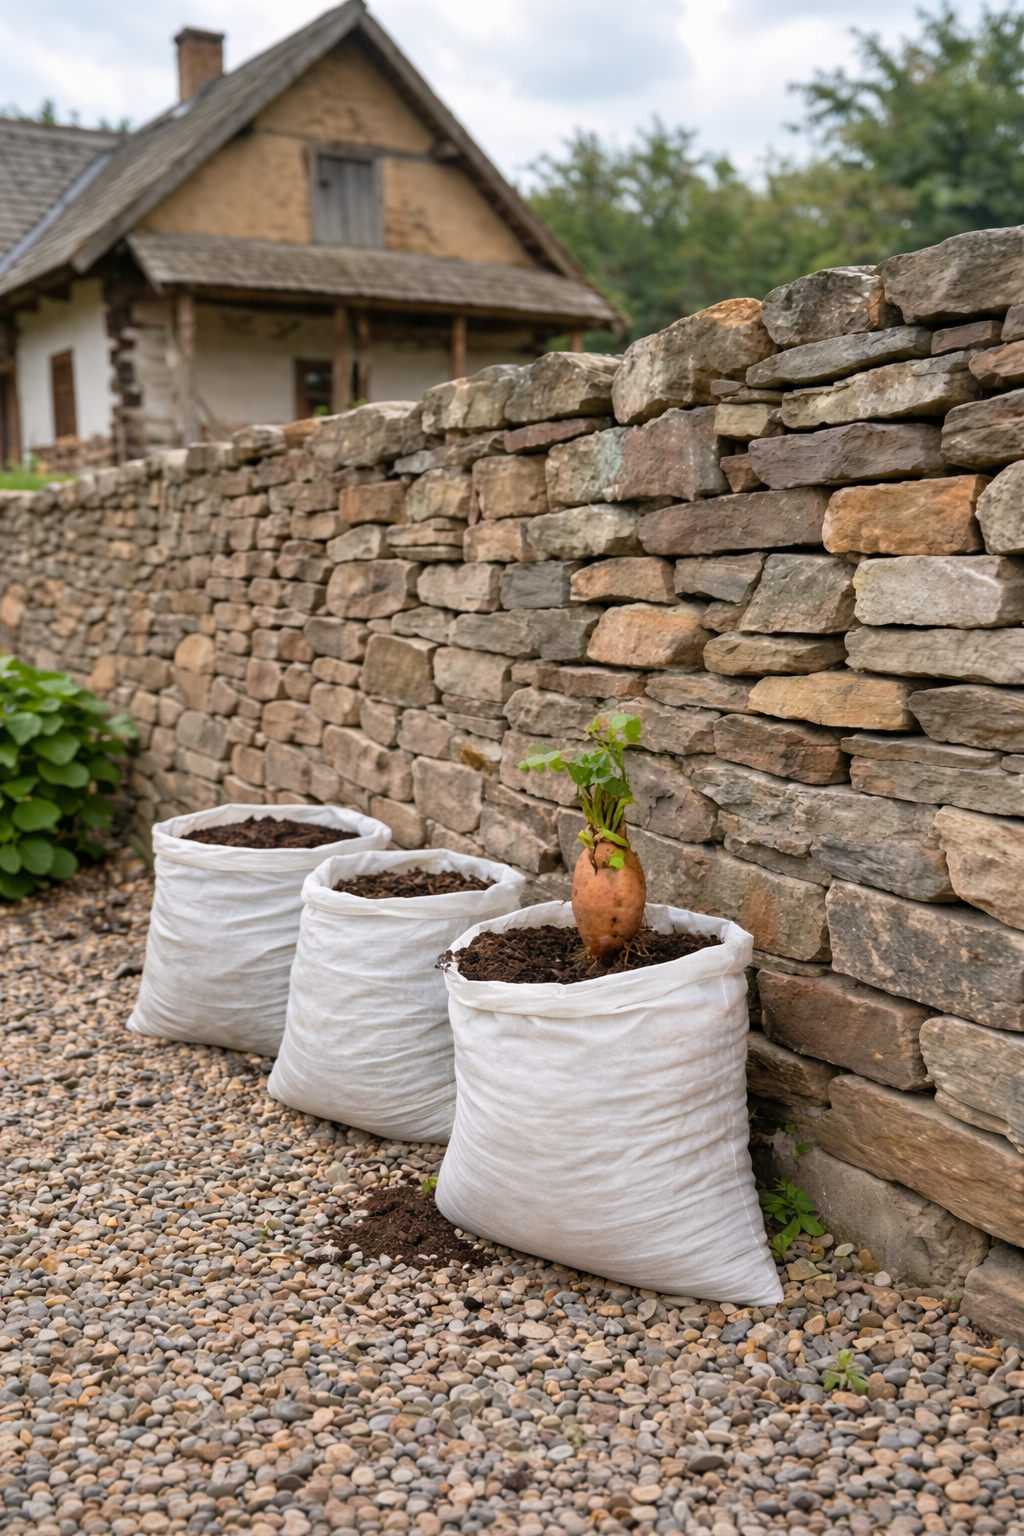
Grow 3X More Sweet Potatoes at Home with This Simple Soil Bag Trick
Want to grow 3 times more sweet potatoes in a small space? This clever soil bag trick is a game-changer. Learn how to plant sweet potatoes in bags for a massive harvest—perfect for small gardens and patios. Let me tell you about the gardening trick that turned my tiny patio into a sweet potato factory.…