

If you’re looking for the perfect soft and buttery yeast rolls, look no further! These homemade rolls are soft, pillowy, and absolutely delicious, with the perfect balance of flavor and texture. Whether you’re preparing for a special occasion, holiday, or just craving freshly baked bread, these rolls will surely be a hit with your family and friends. Let’s dive into this classic recipe!
Ingredients:
4 cups all-purpose flour – The base for these rolls, giving them the right structure and texture.
2 eggs (room temperature) – Eggs help with the softness and richness of the rolls.
1 cup whole milk – Warmed to about 110°F (43°C), the milk activates the yeast and adds moisture.
1/4 cup granulated sugar – Sweetens the dough and helps activate the yeast.
2 1/4 teaspoons active dry yeast – The yeast will make the dough rise, giving the rolls that soft and airy texture.
1/2 cup unsalted butter (melted) – Adds richness and buttery flavor, giving the rolls that irresistible golden color.
1 teaspoon salt – To balance out the sweetness and enhance the overall flavor.
Sesame seeds (optional) – For sprinkling on top of the rolls before baking for a crunchy finish.
Instructions:
Step 1: Activate the Yeast
Start by warming the milk. Pour the whole milk into a microwave-safe bowl or pot and heat it until it’s warm but not hot — around 110°F (43°C). You can test it by dipping your finger in; it should feel warm to the touch but not scalding.
Add sugar to the milk. Stir the sugar into the warm milk and then sprinkle in the active dry yeast. Stir gently to combine. Let this mixture sit for about 5-10 minutes, until it becomes frothy and bubbly. This is the sign that the yeast is activated and ready to make your dough rise.
Step 2: Prepare the Dough
In a large mixing bowl, combine the flour and salt. Add in the eggs and melted butter. Once the yeast mixture has become bubbly, add it into the flour mixture, and stir until it starts to come together as a dough.
Begin kneading the dough. If you have a stand mixer, you can use the dough hook attachment to knead it on low speed for about 5-7 minutes. If kneading by hand, turn the dough onto a lightly floured surface and knead it for about 8-10 minutes, until the dough is smooth and elastic.
Step 3: First Rise
Once your dough is kneaded, place it in a large, greased bowl. Cover it loosely with a clean kitchen towel or plastic wrap and let it rise in a warm, draft-free spot for about 1 hour or until it has doubled in size.
Step 4: Shape the Rolls
After the dough has risen, punch it down to release the air. Turn the dough onto a lightly floured surface and roll it out into a large rectangle.
Cut the dough into 12 even pieces (or more if you prefer smaller rolls).
Take each piece and shape it into a ball by rolling it in your hands. Place the dough balls in a greased 9×13-inch baking dish, arranging them in rows with each roll slightly touching the next. This will help them rise together, creating soft, pull-apart rolls.
Step 5: Second Rise
Cover the pan loosely with a towel and let the rolls rise for another 30-45 minutes, or until they’ve puffed up and are touching each other.
Step 6: Bake the Rolls
Preheat your oven to 375°F (190°C). Once the rolls have completed their second rise, bake them for 15-20 minutes or until they are golden brown on top.
For an extra touch of flavor, brush the tops of the rolls with some melted butter as soon as they come out of the oven. If you like, you can also sprinkle sesame seeds on top before baking for a little added crunch and flavor.
Tips for Perfect Yeast Rolls:
Room Temperature Ingredients: Make sure your eggs and butter are at room temperature before starting. This helps the dough come together smoothly.
Check the Temperature of the Milk: If the milk is too hot, it can kill the yeast, so always test the temperature before adding it to the yeast.
Proper Rising Time: Don’t rush the rising process! The dough needs enough time to rise to ensure the rolls are light and fluffy. You can place the dough in a warm oven (turned off) or near a warm stovetop to help speed up the process.
Kneading: Kneading the dough properly is key for the texture. If it’s too sticky, add a little flour, but don’t add too much—sticky dough is a good sign of soft, light rolls.
Optional Topping: For a little extra flavor and a golden finish, you can brush the tops of the rolls with more melted butter once they’re out of the oven.
Serving Suggestions:
For Breakfast or Brunch: Serve these buttery rolls alongside scrambled eggs, bacon, or sausage for a perfect breakfast or brunch.
With Soups and Stews: These rolls are perfect for sopping up soup, stew, or gravy. They pair beautifully with dishes like chicken noodle soup, beef stew, or a hearty vegetable soup.
For Holiday Meals: These rolls are perfect for Thanksgiving, Christmas, or Easter dinner. Serve them alongside your favorite holiday main dishes, such as roast turkey, ham, or beef.
Storage and Freezing:
Storage: Store leftover rolls in an airtight container or wrapped in plastic wrap at room temperature. They will stay fresh for up to 2 days. If you want to keep them longer, you can store them in the fridge for up to 5 days, but they’re best eaten fresh.
Freezing: If you want to make these rolls in advance, you can freeze the dough after the first rise. Simply shape the rolls, place them on a baking sheet to freeze individually, then transfer them to a freezer-safe bag. When you’re ready to bake, thaw them in the fridge overnight and allow them to rise for about 30 minutes before baking.
Conclusion: Soft, Buttery, and Irresistible
These homemade soft and buttery yeast rolls are the ultimate comfort food, perfect for any occasion. Whether you’re serving them for a holiday dinner, as a side to your favorite soup, or just because you’re craving something warm and fresh from the oven, these rolls will never disappoint.
With their light, fluffy texture and buttery finish, you’ll never want store-bought rolls again. Once you try this recipe, it’s sure to become a family favorite!
Happy baking, and enjoy your perfect rolls!
More Recipes You Might Like
-
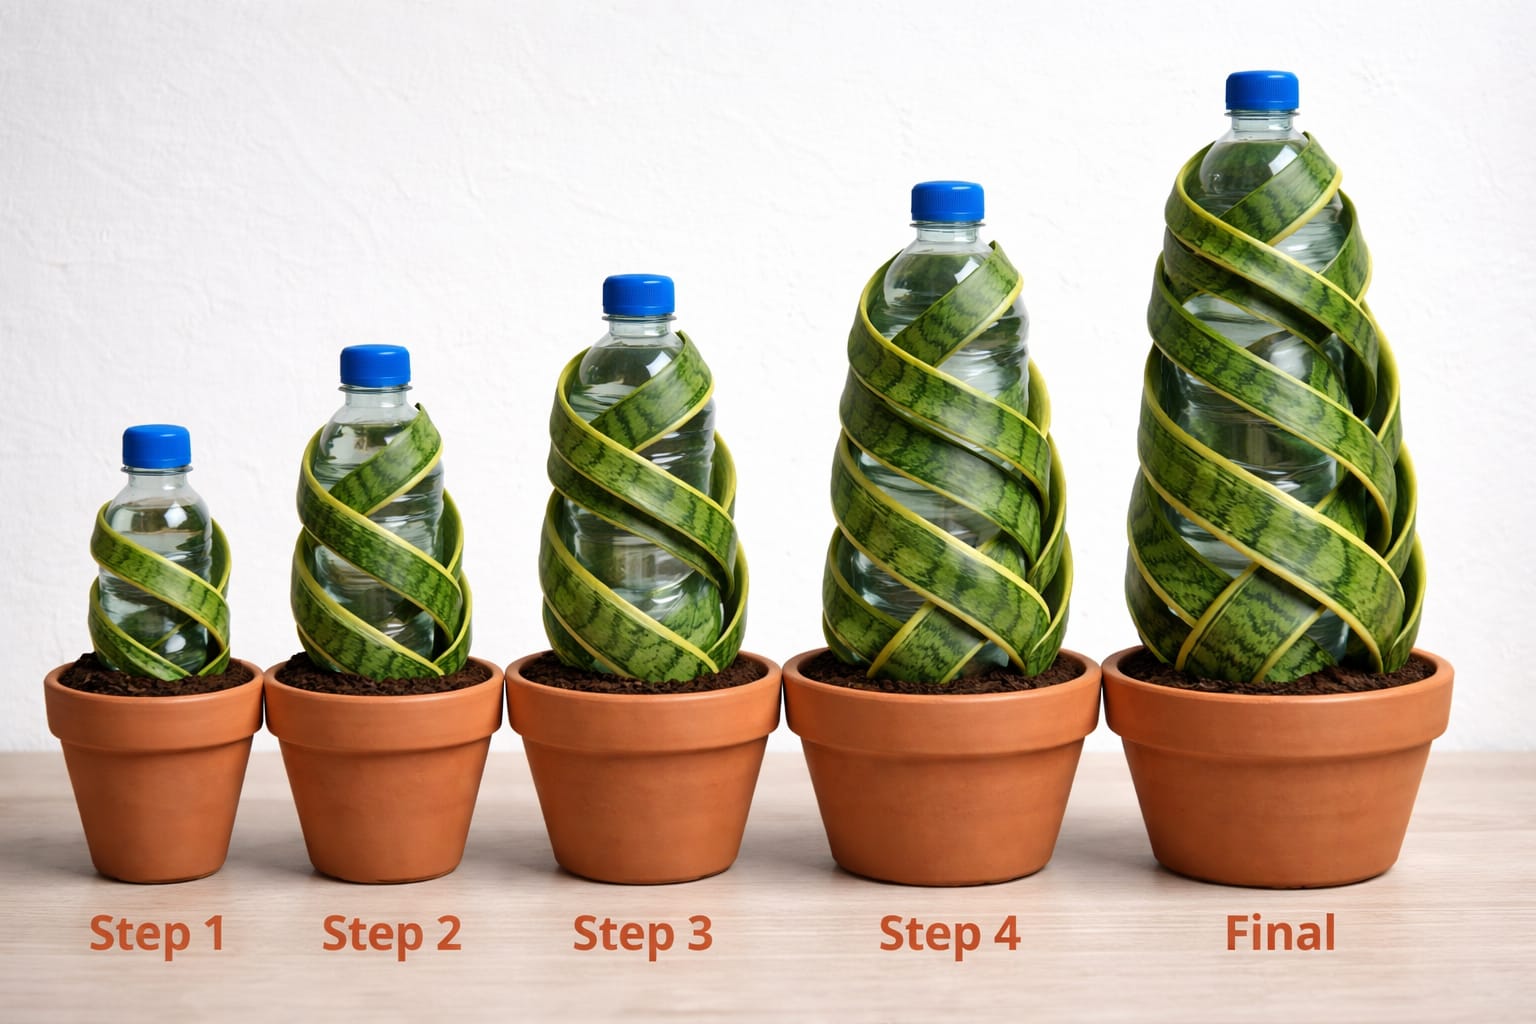
Gardeners Are Quietly Shaping Snake Plants Using This Simple Bottle Method
Discover the secret bottle method that turns ordinary snake plants into stunning spiral sculptures. Learn how to shape your Sansevieria with patience and a simple household item. Let me share a gardening secret that’s quietly making the rounds among plant lovers: you can shape your snake plant into a beautiful spiral using nothing more than…
-
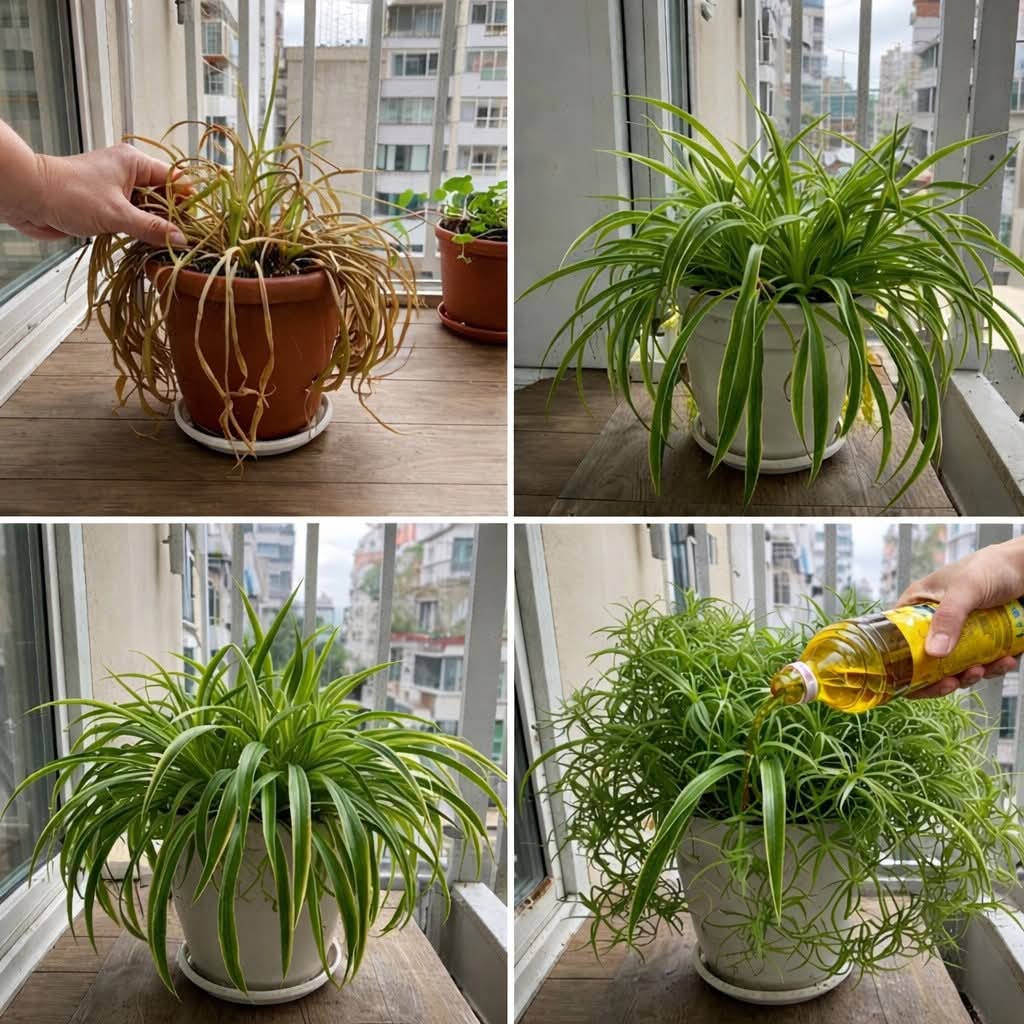
How to Revive a Struggling Spider Plant and Turn It Full, Green, and Bushy Again
Is your spider plant looking thin, yellow, or sad? Learn how to revive it with simple steps—repotting, proper watering, lighting, and pruning tips to turn it lush and bushy again. Let me tell you about the spider plant that almost ended up in the compost bin—and now sits in my living room, overflowing with healthy…
-
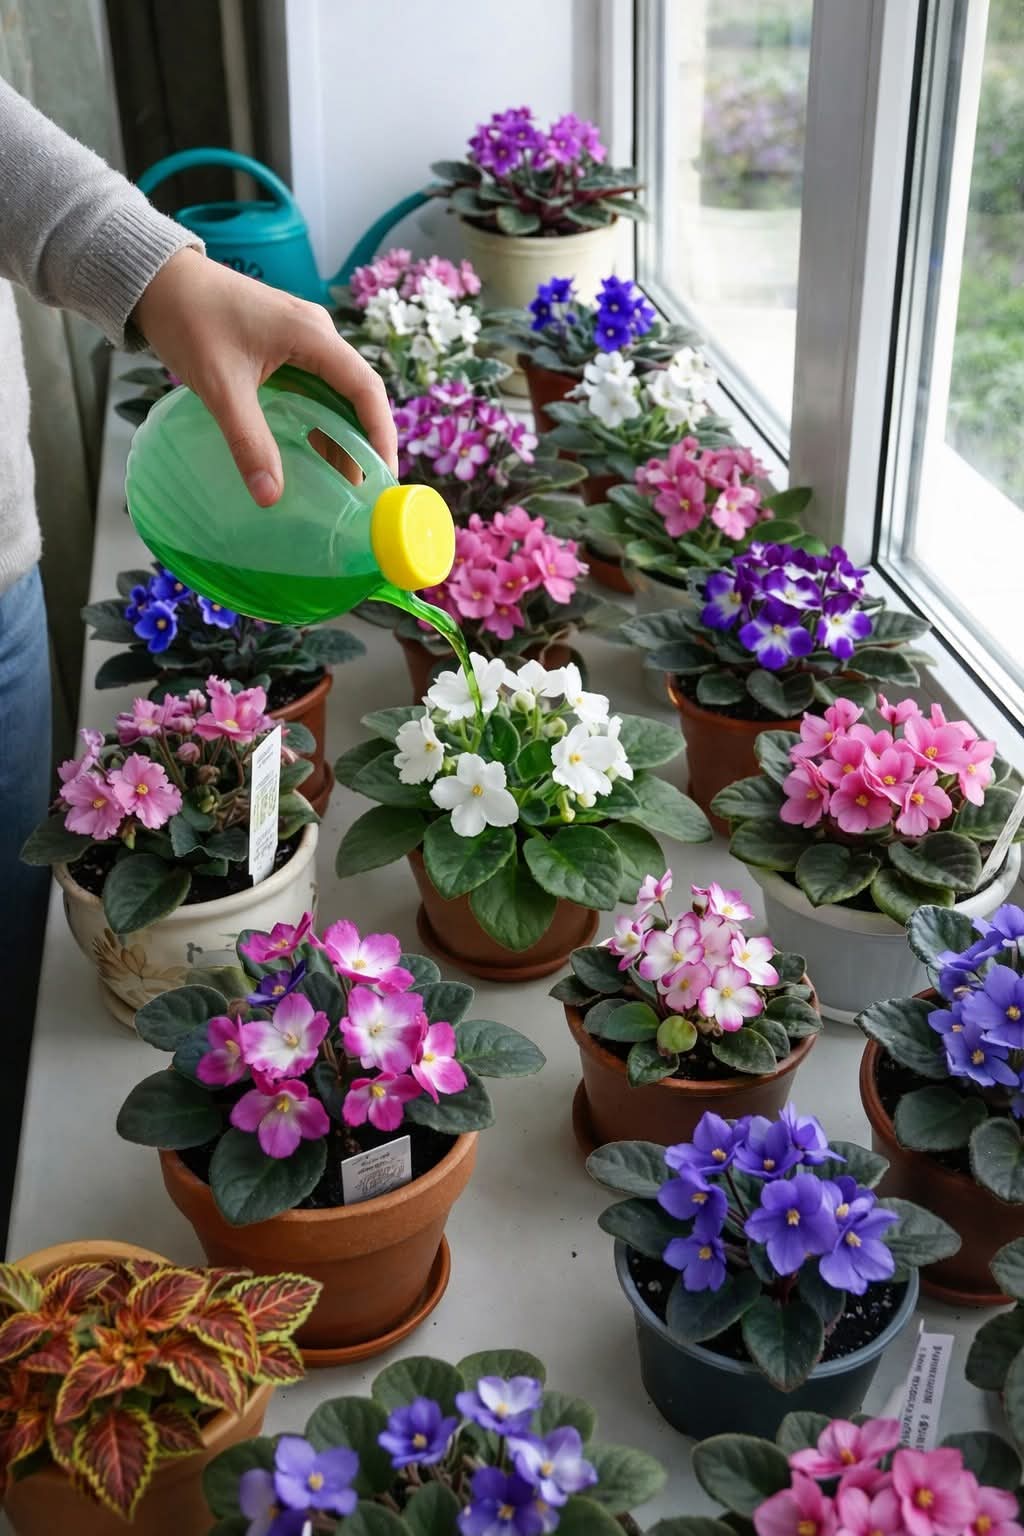
All You Need to Know About the Secrets to Make African Violets Bloom Abundantly
Unlock the secrets to abundant African violet blooms! Learn expert tips on light, water, fertilizer, soil, and care to enjoy vibrant flowers year-round. Perfect for beginners and experienced growers alike. Let me share the journey that turned my shy, leaf‑only African violets into nonstop blooming beauties. African violets (Saintpaulia) are among the most charming and…