
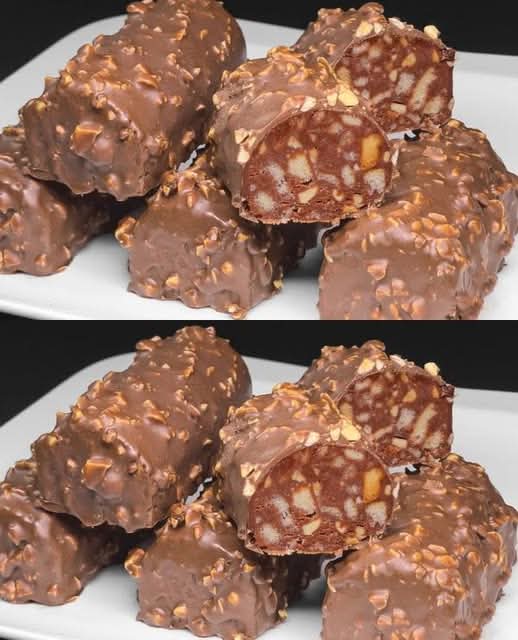
If you’re looking for a simple, no-bake dessert that’s both quick to prepare and absolutely delicious, look no further than these Chocolate Nut Bars! With just a few ingredients and in less than 5 minutes, you can have a sweet, crunchy treat ready to enjoy. This dessert has quickly become a household favorite, and I make it at least three times a week. It’s perfect for when you’re craving something sweet but don’t have the time or energy to bake.
These chocolate nut bars are the perfect combination of chocolate, nuts, and a smooth, chewy interior. They’re also customizable, so you can experiment with your favorite nuts or add-ins. Let’s dive into how to make these tasty treats!
Ingredients You’ll Need:
This dessert requires minimal ingredients, most of which you probably already have in your pantry. Here’s what you’ll need:
2 cups of milk chocolate chips – For the smooth, creamy outer coating. You can use dark chocolate if you prefer a richer flavor.
1 cup of chopped mixed nuts – You can use almonds, peanuts, cashews, or walnuts—whatever you prefer! The crunch from the nuts pairs perfectly with the chocolate.
1/2 cup of sweetened condensed milk – This will act as the binding agent, giving the bars a chewy texture and sweetness.
1 teaspoon of vanilla extract – Adds a warm, aromatic flavor that complements the chocolate.
Optional:
A pinch of salt – This helps balance the sweetness of the chocolate and adds a depth of flavor.
Instructions:
Step 1: Prepare Your Ingredients
Begin by chopping the nuts into smaller pieces. You can use a mixture of your favorite nuts, but make sure they are chopped into bite-sized pieces for easy chewing and an even distribution throughout the bars.
Step 2: Melt the Chocolate
In a microwave-safe bowl, add the milk chocolate chips and sweetened condensed milk. Microwave in 30-second intervals, stirring after each interval until the chocolate is fully melted and smooth. Be careful not to burn the chocolate; stir it gently as it melts to get the perfect consistency.
Once melted, stir in the vanilla extract and a pinch of salt if you’re using it.
Step 3: Add the Nuts
After the chocolate mixture is smooth, fold in the chopped nuts. Stir gently to coat the nuts with the chocolate mixture. This will help the nuts distribute evenly throughout the bars.
Step 4: Form the Bars
Line a baking dish or tray with parchment paper or wax paper for easy removal of the bars later.
Pour the chocolate-nut mixture into the tray and spread it evenly. You can make the bars as thick or thin as you like, but I recommend making them about 1/2 inch thick for the perfect balance of texture and flavor.
Step 5: Chill the Bars
Once the mixture is evenly spread, place the tray in the refrigerator for about 30 minutes or until the bars are firm. The cool temperature will help the chocolate set and hold the bars together.
Step 6: Cut and Serve
After the chocolate has hardened and the bars are set, remove the tray from the refrigerator. Cut the bars into squares or rectangles, depending on your preference.
Why You’ll Love These Chocolate Nut Bars:
No Baking Required: This is a no-bake dessert that’s perfect for when you don’t feel like turning on the oven. The whole process takes just 5 minutes of prep time and then some chilling.
Quick and Easy: With just a handful of ingredients, these chocolate nut bars are simple to make and take almost no time to prepare. You won’t find an easier dessert recipe!
Customizable: Feel free to swap out the nuts for your favorites or add other ingredients such as dried fruits, marshmallows, or shredded coconut to give the bars a unique twist. The recipe is incredibly versatile and can be tailored to your tastes.
Perfect for Any Occasion: Whether you’re craving a quick snack, need a dessert for a gathering, or want a gift for someone special, these chocolate nut bars fit the bill. They’re a crowd-pleaser at parties, potlucks, and family gatherings.
Sweet and Nutty: The balance of creamy chocolate with crunchy nuts creates a satisfying combination of flavors and textures that will leave you coming back for more. The bars are sweet, rich, and indulgent, making them a great dessert for chocolate lovers.
Storage and Shelf Life:
Room Temperature: You can store these bars at room temperature in an airtight container for up to 3-5 days. Just make sure they are kept cool and away from direct sunlight to prevent them from melting.
Refrigerator: For longer shelf life or if you prefer a firmer texture, store them in the refrigerator for up to 2 weeks. They’ll stay fresh and firm, and you can grab one whenever you’re in the mood for a treat.
Freezing: If you want to keep a stash of these bars on hand, they freeze very well. Wrap individual bars in plastic wrap or place them in a freezer-safe container. They can last for up to 3 months in the freezer. Just thaw them in the fridge or at room temperature before serving.
Customizing Your Chocolate Nut Bars:
These bars are super customizable, so feel free to get creative with the ingredients. Here are some ideas:
Add Dried Fruit: Add dried cranberries, raisins, or apricots for a chewy texture and a burst of natural sweetness. Dried cherries also pair well with the chocolate and nuts.
Mix in Other Nuts: Try adding almonds, pistachios, or hazelnuts for a different crunch. Each nut will give the bars a distinct flavor.
Coconut Lovers: Add shredded coconut for an extra tropical flavor. It pairs beautifully with chocolate and adds a chewy texture to the bars.
Go Darker: For a richer flavor, swap the milk chocolate for dark chocolate or a combination of dark and milk chocolate.
Add Some Spice: Experiment with a dash of cinnamon, cayenne pepper, or sea salt for a unique twist on this classic treat. A little spice can balance the sweetness of the chocolate beautifully.
Serving Ideas:
For a Sweet Snack: These chocolate nut bars are perfect for when you want a quick snack that satisfies your sweet tooth without being too heavy.
With Coffee or Tea: Pair these bars with a cup of your favorite coffee or tea for a delightful afternoon treat. The richness of the chocolate complements the warmth of your beverage.
As a Gift: Package the bars in a cute tin or gift box for an easy and thoughtful homemade gift. You can add a little decorative ribbon and label for a personalized touch.
At Parties: These bars are ideal for potlucks, family gatherings, or holiday parties. Serve them on a dessert table, and watch everyone go back for seconds (or thirds!).
Conclusion:
These Chocolate Nut Bars are a perfect treat for any occasion. They’re quick, easy, and customizable, so you can tailor them to suit your tastes. Whether you’re making them for yourself, your family, or a crowd, they’re sure to be a hit every time. With just a few ingredients and minimal prep time, you’ll have a sweet, indulgent snack that everyone will love.
Try making a batch today and see just how irresistible these bars are. Enjoy the perfect combination of chocolate and nuts, and get ready to satisfy your sweet tooth in the best way possible!
Happy snacking, and enjoy your homemade chocolate nut bars! 🍫🥜
More Recipes You Might Like
-
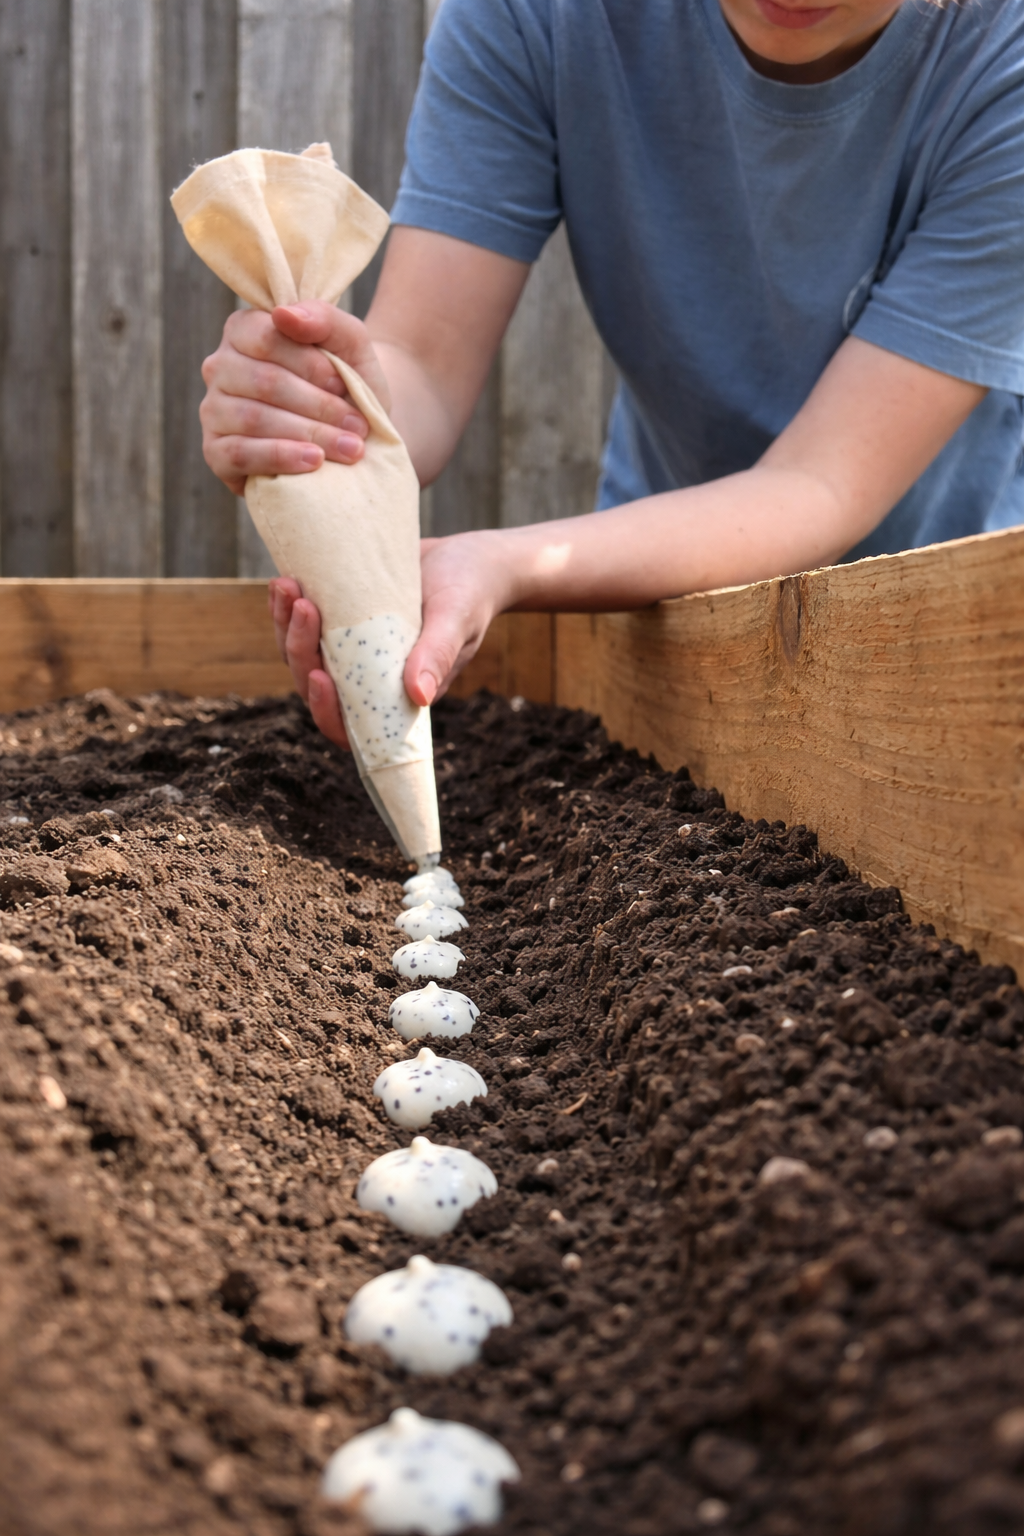
The Easy Garden Hack That Guarantees Straight, Healthy Carrots
Say goodbye to crooked, stunted carrots! Discover the simple seed paste hack that ensures perfect spacing and straight roots. This easy planting technique will transform your carrot harvest. Let me tell you about the gardening trick that turned my carrot patch from a tangle of twisted roots into a picture-perfect harvest. I love growing carrots.…
-

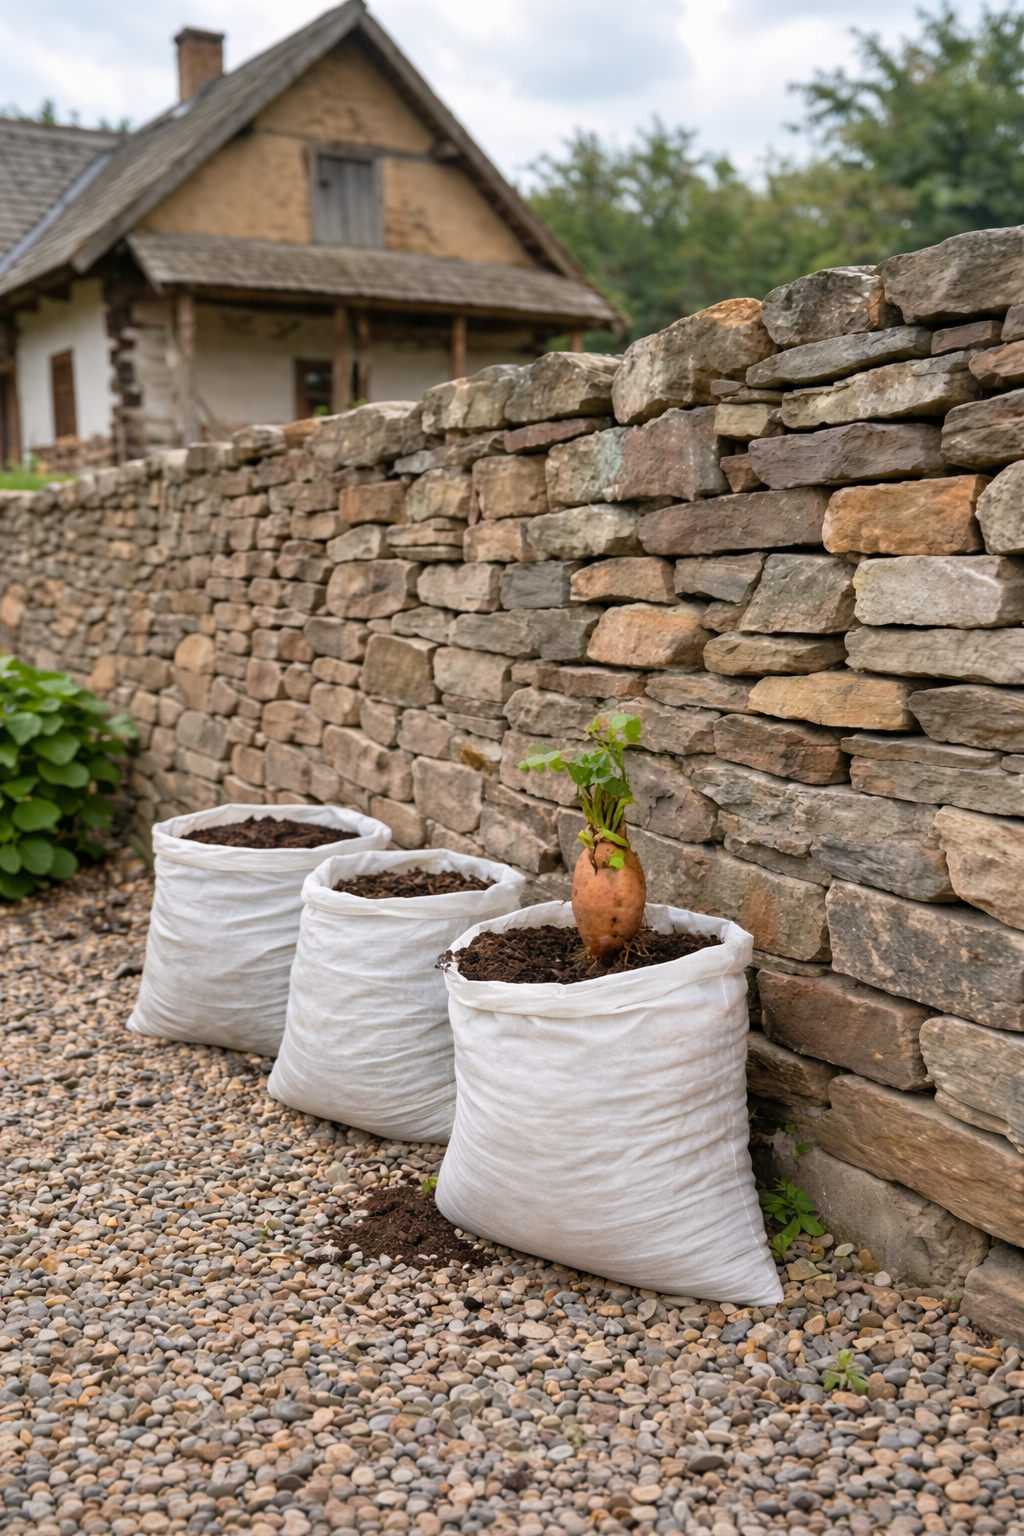
Grow 3X More Sweet Potatoes at Home with This Simple Soil Bag Trick
Want to grow 3 times more sweet potatoes in a small space? This clever soil bag trick is a game-changer. Learn how to plant sweet potatoes in bags for a massive harvest—perfect for small gardens and patios. Let me tell you about the gardening trick that turned my tiny patio into a sweet potato factory.…
-
Grow 3X More Sweet Potatoes at Home with This Simple Soil Bag Trick
Want to grow 3 times more sweet potatoes in a small space? This clever soil bag trick is a game-changer. Learn how to plant sweet potatoes in bags for a massive harvest—perfect for small gardens and patios. Let me tell you about the gardening trick that turned my tiny patio into a sweet potato factory.…