
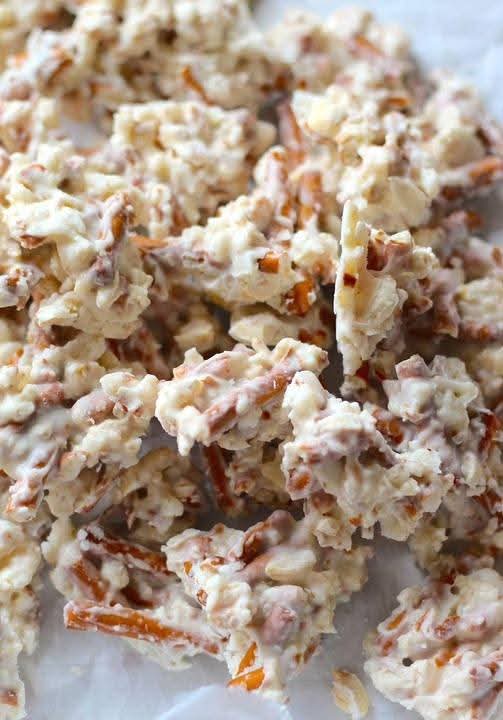
Ragtag Candies: Your New Favorite Forgotten Candy Recipe
Tired of the same old desserts? Dive into the delightful chaos of Ragtag Candies! This legendary easy no-bake candy is a symphony of textures and flavors—crunchy, chewy, chocolatey, and sweet all at once. Often called “Everything Cookies,” “Kitchen Sink Candy,” or “Rocky Road Clusters,” this recipe is the ultimate pantry-cleaner and a surefire family-friendly cooking project. With no oven required and endless customization, it’s the perfect last-minute holiday treat or after-school snack. Let’s rescue this vintage candy recipe from obscurity and make it your new go-to!
What Are Ragtag Candies? A Bite of History
Ragtag Candies are a heartfelt piece of American home cooking history. Born from frugality and creativity in mid-20th century kitchens, this recipe was a clever way for home cooks to use up leftover cereal, broken cookies, and ends of candy bars. The result? A wonderfully uneven, addictively delicious confection that looks homemade in the best way. It’s the edible equivalent of a cozy, well-loved quilt. Unlike perfect, uniform store-bought sweets, each piece of this classic homemade candy tells a story of what was in your cupboard, making it uniquely yours.
Why This Ragtag Candy Recipe Will Be a Hit
· Zero Baking Required: Just melt, mix, and chill. Perfect for hot days or when you don’t want to heat the oven.
· Ultimate Customizability: The formula is a template—use what you love and what you have.
· Unbeatable Texture: A legendary crunch from cereal and peanuts meets the chew of marshmallows and the smooth cling of chocolate.
· Great for Gifting: Package in mason jars or cellophane bags for a heartfelt, homemade food gift everyone adores.
· Kid-Approved & Kid-Friendly: Little hands love to help stir and sprinkle. It’s a fantastic fun cooking activity for kids.
Ragtag Candies Ingredients: The Formula for Fun
The beauty lies in the ratios. Here’s the base formula, followed by a world of substitutions.
The Essential Base:
· 1 (12 oz) bag of Semi-Sweet Chocolate Chips: The classic binder. High-quality chips melt smoother.
· 1/2 cup Creamy Peanut Butter: Adds richness, flavor, and helps bind everything. Must be shelf-stable, not natural/oily.
· 3 cups Dry, Crispy Base: This is where the “ragtag” spirit shines. Choose one or mix:
· Crisp Rice Cereal
· Corn Flakes
· Chow Mein Noodles (for a salty twist!)
· Broken pretzel sticks
· 1 1/2 cups “Mix-In” Goodies: The confetti! Aim for 2-3 types:
· Mini Marshmallows
· Roasted, Salted Peanuts
· Broken up potato sticks
· Raisins or dried cranberries
· Shredded sweetened coconut
The Finishing Touch:
· Flaky Sea Salt: A sprinkle on top after dipping is chef’s kiss.
Required Kitchen Tools (No Fancy Equipment!)
· Large, heatproof mixing bowl (glass or metal)
· Medium saucepan for a double boiler, OR a microwave-safe bowl
· Spatula or wooden spoon
· Baking sheet
· Parchment paper or wax paper
· Tablespoon or small cookie scoop
Step-by-Step Instructions: How to Make Ragtag Candies
Step 1: Prepare Your Workspace. Line a standard baking sheet with parchment paper. Have all your ingredients measured and ready. This process moves quickly once the chocolate is melted.
Step 2: Melt the Chocolate and Peanut Butter. Using the double boiler method (bowl set over a pot of simmering water, ensuring the bowl doesn’t touch the water) is best for control. Stir the chocolate chips and peanut butter together until completely smooth and glossy. Alternatively, microwave in 30-second bursts, stirring vigorously between each, until melted. Be careful not to overheat!
Step 3: The Grand Mix-Off. Remove the melted mixture from the heat. Immediately add your chosen 3 cups of dry, crispy base (e.g., cereal). Stir until evenly coated. Now, gently fold in your 1 1/2 cups of “mix-in” goodies (marshmallows, peanuts, etc.). Work quickly before the chocolate sets.
Step 4: Form the Clusters. Using a tablespoon or small cookie scoop, drop heaping mounds of the mixture onto the prepared parchment-lined sheet. Leave a little space between each. If desired, use the spoon to shape them into rough mounds.
Step 5: Set to Perfection. Place the entire baking sheet in the refrigerator for at least 30-45 minutes, or until the chocolate is completely firm and set.
Step 6: The Optional (But Recommended) Chocolate Dip & Sprinkle. For a more polished, decadent homemade candy look, melt an additional 1/2 cup of chocolate chips. Dip the bottom or drizzle the top of each set cluster in the extra chocolate, return to parchment, and immediately sprinkle with a pinch of flaky sea salt.
Pro Tips for Perfect Ragtag Clusters Every Time
· Keep It Crispy: Ensure your cereal and mix-ins are fresh and crispy. Stale ingredients make a sad candy.
· Fold, Don’t Stir: When adding marshmallows, fold gently to prevent them from smashing and becoming gummy.
· Quick Work is Key: Have everything prepped before melting the chocolate to avoid it seizing up.
· Test for Set: The candies are ready when they feel firm to the touch and don’t give when pressed.
Customization Ideas: Make It Your Own!
This is where you unleash your inner candy artist. Follow the 3-cup dry / 1.5-cup mix-in ratio and experiment!
· The Turtle Twist: Use pecans, caramel bits, and a dark chocolate base.
· Peanut Butter Lover’s: Use all peanuts and peanut butter chips in the melt.
· Holiday Version: Use broken candy canes and white chocolate for a festive look.
· Trail Mix Style: Use almonds, dried cherries, and coconut with milk chocolate.
Storing, Freezing, and Gifting Your Homemade Candy
· Storage: Keep in an airtight container in the refrigerator for up to 2 weeks. They can be kept at cool room temp for 3-4 days.
· Freezing: These freeze brilliantly! Layer between parchment in an airtight container for up to 3 months. Thaw in the fridge.
· Gifting: Stack them in a clear treat bag tied with ribbon, or pack a decorative tin. Include a cute tag with the name “Ragtag Candies”—it’s a wonderful thoughtful homemade gift.
Dietary Modifications: Gluten-Free & Dairy-Free Options
· Gluten-Free Ragtag Candies: Use certified gluten-free crisp rice cereal, corn flakes, and pretzels. Ensure all other ingredients (chocolate, marshmallows) are GF.
· Dairy-Free Version: Use dairy-free chocolate chips and ensure your mix-ins are dairy-free.
What to Serve With Your Candy Creations
These are fantastic on their own, but they also shine as part of a dessert spread.
· On a Holiday Cookie Platter for textural contrast.
· As a topping for ice cream sundaes (crush them up!).
· Alongside a cup of coffee or cold milk.
Frequently Asked Questions (FAQ)
Q: Can I use milk chocolate instead of semi-sweet?
A:Absolutely! Milk chocolate will make a sweeter, milder candy. It can be slightly less stable when melting, so watch the temperature closely.
Q: Why did my chocolate get chalky or seize?
A:This happens if even a drop of water or steam gets into the melting chocolate, or if it’s overheated. Always ensure your bowls and utensils are completely dry.
Q: My mixture seems too dry and won’t hold together. Help!
A:You may have slightly over-measured your dry ingredients. Next time, be sure to use lightly filled, level cups. For now, try adding another tablespoon of melted peanut butter to bind it.
Q: Can I make these vegan?
A:Yes! Use vegan chocolate chips, vegan marshmallows, and ensure your peanut butter and other mix-ins are vegan-friendly.
H2: The Joy of Imperfection: More “Everything But The Kitchen Sink” Recipes
If you love the creative, use-what-you-have spirit of Ragtag Candies, you’ll adore:
· Everything Bagel Snack Mix
· Leftover Halloween Candy Bark
· Garbage Bread (Savory Stromboli)
· Kitchen Sink Cookies
Final Thought: Embrace the Delicious Chaos
In a world of pristine, algorithm-perfect foods, Ragtag Candies are a joyful rebellion. They celebrate resourcefulness, creativity, and the uniquely delicious results that come from not following a strict rulebook. This easy no-bake candy recipe is more than just a treat; it’s an experience, a memory-maker, and a delicious testament to the fact that sometimes, the best things in life are a little ragtag. So, raid that pantry, gather your helpers, and make a batch of delicious, chaotic joy today.
More Recipes You Might Like
-
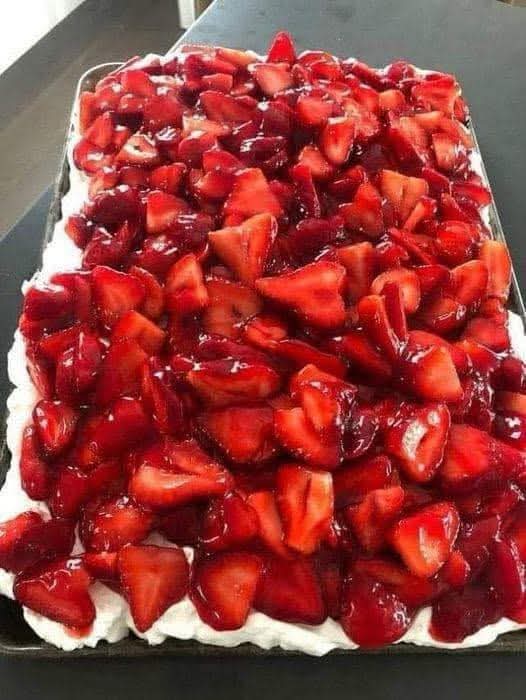
Strawberry Cream Cheese Icebox Cake: The No-Bake Dessert That Steals the Show
Discover the easiest, most elegant strawberry cream cheese icebox cake! Layers of graham crackers, creamy cheesecake filling, and fresh strawberries come together in this no-bake masterpiece. Perfect for summer entertaining. Let me tell you about the dessert that looks like you spent hours in the kitchen but actually takes about 15 minutes to assemble. I…
-

3 Ingredient Pineapple Ice Cream (5 Minutes)
Discover the easiest, healthiest ice cream you’ll ever make! Just 3 ingredients—frozen pineapple, almond milk, and Greek yogurt—create a creamy, tropical treat in 5 minutes. No machine, no sugar added! Let me tell you about the ice cream that made me a convert—no churning, no heavy cream, no sugar, and done in five minutes. I…
-

BBQ Cauliflower Bites: Crispy, Sticky, and Irresistible
Discover the best BBQ cauliflower bites—crispy baked cauliflower coated in sticky, sweet, smoky BBQ sauce. A vegan, gluten‑free appetizer that rivals chicken wings. Easy oven or air fryer recipe! Let me tell you about the appetizer that converted my meat‑loving friends into cauliflower believers. I first made BBQ cauliflower bites for a game day party,…