

Cleaning an oven can feel like one of the most tedious household chores. The grease, burnt-on food, and stubborn stains seem impossible to remove without hours of scrubbing and harsh chemicals. But what if I told you there’s a trick that makes your oven look like new, without breaking a sweat? My friend recently shared this method with me, and I, bigzazoo, can confidently say it’s a total game-changer. Say goodbye to elbow grease, and say hello to a sparkling clean oven using nothing but common household items. This article will guide you through every step, explain why it works, and provide tips and tricks for the best results.
Why This Recipe Works
At first glance, using dishwasher tablets to clean an oven may seem unconventional. However, it’s actually a brilliant hack rooted in chemistry. Dishwasher tablets are designed to tackle tough grease and food residue on dishes, so it makes sense they can do the same on oven surfaces.
Here’s why it works:
Powerful Cleaning Agents: Dishwasher tablets contain surfactants and enzymes that break down protein, starch, and grease. When dissolved in warm water, these components form a solution that softens baked-on grime.
Safe for Metal and Glass: Unlike abrasive scrubbing powders or harsh chemical cleaners, the tablet solution is gentle on oven interiors while still being highly effective. It’s perfect for metal racks, oven glass, and enamel-coated surfaces.
Even Application: By soaking paper towels in the solution and placing them on the surfaces, the cleaner works through contact, loosening stubborn residue without the need for manual scrubbing.
Time-Saving: Traditional oven cleaning can take hours. This method allows you to apply the solution, let it work its magic for about 30 minutes, and achieve incredible results with minimal effort.
This is a brilliant example of using everyday items creatively. It’s eco-friendly, cost-effective, and a huge timesaver.
What You’ll Need For This Recipe
To make your oven shine like new, you’ll only need a few simple items. These are items most households already have:
2 dishwasher tablets – Any brand will work; tablets with enzymes and grease-cutting power are best.
200 ml of warm water – Hot water helps dissolve the tablets faster and activates the cleaning agents.
A sponge – For spreading the solution and rinsing.
Paper towels – To create a soaking layer for maximum grime removal.
Protective gloves – To protect your hands while working with the cleaning solution.
A metal bowl – For dissolving the tablets safely.
Optional: A fork or spoon to crush the tablets for faster dissolution.
These simple ingredients transform a grueling chore into a quick and almost effortless task. You might even start looking forward to oven-cleaning day!
Equipment
While the ingredients are straightforward, having the right equipment ensures a smooth process. Here’s what you’ll need:
Metal bowl – Avoid plastic as hot water may deform it. The bowl holds the dissolved dishwasher tablets for easy application.
Sponge – Choose a soft sponge that won’t scratch your oven’s surface. You’ll use it both to spread the solution and to rinse.
Paper towels – Standard kitchen paper towels are ideal. They act as a cleaning “compress” to target stubborn spots.
Protective gloves – Your hands will thank you for this. The solution is safe but prolonged exposure can dry your skin.
Fork (optional) – To crush the tablets if you want them to dissolve faster.
With this setup, cleaning your oven will feel more like a spa treatment than a chore.
How To Make This Recipe
Follow these steps carefully to achieve a sparkling clean oven without scrubbing:
Step 1: Prepare the Cleaning Solution
Place two dishwasher tablets in a metal bowl.
Pour 200 ml of warm water over them.
If desired, crush the tablets gently with a fork to help them dissolve faster.
Step 2: Protect Yourself
Wear protective gloves to avoid direct contact with the cleaning solution.
Step 3: Apply the Solution
Dip your sponge into the solution and lightly apply it to all surfaces of the oven. Avoid rubbing; just moisten the surfaces.
Soak a few paper towels in the solution and lay them on stubborn spots, including the oven glass. The soaking action helps loosen baked-on grime.
Step 4: Let the Magic Happen
Leave the paper towels on the oven surfaces for about 30 minutes. During this time, the cleaning agents will break down grease and baked-on food, making it much easier to remove.
Step 5: Rinse and Wipe
Remove the paper towels and use a clean sponge and water to rinse the surfaces thoroughly.
Wipe down all areas with paper towels or a dry cloth to remove any remaining residue.
Step 6: Heat the Oven
Turn the oven to its highest setting for a short period. This helps evaporate any lingering moisture and leaves your oven completely fresh.
Step 7: Clean the Grill (Optional)
If your oven has a grill, use a small piece of dishwasher tablet to scrub it gently. This removes baked-on grease effectively without damaging the metal.
By following these steps, you’ll have a clean oven without hours of scrubbing.
Tips + Tricks & More For Recipe Success
Here are some tips from bigzazoo to make your oven-cleaning process even easier and more effective:
Consistency is Key: Clean your oven regularly. The more often you do it, the less buildup occurs, making each session easier.
Pre-Treat Stubborn Spots: For very tough stains, leave paper towels soaked in the solution for 45 minutes instead of 30.
Avoid Abrasive Tools: Never use steel wool or harsh scrubbing pads; they can scratch enamel and glass.
Ventilation Helps: Open windows or turn on your kitchen fan while the oven heats up to avoid steam buildup.
DIY Oven Spray: Keep some of the dissolved solution in a spray bottle for spot cleaning. Just shake well before use.
Eco-Friendly Bonus: This method uses common household items and avoids chemical cleaners, making it environmentally friendly.
Quick Maintenance: Wipe down spills immediately after cooking to reduce future buildup.
These tricks not only save time but also protect your oven and make it last longer.
How to Serve / Using Your Oven After Cleaning
While “serving” isn’t literal in this context, knowing how to use your oven safely after cleaning is important:
Make sure the oven is completely dry before placing trays or food inside.
Run the oven at a high temperature for 10-15 minutes post-cleaning to ensure no cleaning solution residue remains.
Avoid cooking immediately on the racks if you’ve just cleaned the grill; let it air dry for a few minutes.
Serving Suggestion / Optional Extras
To maximize the benefit of your sparkling oven:
Use oven liners to reduce grease buildup. They’re reusable and make future cleaning even easier.
Keep a small spray bottle of diluted dishwasher tablet solution for quick touch-ups.
For glass doors, a little vinegar on a soft cloth after the main cleaning helps remove streaks.
Time
Here’s an approximate breakdown for the whole cleaning session:
Preparation: 5 minutes (dissolving tablets, gathering materials)
Application: 10 minutes (spreading solution, placing paper towels)
Waiting Period: 30 minutes (solution works its magic)
Rinsing & Drying: 10 minutes
Oven Heat Drying: 10–15 minutes
Total Time: About 65–70 minutes, with minimal active effort. Compare that to hours of scrubbing, and you can see why this method is revolutionary.
Final Thoughts
As someone who used to dread oven cleaning, I, bigzazoo, can honestly say this trick has changed my life. With just two dishwasher tablets, some warm water, paper towels, and a sponge, I can achieve a sparkling clean oven with minimal effort. The chemical magic of the dishwasher tablets combined with a smart soaking technique makes baked-on grease and grime disappear effortlessly.
Not only is this method simple and cost-effective, but it’s also eco-friendly and safe for most oven surfaces. Whether you’re a busy parent, a cooking enthusiast, or someone who simply hates scrubbing, this method is a total win.
Next time your oven looks like a lost cause, remember this trick. You don’t have to spend hours scrubbing or buying harsh chemical cleaners. Just a few household items and 30 minutes of patience are all you need.
Give it a try, and your oven will look almost brand new. Trust me, bigzazoo, once you do it, you’ll wonder why you ever scrubbed your oven the old-fashioned way.
Enjoy your sparkling clean oven, and happy cooking!
More Recipes You Might Like
-
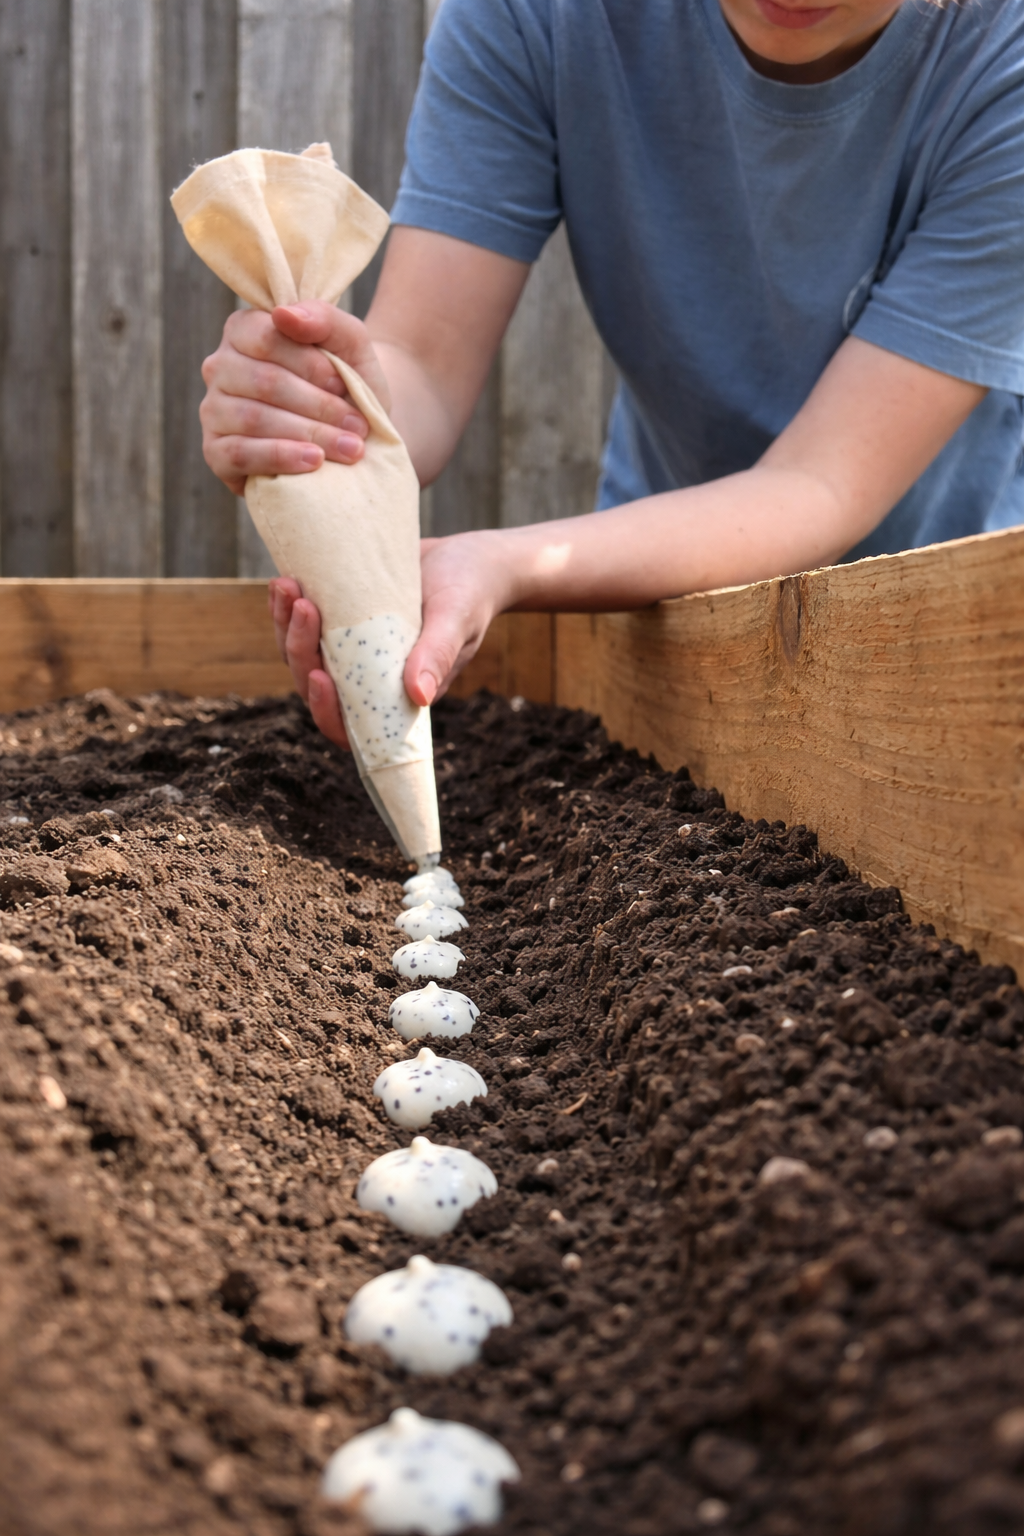
The Easy Garden Hack That Guarantees Straight, Healthy Carrots
Say goodbye to crooked, stunted carrots! Discover the simple seed paste hack that ensures perfect spacing and straight roots. This easy planting technique will transform your carrot harvest. Let me tell you about the gardening trick that turned my carrot patch from a tangle of twisted roots into a picture-perfect harvest. I love growing carrots.…
-
Grow 3X More Sweet Potatoes at Home with This Simple Soil Bag Trick
Want to grow 3 times more sweet potatoes in a small space? This clever soil bag trick is a game-changer. Learn how to plant sweet potatoes in bags for a massive harvest—perfect for small gardens and patios. Let me tell you about the gardening trick that turned my tiny patio into a sweet potato factory.…
-
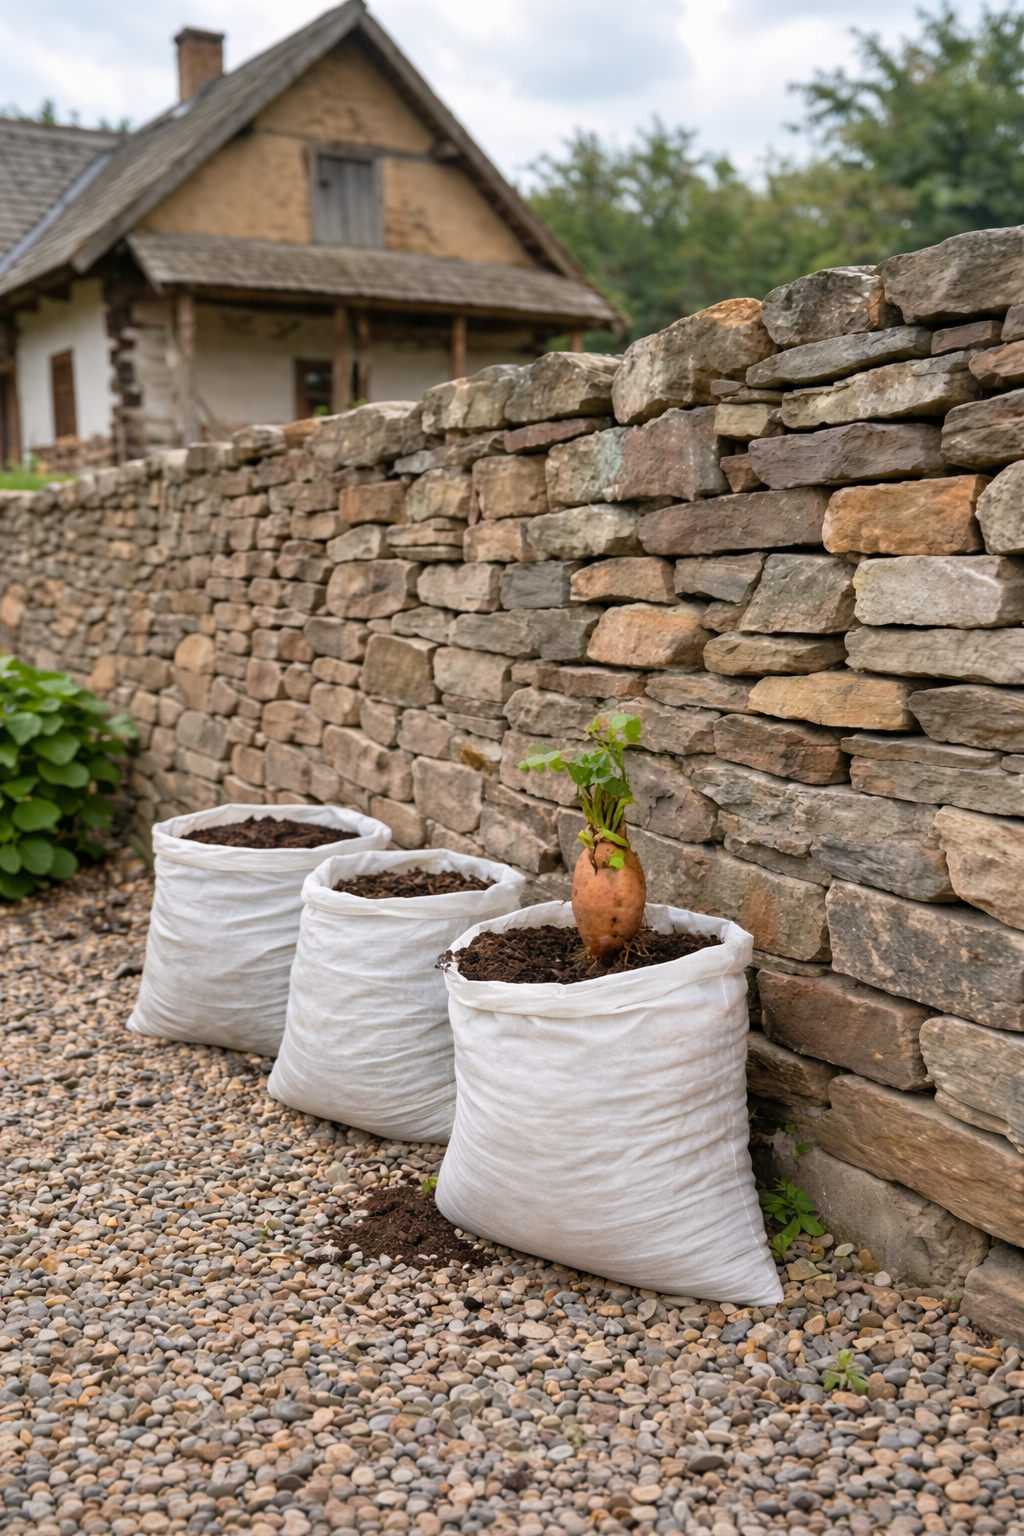
Grow 3X More Sweet Potatoes at Home with This Simple Soil Bag Trick
Want to grow 3 times more sweet potatoes in a small space? This clever soil bag trick is a game-changer. Learn how to plant sweet potatoes in bags for a massive harvest—perfect for small gardens and patios. Let me tell you about the gardening trick that turned my tiny patio into a sweet potato factory.…