For bark‑grown orchids, this usually means watering every 7–10 days, depending on humidity and temperature.
Step 8 – Give Recovery Conditions
Place the repotted orchid in an environment that supports healing.
· Bright indirect light – An east window or a south window with a sheer curtain is ideal. No harsh direct sun.
· Warm room – 65–80°F (18–27°C) during the day. Slightly cooler at night is fine.
· Good airflow – A gentle fan on low (not pointed directly at the plant) helps prevent fungus.
· No drafts – Keep away from air conditioners, heaters, and cold windows in winter.
Step 9 – Do Not Over‑Fertilize
A weak orchid should not be heavily fed right away. Fertilizer can burn damaged roots.
Wait until you see active recovery – new root tips or new leaf growth. This may take 4–8 weeks.
Then use a very diluted orchid fertilizer (quarter strength) every other week during spring and summer. Use a balanced formula like 20‑20‑20 or one labeled for orchids.
Step 10 – Watch for Recovery Signs
Be patient. Orchids recover slowly. After 4–6 weeks, look for these positive signs:
· Firm leaves – Wrinkled leaves begin to plump up.
· Fresh green root tips – Active root tips are bright green and growing.
· New root growth – Silvery roots with green ends emerging from the base.
· Stronger leaf color – Leaves return to a healthy, medium green.
· Eventually, a new flower spike – This can take 6–12 months after recovery.
If you see new root growth, your orchid is on the mend. Keep providing consistent care, and it will reward you.
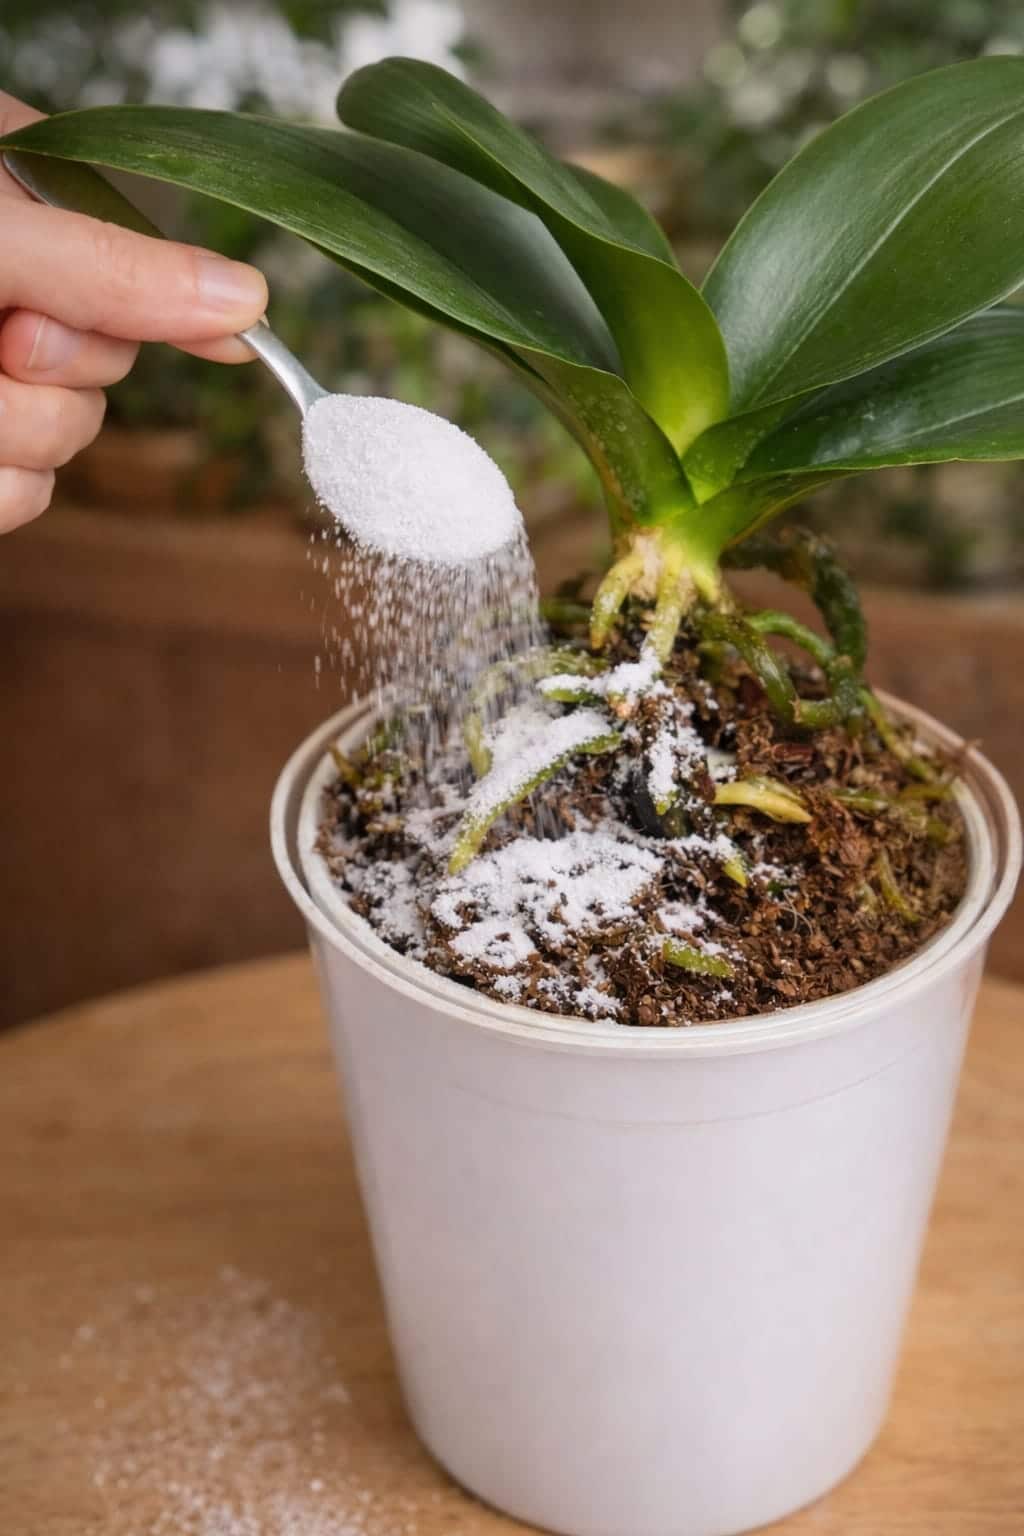
What About That White Powder in Videos?
You have seen the videos: someone sprinkles a white powder on orchid roots, and the “after” shot looks amazing. What is that powder, and should you use it?
In professional orchid propagation, white powders are sometimes used for specific purposes:
· Rooting hormone powder – Used on keikis (baby orchids) or divisions to encourage root growth. Not typically used on mature plants with existing roots.
· Powdered fungicide – Lightly dusted on cut surfaces or propagation trays to prevent fungus. Not a general root treatment.
· Cinnamon – As mentioned, a light dusting on cut wounds can help. But it is not bright white; it is tan to light brown.
The problem with copying videos: You do not know which powder they are using, how much, or whether it is even appropriate for your orchid. Using the wrong powder — or too much — can harm the roots.
The safest, most effective root treatment is the simple method above: trim, repot, water correctly, and provide good light. No mystery powder required.
Common Mistakes That Weaken Orchid Roots
Avoid these errors to keep your orchid’s roots strong.
Overwatering
The #1 killer. Orchid roots need to dry out between waterings. If the bark stays soggy, roots rot.
Using Old, Broken‑Down Bark
Bark decomposes over 1–2 years. Old bark holds too much water and suffocates roots. Repot regularly.
Pot with No Drainage Holes
Orchids cannot sit in water. Always use a pot with holes.
Packing Bark Too Tightly
Orchid roots need air. Loosely fill the pot; do not compress.
Fertilizing a Weak Orchid
Damaged roots cannot absorb fertilizer properly. Wait for recovery signs before feeding.
Ignoring the Crown
Water trapped in the crown (center of leaves) causes deadly crown rot. Always water the bark, not the leaves.
How Often Should You Do This Root Treatment?
You do not need to do a full root treatment every time you water. The full treatment (unpotting, trimming, repotting) is needed when:
· You suspect root rot (mushy roots, yellowing leaves, bad smell)
· The orchid has not been repotted in over a year
· The bark looks dark, compacted, or has visible mold
· The orchid is weak and not responding to normal care
For healthy orchids, simply repot every 1–2 years with fresh bark. Check the roots at that time and trim any dead ones.
Frequently Asked Questions (Orchid Root Treatment)
Can I save an orchid with no roots?
Yes, but it is difficult. If the crown (the main stem) is still firm and green, you can try placing the orchid in a humid environment (like a clear plastic bag with damp sphagnum moss) to encourage new root growth. This can take months. For most home growers, it is easier to start with a healthy plant.
How do I know if my orchid has root rot?
Signs: soft, brown, mushy roots; leaves turning yellow or wrinkled; a sour smell from the pot. If you see these, unpot and inspect immediately.
Can I use hydrogen peroxide on orchid roots?
Diluted hydrogen peroxide (3% mixed with equal parts water) can be used to disinfect roots after trimming rot. Spray lightly, let it fizz, then rinse. Do not soak. This is an advanced step; plain trimming and fresh bark work for most cases.
What is the best potting mix for orchids?
For Phalaenopsis, use medium‑grade fir bark. You can also buy pre‑made orchid mixes that include bark, perlite, and charcoal. Avoid sphagnum moss unless you are experienced — it holds more water and can lead to rot for beginners.
How long does it take for trimmed orchid roots to grow back?
New root growth can appear in 4–8 weeks under good conditions. Full root recovery may take 6 months.
Can I use cinnamon on all orchid roots?
No. Only use cinnamon on cut ends of roots after trimming. Do not dust healthy roots or the crown. Too much cinnamon dries out tissue.
Should I fertilize right after repotting?
No. Wait 4–6 weeks until you see new root growth. Then use a very diluted fertilizer (quarter strength).
Why are my orchid leaves still wrinkled after root treatment?
Wrinkled leaves indicate dehydration. If you trimmed many roots, the orchid cannot take up water efficiently. Be patient — new roots will eventually support the leaves. Keep humidity high and water correctly.
A Final Word on “Miracle” Treatments
You will see many videos promising instant orchid recovery with a single powder or liquid. Ignore most of them.
The truth is that orchids are slow growers. Recovery takes weeks to months. No powder will regrow roots overnight. No sprinkle will force blooms from a weak plant.
What works is simple, consistent care:
· Healthy roots – Trim rot, keep firm roots.
· Fresh, airy bark – Repot every 1–2 years.
· Proper watering – Let the bark dry between waterings.
· Bright indirect light – Energy for recovery.
· Patience – Recovery happens in its own time.
That is the real “root treatment.” And it works every time, without gimmicks.
Final Thoughts
If your orchid looks weak, do not reach for a mystery powder. Instead, follow this simple, proven root treatment:
- Unpot and inspect.
- Trim rotten and dead roots.
- Let cuts dry.
- Dust cinnamon lightly on cut ends (optional).
- Repot in fresh orchid bark.
- Water correctly.
- Provide bright indirect light and good airflow.
- Wait for recovery signs.
- Fertilize only after new growth appears.
This method addresses the real problem: root health. And when the roots are strong, the rest of the orchid follows — firmer leaves, new growth, and eventually, those beautiful blooms that made you fall in love with orchids in the first place.
So put down the mystery powder. Pick up some fresh bark. And give your orchid the simple, honest care it deserves.
Have you tried this simple root treatment on a weak orchid? Share your experience in the comments below. And if you found this guide helpful, save it for later or send it to a friend who is struggling with orchid care.