
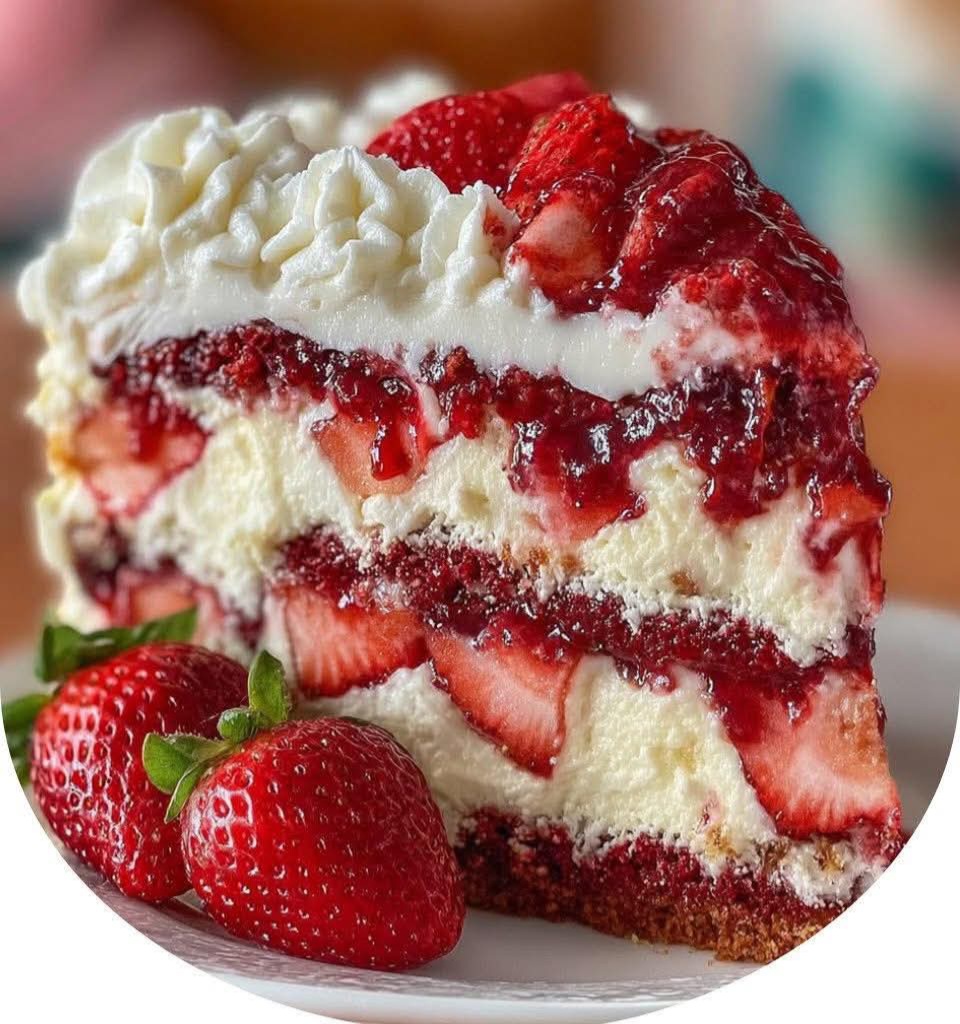
Imagine the velvety richness of New York cheesecake, the soft tenderness of vanilla cake, the sweetness of fresh strawberries, and the cloud-like fluff of whipped cream, all stacked into one breathtaking dessert. That’s the magic of this Strawberries and Cream Dream Layer Cheesecake Cake.
This isn’t just a cake; it’s an experience. It’s the answer to “What should I bring?” for every potluck, birthday, and celebration. It’s the make-ahead party dessert that will have everyone asking for the recipe. We’re fusing two beloved classics into a stunning, multi-textured masterpiece that balances sweet, tangy, and creamy in every single forkful.
If you’re looking for a showstopper layer cake that delivers on both beauty and unbelievable flavor, you’ve found it. While it has a few steps, each component is simple, and the result is pure culinary magic. Get ready to create the most memorable dessert of the season.
Why This Layer Cheesecake Cake Recipe Works
This recipe is designed for success and maximum impact:
· Texture Symphony: The contrast between the dense, creamy cheesecake layer and the light, fluffy cake layer is what dreams are made of. Add the fresh strawberries and whipped cream, and you have a party in every bite.
· Make-Ahead Perfection: Every component can be made in advance, making assembly on the day of your event stress-free and simple.
· Flavor Harmony: The tang of cream cheese and lemon juice perfectly cuts the sweetness of the cake and berries, creating a sophisticated, balanced flavor profile that’s far from cloying.
· Visually Stunning: The naked sides and visible layers make this cake look professionally crafted with minimal effort. It’s a true special occasion cake.
Gathering Your Ingredients
This recipe has four main components: the cheesecake layer, the vanilla cake layer, the strawberry filling, and the whipped cream frosting.
For the Cheesecake Layer:
· 24 ounces (3 full 8-oz bricks) full-fat cream cheese, softened to room temperature
· 1 cup (200g) granulated sugar
· 1 tablespoon fresh lemon juice
· 1 teaspoon pure vanilla extract
· 3 large eggs, at room temperature
· ½ cup (120ml) sour cream, at room temperature
For the Vanilla Cake Layer:
· 1 ½ cups (190g) all-purpose flour
· 1 ½ teaspoons baking powder
· ¼ teaspoon salt
· ½ cup (113g) unsalted butter, softened
· 1 cup (200g) granulated sugar
· 2 large eggs, at room temperature
· 2 teaspoons pure vanilla extract
· ½ cup (120ml) whole milk, at room temperature
For the Strawberry Components:
· 1 pound fresh strawberries, divided
· ¼ cup (50g) granulated sugar (for macerating)
· 1 tablespoon cornstarch mixed with 1 tablespoon water (optional, for thickening)
For the Whipped Cream Frosting:
· 2 cups (480ml) heavy whipping cream, very cold
· ½ cup (60g) powdered sugar
· 1 teaspoon pure vanilla extract
For Assembly:
· Additional whole and sliced strawberries for garnish
Essential Equipment for Success
Having the right tools makes this layered project smooth and enjoyable.
Two 9-inch Round Cake Pans: You’ll need two identical pans for even layers. Parchment paper rounds are non-negotiable for easy release.
Stand Mixer or Hand Mixer: A must for properly creaming the cream cheese/butter and whipping the heavy cream. The paddle and whisk attachments are ideal.
Large Mixing Bowls: Multiple bowls for dry ingredients, whipping cream, and macerating strawberries.
Fine-Mesh Sieve: For dusting the finished cake with powdered sugar (optional but pretty).
Spatulas: Both a sturdy silicone spatula for folding and a thin, offset spatula for smoothing the whipped cream.
Cooling Racks: Essential for cooling the cake and cheesecake layers completely before assembly.
Food Processor or Blender: For pureeing part of the strawberries for the filling layer.
Step-by-Step Instructions
Part 1: The Cheesecake Layer (Make First – Can Be Done a Day Ahead)
Step 1: Prep and Preheat.
Preheat your oven to 325°F(160°C). Line the bottom of one 9-inch cake pan with parchment paper and grease the sides. Wrap the outside bottom and sides of the pan tightly with 2 layers of heavy-duty aluminum foil to prevent water leakage if using a water bath (highly recommended for crack-free results).
Step 2: Mix the Base.
In your stand mixer bowl,beat the softened cream cheese on medium speed until completely smooth and creamy, about 2 minutes. Scrape down the bowl. Add the 1 cup of sugar and beat for another minute until combined. Beat in the lemon juice and vanilla.
Step 3: Incorporate Eggs and Sour Cream.
With the mixer on low,add the eggs one at a time, mixing until just blended after each. Do not overmix. Scrape down the bowl, then mix in the sour cream until just combined.
Step 4: Bake.
Pour the batter into your prepared pan.Place this pan inside a larger roasting pan. Carefully pour hot water into the larger pan until it comes about halfway up the sides of the cake pan. Bake for 45-55 minutes, until the edges are set but the center still has a slight jiggle.
Step 5: Cool Slowly.
Turn off the oven,crack the door open, and let the cheesecake cool inside for 1 hour. This prevents drastic temperature changes and cracking. Then, remove it from the water bath, take off the foil, and cool completely on a rack. Refrigerate for at least 4 hours, or overnight, until very firm.
Part 2: The Vanilla Cake Layer
Step 1: Prep and Preheat.
Preheat oven to 350°F(175°C). Grease the second 9-inch pan, line the bottom with parchment, and grease the parchment. Whisk together the flour, baking powder, and salt in a medium bowl.
Step 2: Cream Butter and Sugar.
In your mixer bowl,cream the softened butter and 1 cup sugar together on medium-high speed for 3-4 minutes, until light and fluffy.
Step 3: Add Wet Ingredients.
Beat in the eggs one at a time,then the vanilla. Scrape down the bowl.
Step 4: Combine Dry and Wet.
With the mixer on low,add about one-third of the flour mixture, followed by half of the milk. Repeat, ending with the last third of the flour. Mix until just combined.
Step 5: Bake and Cool.
Pour batter into the prepared pan and bake for 25-30 minutes,until a toothpick inserted in the center comes out clean. Cool in the pan for 10 minutes, then invert onto a cooling rack to cool completely.
Part 3: The Strawberry Filling & Whipped Cream
Step 1: Macerate and Prepare.
Hull and slice ½ pound of the strawberries.Toss with ¼ cup sugar and let sit for 30+ minutes to create a juicy syrup. For a thicker filling, puree half of these macerated berries, then cook in a small saucepan with the cornstarch slurry over medium heat until thickened (2-3 minutes). Let cool completely. Reserve the other half of the sliced berries for assembly.
Step 2: Whip the Cream.
Just before assembly,place your very cold mixing bowl and whisk attachment in the freezer for 10 minutes. Whip the heavy cream, powdered sugar, and vanilla on medium-high speed until stiff peaks form.
The Grand Assembly
Level Layers: Ensure both the cooled cake and the chilled cheesecake are level. If the cake has a dome, carefully slice it off with a serrated knife.
Base Layer: Place the vanilla cake layer on your serving plate or cake stand.
First Cream Layer: Spread a thin, even layer of whipped cream over the cake.
Strawberry Layer: Spoon the cooled strawberry filling (or the macerated sliced berries) over the cream, leaving a small border.
The Cheesecake Lift: Carefully run a knife around the edge of the cheesecake pan. Place a plate over the top, invert, and gently remove the pan and parchment. Place this cheesecake layer on top of the strawberries. It’s okay if it’s fragile—the cream will hold it together.
Frost the Dream: Use the remaining whipped cream to frost the top and sides of the entire layered cake. An “almost naked” look where the layers peek through is beautiful.
Garnish: Decorate the top with remaining fresh strawberries (whole and sliced). For a final touch, dust with powdered sugar.
Chill for at least 1 hour before slicing with a sharp, hot knife (dipped in hot water and wiped clean between cuts).
Pro Tips for Flawless Results
· Room Temperature is KEY: For both the cheesecake and cake batters, room temperature ingredients (cream cheese, eggs, sour cream, milk) emulsify better and prevent overmixing, which leads to a denser texture.
· Prevent Cracks: The water bath and slow cooling are the best insurance against a cracked cheesecake top. Don’t skip them!
· Stable Whipped Cream: For a frosting that holds up longer (especially in warm weather), add 1 tablespoon of instant vanilla pudding powder or 1 teaspoon of cream of tartar while whipping.
· Clean Slices: For picture-perfect layers, dip a long, sharp knife in hot water, wipe it dry, then make a cut. Repeat for every slice.
Frequently Asked Questions (FAQs)
Can I make this entire cake ahead of time?
Absolutely.Bake and chill the cheesecake layer up to 2 days ahead. Bake the cake layer 1 day ahead, wrap tightly, and keep at room temp. Macerate the berries 1 day ahead. Assemble and frost the cake up to 1 day before serving; keep refrigerated.
Can I use frozen strawberries?
Yes,for the filling. Thaw completely in a strainer over a bowl to capture the excess liquid, which you can reduce on the stove with a little cornstarch for a great filling.
My cheesecake cracked! Is it ruined?
Not at all!This is a layered cake, and the whipped cream frosting will cover any imperfections. It will still taste incredible.
How do I store leftovers?
Cover the cake and store in the refrigerator for up to 4 days.The whipped cream may start to soften but will still be delicious.
Can I use a different fruit?
Yes!This recipe is versatile. Raspberries, blueberries, or a mix would be fantastic. Adjust sugar for tartness.
The Final Slice
This Strawberries and Cream Dream Layer Cheesecake Cake is more than a dessert—it’s a labor of love, a celebration in edible form. It embodies the joy of baking: the process of creating separate components that come together to make something truly greater than the sum of its parts.
With its stunning layers and symphony of textures and flavors, this cake promises to be the centerpiece of your table and the highlight of any gathering. It’s a recipe that looks like you fussed for days but is built on simple, tried-and-true techniques. So gather your ingredients, take a deep breath, and prepare to make a dream dessert a delicious reality. Your standing ovation awaits
More Recipes You Might Like
-
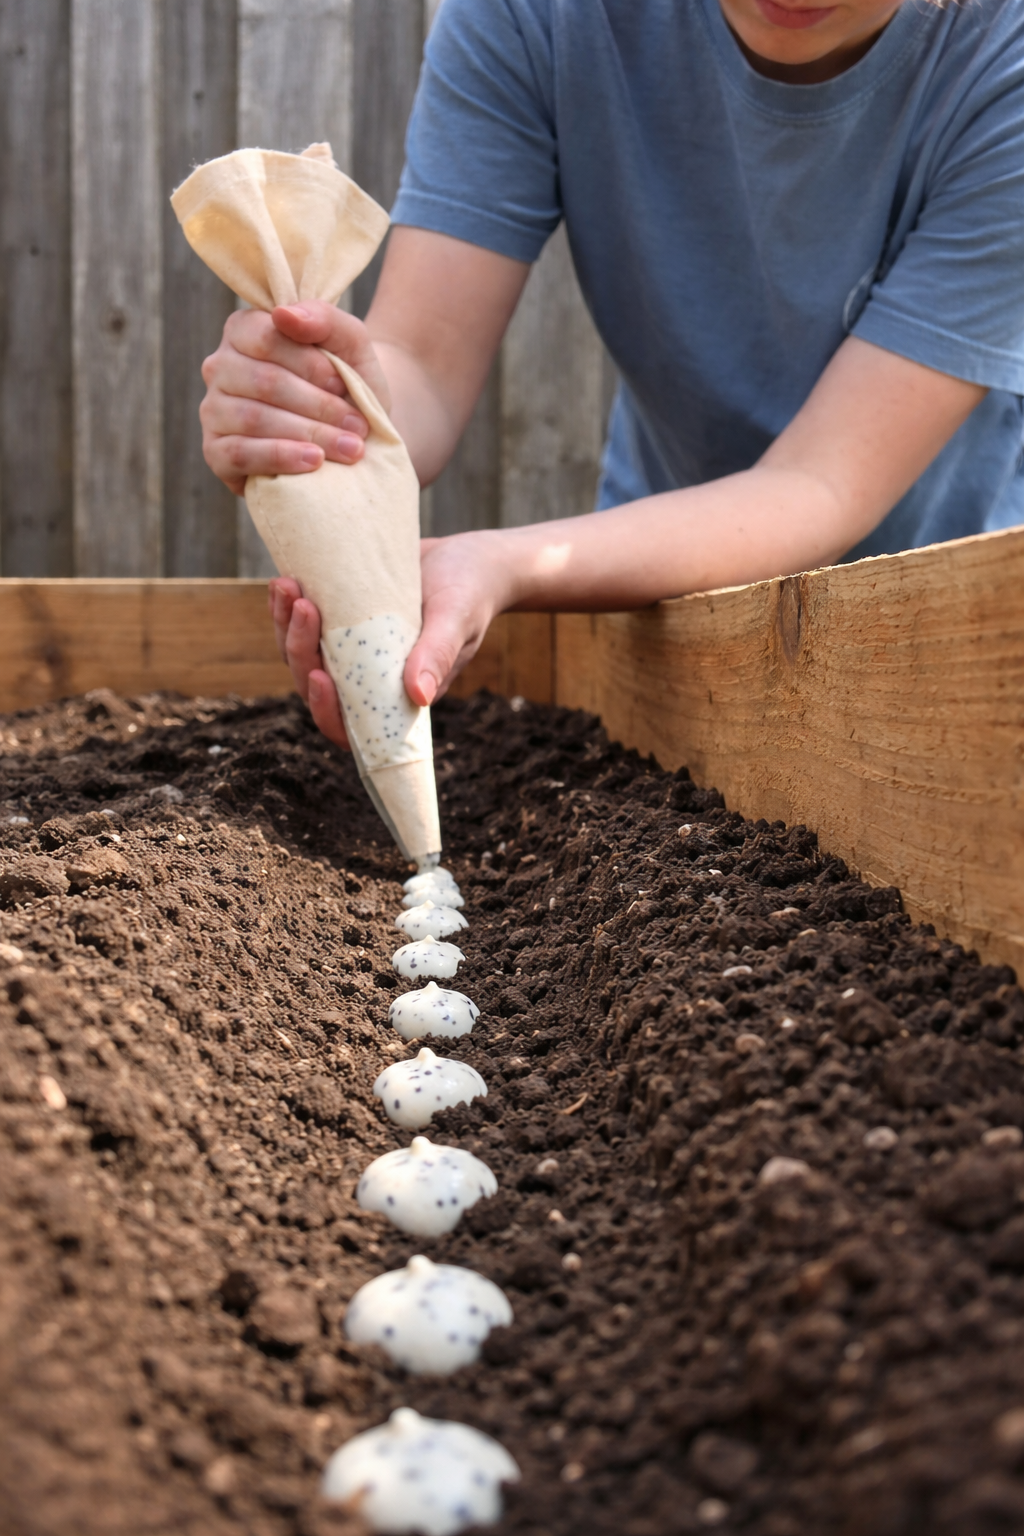
The Easy Garden Hack That Guarantees Straight, Healthy Carrots
Say goodbye to crooked, stunted carrots! Discover the simple seed paste hack that ensures perfect spacing and straight roots. This easy planting technique will transform your carrot harvest. Let me tell you about the gardening trick that turned my carrot patch from a tangle of twisted roots into a picture-perfect harvest. I love growing carrots.…
-
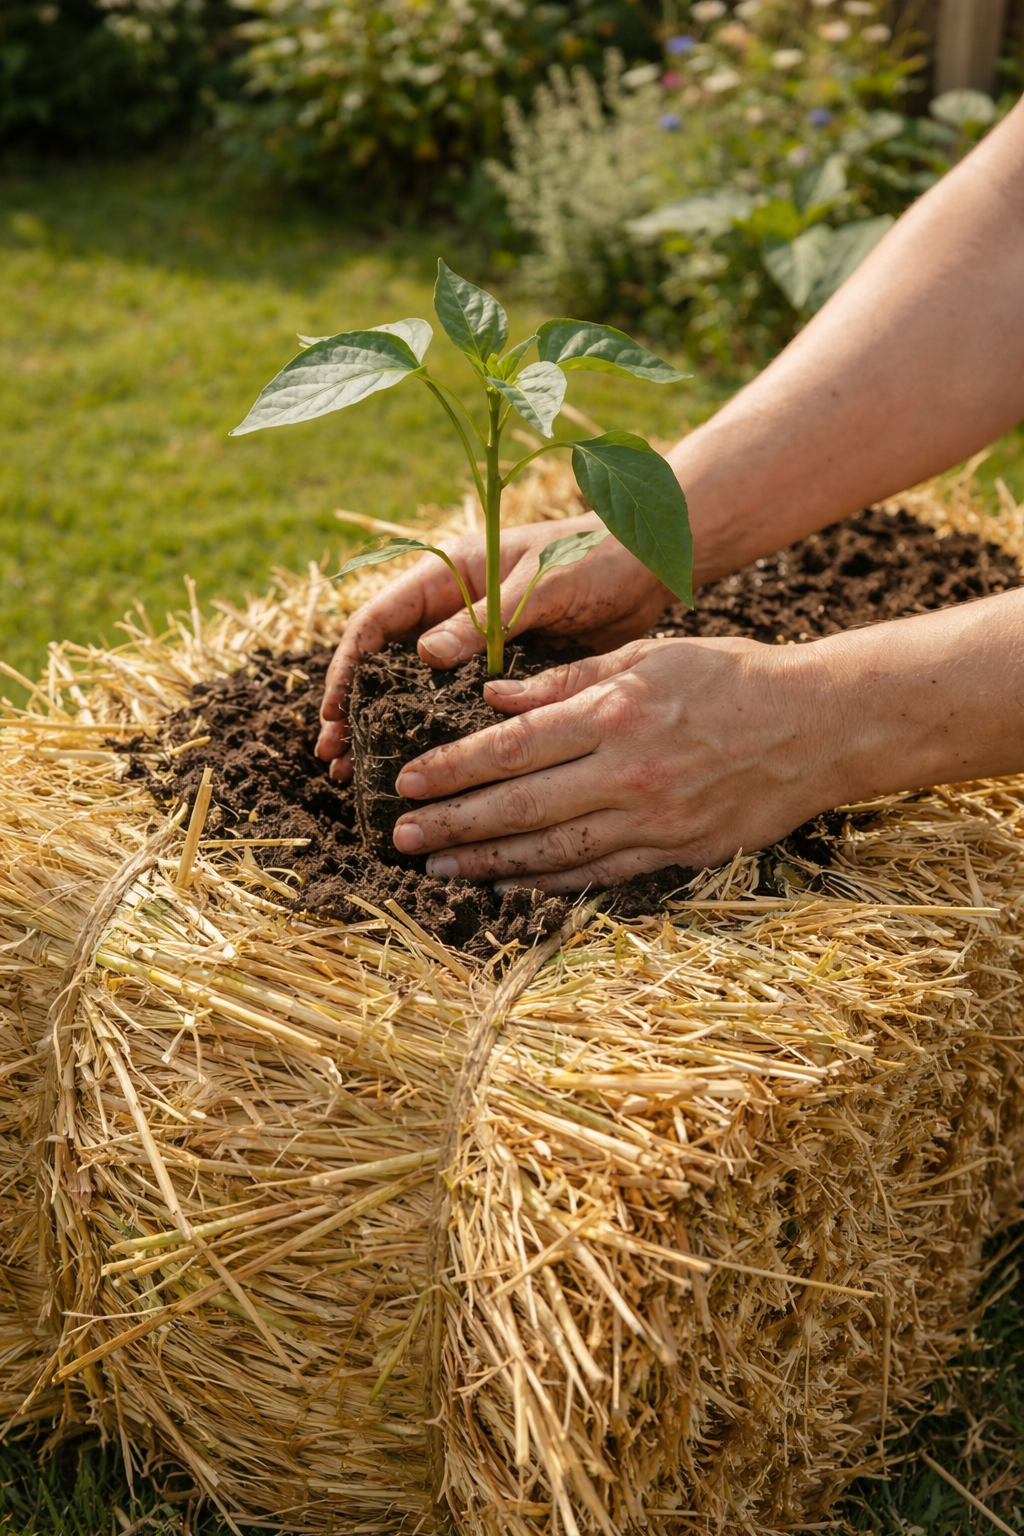
Grow 3X More Sweet Potatoes at Home with This Simple Soil Bag Trick
Want to grow 3 times more sweet potatoes in a small space? This clever soil bag trick is a game-changer. Learn how to plant sweet potatoes in bags for a massive harvest—perfect for small gardens and patios. Let me tell you about the gardening trick that turned my tiny patio into a sweet potato factory.…
-
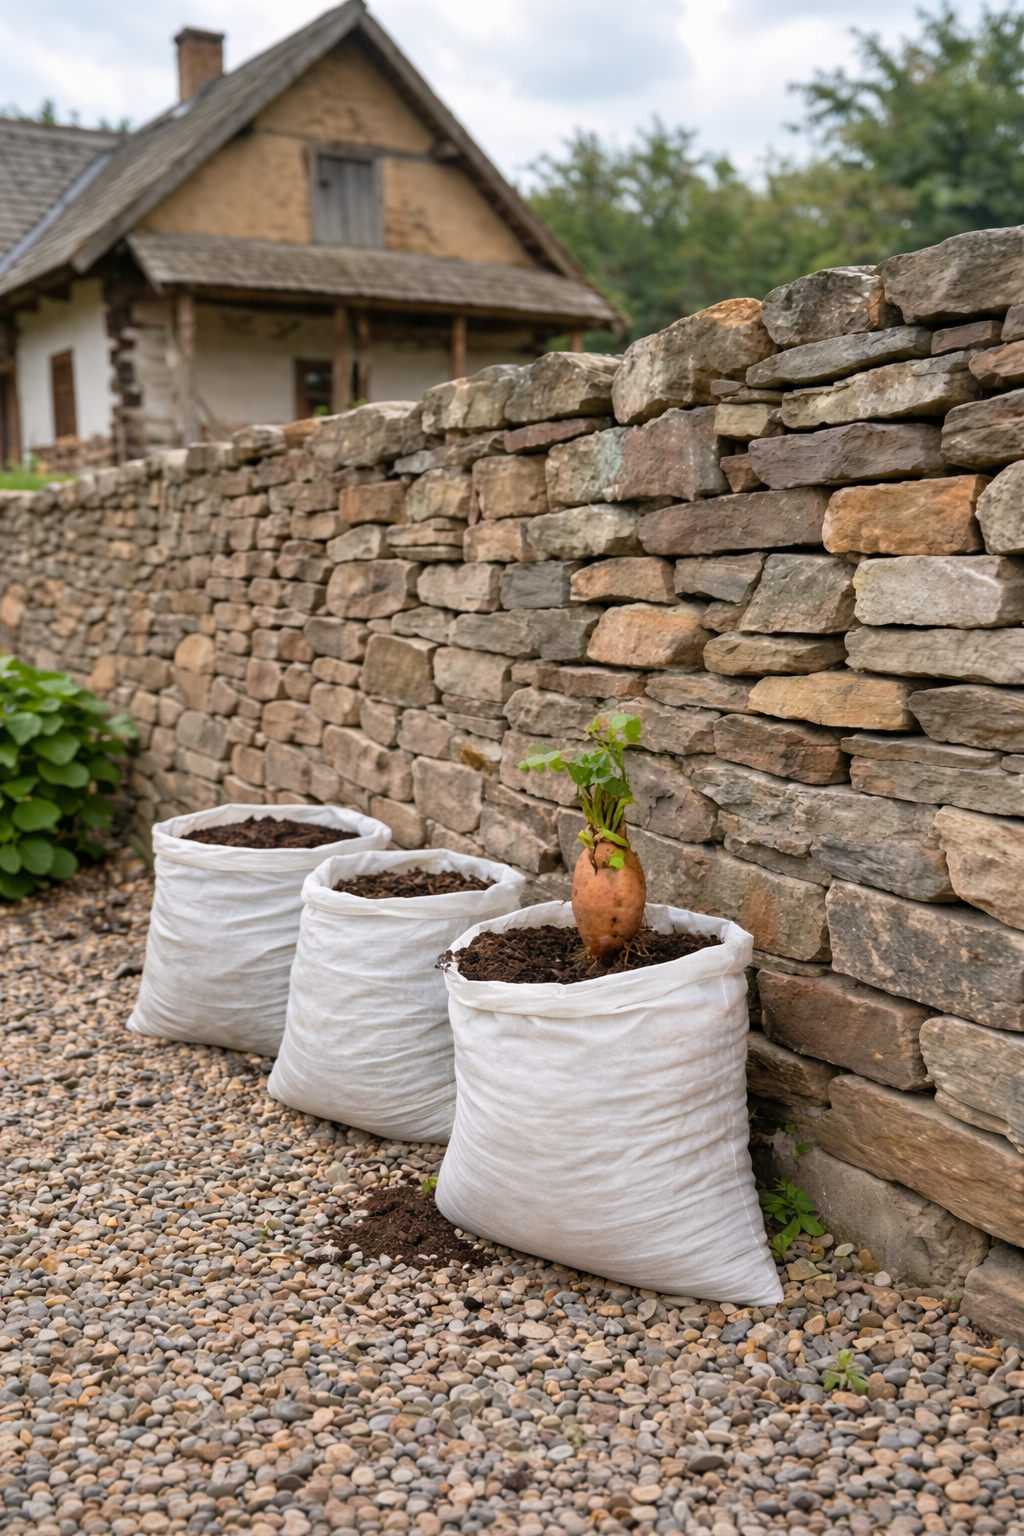
Grow 3X More Sweet Potatoes at Home with This Simple Soil Bag Trick
Want to grow 3 times more sweet potatoes in a small space? This clever soil bag trick is a game-changer. Learn how to plant sweet potatoes in bags for a massive harvest—perfect for small gardens and patios. Let me tell you about the gardening trick that turned my tiny patio into a sweet potato factory.…