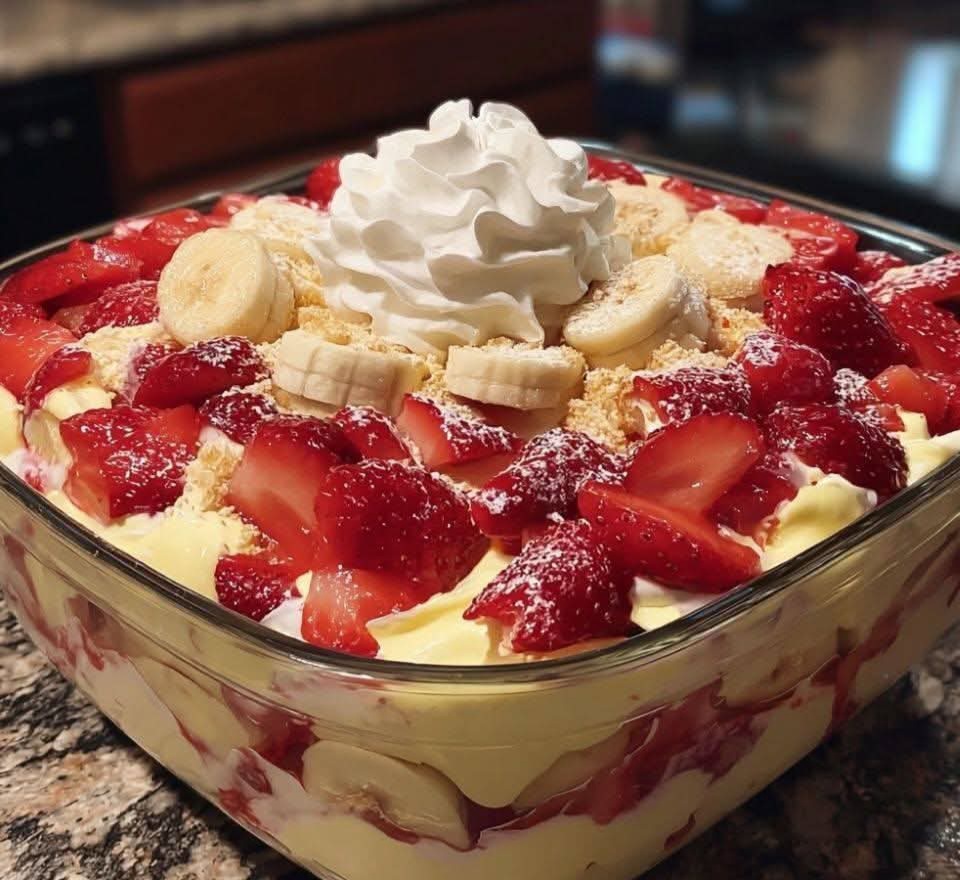
Imagine the comforting, creamy bliss of classic banana pudding, then elevate it with the vibrant, sunny sweetness of fresh strawberries. That’s the magic of Strawberry Banana Pudding Dream—a luscious, layered dessert that’s as stunning in a trifle bowl as it is delightfully simple to make. This is the ultimate no-bake dessert for busy weekends, potlucks, or when you crave something spectacular without turning on the oven.
This dessert is a textural dream: velvety vanilla pudding, clouds of whipped cream, soft vanilla wafers, and layers of sweet strawberries and ripe bananas that meld together into pure harmony. It’s a crowd-pleasing potluck dessert that feeds a group, a make-ahead summer treat that only gets better as it chills, and a guaranteed family-friendly favorite that feels nostalgic and fresh at the same time.
If you’re looking for a dessert that’s effortlessly impressive, joyfully colorful, and tastes like a slice of summer, you’ve found your new go-to recipe. Let’s build this dream together.
Why This Pudding Dream is a Desert Island Dessert
This recipe takes a beloved classic and adds a pop of berry flavor, creating something truly special. Here’s why it works so beautifully:
· The No-Bake, No-Stress Advantage: All the components come together without any baking. It’s a cooling, refreshing dessert perfect for warm days or when you need a last-minute showstopper.
· The Magic of Overnight Mingling: While you can serve it after a few hours, letting it rest overnight is the secret. The vanilla wafers soften into a cake-like layer, the fruit flavors permeate the pudding, and everything transforms into a cohesive, spoonable dream.
· Endlessly Adaptable: Serve it in a large trifle bowl for drama, in individual glasses for elegant portions, or even in a classic casserole dish for a homey feel.
· Perfect Balance of Sweet & Bright: The rich, creamy pudding and sweet bananas are perfectly balanced by the slight tartness of fresh strawberries, preventing the dessert from ever feeling too heavy or cloying.
Gathering Your Dream Ingredients
This recipe uses simple, accessible ingredients to create layers of flavor and texture.
For the Creamy Pudding Layer:
· 2 (3.4 oz) boxes instant vanilla pudding mix – The foundation of our creamy dream.
· 3 cups cold whole milk – For the richest, creamiest pudding.
· 1 (8 oz) block full-fat cream cheese, softened – This is the secret for an extra-luxurious, tangy, and stable cream layer.
· 1 (14 oz) can sweetened condensed milk – Adds sweetness and a wonderfully dense, smooth texture.
· 1 tablespoon pure vanilla extract
For the Fluffy Whipped Layer:
· 1 (8 oz) container frozen whipped topping, thawed (like Cool Whip) – For convenience and stability.
· OR 2 cups heavy cream + ¼ cup powdered sugar – For a from-scratch whipped cream option.
The Fruit & Cookie Layers:
· 1 (11 oz) box vanilla wafer cookies (like Nilla Wafers) – The classic choice for that iconic texture and flavor.
· 4-5 ripe (but not mushy) bananas – Sliced just before assembling to prevent browning.
· 1 pound fresh strawberries, hulled and sliced – Reserve a few perfect slices for garnish.
· Optional Garnish: Additional whipped topping, whole strawberries, and a mint sprig.
Essential Equipment for Easy Assembly
No special tools are required, just a few basics to make layering a breeze.
Large Trifle Bowl or 9×13-inch Baking Dish: A clear glass trifle bowl (approx. 4-quart) is ideal for showing off the beautiful layers. A 9×13-inch dish works perfectly for a more traditional “pudding” style.
Electric Mixer (Hand or Stand): Crucial for beating the cream cheese until smooth and for whipping cream if making it from scratch.
Large Mixing Bowls: You’ll need at least two: one for the pudding mixture and one for whipped cream (if making from scratch).
Spatulas: A sturdy spatula for folding and a smaller one for smoothing layers.
Sharp Knife & Cutting Board: For prepping the fresh fruit.
Measuring Cups & Spoons
Step-by-Step Instructions: Building the Dream
The process is all about layering. Have all your components prepped before you begin for a smooth assembly.
Part 1: Prepare the Pudding & Cream
Step 1: Make the Pudding Base.
In a large bowl,whisk the instant pudding mixes with the 3 cups of cold milk for 2 minutes until it begins to thicken. Set it aside to continue setting.
Step 2: Create the Creamy Dream Filling.
In another large bowl using an electric mixer,beat the softened cream cheese until completely smooth. Gradually beat in the sweetened condensed milk and vanilla extract until the mixture is silky and uniform.
Step 3: Combine & Lighten.
Gently fold the thickened pudding into the cream cheese mixture until no streaks remain.Then, carefully fold in the entire container of thawed whipped topping (or your from-scratch sweetened whipped cream) until the mixture is light, fluffy, and homogenous. This is your dreamy cream layer.
Part 2: Assemble the Layers
Step 4: The First Cookie Layer.
Spread a thin,even layer of the creamy pudding mixture on the bottom of your trifle dish or baking dish. This helps anchor the first layer of cookies. Arrange a single layer of vanilla wafers over the cream, breaking some to fill in gaps.
Step 5: The Fruit & Cream Sequence.
· Layer 1: Spoon about one-third of the remaining cream mixture over the cookies and spread gently.
· Layer 2: Add a single layer of sliced bananas and sliced strawberries, covering the cream.
· Repeat: Add another layer of cookies, another third of the cream, and the remaining bananas and strawberries.
· Finale: Top with a final layer of cookies (you may not use the whole box) and finish with the last of the cream mixture, spreading it smoothly to seal in the fruit.
Step 6: Garnish & Chill.
Garnish the top with swirls of extra whipped topping,reserved strawberry slices, and perhaps a few whole cookies or mint. Cover tightly with plastic wrap.
Step 7: The Patience Payoff.
Refrigerate for at least 4 hours, but ideally overnight (8-12 hours).This chilling time is non-negotiable—it allows the cookies to soften into a cake-like layer and the flavors to marry into pure magic.
Pro Tips for Pudding Perfection
· Banana Browning Defense: Slice your bananas just before you’re ready to layer. For extra insurance, you can toss the banana slices in a tiny bit of lemon or pineapple juice, but it’s often not needed if they are buried between layers and served within 24 hours.
· Cream Cheese Softening: Ensure your cream cheese is truly at room temperature. This prevents lumpy streaks in your creamy layer.
· Customize Your Cookies: For a deeper flavor, use chessman cookies or shortbread. For a fun twist, try strawberry wafer cookies.
· The Scrape-Down: Regularly scrape down the sides of your mixing bowls to ensure everything is evenly incorporated.
· Make it Lighter: You can use reduced-fat cream cheese, sugar-free pudding mix, and light whipped topping. The texture will be slightly less rich but still delicious.
Frequently Asked Questions (FAQs)
Can I use homemade cooked pudding instead of instant?
Yes,but ensure it is thoroughly chilled and very thick before folding it into the cream cheese mixture. Instant pudding is preferred for its guaranteed consistency and ease.
How long does this dessert keep?
It is best enjoyed within 2-3 days.The bananas will continue to soften and may brown slightly after day 2, but it will still taste wonderful.
Can I use different fruit?
Absolutely!Blueberries, raspberries, or a mix of berries are fantastic. Avoid watery fruits like watermelon or citrus segments.
Can I make this in individual servings?
Yes!This recipe is perfect for layering in clear plastic cups, mason jars, or parfait glasses. Assemble in the same order, then chill.
My pudding seems runny. What happened?
If you used”Cook & Serve” pudding by mistake, it will not set properly without cooking. Also, ensure you used cold milk with instant pudding, as warm milk can prevent setting. If it’s too loose, simply chill the filling mixture for 20-30 minutes before assembling to help it firm up.
Delicious Variations to Explore
Flavor Twists:
· Tropical Dream: Use banana cream pudding mix, and layer with bananas, strawberries, and toasted coconut. Add crushed pineapple (well-drained) to the fruit layers.
· Chocolate Berry: Use chocolate pudding mix and chocolate wafer cookies. Layer with strawberries and bananas for a chocolate-covered strawberry effect.
· Lemon Berry Bliss: Use lemon pudding mix and layer with strawberries, blueberries, and raspberries. Omit the bananas for a bright, citrusy version.
Serving & Presentation Ideas:
· Fourth of July Flag: In a rectangular dish, use blueberries and lines of strawberries to create a flag design on the white cream topping.
· Elegant English Trifle: Soak the vanilla wafers in a little sherry or strawberry liqueur before layering.
· Ice Cream Sundae Topping: Scoop the chilled pudding dream over a bowl of vanilla ice cream for an over-the-top treat.
The Final Spoonful
The Strawberry Banana Pudding Dream is more than a dessert; it’s an experience. It’s the joy of building beautiful layers, the anticipation of the overnight chill, and the shared delight of scooping into a creamy, fruity, perfectly balanced masterpiece. It proves that the most memorable desserts don’t require complex techniques—just great ingredients, a little layering love, and the patience to let the magic happen.
So, gather your strawberries, bananas, and wafers, and prepare to make a dessert that’s as fun to assemble as it is to devour. This dream is ready to become your family’s new favorite tradition. One spoonful, and you’ll be transported.
More Recipes You Might Like
-

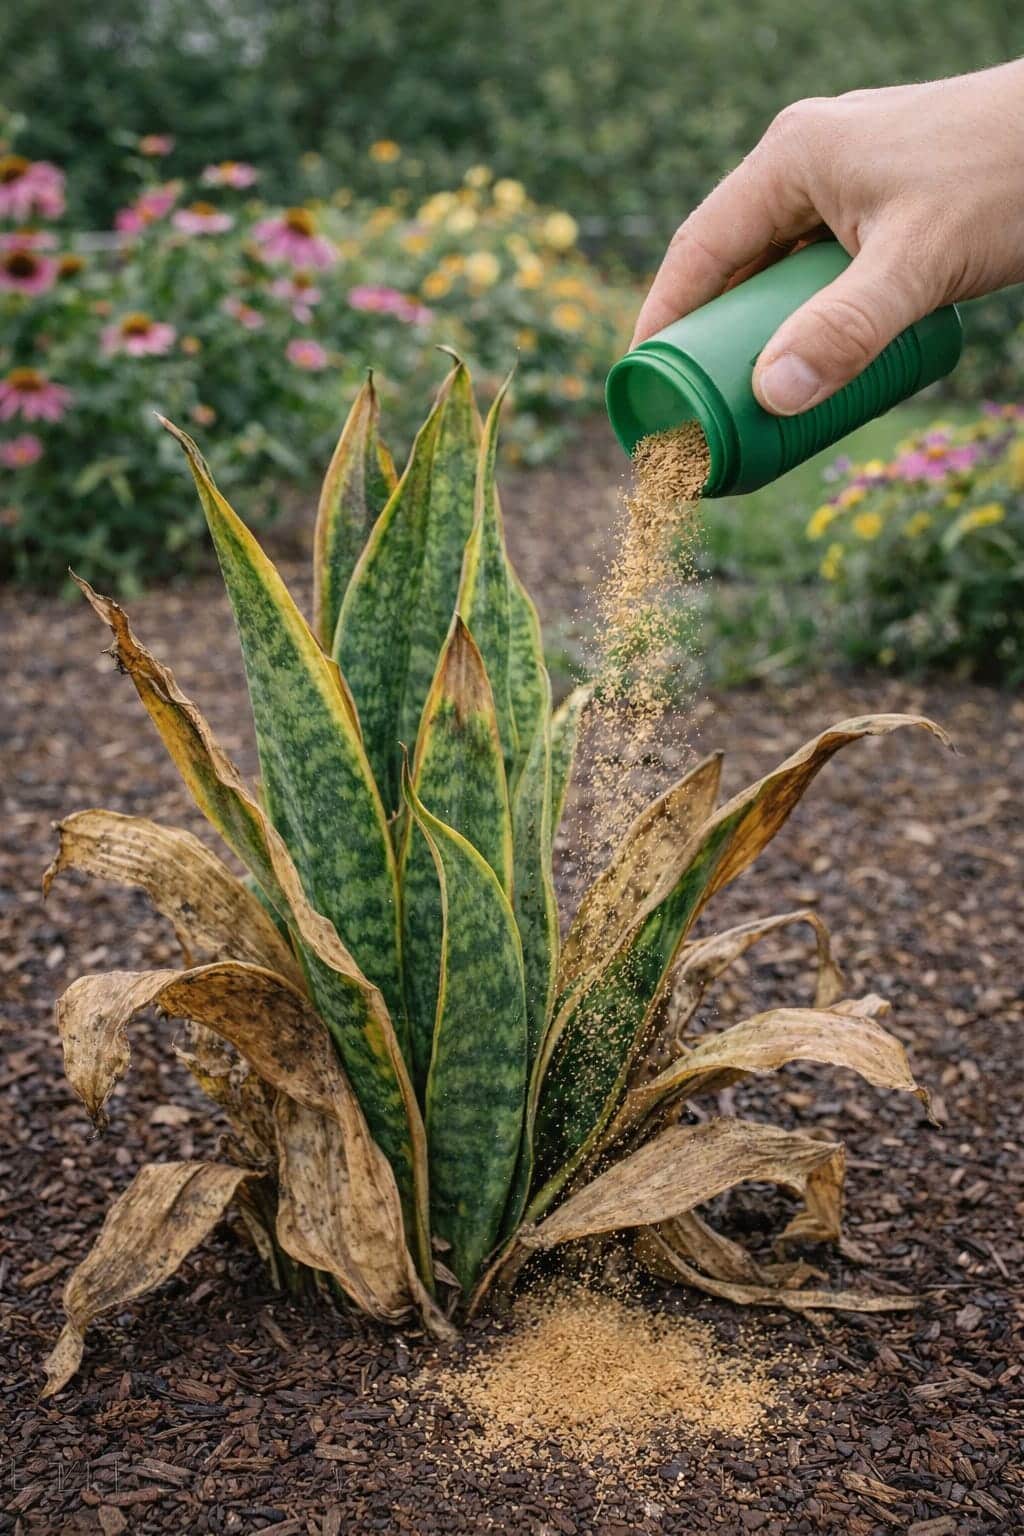
The Snake Plant Recovery Method Using a Simple Natural Powder – How to Fix Dry Leaves and Improve Outdoor Growth
Moving your snake plant outdoors? Leaves may dry out or turn brown. Learn how a simple natural powder (mineral supplement … Read more
-
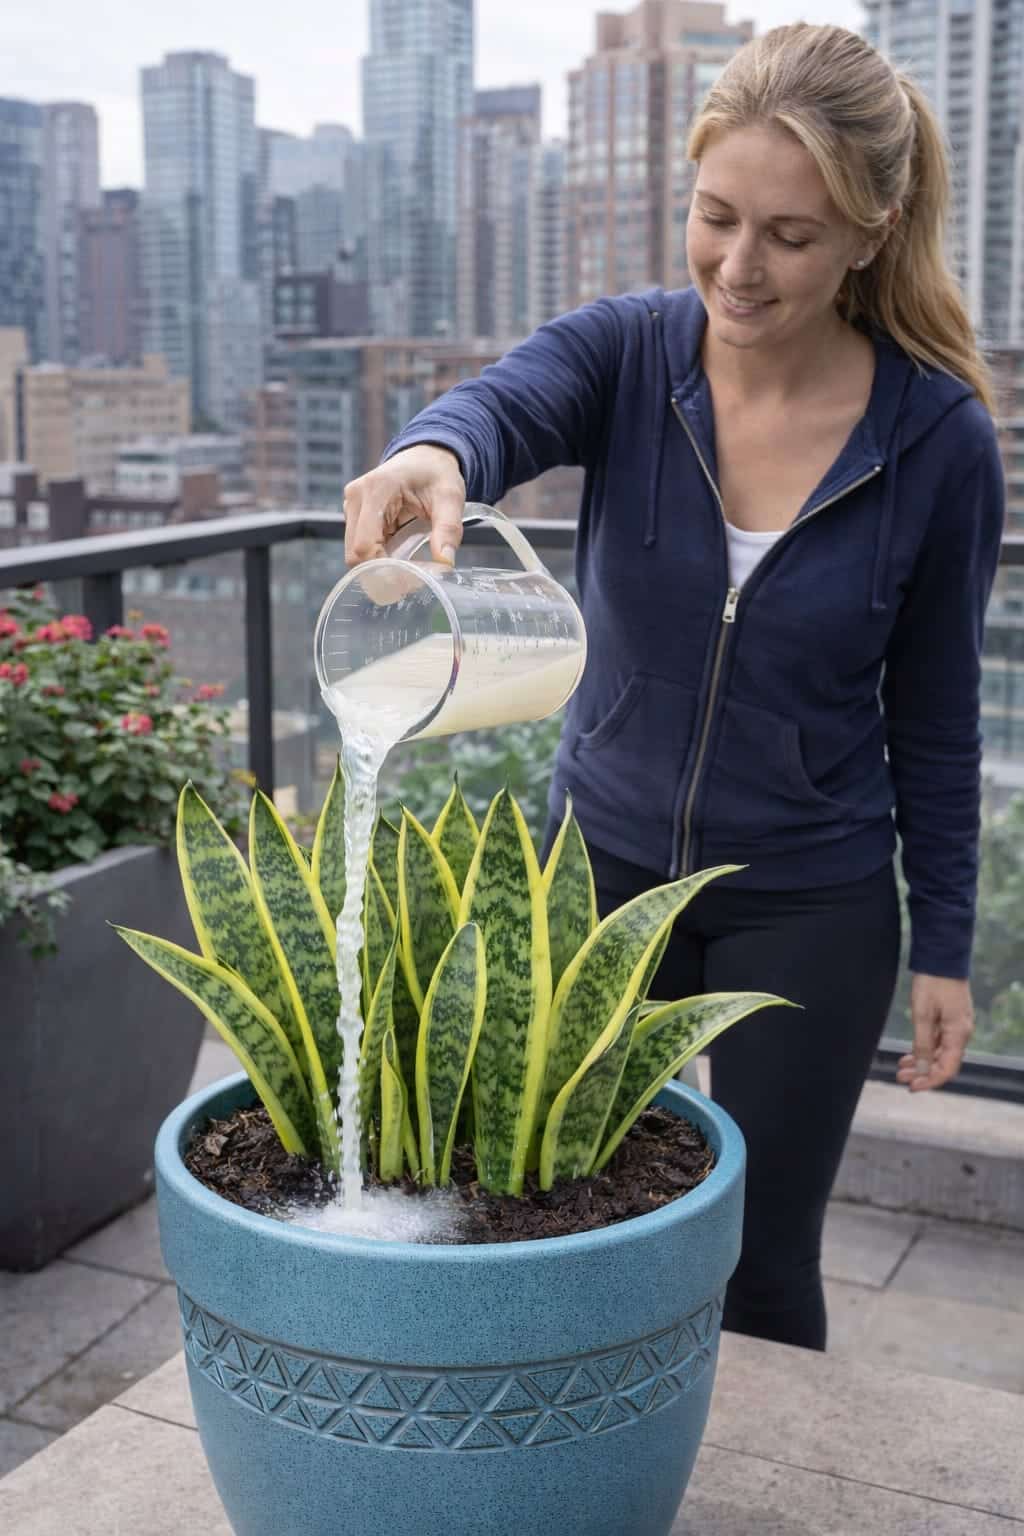
The Snake Plant Growth Method Using Rice Water – How to Revive, Improve Leaf Health, and Support Natural Blooming
Can rice water help your snake plant grow faster and healthier? Learn how to use rice water correctly – as … Read more
-
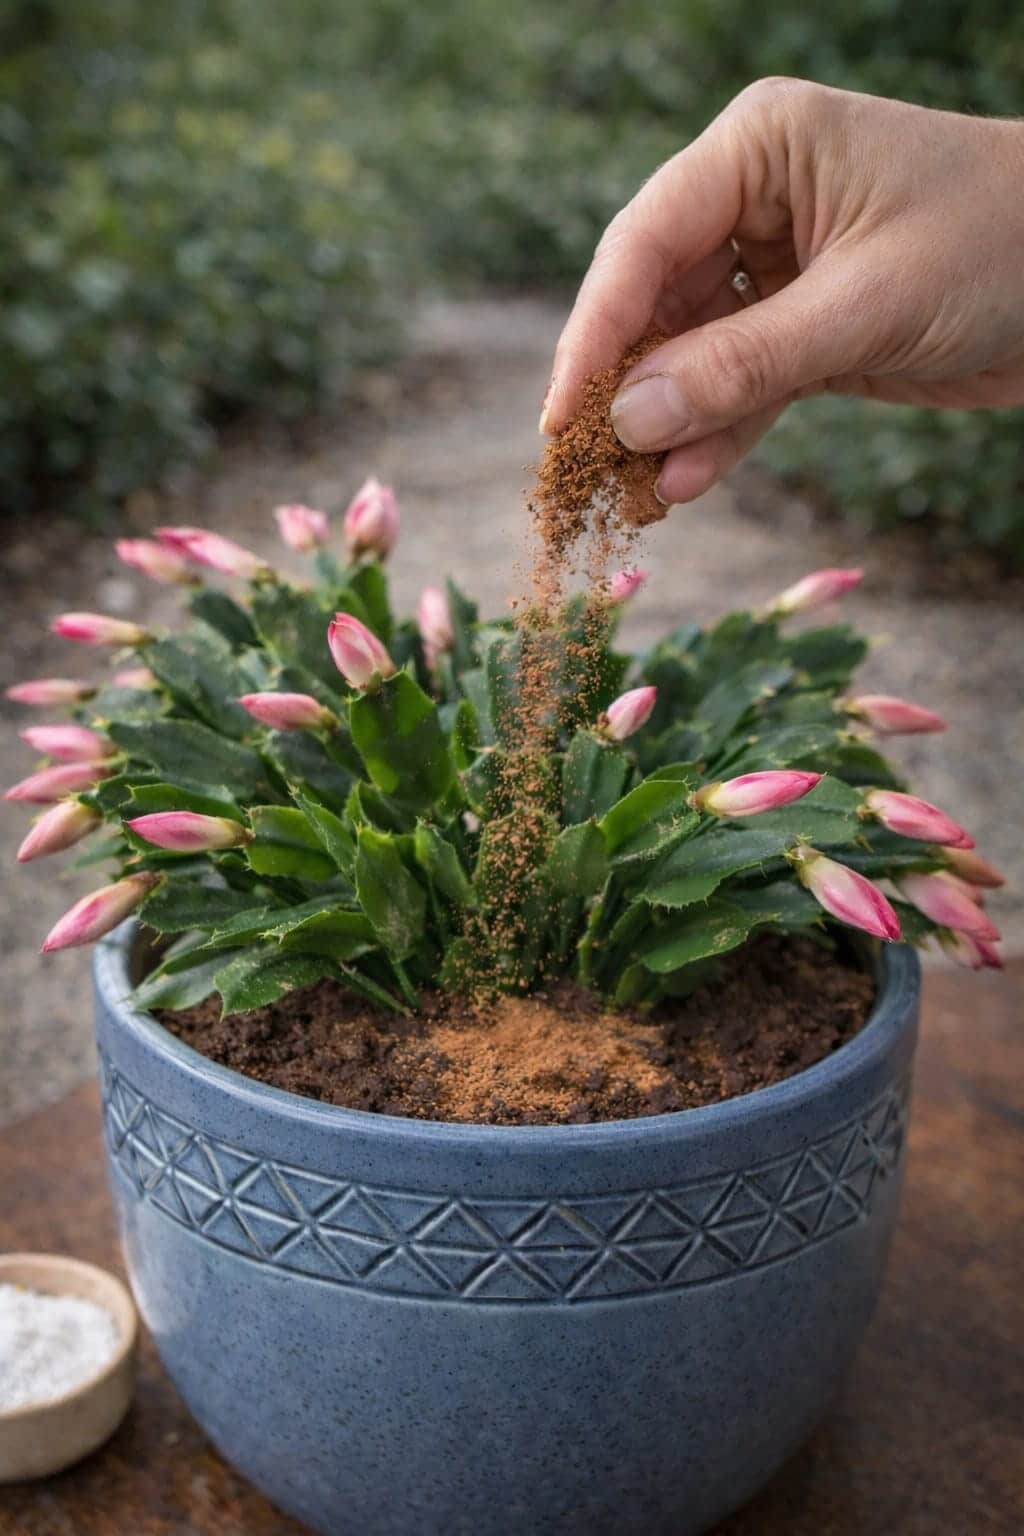
Indoor Gardeners Are Sprinkling This Powder on Christmas Cactus — Here’s Why It Helps Flowers Open Faster
Are your Christmas cactus buds falling off or failing to open? Learn how a simple natural powder (mineral supplement or … Read more