

How To Thoroughly Clean Dull And Grimy Kitchen Cabinets
When you walk into a kitchen, what’s the first thing you notice? For many, it’s the cabinets. They take up the most space in the room, frame your appliances, and set the tone for your overall kitchen style. But there’s a problem every homeowner faces sooner or later: grease build-up. Whether you’re frying bacon, simmering tomato sauce, or sautéing veggies, invisible grease particles rise into the air and slowly settle on your cabinets. Over time, this creates a dull, sticky film that attracts dust and dirt. Suddenly, those once-shiny cabinets look aged, grimy, and less than inviting.
Luckily, you don’t need harsh commercial chemicals or expensive specialty cleaners to bring your cabinets back to life. In fact, there’s a simple, genius tip that has been passed down in households for generations: using natural, effective solutions to cut through grease and restore shine. Let’s dive into why cabinets get greasy, the DIY method that works wonders, step-by-step cleaning instructions, and tips to keep your kitchen looking fresh and spotless every day.
Why Do Kitchen Cabinets Get Greasy?
Cooking releases oils and fats into the air, which don’t just disappear. They cling to surfaces, especially cabinets near your stove. When mixed with dust, these oils form a sticky layer that darkens over time. Common culprits include:
Frying food: Oil splatters and airborne grease settle onto cabinets.
Steam from cooking: Steam carries microscopic grease particles that stick to surfaces.
Touching cabinets with messy hands: Over time, fingerprints add oils to the surface.
This grease build-up is stubborn, often resisting simple soap and water. That’s where Nana’s wisdom—or modern science—steps in with an effective, affordable solution.
The Genius Grease-Busting Tip
Here’s the secret: a simple solution made from vinegar, dish soap, and warm water.
White vinegar cuts through grease naturally thanks to its acidity.
Dish soap is designed to break down oils and lift grime.
Warm water loosens the sticky film and makes scrubbing easier.
This trio forms a safe, eco-friendly, and surprisingly powerful degreaser that works on wood, laminate, or painted cabinets.
DIY Grease-Cutting Solution
2 cups warm water
1 cup white vinegar
1 teaspoon dish soap (mild, not overly concentrated)
Mix in a spray bottle, shake gently, and you’re ready to clean.
Step-By-Step: How To Thoroughly Clean Dull and Grimy Cabinets
Step 1: Empty the Cabinets (Optional but Recommended)
If your cabinets are very dirty, it’s best to clear them out so grease doesn’t drip onto food or dishes while cleaning.
Step 2: Wipe Away Loose Dust
Use a dry microfiber cloth or duster to remove surface dust before applying liquid cleaner. This prevents smearing dirt into the grease.
Step 3: Spray and Let Sit
Spray the vinegar-dish soap solution directly onto greasy spots. Let it sit for 2–3 minutes to loosen the build-up.
Step 4: Scrub Gently
Use a soft sponge or microfiber cloth to wipe in circular motions. For stubborn grease, dip a soft-bristled toothbrush into the solution and scrub the crevices, handles, and corners.
Step 5: Rinse and Wipe Dry
Dampen a clean cloth with warm water, wipe away any soapy residue, then dry thoroughly with a towel to avoid streaks or water damage.
Step 6: Polish (Optional)
For wooden cabinets, apply a small amount of olive oil or coconut oil on a clean cloth and buff gently. This restores shine and adds a protective layer.
Natural Alternatives for Stubborn Grease
If you’re dealing with years of built-up grease, here are some backup natural cleaners:
Baking Soda Paste – Mix baking soda with a little water to form a paste. Apply to sticky spots, let sit for 5 minutes, then scrub gently.
Lemon Juice – The natural acidity cuts grease and leaves a fresh scent.
Cornstarch – Surprisingly effective at absorbing oils; sprinkle on greasy handles before wiping clean.
Pro Tips for Cabinet Cleaning Success
Work from top to bottom. Start with the highest cabinets so drips don’t dirty areas you’ve already cleaned.
Test first. Always test cleaners on a small, hidden spot to make sure they don’t damage the finish.
Avoid harsh scrubbing. Steel wool or abrasive pads can scratch cabinet surfaces. Stick to soft cloths and sponges.
Use warm (not hot) water. Hot water can warp wood or strip paint over time.
Don’t oversaturate. Too much water can damage wooden cabinets; always wring out sponges well.
Keeping Cabinets Clean Longer
Once you’ve tackled the grime, the goal is to keep grease from building up again. Here’s how:
Wipe weekly. A quick once-over with a damp microfiber cloth prevents layers of grease from forming.
Cook with lids on. Containing steam reduces airborne grease.
Ventilate. Always turn on your range hood or open a window while cooking.
Handle with care. Use cabinet handles rather than touching surfaces with oily hands.
Monthly maintenance. Give cabinets a deeper clean once a month to avoid heavy scrubbing later.
Why This DIY Method Is Better Than Store-Bought Cleaners
Commercial degreasers often contain harsh chemicals like ammonia or bleach. While powerful, these can:
Damage cabinet finishes over time.
Release strong fumes that irritate lungs and skin.
Be harmful if used around food prep areas.
In contrast, this DIY vinegar-based cleaner is:
Safe for most cabinet surfaces.
Non-toxic and food-safe.
Budget-friendly (using ingredients you already own).
Eco-friendly and biodegradable.
When to Consider a Deep Restoration
If your cabinets still look dull after cleaning, grease may not be the only problem. Wood cabinets sometimes need:
Sanding and refinishing for scratched or worn finishes.
Cabinet polish or wax for added shine.
New hardware (knobs and handles) for an instant facelift.
Cleaning removes grime, but a little maintenance can make your kitchen look brand-new again.
Final Thoughts
Grease on kitchen cabinets is one of the most common—and most frustrating—cleaning challenges. But with this genius DIY solution of vinegar, dish soap, and warm water, you don’t need to stress or spend a fortune on products that may not even work better. This method is simple, effective, safe, and eco-friendly.
With regular upkeep and a few preventative measures, you can keep your cabinets looking fresh, shiny, and grease-free all year long. A clean kitchen doesn’t just look better; it feels better too—more inviting, more hygienic, and more enjoyable for cooking and family time.
So, the next time you notice your cabinets losing their shine, remember this tip. A few minutes of cleaning can transform your kitchen from dull and sticky to sparkling and fresh—just the way it should be.
More Recipes You Might Like
-
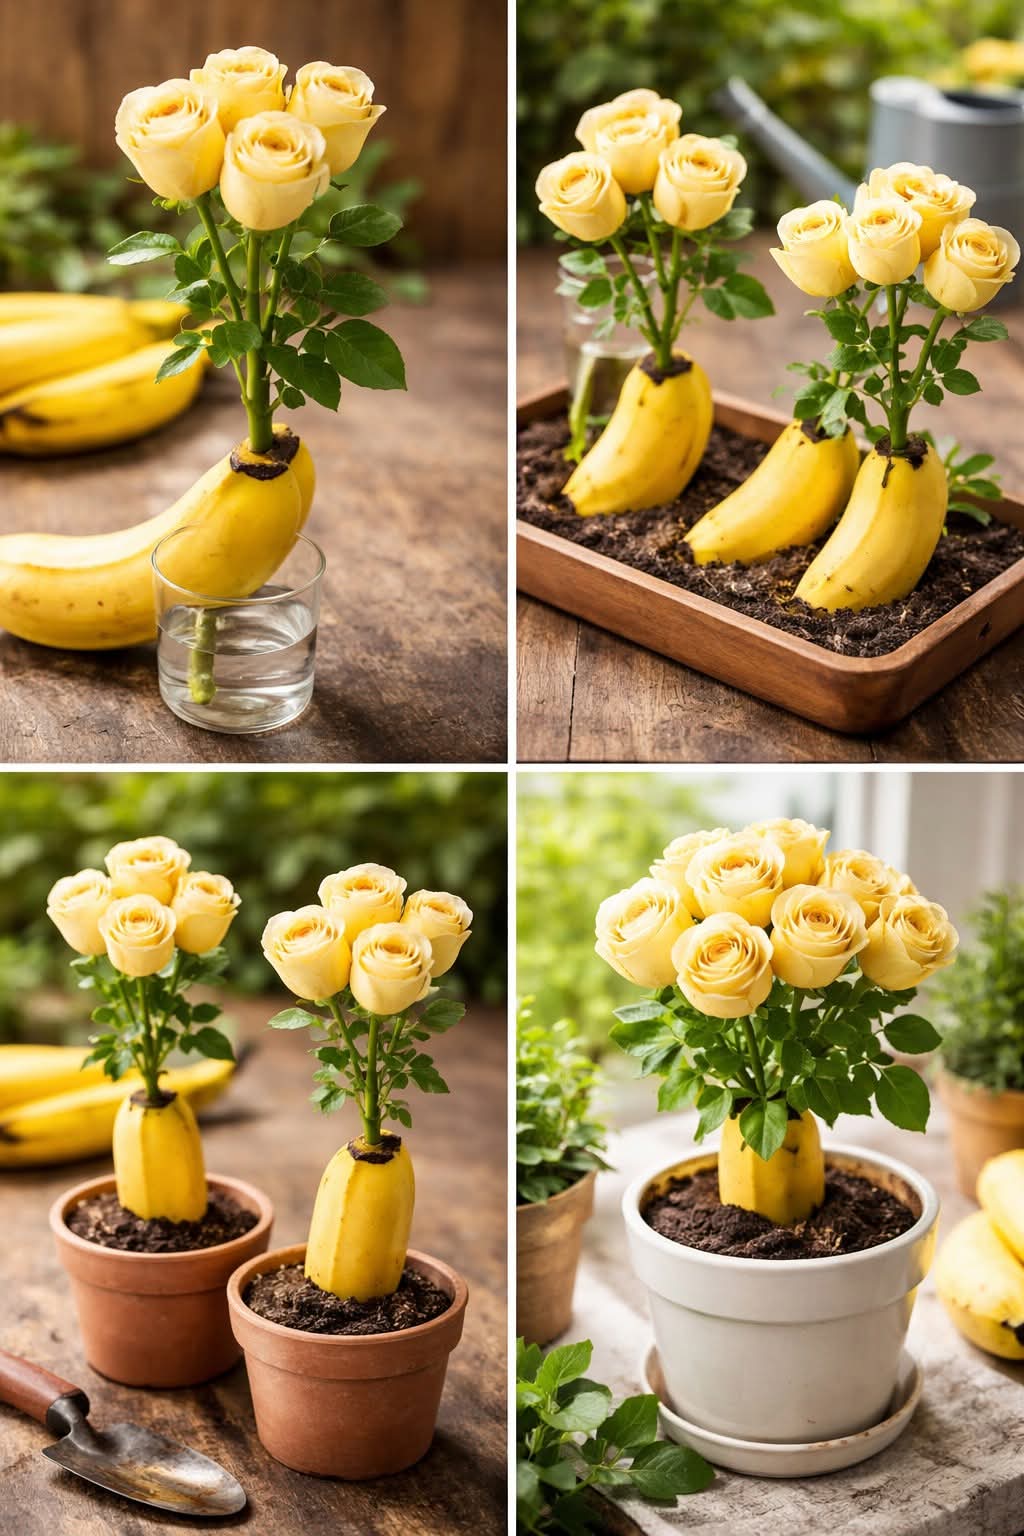
How to Reproduce Roses Infinitely with the Banana Method
If you love roses but have struggled to propagate them successfully, you’re not alone. Rose cuttings can be notoriously finicky—they often dry out or rot before roots ever form. But there’s a surprising, natural solution that might already be in your kitchen: a simple banana. This method has been gaining attention among gardeners for its…
-
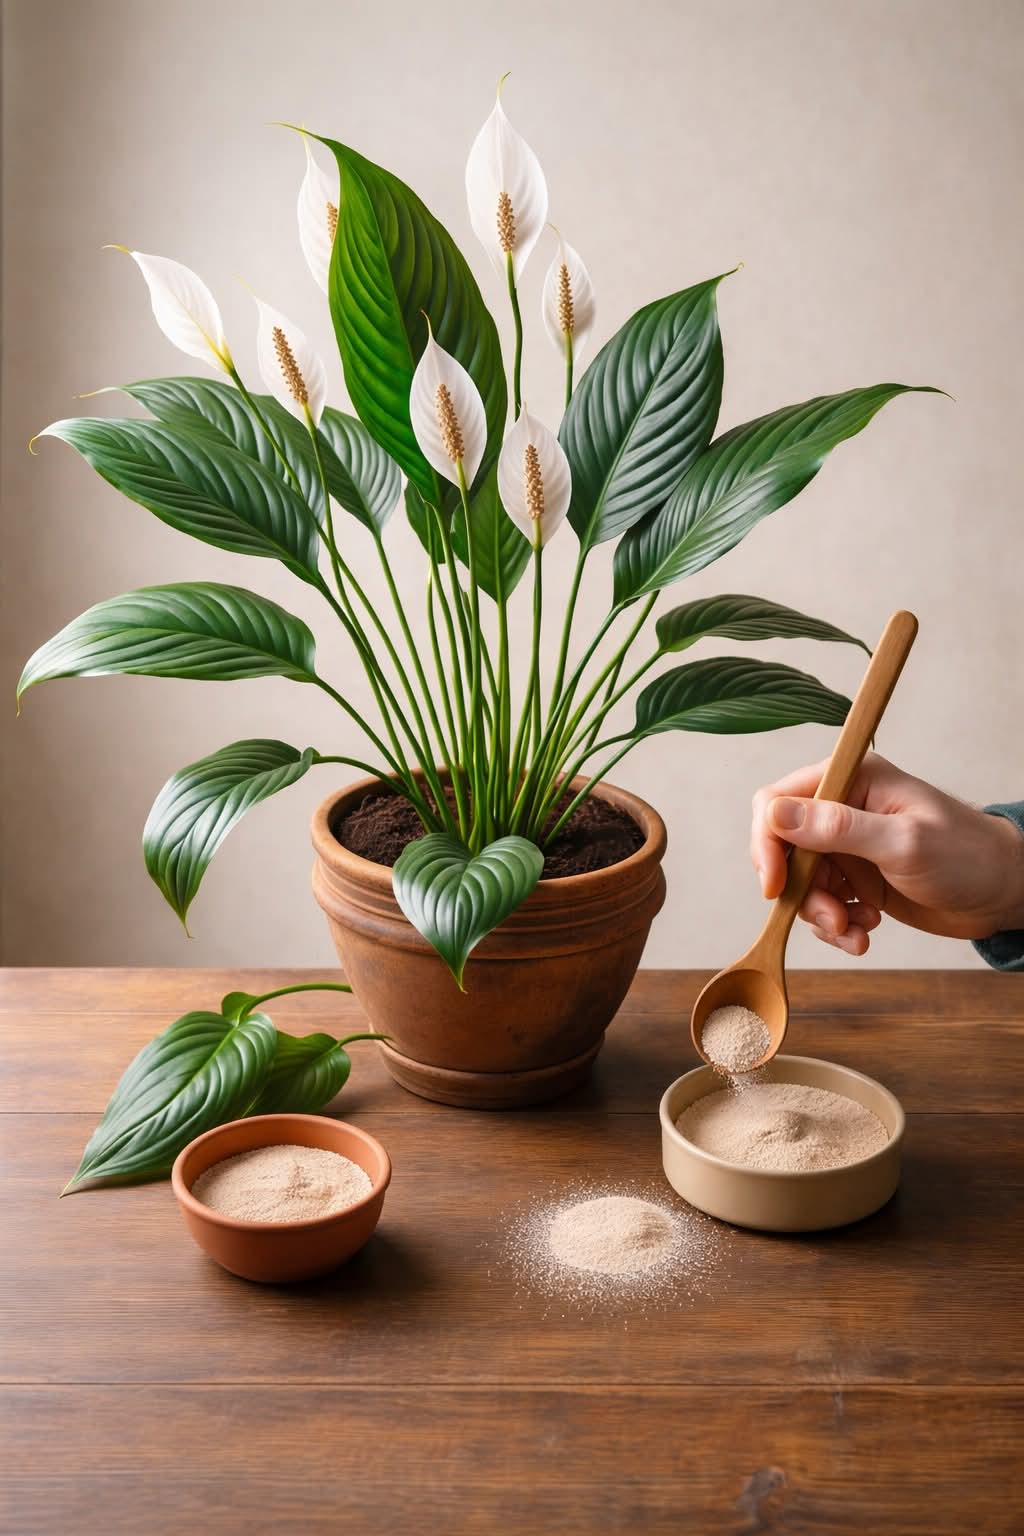
The One Cup Trick How to Revive a Peace Lily and Get It Blooming Again
Is your peace lily refusing to bloom? You’re not alone. Discover the simple one‑cup natural mix that can encourage those elegant white flowers to reappear. Easy, organic, and surprisingly effective. If your peace lily isn’t blooming as much as you’d like, you’re not alone. Many plant lovers struggle to get those elegant white flowers to…
-
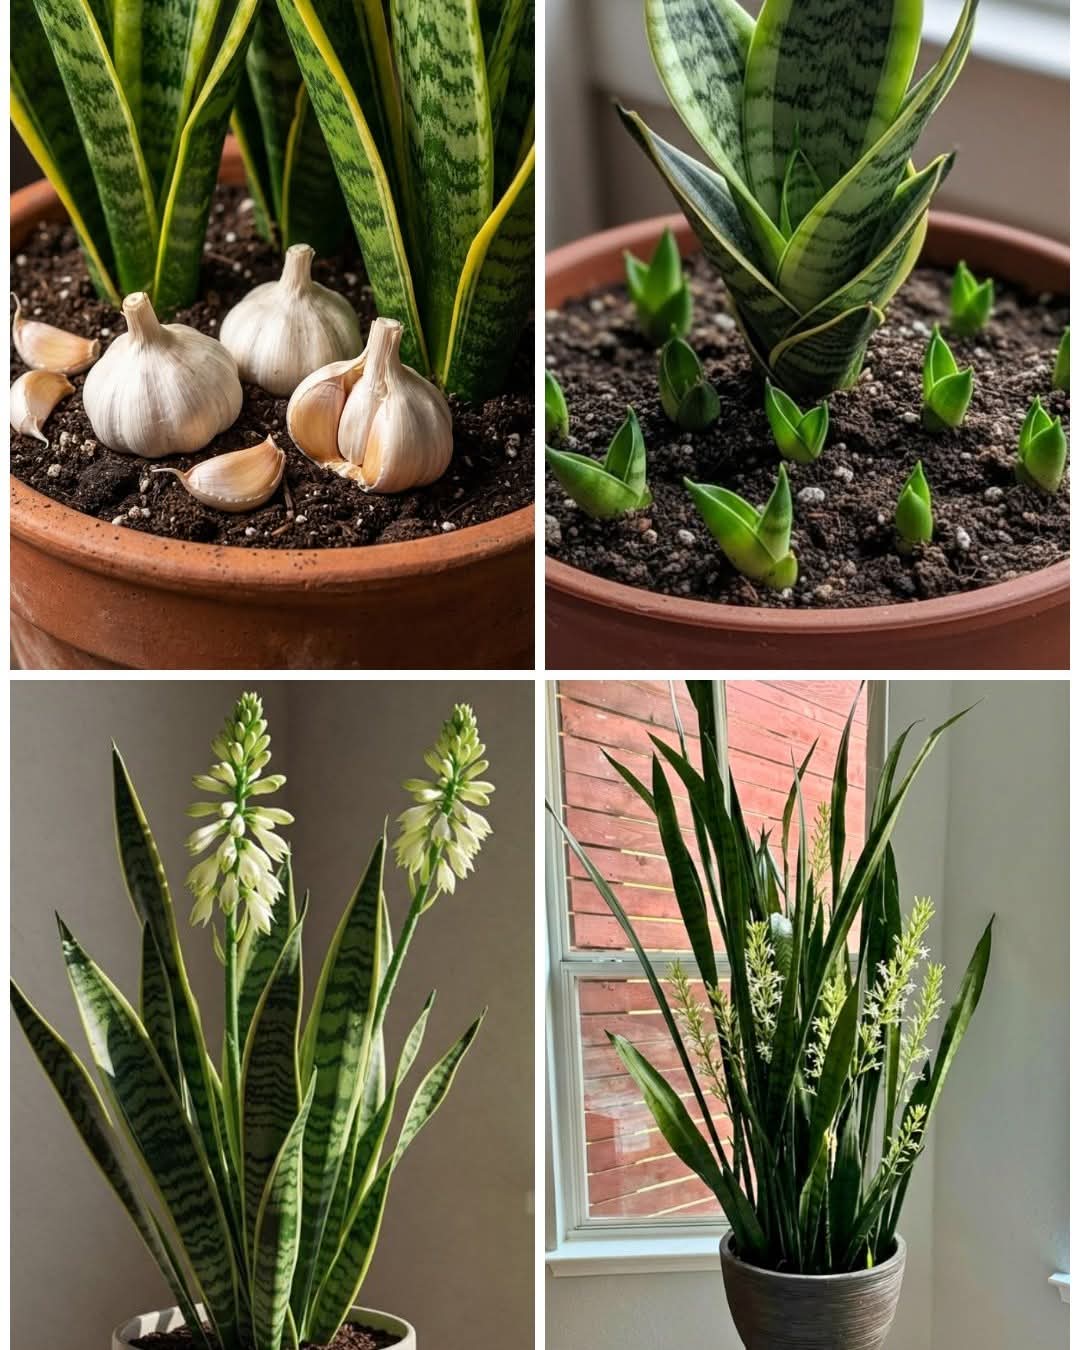
Putting Garlic Cloves Near a Snake Plant! Does This Viral Hack Actually Work?
The viral hack of placing garlic cloves near snake plants is taking over social media. Does it really repel pests, boost growth, or work like a natural fertilizer? Learn the science, benefits, risks, and better alternatives. If you’ve been on plant TikTok, Instagram Reels, or gardening forums lately, you’ve probably seen it: a person placing…