
In the entire universe of baking, no recipe is more fundamental, more celebrated, or more deceptively simple than the Vanilla Cake. It is the blank canvas of the dessert world—a pure, elegant expression of technique where there is absolutely nowhere to hide. A perfect vanilla cake is not “plain”; it is a revelation. It boasts a tender, velvety crumb so fine it practically melts on the tongue, a beautiful golden-brown crust, and a haunting, complex aroma of real vanilla that fills the kitchen with a sense of celebration. This is the cake that forms the foundation of towering birthday creations, humble snacking cakes, and everything in between. Mastering it is a baker’s rite of passage, and this guide is your comprehensive masterclass.
The quest for the ultimate vanilla cake is a pursuit of balance and texture. It must be sturdy enough to layer and frost, yet ethereally light. It must be sweet, but not cloying, allowing the nuanced flavor of vanilla to shine. This deep dive will equip you with the essential baking equipment, the precise scientific understanding, and the chef-tested techniques to move beyond the box mix and create a homemade vanilla cake that is, quite simply, perfect.
The Precision Baker’s Toolkit: Why Equipment is Everything
Vanilla cake is a delicate emulsion and an aerated structure that is highly sensitive to its environment. The right tools provide the control necessary for consistent, professional-grade results, transforming a good cake into an extraordinary one.
The Digital Kitchen Scale: The Non-Negotiable Foundation
If you take one piece of advice from this guide,let it be this: bake by weight. A digital kitchen scale is the single most important tool in your kitchen for baking. Measuring flour by volume (cups) is notoriously inconsistent; a variance of just 10% can mean the difference between a tender cake and a dry, dense one. Weighing your cake flour, sugar, eggs, and butter guarantees perfect hydration and structure every single time.
The Stand Mixer: For Perfect Emulsification and Aeration
Aheavy-duty stand mixer (like a KitchenAid Artisan) is invaluable. The “creaming” step—beating room-temperature butter and sugar together—is the primary method of incorporating air into your cake. A stand mixer can do this for the full 5-7 minutes required without over-heating the butter, creating a pale, fluffy foundation that defines the cake’s texture. Its consistent power is also crucial for alternately adding dry and wet ingredients without overmixing.
Light-Colored Cake Pans & Insulation Strips: For an Even, Flat Rise
The type of pan matters.Light-colored aluminum pans (like Nordic Ware) reflect heat, promoting gentle, even baking and a lighter crust. Dark pans absorb heat and can cause over-browning. For perfectly flat layers (a dream for stacking and frosting), cake strips are a professional secret. These fabric strips soak in water and wrap around the pan, insulating the edges so the cake bakes evenly from the center outward, eliminating the domed top.
Oven Thermometer & Instant-Read Probe: Tools of Absolute Truth
Your oven lies.Most are off by 25°F or more. An oven thermometer hanging from your rack tells you the true temperature. Baking at an accurate 350°F is critical. Furthermore, an instant-read probe thermometer takes the guesswork out of doneness. Insert it into the cake’s center; it’s perfectly baked at 205-210°F (96-99°C). This is more reliable than the “clean toothpick” test.
The Sifter, Parchment, and Cooling Racks: For Texture and Release
Afine-mesh sieve is used to sift cake flour with leaveners. This aerates the dry ingredients, prevents lumps, and leads to a finer crumb. Parchment paper rounds at the bottom of your pans guarantee flawless, crumb-free release. And wire cooling racks are essential—they allow air to circulate around the hot cakes, stopping the cooking process and preventing a soggy bottom.
The Essential Vanilla Cake Arsenal:
- · Digital kitchen scale (buy it from here)
- · Stand mixer with paddle attachment (buy it from here)
- · Two 8-inch or 9-inch round light aluminum cake pans (buy it from here)
- · Cake strips (for flat layers) (buy it from here)
- · Oven thermometer & instant-read probe (buy it from here)
- · Fine-mesh sieve (buy it from here)
- · Parchment paper (buy it from here)
- · Wire cooling racks (buy it from here)
- · Quality rubber spatula (buy it from here)
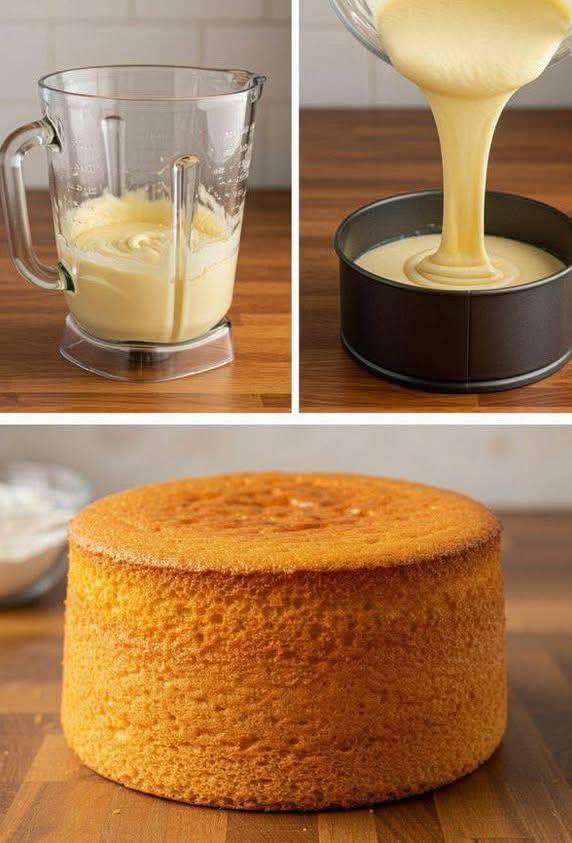
The Master Recipe: The Ultimate Homemade Vanilla Cake
This recipe uses the “reverse creaming” or “two-stage” method, which minimizes gluten development for an exceptionally tender, moist, and fine-crumbed cake. It’s a favorite of professional bakers for its reliability.
Prep Time: 30 minutes | Bake Time: 28-32 minutes | Cool Time: 2 hours | Yields: Two 8-inch or 9-inch layers
Ingredients:
For the Cake:
· 300g (2 ½ cups) cake flour (not all-purpose; see The Science below)
· 300g (1 ½ cups) granulated sugar
· 1 tbsp baking powder
· ½ tsp baking soda
· 1 tsp fine sea salt
· 170g (¾ cup) unsalted butter, at cool room temperature (about 67°F), cubed
· 60g (¼ cup) neutral oil (avocado, grapeseed)
· 240ml (1 cup) whole milk, at room temperature
· 3 large eggs, at room temperature
· 2 large egg whites, at room temperature
· 1 tbsp pure vanilla extract (see note on quality)
· ½ tsp almond extract (optional, enhances vanilla flavor)
For the Simple Vanilla Buttercream (to frost one 2-layer cake):
· 226g (1 cup) unsalted butter, softened
· 480g (4 cups) powdered sugar, sifted
· 2-3 tbsp heavy cream or whole milk
· 2 tsp pure vanilla extract
· Pinch of salt
Step-by-Step Instructions (Reverse Creaming Method):
PART 1: PREPARE THE PANS & PREHEAT
Prep: Preheat oven to 350°F (175°C). Place an oven thermometer inside. Grease, line with parchment rounds, and flour your cake pans. If using, attach soaked cake strips.
Combine Dry Ingredients: In the bowl of your stand mixer, sift together the cake flour, sugar, baking powder, baking soda, and salt. Fit the mixer with the paddle attachment. Mix on low for 30 seconds to combine.
PART 2: THE REVERSE CREAM
Add Fats: With the mixer on low, add the cubed cool butter and the oil to the dry ingredients. Mix on low until the mixture resembles coarse, damp sand with no large butter lumps remaining, about 2-3 minutes. The mixture will look like gravel, not like creamed butter and sugar. This coats the flour proteins with fat, inhibiting gluten formation—the key to tenderness.
Combine Wet Ingredients: In a separate bowl or large measuring cup, whisk together the milk, whole eggs, egg whites, vanilla, and almond extract until uniform.
PART 3: INCORPORATE WET & BAKE
Add Wet Mixture in Stages: With the mixer on low, add about two-thirds of the wet mixture to the dry. Mix on medium-low for 1-2 minutes until the batter is smooth and thick, scraping the bowl as needed. This initial high-liquid addition helps hydrate the flour gently.
Finish Batter: With the mixer on low, add the remaining wet ingredients and mix for another 30-60 seconds, just until the batter is smooth, glossy, and homogenous. Do not overmix. The batter will be somewhat thick.
Bake: Divide the batter evenly between the prepared pans (using your scale for precision). Smooth the tops. Bake on the center rack for 28-32 minutes. The cake is done when it springs back lightly when touched, the edges pull away from the pan, and an instant-read thermometer inserted into the center reads 205-210°F (96-99°C).
Cool: Let cakes cool in pans on a wire rack for 15 minutes. Then, invert onto the rack, peel off parchment, and allow to cool completely (at least 2 hours) before frosting.
PART 4: MAKE BUTTERCREAM & ASSEMBLE
Cream Butter: In a clean mixer bowl, beat the softened butter on medium-high until very pale and creamy, about 3 minutes.
Add Sugar and Flavor: With mixer on low, gradually add the sifted powdered sugar until incorporated. Add vanilla and salt. Increase speed to medium and beat for 2 minutes.
Adjust Consistency: Add heavy cream, 1 tablespoon at a time, beating after each, until the frosting is light, fluffy, and spreadable.
Frost: Level cake layers if needed. Place one layer on a cake stand, spread with frosting, top with the second layer, and frost the top and sides.
The Science of Perfection: Why This Recipe Works
· Cake Flour vs. All-Purpose: Cake flour is milled from soft wheat and is lower in protein (about 8%) than all-purpose flour (10-12%). Less protein means less gluten formation, resulting in a much more tender, fine-grained crumb.
· The Reverse Creaming Method: Unlike traditional creaming, this method coats the flour particles with fat before adding liquid. This fat barrier dramatically limits gluten development when the liquid is added, guaranteeing a supremely tender texture. It also creates a tighter, more even crumb structure, perfect for slicing.
· The Role of Oil: Butter provides unparalleled flavor, but it solidifies when cool. Adding a small amount of liquid oil ensures the cake stays moist and soft, even when refrigerated.
· Egg Whites for Structure: Using extra egg whites (in addition to whole eggs) adds structure and a lighter, whiter crumb without the density of extra yolks.
Creative Variations: The Endless Canvas
· Vanilla Bean: Split and scrape 1-2 vanilla beans, adding the paste to the wet ingredients. The speckled appearance is stunning.
· Brown Butter Vanilla: Brown the butter for the cake, let it resolidify, and use as directed. It adds a profound, nutty depth.
· Earl Grey Infusion: Steep 2 tbsp of loose Earl Grey tea in the warm milk for 30 minutes; strain and proceed.
· Citrus-Vanilla: Add the zest of one lemon or orange to the dry ingredients.
· Confetti/Funfetti: Fold ½ cup of rainbow sprinkles (jimmies, not nonpareils) into the finished batter.
Troubleshooting & FAQ
· My cake is dense/gummy. The most common cause is overmixing after the flour is added, which develops gluten. Mix only until the last streak of flour disappears. Using all-purpose flour instead of cake flour can also cause this.
· My cake is dry. It was likely overbaked or had too much flour (if measured by volume). Use the thermometer and weigh your ingredients. A touch of simple syrup brushed on the layers before frosting can rescue a dry cake.
· It domed in the middle. The oven was too hot, or you didn’t use cake strips. An oven thermometer is essential to verify temperature. Lower the temperature by 25°F next time.
· Can I make this into cupcakes? Absolutely. Line a muffin tin, fill cups ⅔ full, and bake at 350°F for 18-22 minutes. Yields about 24 cupcakes.
· How do I store it? An unfrosted cake can be wrapped tightly and kept at room temperature for 2 days, or frozen for 3 months. A frosted cake should be covered and refrigerated due to the buttercream. Let slices come to room temperature for 20 minutes before serving for the best flavor and texture.
· What’s the best vanilla extract? Use pure vanilla extract, not imitation. For a special treat, Nielsen-Massey or Heilala are superb brands. The flavor is the soul of this cake; don’t compromise.
Conclusion: The Timeless Mastery of a Classic
A perfect vanilla cake is a testament to a baker’s skill and understanding. It demonstrates control, precision, and a respect for ingredients. It is the foundation upon which all other cakes are built and a standalone masterpiece of subtlety and grace.
So, arm yourself with your scale, your thermometer, and your finest vanilla. Approach this recipe not as a simple task, but as a rewarding exercise in culinary craft. When you pull those level, golden layers from the oven and taste that first, tender, fragrant bite, you’ll understand why mastering the vanilla cake is one of baking’s greatest—and most delicious—achievements.
More Recipes You Might Like
-
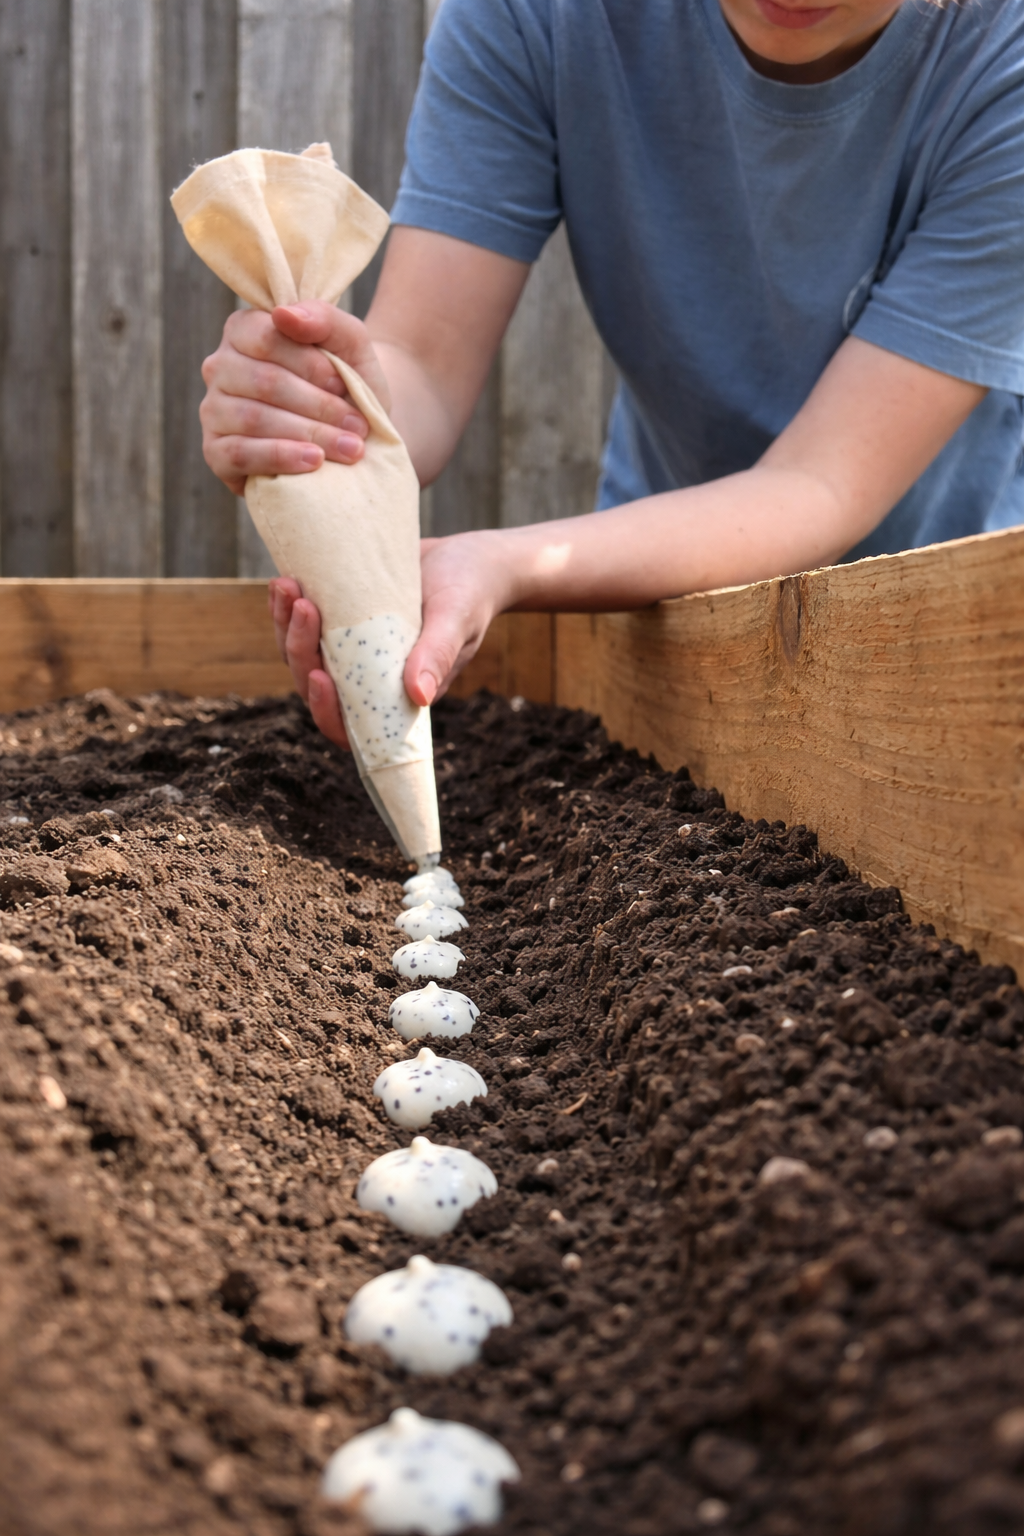
The Easy Garden Hack That Guarantees Straight, Healthy Carrots
Say goodbye to crooked, stunted carrots! Discover the simple seed paste hack that ensures perfect spacing and straight roots. This easy planting technique will transform your carrot harvest. Let me tell you about the gardening trick that turned my carrot patch from a tangle of twisted roots into a picture-perfect harvest. I love growing carrots.…
-
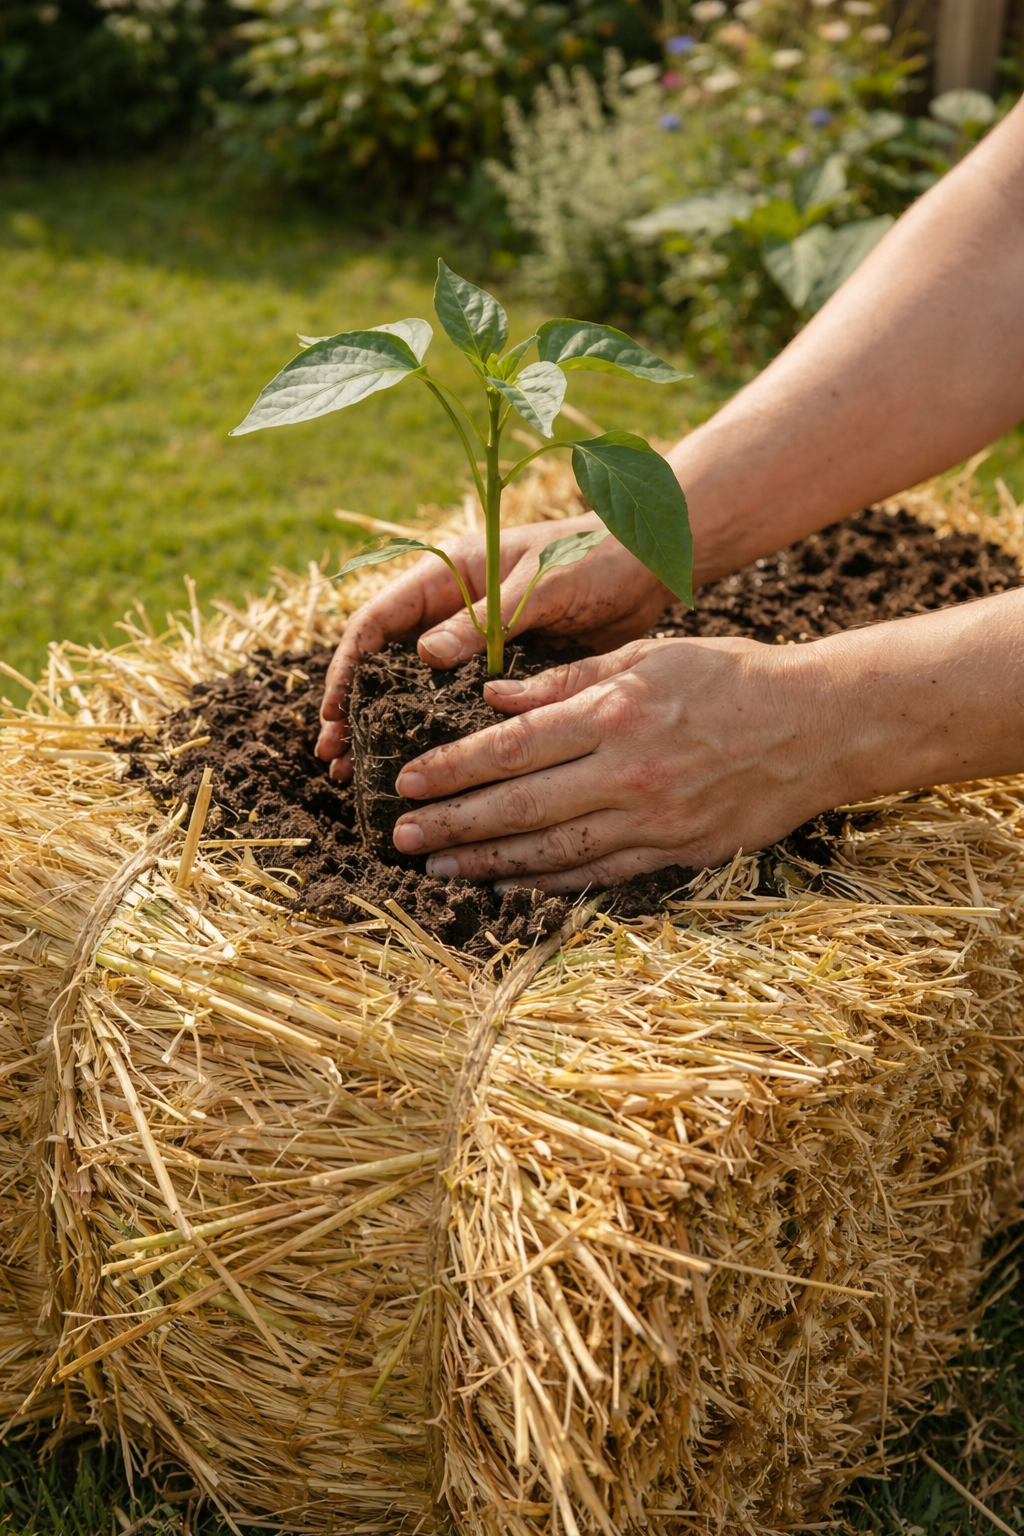
Grow 3X More Sweet Potatoes at Home with This Simple Soil Bag Trick
Want to grow 3 times more sweet potatoes in a small space? This clever soil bag trick is a game-changer. Learn how to plant sweet potatoes in bags for a massive harvest—perfect for small gardens and patios. Let me tell you about the gardening trick that turned my tiny patio into a sweet potato factory.…
-
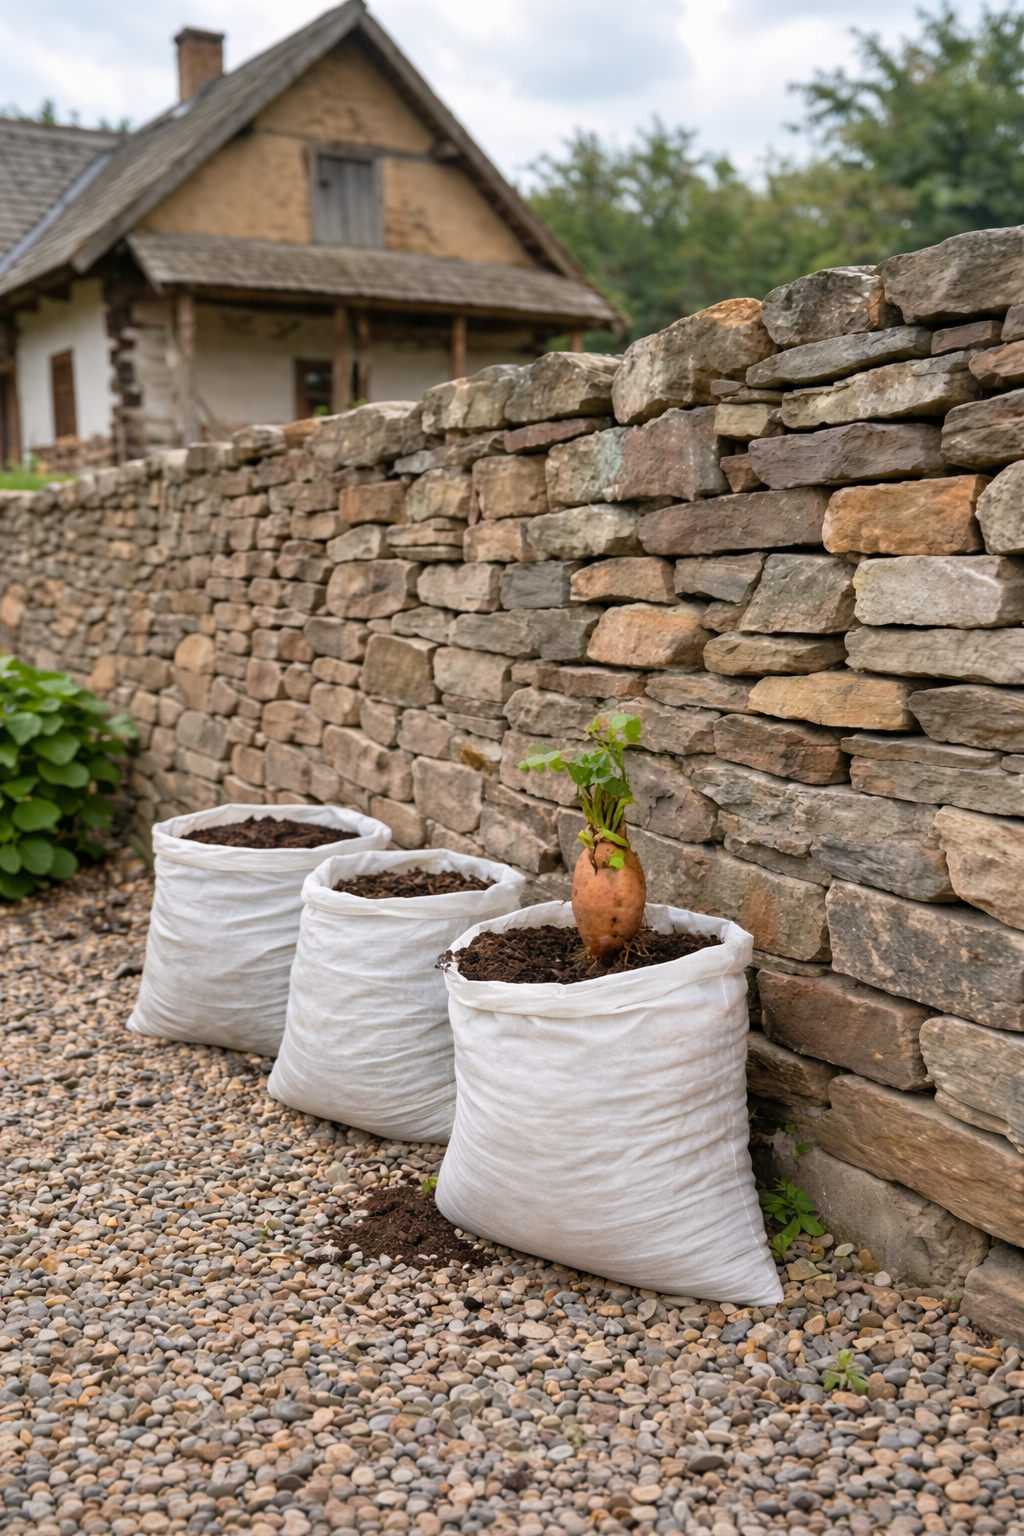
Grow 3X More Sweet Potatoes at Home with This Simple Soil Bag Trick
Want to grow 3 times more sweet potatoes in a small space? This clever soil bag trick is a game-changer. Learn how to plant sweet potatoes in bags for a massive harvest—perfect for small gardens and patios. Let me tell you about the gardening trick that turned my tiny patio into a sweet potato factory.…