Step 1: Check the Roots
· Healthy roots: Firm, green or silvery when dry.
· Unhealthy roots: Brown, mushy, black, or hollow.
Step 2: Trim Damaged Roots
· Use sterilized scissors.
· Cut away all mushy, black, or foul‑smelling roots.
· Leave only firm, healthy roots.
Step 3: Repot in Fresh Bark Mix
· Never use regular soil – it suffocates roots.
· Use: Orchid bark mix (pine bark, charcoal, perlite).
· Pot: Clear plastic pot with drainage holes (allows you to monitor roots).
Step 4: Improve Airflow
· Orchid roots need air. Ensure the pot has ventilation holes.
· Place the orchid in a spot with gentle air circulation (not a drafty window).
Step 5: Water Properly
· When to water: When the roots turn silvery (not green) and the bark feels dry.
· How to water: Run room‑temperature water through the pot for 1–2 minutes. Let it drain completely. Empty the saucer.
Step 6: Provide Bright, Indirect Light
· Ideal: East or north‑east window.
· Avoid: Direct afternoon sun (burns leaves) and dark corners (no energy).
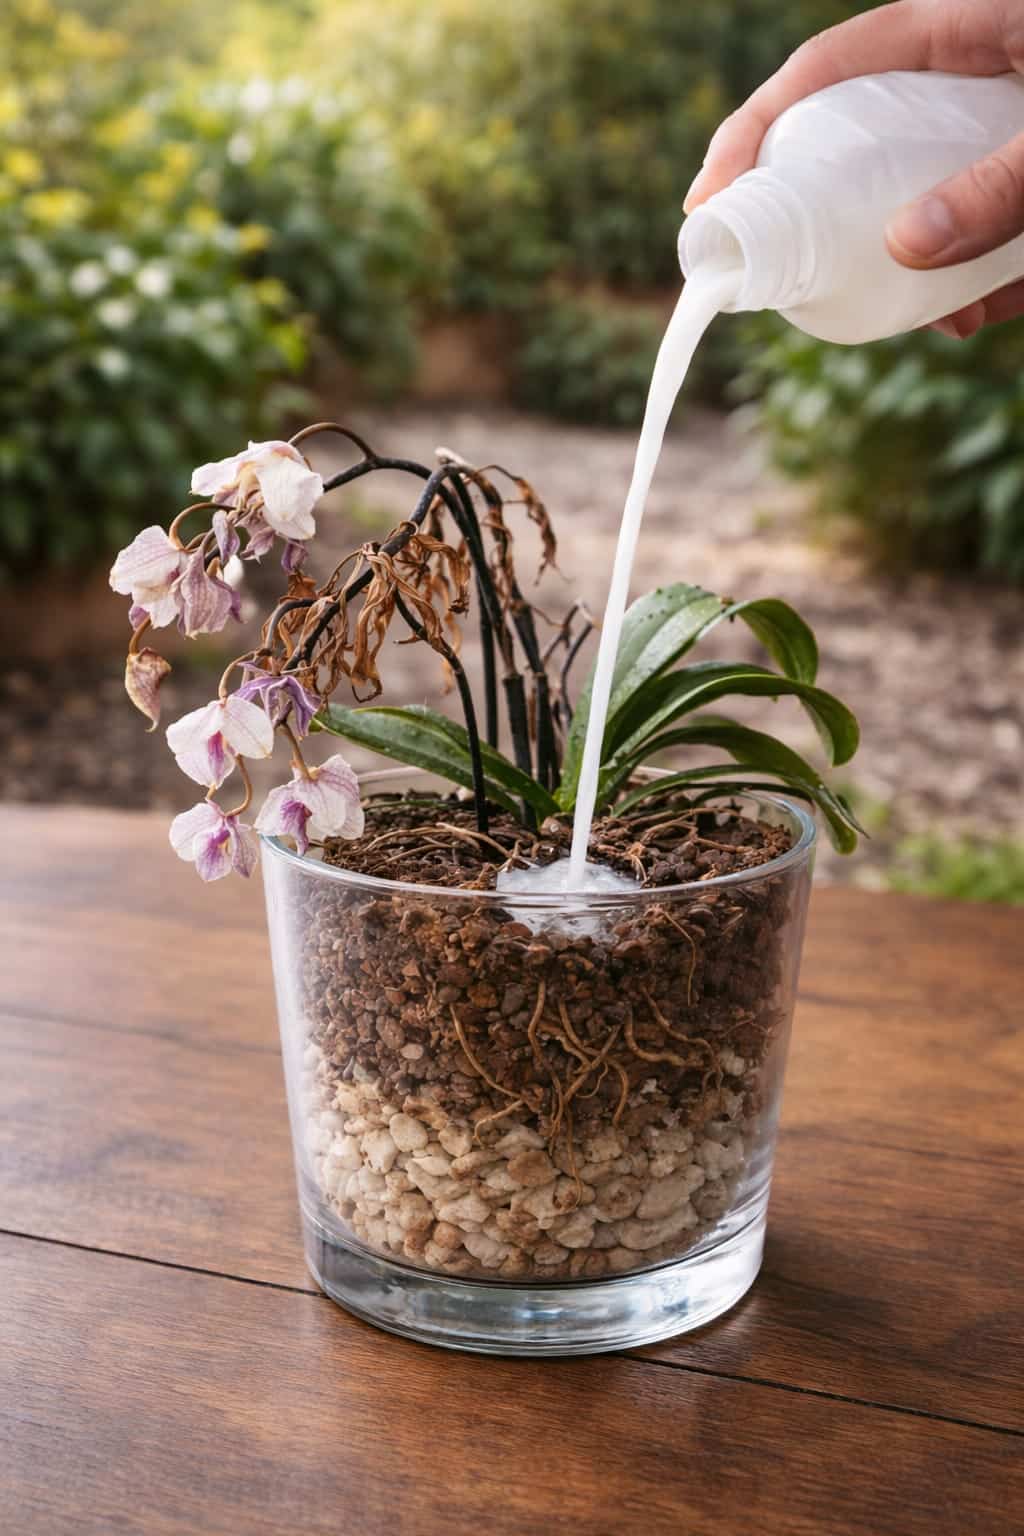
Step 7: Optional – Diluted Solution (Very Rare)
If you want to use a diluted white liquid, wait until the orchid shows new growth (roots or leaves). Then use a very weak solution (1 part milk to 5 parts water) once a month at most. It is not necessary for recovery.
Orchid Care Essentials – Quick Reference Table
Factor Ideal Condition Result
Light Bright, indirect (east/north‑east window) Better blooming
Water When roots turn silvery and bark is dry Prevents rot
Growing medium Bark‑based mix (orchid bark) Proper airflow
Humidity Moderate (50–70%) – use pebble tray Healthy leaves
Feeding Light & occasional (diluted orchid fertilizer) Balanced growth
White liquid Occasional, heavily diluted (optional) Gentle supplement – not required
How to Revive a Dying Orchid – Step by Step
Follow this plan if your orchid looks weak.
- Remove the orchid from its pot – gently take it out.
- Inspect roots – trim all brown, mushy, or black roots.
- Repot in fresh orchid bark – never reuse old, broken‑down bark.
- Use a clear pot with drainage holes – to monitor root health.
- Place in bright, indirect light – east or north‑east window.
- Water only when roots turn silvery – usually every 7–10 days.
- Increase humidity – use a pebble tray or humidifier.
- Do not feed until new growth appears (roots or leaves).
- Be patient – new roots can take 4–8 weeks.
Frequently Asked Questions (FAQs)
Q: Can orchids recover after dying?
Yes, if roots are still partially healthy. Even orchids with no roots can sometimes be saved with high humidity and careful care (sphagnum moss method).
Q: Is milk necessary for orchids?
No, it’s optional and rarely needed. Proper watering, light, and bark medium are far more important.
Q: How often should orchids be watered?
Every 7–10 days depending on dryness. Water when the roots turn silvery and the bark feels dry.
Q: Why are my orchid leaves drooping?
Usually root issues – either overwatering (rot) or underwatering (dehydration). Check roots immediately.
Q: Can I use regular soil for orchids?
No, always use bark mix. Soil suffocates orchid roots.
Q: Should orchid roots be exposed?
Partially, yes. Orchid roots need airflow. Clear pots with ventilation holes are ideal.
Q: Do orchids need direct sunlight?
No – bright indirect light is best. Direct sun burns leaves.
Q: Can milk damage orchids?
Yes, if overused. Undiluted or frequent milk application can cause rot, mold, and pest issues.
Q: What’s the biggest mistake people make with orchids?
Overwatering – it is the #1 killer of orchids. Let the bark dry out between waterings.
Q: Do orchids rebloom?
Yes, with proper care. After the flowers fade, cut the spike back, provide bright light, and maintain a consistent routine. A temperature drop at night can trigger new spikes.
Printable Orchid Revival Checklist
☐ Remove orchid from pot
☐ Trim all brown, mushy, or black roots with sterilized scissors
☐ Discard old, broken‑down bark
☐ Repot in fresh orchid bark mix
☐ Use a clear plastic pot with drainage holes
☐ Place in bright, indirect light (east/north‑east window)
☐ Water only when roots turn silvery and bark is dry
☐ Increase humidity with pebble tray or humidifier
☐ Do not feed until new roots or leaves appear
☐ Optional: use diluted white liquid (1 part milk to 5 parts water) once a month – not necessary
☐ Be patient – recovery takes 4–8 weeks
Final Thoughts – Support, Not Magic
The “white liquid” trend is not magic. A very diluted milk solution may provide trace nutrients, but it will never replace the fundamentals: proper watering, bright indirect light, bark medium, good airflow, and healthy roots.
If your orchid is dying, don’t reach for a bottle first. Check the roots, trim the damage, repot in fresh bark, and adjust your watering. Once the plant shows new growth, a little diluted white liquid every few weeks can give it a gentle nudge – but it’s never the cure.
With patience and the right care, your orchid can recover, grow new roots, and bloom again.
Now it’s your turn! Have you tried a white liquid on your orchids? What worked – or didn’t? Drop a comment below – I’d love to hear your experience.
And if you found this guide helpful, share it with a friend who’s about to throw away their orchid. Pin it for later, and subscribe to our newsletter for more practical plant care.
Stay bright, stay dry, and watch your orchid recover. 🌸✨