
🌱💧 The Fastest Way to Get Snake Plant Roots in Water — Step-by-Step Guide
Snake plants are among the most محبوب houseplants in the world—and for good reason. They’re low-maintenance, مقاومة للجفاف، and incredibly stylish. But what if you could multiply your snake plant quickly without soil, expensive fertilizers, or complicated methods?
Good news: you can! 😳✨
In this complete guide, you’ll discover the fastest way to root snake plant cuttings in water, along with expert tips, common mistakes to avoid, and proven techniques to speed up growth. Whether you’re a beginner or a plant lover looking to scale your indoor garden, this method is simple, effective, and perfect for you.
🌿 Why Propagate Snake Plants in Water?
Before jumping into the steps, let’s understand why water propagation is becoming so popular.
✅ Key Benefits:
Faster root development compared to soil
Zero mess — no خاک or repotting stress
Easy monitoring — you can see roots growing in real time
Budget-friendly — no need for expensive supplies
Perfect for beginners
If you’re looking for a high success rate plant propagation method, this is one of the best techniques available today.
🌱 What You’ll Need
To get started, you don’t need anything fancy:
A healthy snake plant leaf
Clean scissors or pruning shears
A glass or jar
Fresh, clean water
(Optional) Activated charcoal
These simple tools make this method one of the most cost-effective indoor gardening hacks.
✂️ Step 1: Choose a Healthy Leaf
Start by selecting a strong, mature leaf from your snake plant.
🔍 What to look for:
Thick, upright leaves
Deep green color (or healthy variegation)
No signs of rot, pests, or yellowing
Pro Tip: Healthy cuttings = faster rooting. Weak leaves take longer and may fail.
✂️ Step 2: Cut the Leaf Properly
Using clean, sterilized scissors, cut the leaf near the base.
You can:
Keep it whole, OR
Cut it into 2–3 sections to create multiple plants 🌱
⚠️ Important:
Always remember which side is the bottom. Roots only grow from the base!
⏳ Step 3: Let the Cutting Callus
This step is often skipped—but it’s crucial.
Place your cuttings in a dry area for 24–48 hours until the ends dry out.
Why this matters:
Prevents rot in water
Protects against bacteria
Increases success rate
Think of it as giving your plant a protective shield before placing it in water.
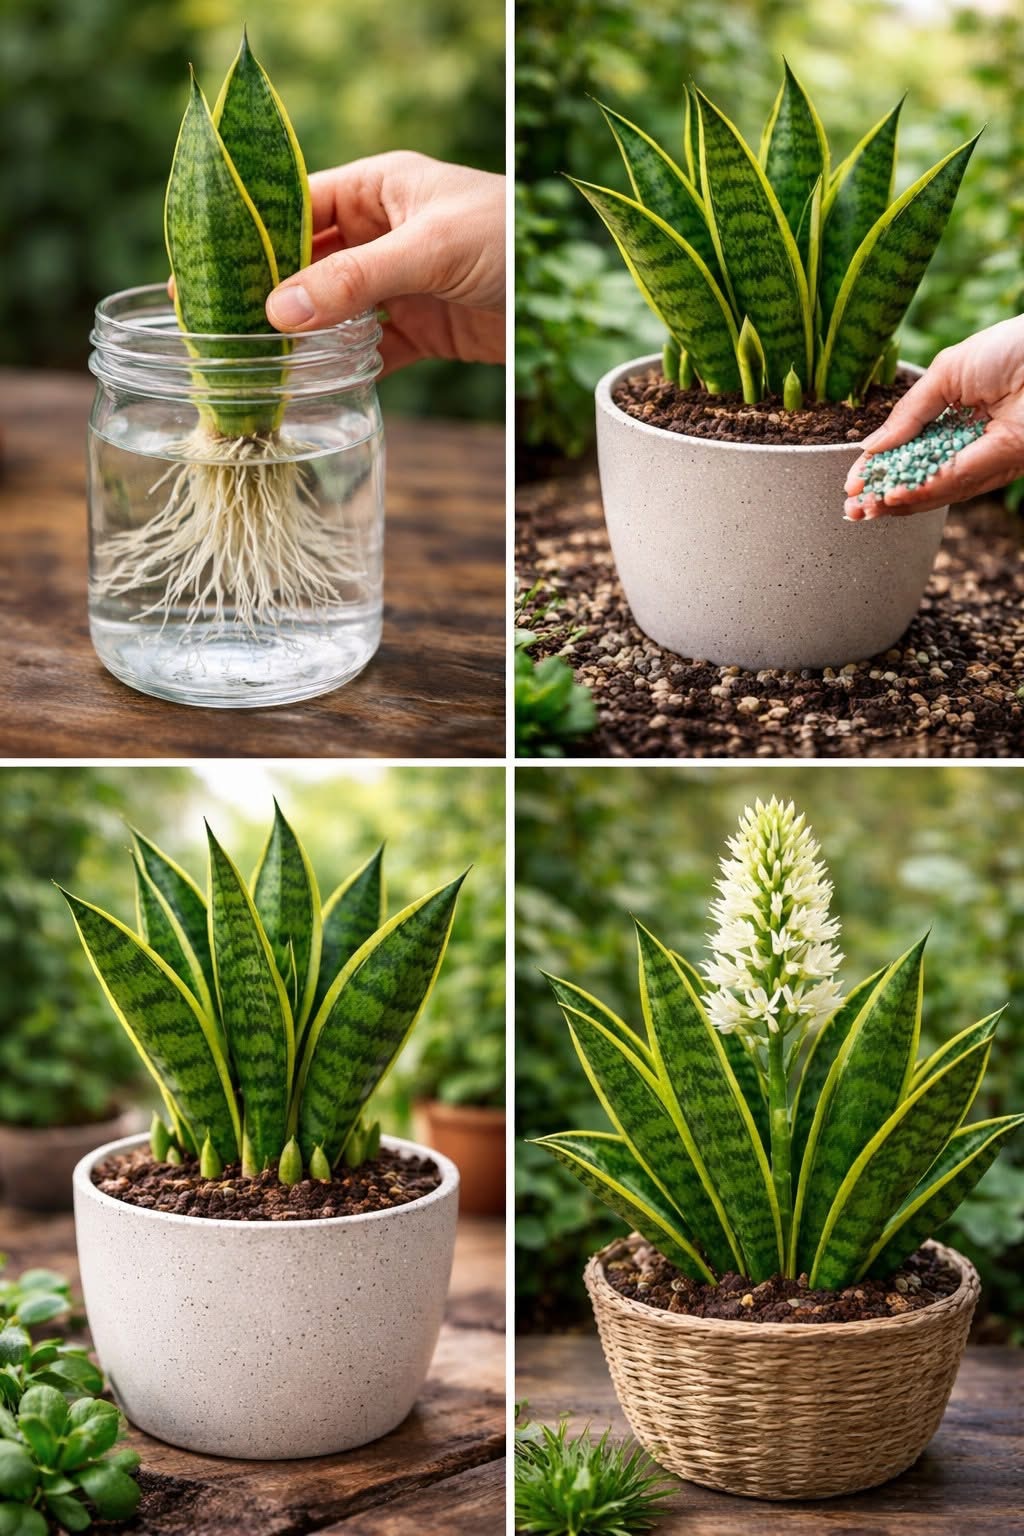
💧 Step 4: Place in Water (The Right Way)
Fill a glass or jar with clean water and place the cutting inside.
✔️ Key Rules:
Only submerge the bottom 2–3 cm
Keep the rest of the leaf dry
Use room-temperature water
This method ensures optimal oxygen flow and prevents rotting—essential for fast root growth.
☀️ Step 5: Provide Ideal Lighting
Lighting plays a huge role in how fast your roots develop.
🌞 Best conditions:
Bright, indirect sunlight
Near a window (but no harsh direct sun)
Too much sun can burn the leaf, while too little light slows down growth.
🔄 Step 6: Change Water Regularly
Clean water = healthy roots.
Change the water every 3–5 days to:
Prevent bacteria buildup
Keep oxygen levels high
Avoid unpleasant smells
This simple habit can significantly speed up your results.
✨ Step 7: Watch Roots Grow (Fast!)
Here’s the exciting part 😍
With this method, roots typically appear in:
- 2 to 4 weeks (sometimes even sooner!)
You’ll see:
Small white roots forming
Gradual root length increase
Healthy, steady development
This is why water propagation is considered one of the fastest plant rooting techniques.
🌟 Bonus Trick: Speed Up Root Growth Even More
Want even faster results? Try this:
➕ Add Activated Charcoal
A small piece in the water helps:
Keep water fresh longer
Reduce bacteria
Improve root health
It’s a simple upgrade used by experienced plant growers.
🌱 When to Transfer to Soil
Once your roots reach about 2–5 cm, your plant is ready for soil.
🪴 Steps:
Prepare well-draining soil
Plant the rooted cutting gently
Water lightly
Or—you can keep it in water permanently for a modern, decorative look!
❌ Common Mistakes to Avoid
Even though this method is simple, avoid these mistakes:
🚫 Submerging too much of the leaf
Leads to rot and failure.
🚫 Skipping the callus step
Increases risk of infection.
🚫 Not changing water
Dirty water slows growth.
🚫 Using weak leaves
Results in slow or no rooting.
🌿 Expert Tips for Faster Results
Use filtered or distilled water for best results
Keep temperature between 18–27°C
Avoid moving the cutting too often
Use clear glass to monitor root growth
These small optimizations can make a big difference in your success rate.
💡 Why This Method Works So Well
Snake plants store water in their leaves, making them perfect for water propagation. When placed in water under the right conditions, they quickly redirect energy toward root development.
That’s why this technique is widely recommended in indoor plant care guides and gardening communities.
🌍 Final Thoughts
If you’ve been struggling to propagate your snake plant, this method is a game-changer.
No soil. No stress. No waiting months.
Just a simple, effective system that delivers real results—fast. 🌱💧
Whether you’re growing your indoor garden, saving money, or even starting a small plant business, mastering this technique gives you a huge advantage.
❓ FAQs
How long does it take for snake plant roots to grow in water?
Usually between 2 to 4 weeks, depending on light and temperature.
Can I keep my snake plant in water forever?
Yes! Just change the water regularly and provide nutrients occasionally.
Why are my cuttings rotting?
Most likely due to skipping the drying step or submerging too much of the leaf.
Is water propagation better than soil?
For beginners and faster results—yes. It’s easier and more reliable.
🌿✨ Ready to multiply your snake plants effortlessly?
Try this method today and watch your plant collection grow faster than ever!