

Cheesy Beef Sliders are small sandwiches filled with seasoned ground beef and melted cheese, baked in soft, sweet Hawaiian buns till golden and toasted.
Ingredients:
For the Sliders:
1/2 teaspoon garlic powder
1/2 teaspoon onion powder
Salt and pepper, to taste
12 Hawaiian sweet rolls
12 slices cheddar cheese (or your preferred cheese)
1/2 green bell pepper, diced (optional)
For the Butter Topping:
1/2 cup butter, melted
1 teaspoon poppy seeds
1 teaspoon dried minced onion
1/2 teaspoon Worcestershire sauce
1/2 teaspoon garlic powder
Instructions:
Preheat Oven: Preheat your oven to 350°F (175°C).
Cook the Beef: In a skillet over medium heat, cook the ground beef with garlic powder, onion powder, salt, and pepper. Break apart the beef as it cooks until it’s browned and no longer pink. Drain any excess fat and mix in the diced bell pepper if using.
Prepare the Sliders: Cut the Hawaiian rolls in half without separating them, creating a top and bottom slab. Place the bottom half in a baking dish.
Layer the Ingredients: Spread the cooked beef evenly over the bottom slab of rolls. Place a layer of cheese slices over the beef. Place the top half of the rolls on top.
Make the Butter Topping: Combine melted butter, poppy seeds, dried minced onion, Worcestershire sauce, and garlic powder. Brush this mixture over the tops of the rolls.
Bake: Cover the sliders with foil and bake for 15 minutes. Remove the foil and bake for an additional 5-10 minutes, or until the tops are golden brown and the cheese is melted.
Serve: Let the sliders cool for a few minutes, then cut into individual servings and enjoy while warm and gooey!
Recipe Card

Cheesy Beef Sliders
Ingredients
For the Sliders:
- 1 pound ground beef
- 1/2 teaspoon garlic powder
- 1/2 teaspoon onion powder
- Salt and pepper to taste
- 12 Hawaiian sweet rolls
- 12 slices cheddar cheese or your preferred cheese
- 1/2 green bell pepper diced (optional)
For the Butter Topping:
- 1/2 cup butter melted
- 1 teaspoon poppy seeds
- 1 teaspoon dried minced onion
- 1/2 teaspoon Worcestershire sauce
- 1/2 teaspoon garlic powder
Instructions
- Preheat Oven: Preheat your oven to 350°F (175°C).
- Cook the Beef: In a skillet over medium heat, cook the ground beef with garlic powder, onion powder, salt, and pepper. Break apart the beef as it cooks until it’s browned and no longer pink. Drain any excess fat and mix in the diced bell pepper if using.
- Prepare the Sliders: Cut the Hawaiian rolls in half without separating them, creating a top and bottom slab. Place the bottom half in a baking dish.
- Layer the Ingredients: Spread the cooked beef evenly over the bottom slab of rolls. Place a layer of cheese slices over the beef. Place the top half of the rolls on top.
- Make the Butter Topping: Combine melted butter, poppy seeds, dried minced onion, Worcestershire sauce, and garlic powder. Brush this mixture over the tops of the rolls.
- Bake: Cover the sliders with foil and bake for 15 minutes. Remove the foil and bake for an additional 5-10 minutes, or until the tops are golden brown and the cheese is melted.
- Serve: Let the sliders cool for a few minutes, then cut into individual servings and enjoy while warm and gooey!
-
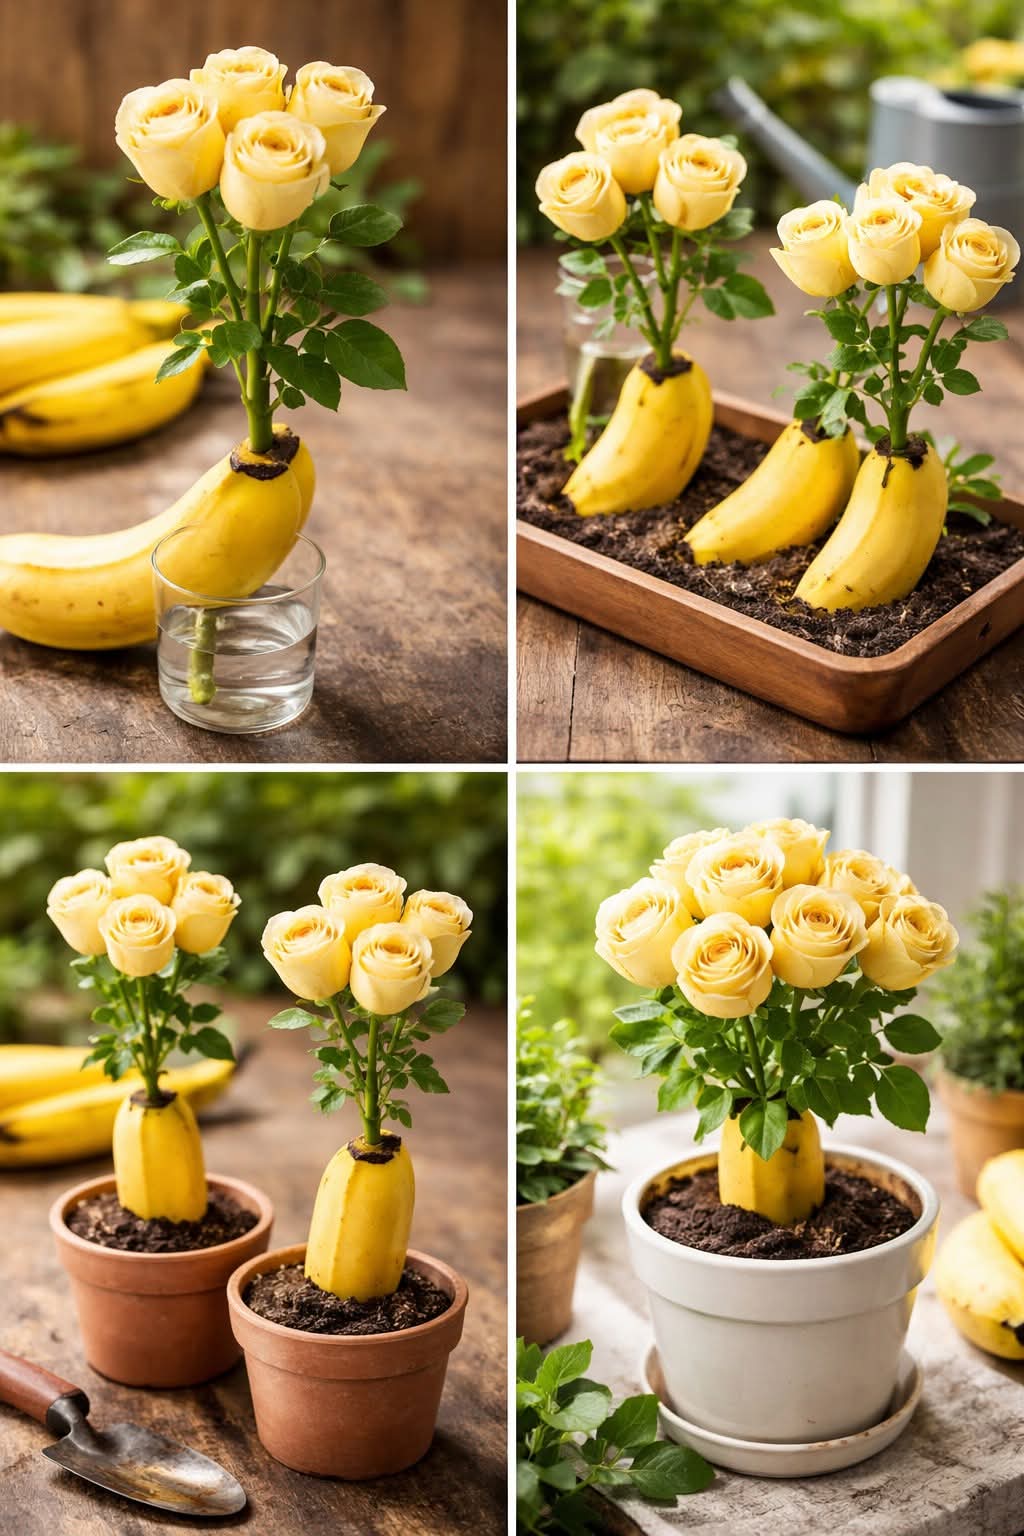
How to Reproduce Roses Infinitely with the Banana Method
If you love roses but have struggled to propagate them successfully, you’re not alone. Rose cuttings can be notoriously finicky—they often dry out or rot before roots ever form. But there’s a surprising, natural solution that might already be in your kitchen: a simple banana. This method has been gaining attention among gardeners for its…
-
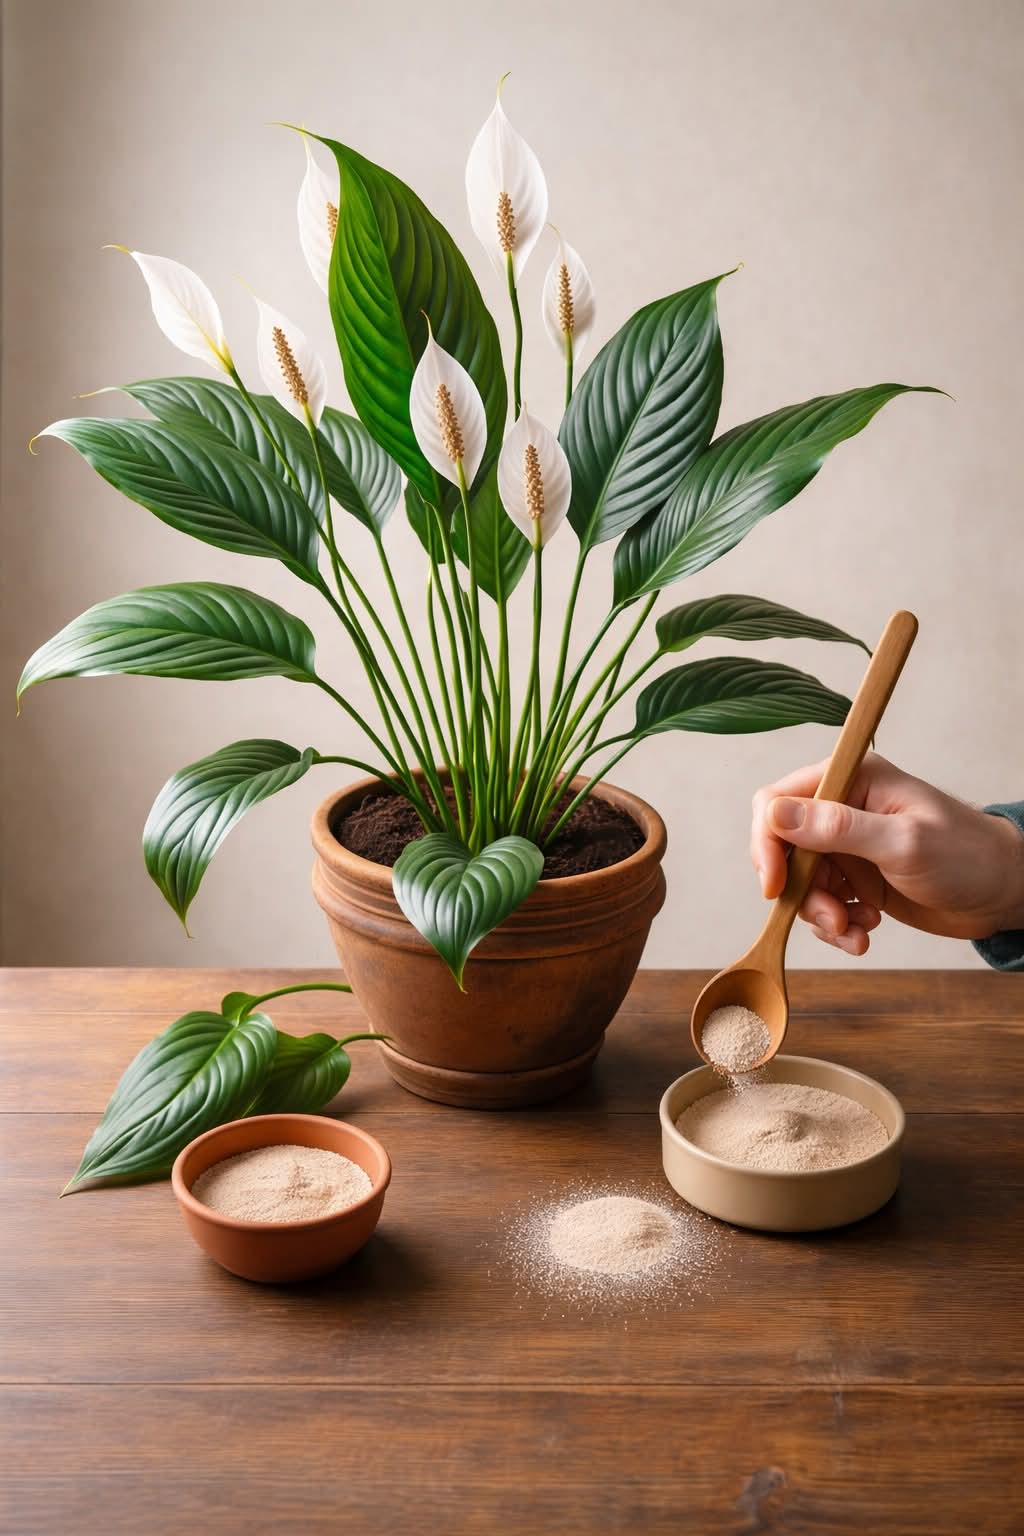
The One Cup Trick How to Revive a Peace Lily and Get It Blooming Again
Is your peace lily refusing to bloom? You’re not alone. Discover the simple one‑cup natural mix that can encourage those elegant white flowers to reappear. Easy, organic, and surprisingly effective. If your peace lily isn’t blooming as much as you’d like, you’re not alone. Many plant lovers struggle to get those elegant white flowers to…
-
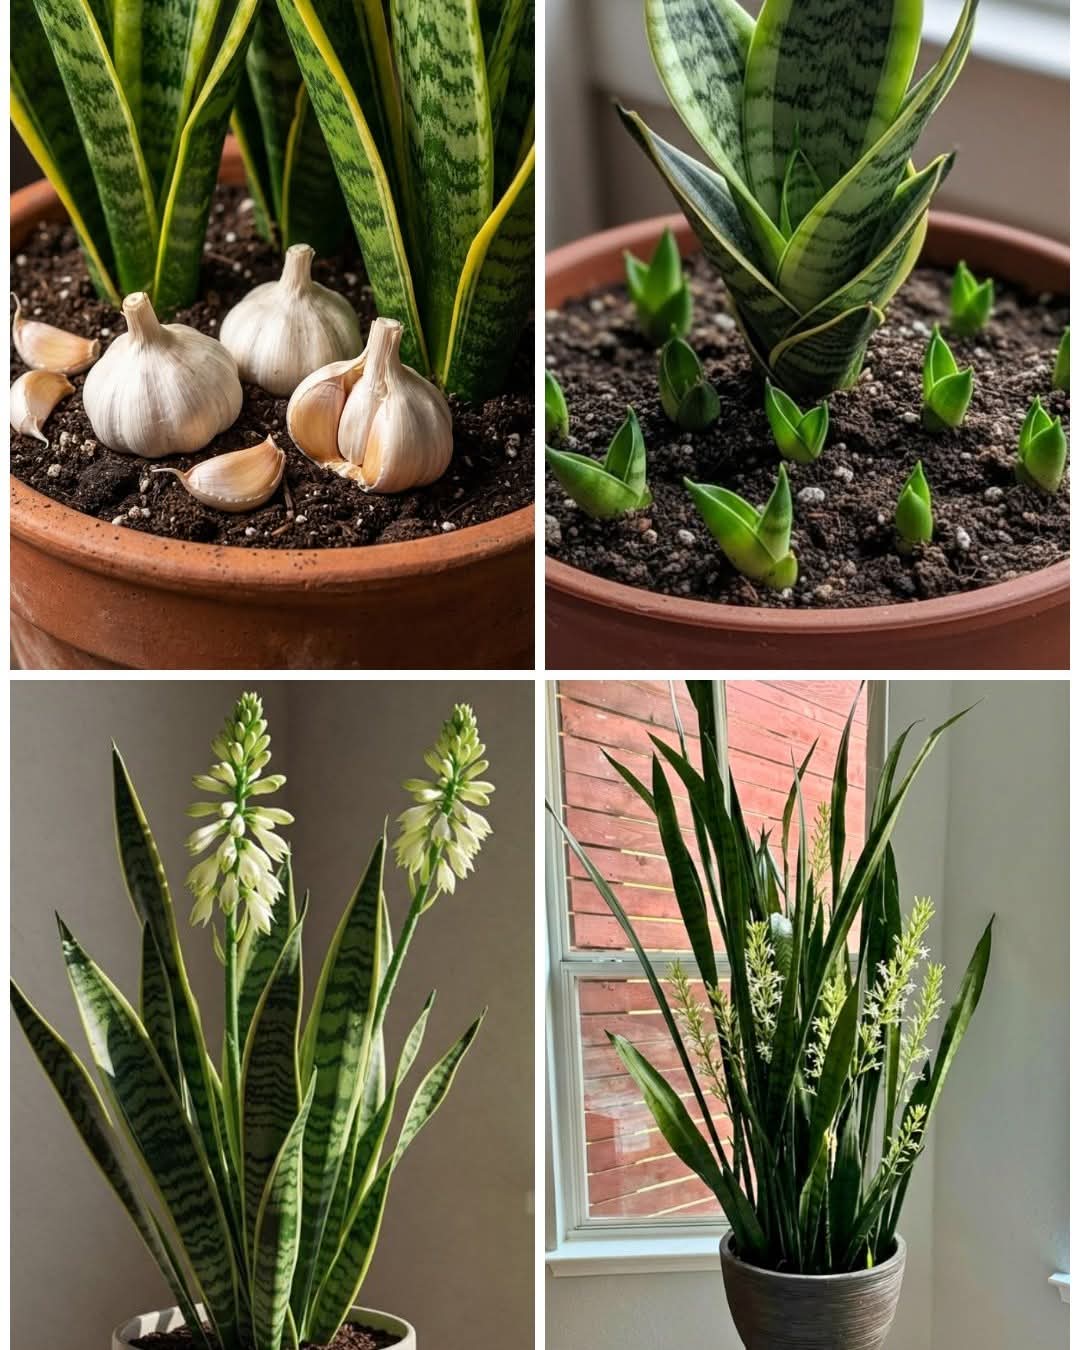
Putting Garlic Cloves Near a Snake Plant! Does This Viral Hack Actually Work?
The viral hack of placing garlic cloves near snake plants is taking over social media. Does it really repel pests, boost growth, or work like a natural fertilizer? Learn the science, benefits, risks, and better alternatives. If you’ve been on plant TikTok, Instagram Reels, or gardening forums lately, you’ve probably seen it: a person placing…