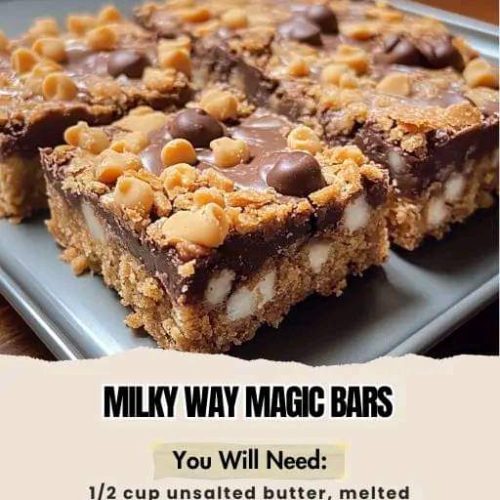
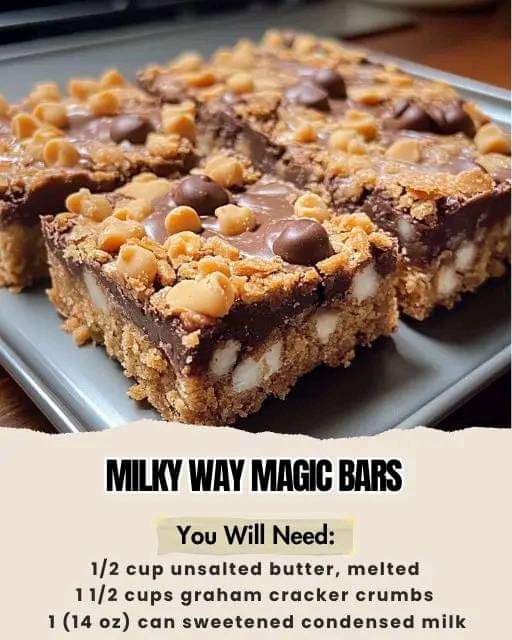
When it comes to indulgent desserts, Milky Way Magic Bars are at the top of the list. These gooey, rich bars combine layers of chocolate, butterscotch, coconut, and, of course, delicious chopped Milky Way bars for a treat that’s as magical as it is irresistible. Whether you’re making them for a party, a family gathering, or just a sweet snack, Milky Way Magic Bars will quickly become a favorite. They’re simple to prepare and packed with layers of flavor, making them a crowd-pleaser for both kids and adults alike.
Ingredients for Milky Way Magic Bars
To make Milky Way Magic Bars, you’ll need the following ingredients:
- ½ cup unsalted butter, melted
- 1 ½ cups graham cracker crumbs
- 1 (14 oz) can sweetened condensed milk
- 1 cup semi-sweet chocolate chips
- 1 cup butterscotch chips
- 1 cup shredded coconut
- 1 cup chopped Milky Way bars
- ½ cup chopped walnuts
These ingredients work together to create the perfect balance of sweet, creamy, crunchy, and chewy textures that will leave you craving more. The combination of chocolate and butterscotch chips provides a delightful contrast to the richness of the Milky Way bars, while the shredded coconut adds a subtle tropical flavor that ties everything together.
Instructions for Milky Way Magic Bars
1. Preheat the oven:
- Begin by preheating your oven to 350°F (175°C). This will ensure that the Milky Way Magic Bars bake evenly and come out with perfectly golden edges.
2. Prepare the crust:
- Pour the melted butter into a 9×13-inch baking dish. Spread it evenly across the bottom of the dish. Then, sprinkle the graham cracker crumbs over the butter, making sure to cover the entire base of the dish. Press the crumbs down slightly to create a firm crust. This buttery graham cracker layer forms the foundation of your Milky Way Magic Bars.
3. Add the sweetened condensed milk:
- Pour the can of sweetened condensed milk evenly over the graham cracker layer. The condensed milk will soak into the graham cracker crust and bind all the other ingredients together as it bakes, creating a gooey and decadent middle layer.
4. Layer the toppings:
- Now comes the fun part—layering the toppings! Start by sprinkling the chocolate chips and butterscotch chips evenly over the condensed milk. Next, add the shredded coconut, chopped Milky Way bars, and chopped walnuts. Be sure to distribute each topping evenly so every bite of your Milky Way Magic Bars is packed with flavor.
5. Press the layers down:
- Once you’ve added all the toppings, gently press them down with the back of a spoon. This will help the layers stick together during baking and ensure that the Milky Way Magic Bars hold their shape when you cut them.
6. Bake the bars:
- Place the baking dish in the preheated oven and bake for 25-30 minutes, or until the edges of the bars are lightly browned and the coconut is toasted. Keep an eye on the bars during the last few minutes of baking to make sure they don’t burn.
7. Cool and serve:
- Once the Milky Way Magic Bars are finished baking, remove them from the oven and allow them to cool completely in the baking dish. Cooling is crucial, as it allows the layers to set and makes the bars easier to cut. Once cooled, cut the bars into squares and serve.
Serving Suggestions for Milky Way Magic Bars
Milky Way Magic Bars are incredibly versatile and can be served in a variety of ways. For an extra indulgent treat, consider serving them with a scoop of vanilla ice cream or a dollop of whipped cream. You can also drizzle some caramel or chocolate sauce over the top for added decadence.
These bars are perfect for holiday gatherings, potlucks, or as a sweet surprise in lunchboxes. They also make for a great dessert to bring to bake sales or as a thoughtful gift for friends and family.
Helpful Tips for Making Milky Way Magic Bars
- Chilling for Cleaner Slices: If you want perfectly clean slices, try chilling the Milky Way Magic Bars in the refrigerator for about an hour before cutting. This will make the bars firmer and easier to cut without sticking to the knife.
- Substitute Ingredients: If you’re not a fan of walnuts, you can easily substitute them with another type of nut, like pecans or almonds. Alternatively, you can omit the nuts entirely for a nut-free version. If you prefer, you can also swap out the Milky Way bars for another candy bar, like Snickers or Twix, to add your own twist to the recipe.
- Storage: Milky Way Magic Bars can be stored in an airtight container at room temperature for up to 5 days. If you prefer a firmer texture, you can store them in the refrigerator. They also freeze well—just wrap each bar individually in plastic wrap and place them in a freezer-safe container. They’ll keep in the freezer for up to 3 months.
- Make Ahead: These bars are great for making ahead of time. You can prepare them a day or two in advance and store them in an airtight container until you’re ready to serve.
Nutritional Information (Per Serving)
- Calories: 320 kcal
- Total Fat: 19g
- Saturated Fat: 11g
- Cholesterol: 25mg
- Sodium: 120mg
- Total Carbohydrates: 38g
- Sugars: 30g
- Protein: 4g
Please note that these nutritional values are estimates based on standard serving sizes of Milky Way Magic Bars. The exact values may vary depending on the specific brands and quantities of ingredients used.
Time Needed for Milky Way Magic Bars
- Prep Time: 10 minutes
- Bake Time: 25-30 minutes
- Cool Time: 1-2 hours
- Total Time: Approximately 2 hours and 40 minutes
Conclusion
Milky Way Magic Bars are the ultimate indulgent dessert for any occasion. With their gooey layers of chocolate, butterscotch, coconut, and Milky Way bars, these bars are sure to satisfy your sweet tooth and impress anyone who takes a bite. Not only are they easy to make, but they’re also versatile and can be customized with your favorite toppings or candy bars.
Whether you’re making them for a special celebration, a casual gathering, or just as a sweet treat for yourself, Milky Way Magic Bars are a guaranteed hit. Their rich flavor and satisfying texture make them a standout dessert that you’ll want to make again and again!
Recipe Card

Milky Way Magic Bars
Ingredients
- – ½ cup unsalted butter melted
- – 1 ½ cups graham cracker crumbs
- – 1 14 oz can sweetened condensed milk
- – 1 cup semi-sweet chocolate chips
- – 1 cup butterscotch chips
- – 1 cup shredded coconut
- – 1 cup chopped Milky Way bars
- – ½ cup chopped walnuts
Instructions
1. Preheat the oven:
- – Begin by preheating your oven to 350°F (175°C). This will ensure that the **Milky Way Magic Bars** bake evenly and come out with perfectly golden edges.
2. Prepare the crust:
- – Pour the melted butter into a 9×13-inch baking dish. Spread it evenly across the bottom of the dish. Then, sprinkle the graham cracker crumbs over the butter, making sure to cover the entire base of the dish. Press the crumbs down slightly to create a firm crust. This buttery graham cracker layer forms the foundation of your **Milky Way Magic Bars**.
3. Add the sweetened condensed milk:
- – Pour the can of sweetened condensed milk evenly over the graham cracker layer. The condensed milk will soak into the graham cracker crust and bind all the other ingredients together as it bakes, creating a gooey and decadent middle layer.
4. Layer the toppings:
- – Now comes the fun part—layering the toppings! Start by sprinkling the chocolate chips and butterscotch chips evenly over the condensed milk. Next, add the shredded coconut, chopped Milky Way bars, and chopped walnuts. Be sure to distribute each topping evenly so every bite of your **Milky Way Magic Bars** is packed with flavor.
5. Press the layers down:
- – Once you’ve added all the toppings, gently press them down with the back of a spoon. This will help the layers stick together during baking and ensure that the **Milky Way Magic Bars** hold their shape when you cut them.
6. Bake the bars:
- – Place the baking dish in the preheated oven and bake for 25-30 minutes, or until the edges of the bars are lightly browned and the coconut is toasted. Keep an eye on the bars during the last few minutes of baking to make sure they don’t burn.
7. Cool and serve:
- – Once the **Milky Way Magic Bars** are finished baking, remove them from the oven and allow them to cool completely in the baking dish. Cooling is crucial, as it allows the layers to set and makes the bars easier to cut. Once cooled, cut the bars into squares and serve.
