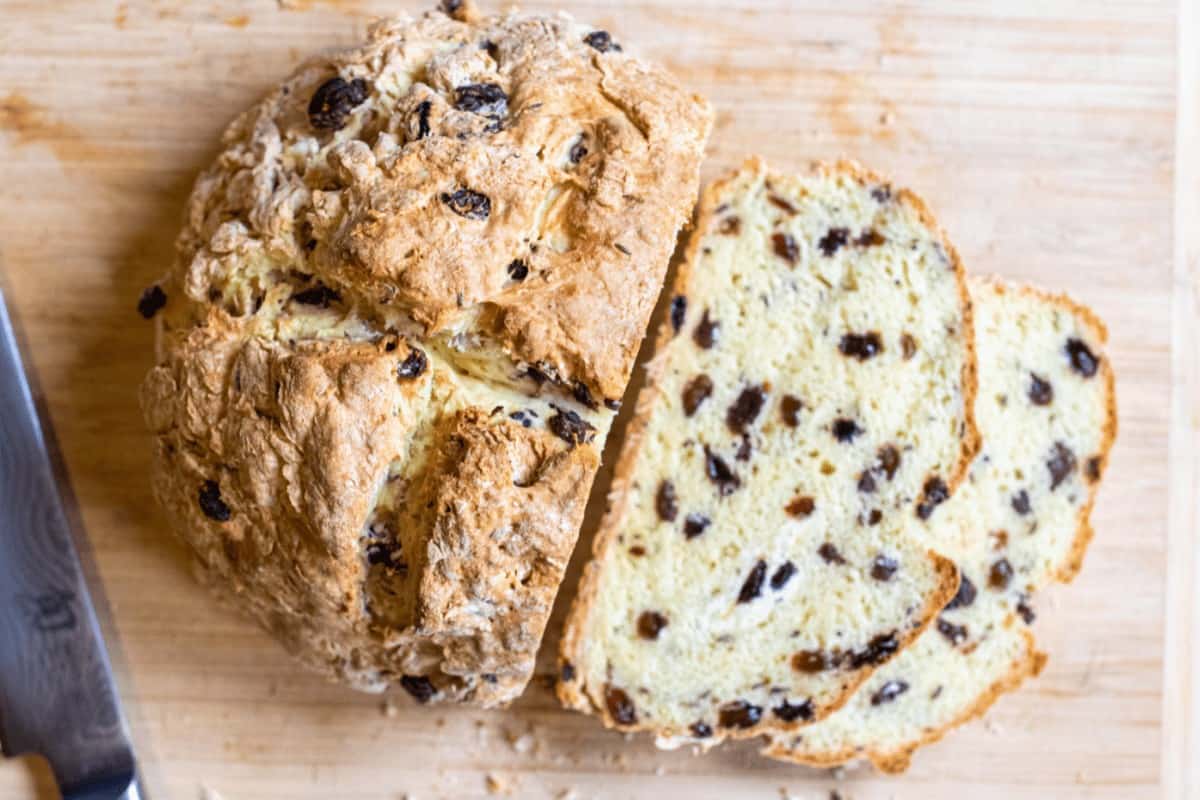
When you want a fast, tasty loaf with a crispy top and a soft crumb without the hassle of yeast or kneading, this homemade Irish soda bread is ideal!
I’ve had it on my to-do list for a while: homemade Irish soda bread. A rich, compact crumb bread leavened by baking soda and buttermilk without the need for kneading? I’m on board. I’m also all in whenever we get to utilize our Finex cast iron skillet.
What is Soda Bread?
This type of bread doesn’t need yeast since the baking soda (the “soda”) and buttermilk work together to leaven it naturally. This makes the bread fast. This results in a lovely crispy exterior with a thick crumb, enhanced by the rich flavor of the buttermilk.
Although it isn’t really Irish, soda bread originated in Ireland and many other European nations in the 1800s when wheat wasn’t able to yield decent yeast bread.
Have you ever tried Irish soda bread before and been turned off by its very bitter flavor? Yes, I have! This indicates that the recipe called for an excessive amount of baking soda and that the proportion of baking soda to buttermilk was incorrect. With this recipe, you don’t have to worry about it at all because it tastes nothing harsh!
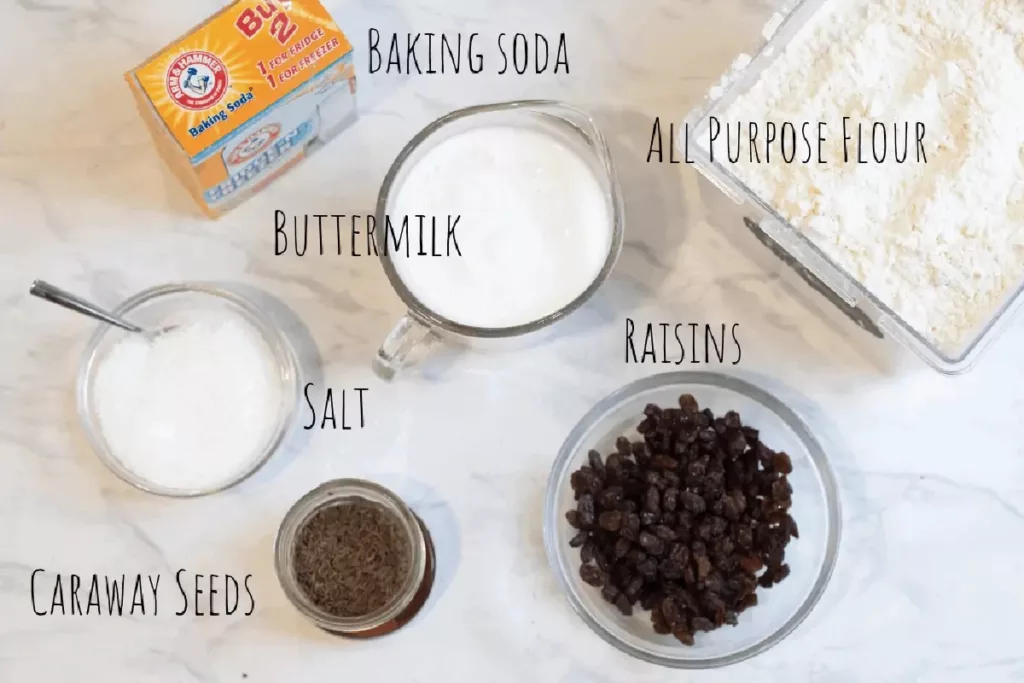
Ingredients Needed
The ingredients for a highly traditional Irish soda bread are actually very simple: flour, baking soda, buttermilk, and salt. There are a ton of additional recipes available that also call for eggs and butter. I’ve tried this dish both ways, but I think it tastes better without the butter and eggs. The outcome is a softer, more delicate bread!
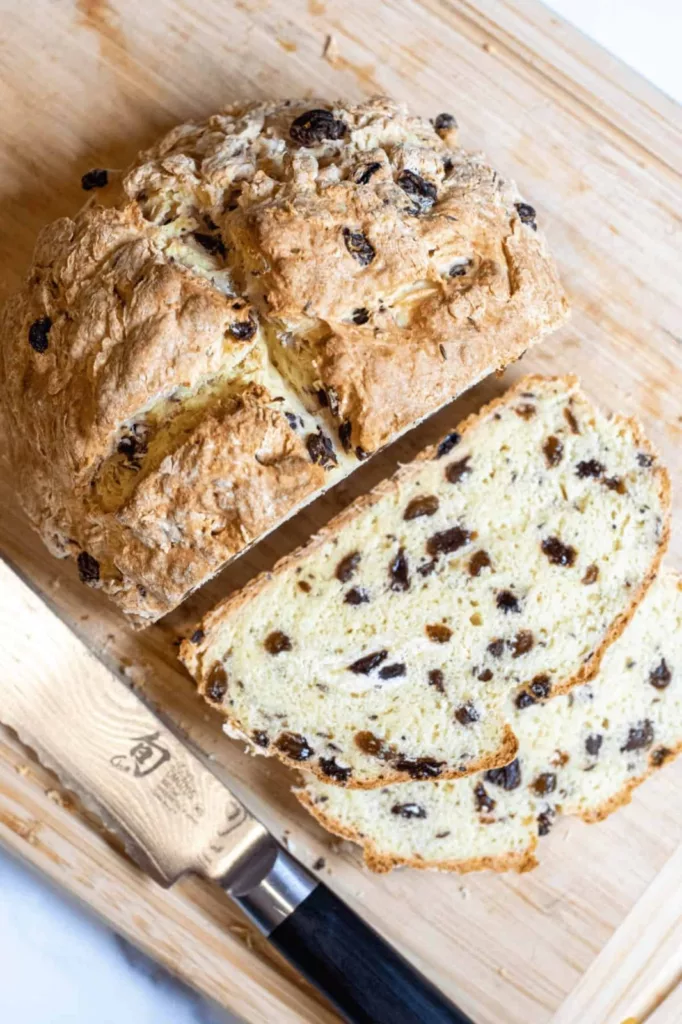
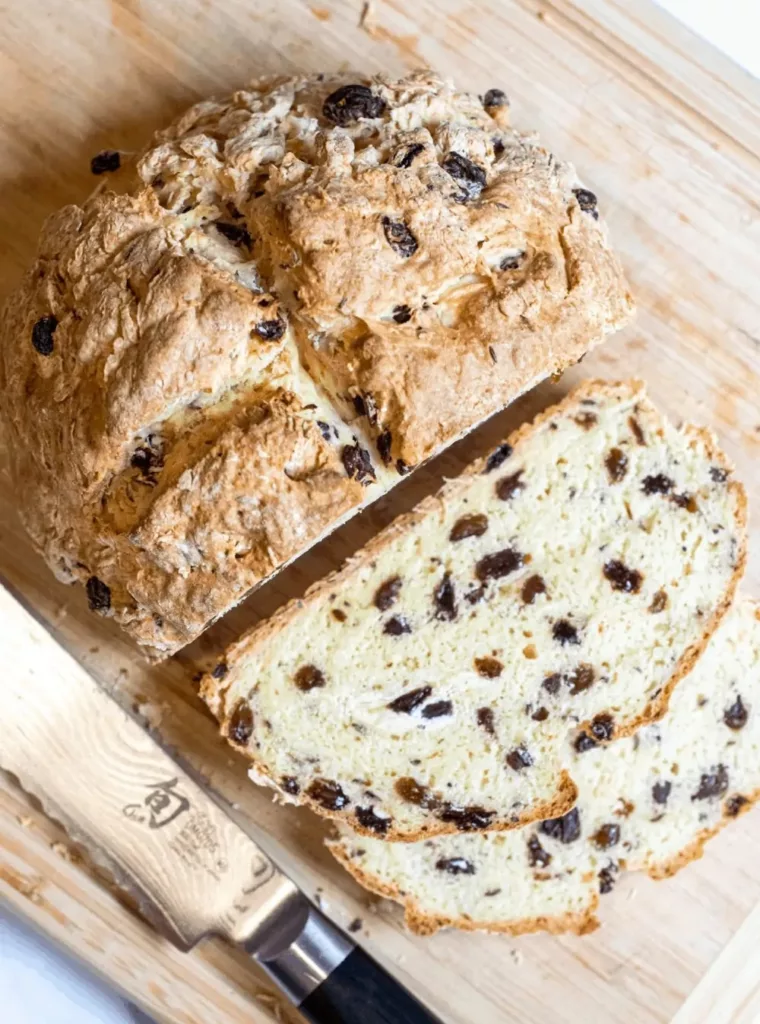
You could stop here and enjoy a great loaf, but I wanted to add a little more flavor, so I mixed in some caraway seeds and raisins, two traditional additions to Irish soda bread.
Amazingly Simple to Produce
- In a large bowl, combine flour, baking soda, and salt. Fold in your add-ins, if desired.
- When the buttermilk is added, stir it gently until it is fully combined.
- Shape the dough into a ball very gently. It’s okay that the dough will be shaggy. The most crucial thing to remember is not to overwork the dough, so don’t panic if part of the flour doesn’t get integrated into the dough ball. Roll it into a ball and you’re done.

- Transfer this rough dough to a Dutch oven, cast iron, or baking sheet covered with parchment paper. Cut a deep, wide X in the bread.
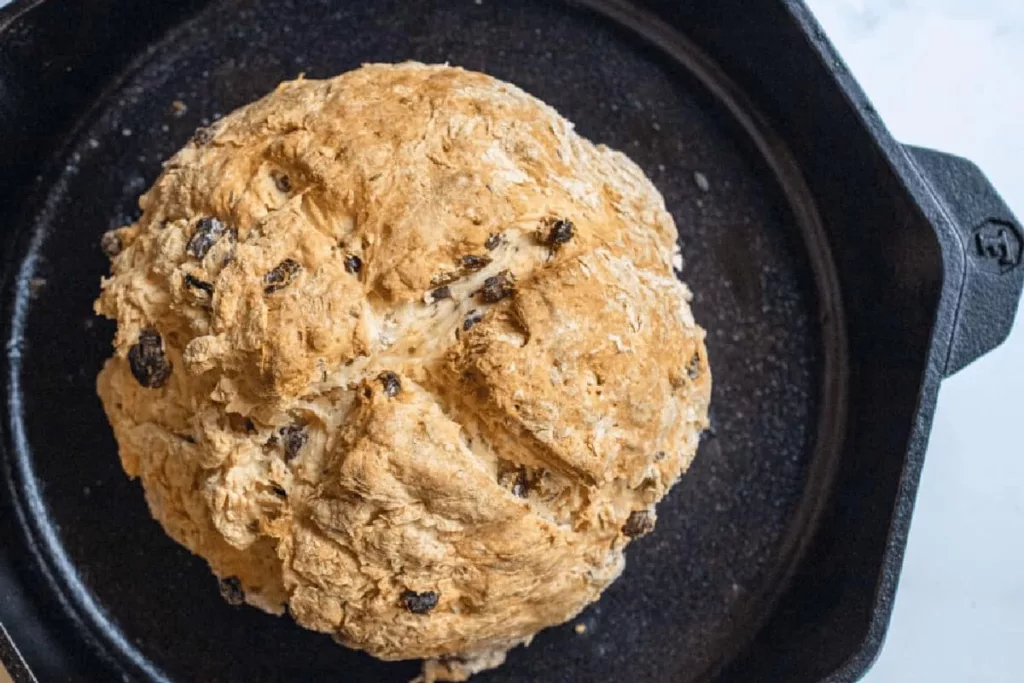
- Cook! A soda bread baked in a cast iron pan, using one of our best Finex skillets!
Important Tips
Although it is easy to prepare, there are a few things to remember to get the best results when creating this bread!
- Hold off on adding the buttermilk until right before baking! You can prepare the flour, baking soda, salt, and other ingredients ahead of time, but you really should wait to add the buttermilk until right before baking. This entails preheating the oven, greasing the cast iron, and lining the baking sheet with parchment paper. This is due to the fact that as soon as the buttermilk is added, the baking soda and buttermilk begin to activate. Since there is no yeast present, this is how the bread rises. During the baking process in the oven, you want that to occur.
- Simply Roll Into a Ball. The dough is going to be shaggy and sticky. It’s preferable, in my opinion, to use your hands to mix in the buttermilk after you’ve stirred it into the dough mostly until the dough just barely comes together. It’s okay if there is some leftover flour.
- Avoid Kneading! Not necessary (har har). Very seriously, you don’t want to overwork your dough, just as with any non-yeast bread. If you must knead the dough together, do it no more than five or six times at most. Overkneading the bread will result in a thick, firm crumb. Generally speaking, while making bread without yeast, the less kneading, the softer the crumb.
- Make a score on the bread. To help make sure the center is done, this is a crucial step. Make sure the depth is at least one-third of an inch. For this, use a bread lame or a really sharp knife.

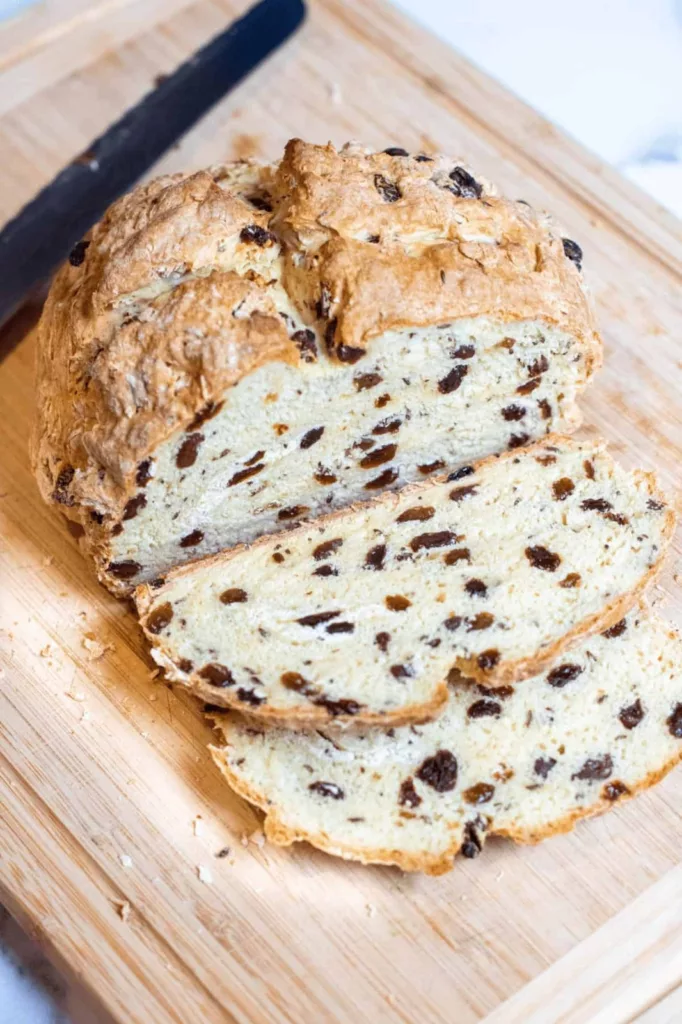
When cooked, the crust is crispy and the crumb stays beautifuul and tight!
Quick bread! This one requires no kneading, proofing, or special equipment. This delicious quick bread is ideal for making butter toast for morning. Alternatively, omit the caraway seeds and raisins and have a delicious, simple, crusty soft bread to go with your preferred stew or soup!
FAQs
Can I leave out the caraway seeds and raisins?
Naturally, of course! It’s a crusty bread that’s great simply and requires no other ingredients!
My dough is super shaggy and didn’t use all of the flour.
It’s alright. The dough shouldn’t be too worked or excessively dry. Just work everything into a nice ball, but don’t knead it more than five or six times. It’s okay if there’s a little leftover flour.
What do I bake it in?
Whatever you possess! For the crispiest crust, we prefer baking it in a cast iron pan, but you can also bake it in a Dutch oven or on a baking sheet.
How do I know it’s done?
Tapping the bottom of the loaf is the simplest way to determine if it’s done, as it is with most breads. It’s over if it sounds hollow. If the interior temperature is 200°F, an instant read thermometer can also be used. This guarantees that there is just enough moisture removed to make it dry, but not so much heat that the crumb dries out.
Most soda breads I’ve eaten have tasted too bitter.
Yes, I’ve been there. This indicates that there was simply too much baking soda and an improper ratio of baking soda to buttermilk. With this bread, don’t be afraid or taste harsh!
What is the duration of it?
Since soda bread dries up easily, it’s better to preserve it for three to four days in plastic or an airtight container.
Shall I freeze it?
Sure. Wrapped in plastic or aluminum foil, baked and completely cooled bread can be stored in the freezer for up to two months.
More delicious Recipes You Might Like
- Dutch Oven Chicken and Dumplings Soup
- Joe Rogan Inspired Pizza: Anchovies, Pineapple, And The Spirit Of Innovation
- Easy Vegetarian Chickpea Stew
- Prize Winning Key Lime Pie Recipe
Homemade Irish Soda Bread

Quick bread! In only one hour, this homemade Irish soda bread may be prepared without the need for yeast or kneading!
- 4 cups all purpose flour
- 1 1/4 teaspoon baking soda
- 1 1/4 teaspoon salt
- 1 1/2 cups buttermilk
- 1 cup raisins
- 1 tablespoon caraway seeds
- Set oven temperature to 400°F. Use butter to grease a Dutch oven or cast iron pan, or line a baking sheet with parchment paper.
- Combine the flour, baking soda, and salt in a large basin. Stir in the caraway seeds and raisins.
- When the oven is ready to bake and the flour mixture is in the bowl, form a well and pour in the buttermilk. Mix gradually to form a shaggy dough using a big spoon.
- Work the dough in the bowl a few times until it forms a soft, shaggy ball. You might not incorporate all of the flour, and that’s okay too.
- Place the balled dough onto a baking sheet, Dutch oven, or cast iron that has been oiled. Cut an X in the middle of the dough that is 1/3 inch deep. Give the loaf’s top a few quick sprays of water.
- Bake for 40–45 minutes, or until the interior temperature reaches 200°F, or until golden brown.
- Before slicing, let cool for at least half an hour.
One slice of the twelve-slice bread is served.
For baking purposes, always measure your flour with a spoon and level it. The most exact technique to measure is with weights.
Wait to add the buttermilk until right before baking. It will begin to activate as soon as the buttermilk and baking soda are combined, and you want this to happen in the oven.
Avoid overmixing! Make sure the mixture is mixed until it just begins to resemble shaggy dough, and then shape it into a ball. When kneading it, take care not to overwork it; only knead it five or six times at most.
For up to three to four days, store in an airtight container.
Wrapped in plastic or aluminum foil, freeze freshly made bread that has cooled completely for up to two months.